In addition to the mirrored pocket door, my latest completed project is the linen cabinet. WOOHOO!!! The carcass had been done for a while but I just got around to building the drawers and installing the doors that Cabinet Now sent me. 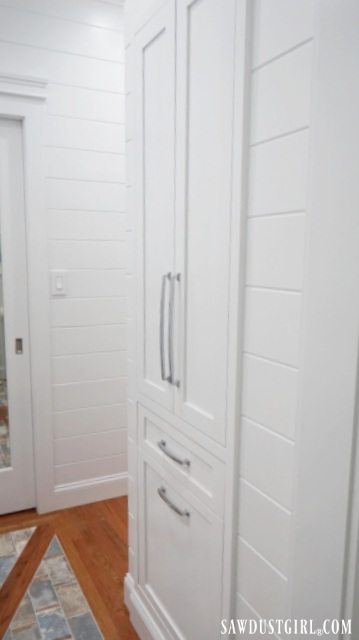
Linen Cabinet Recap
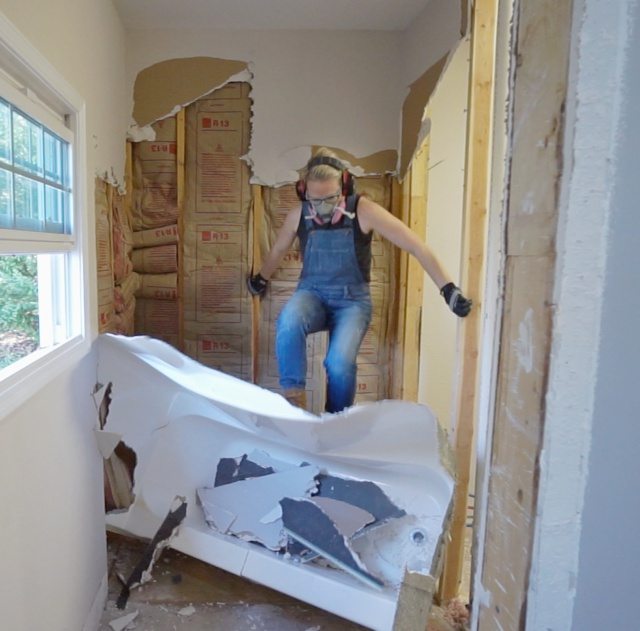
Looking back at all my video footage to get photos for these Jack and Jill bathroom posts has been enlightening. I’ve done so much to this space. I gutted three rooms (two closets and a bathroom), to create my vision. It’s been a lot of work and it’s SO exciting to finally be finishing the things that make it all functional and pretty!
If you remember, the linen cabinet is back to back with one of the wardrobe cabinets in the guest bedroom closet. I like shallow cabinets for shelving. Shelves that are too deep are a waste of space because things get lost behind each other. So, building two shallow cabinets, back to back, gave me usable storage space for both rooms. And it was the solution to me wanting a linen cabinet in the bathroom where I otherwise wouldn’t have gotten one.
It wasn’t all smooth sailing. I miscalculated the width of the opening and had to plane down one of the studs to get the linen cabinet to fit. Check out my post and video showing more of that process in this Jack and Jill bathroom update. Obviously, I did make it fit!

It has to have a junction box in it to house some electrical wiring from the original bathroom configuration. There wasn’t enough Romex to pull to a new location so we just tied into it. I won’t be using that junction box for anything but it can be accessed easily if it ever needs to be.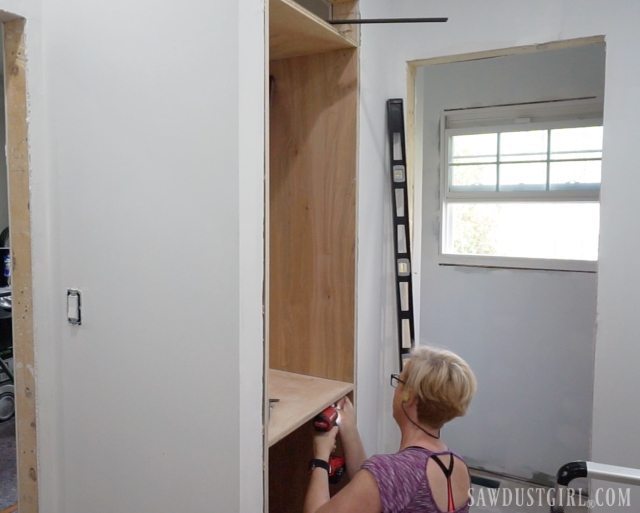
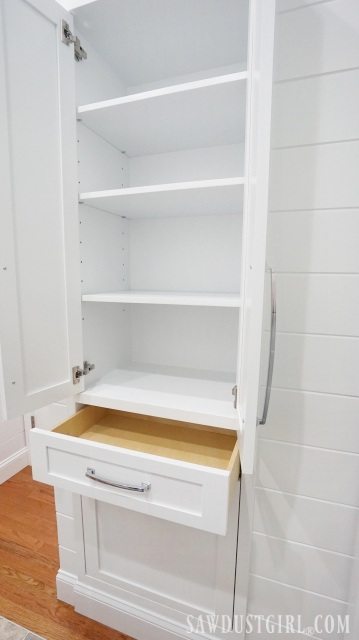
The linen cabinet is a simple carcass with one fixed shelf. I planned adjustable shelves for the top portion and drawers in the bottom. I painted the linen cabinet, trim and plywood plank walls all at the same time.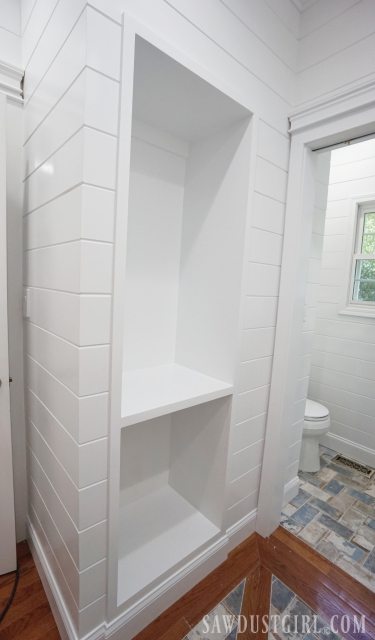
Adjustable shelves
Sometimes I’ll drill the holes before assembling the cabinet. This time I drilled them after the cabinet was painted. Drilling a bunch of holes takes time. It’s faster and easier to do it before assembly. Sometimes I need to quickly knock out the cabinets and move on to other things.
One benefit of waiting until after the cabinet is painted to drill the shelf pin holes is that no paint gets into the holes. I almost always have to dig paint out of holes when I do it the other way around.
I have a few different shelf pin jigs. Sometimes I use pegboard. This particular one is the Jig It Shelving Jig. (I have a review already drafted up so watch for that.)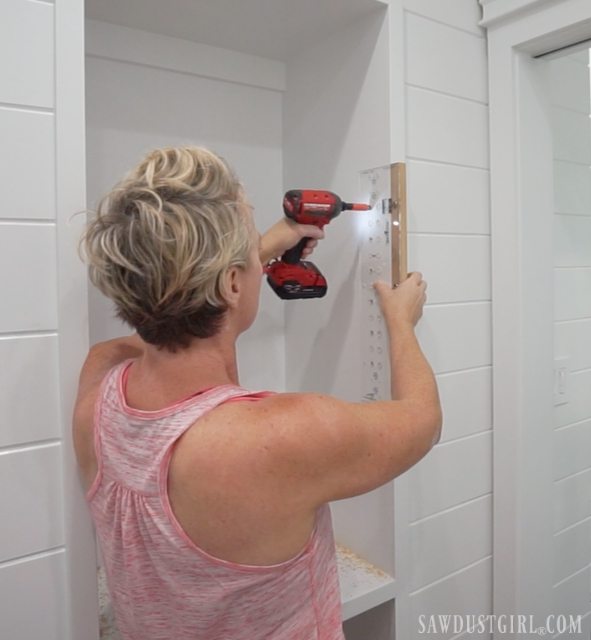
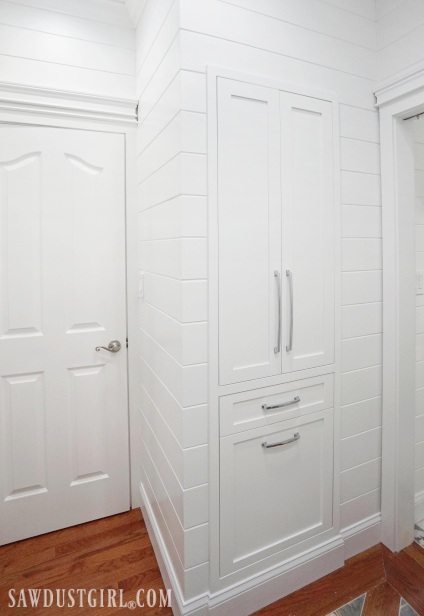
Bottom Drawers
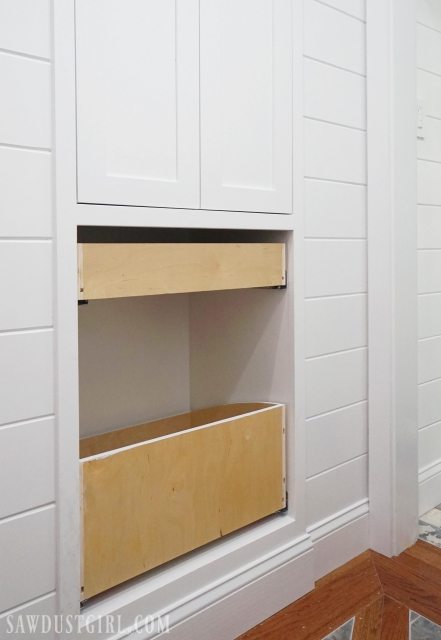
The lower section of the linen cabinet has two drawers, which I built and installed using Blum drawer slides. The top drawer is a 4″ drawer for little stuff. The rest of the area I was torn about what to do with. One part of me wanted to do a pull out hamper. The other part of me wanted to three more drawers, providing LOTS of storage.
Madison has been using the Jack and Jill bathroom for quite a few months — even though it hasn’t had any drawers or shelves. The counter and cabinet carcasses have been cluttered with toiletries. That makes me feel like I need to add as much storage everywhere!
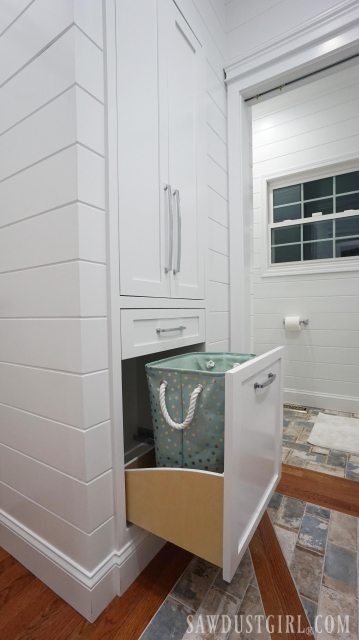
But my original plan was the pull out hamper. And I already had the drawer front for that — so that’s what I did. (Once I get all the vanity drawers built there will be plenty of storage.)
Doors and Drawer Fronts
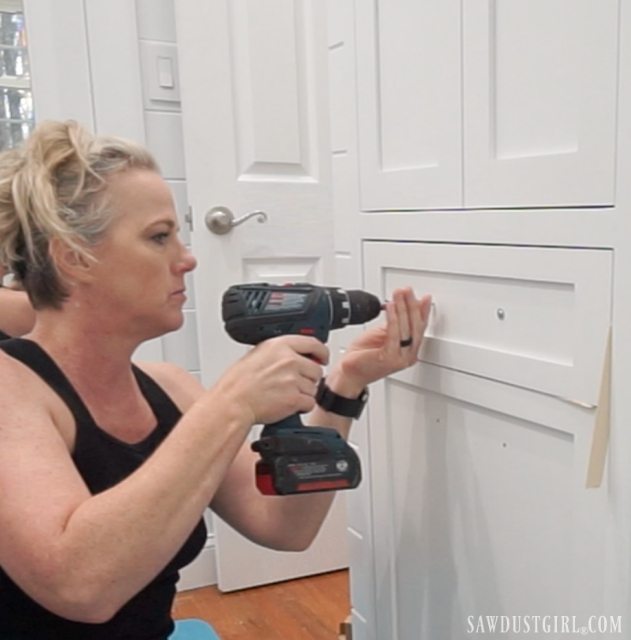
When I build my own drawer fronts, I almost always use 1×3 for the entire frame; both rails and stiles. The rails on the Cabinet Now drawer fronts are 1×2 while the stiles are 1×3. They informed me of that when I placed the order to make sure I knew and was ok with it. I’d never done it that way but was ok with it.
I sometimes make my frame narrower on drawer fronts that are not very tall so the inset panel isn’t a thin strip which would look weird. I think doing all the drawers with narrow rails works great. It maintains uniformity in all the drawer fronts.
I ordered ALL the drawer fronts and doors (49 in total) for the whole Jack and Jill project at one time. That was a LOT of measuring to do at once. These drawer fronts fit perfectly with NO trimming!

The top drawer I installed using my favorite method for installing drawer fronts.
The hamper drawer took some finagling because the actual drawer is shorter than the drawer front.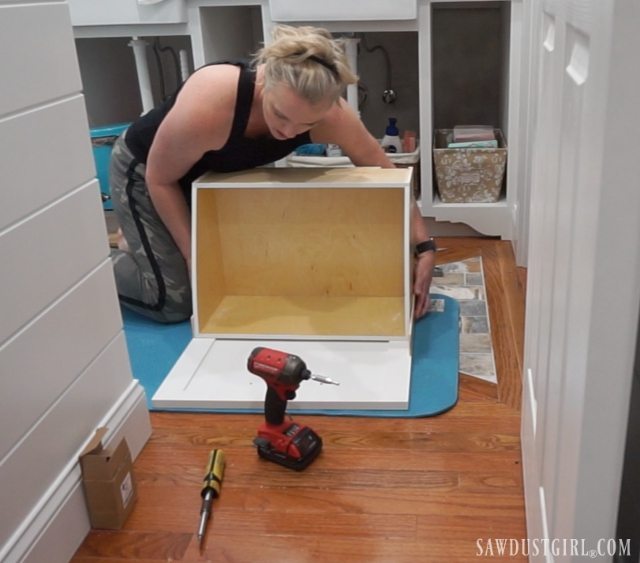
The Blum slides allow you to make small adjustments but I had to remove and adjust my drawer front several times in order to get it perfect (or near enough to satisfy my tolerance level).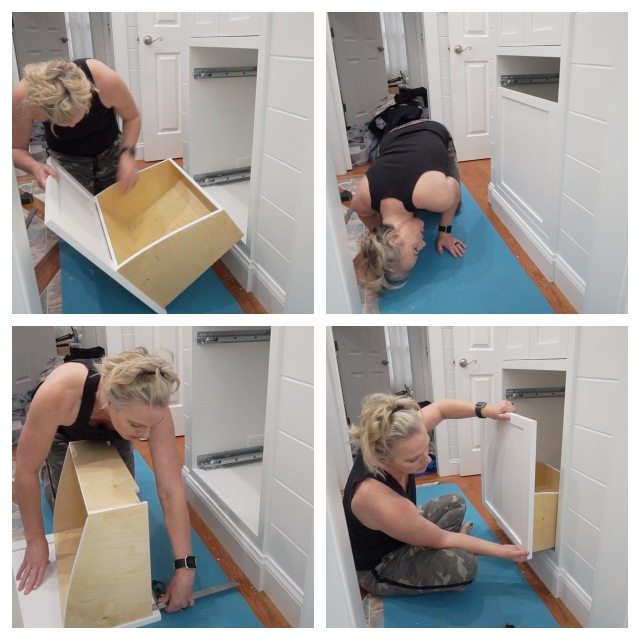 My cabinet hardware was provided by Liberty. I used Classic Edge 12″ cabinet pulls for the doors Classic Edge 6 5/16″ pulls for the drawers.
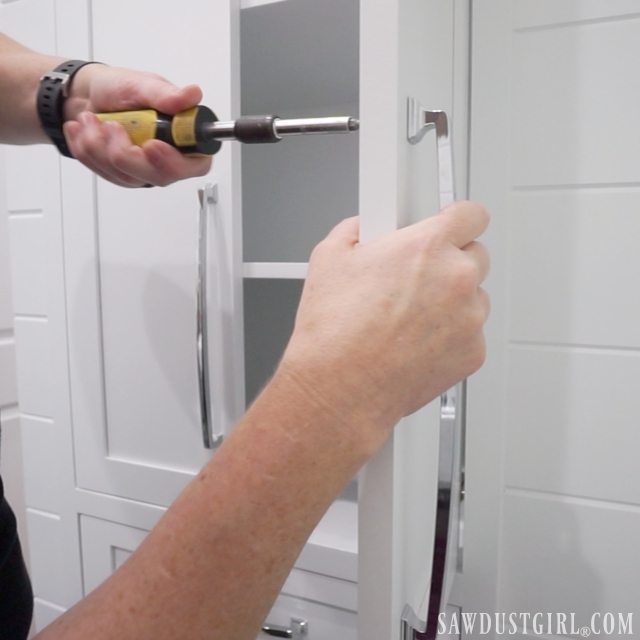
Linen Cabinet Storage Galore!
I used Blum soft close hinges so the doors (as well as the drawers)self close in a soft gliding action. It’s very satisfying to watch.
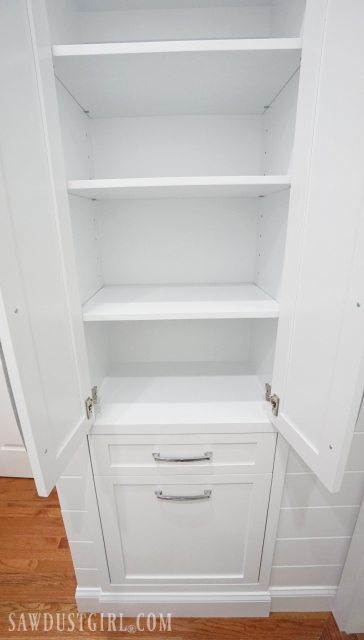
There’s plenty of space on the shelves for towels and other supplies. I was very happy to move some of the “crap” off the countertop and into the cabinet. (Madison hates when I call her stuff crap, but crap is what I call things that strewed about in a messy manner.)
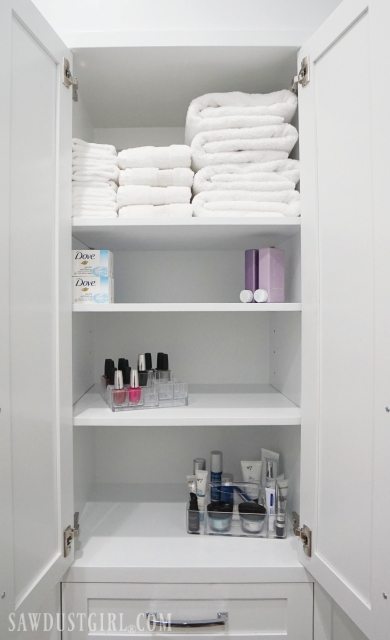
And that soft, self closing top drawer is another place for more supplies!
Funny (not so funny) story: Whenever Wes sees “working” self closing drawers he says, “I wish my closet drawers closed like that”. Which is a “thing” between us because I DID install self closing drawer glides in our Master Closet. He’s just broken the mechanism on many of his from overstuffing his drawers and forcing them closed. I throw shade his way for breaking his drawers. He complains that his drawers don’t work. Someday I might fix them for him…
Wes’ broken drawer mechanisms are neither here nor there when it comes to the linen closet so let’s get back to that. LOL
Laundry Hamper
The top drawer is for “crap” storage. The bottom drawer is a hamper!
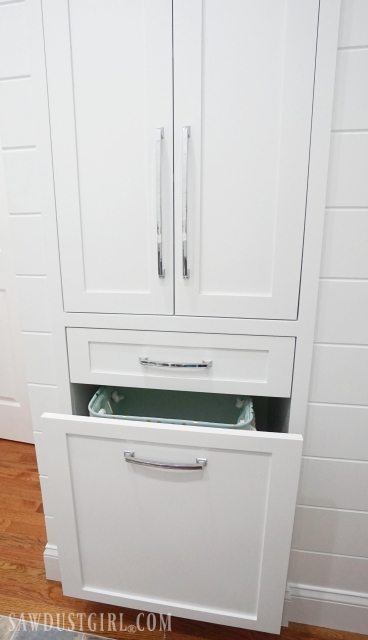
It will be interesting to see if the hamper gets used, or if dirties just keep getting left of the bathroom floor.
Only time will tell. 😀
GWen says
I’ve always read that inset doors are tricky to get fitted just right. True testament to your building skills that you can order drawer fronts and doors and they fit perfectly. Everything must be nice and square and plumb. It really looks great.
I’ve always wondered what paint you use for your shelves? I painted our mantel and a console table years ago. Still, some things that are set on them stick a bit. It’s not because the paint is too thick or hasn’t cured. Makes me shy away from painting any other horizontal surface meant for items to be placed on.
Sandra says
Well not all my doors and drawer fronts fit perfectly. I’ve had to trim a few others which I totally expected. Which is also why it was so exciting that these two fit perfectly without trimming. LOL For years I’ve been using Pro Classic paint from Sherwin Williams. It is meant for painting wood: doors, trim, cabinets, furniture… It dries very hard and doesn’t need a top coat. I’ve never had any issues with the “sticky situation” you’re referring to but I’ve heard of it from people (clients and readers) and don’t have any idea why. I would go to a paint store (not a big box store’s paint department) and ask someone there. They know more about paint and finishes than I ever want to know.
Ishtar says
Do you seal your plywood for the boxes with anything?
Are they rough/hard to keep clean?
Sandra says
I’m not exactly sure what you’re asking. I used cabinet grade plywood to build them so the surface is very smooth. Then I primed and painted — so they are sealed.
Darlene says
I think she might be asking about the drawer boxes. Did you use the prefinished plywood for them?
Ishtar says
Yes, I meant the drawer boxes. 🙂
I was wondering if they were finished with something to keep them from staining (inside the drawers) or if it’s untreated wood. And if it’s untreated, if they are hard to keep clean.
I’m dreaming/thinking/planning/hoping to… in a while… finally to try to tackle making a built-in myself, based on your continuous inspiration Sandra… so I’m trying to figure out what kinda wood/finish etc to use on the drawer boxes themselves.
Do you ever paint the inside of drawers?
Sandra says
The drawers are made from pre-finished drawer sides. It’s plywood, which is polyurethaned and the top is edge banded. The groove for the drawer bottom is already cut out too. I painted the top edge of the bottom one because I cut it to make the curve. I have a tutorial scheduled for Friday for that one. 😉
shane says
Sandra your house building and i love bathroom woodwork painting.You seem to have lots of woodwork skills that make you truly great at this woodwork skill.
Sandra says
Thanks. I continue to learn and improve all the time. So I’m sure I’ll look back at these projects in 10 years and see how I could make improvements. I guess that’s part of what makes life exciting.
Mark Edenfield says
Looks great and very functional. Oh…and the clothes will most likely be found on the bathroom floor. LOL.
Sandra says
Probably. Haha. Thanks so much
Tammy says
FANTASTIC….I LOVE YOUR WORK.. Can I move in..? My clothes will make it to the hamper…!!!!
Sandra says
As long as you promise… LOL Made me laugh out loud! Thanks
Maureen says
Sandra,
I was wondering about the inside of the drawers – are they sealed or is it the bare plywood. If sealed what do you use and when in the building process do you do this? That bathroom is coming along beautifully and the linen closet is the perfect depth for towels.
Maureen
Sandra says
They are made of pre-finished plywood so they are already sealed. I almost always use pre-finished plywood for drawers. It’s way easier than finishing all sides of the inside and outside of drawer boxes after they are built.
Maureen says
Sandra,
You are so smart! Thank you for posting this.
Maureen
STACEY says
I can’t believe the timeliness of this post – I gutted my guest bathroom closet a couple of months of ago with the intent on making a built in linen closet like this and have been struggling with which direction to go – this is perfect! I was beginning to regret my decision! Thanks so much for the inspiration!
Sarah Melanson says
What is the depth on these?
Sandra says
14″ (I think. It’s been a while…)
Laura Porter says
Can you tell me how tall you made the hamper drawer ? How tall a container did you fit in there ? Very nice work !!!
Sandra says
It would be best for you to find the hamper you will use, and the build a drawer to fit it.
unchartedcherokeecountyga says
What hinges did you use for you inset doors on the linen closet?
Sandra says
Blumotion Inserta hinges
Heather says
I’m trying to find if you have plans linked to this for the cabinet, but I don’t remember seeing any. I’d love to build the same in my basement bathroom and wonder what dimensions you used. Any help you can give would be wonderful! Thank you!
Sandra says
No I didn’t post any plans, just showed you my process. The dimensions are so specific to my space it most likely wouldn’t be helpful to anyone else.
Stephanie says
I think I missed why you used Cabinet Now doors for the linen closet built-in? Do you always prefer to get door fronts from Cabinet Now but do your own drawer fronts?
Sandra says
I got the doors and drawer fronts for the whole Jack and Jill bathroom/ 2 bedroom closets renovation. I needed about 40 doors/drawer fronts.
Cody says
What is the width of the linen? Great work!
Sandra says
I don’t remember what the width was on that project. 20-24″ most likely.
Valerie says
Hi there.
I checked out the site you suggested for cabinet doors, and they seemed very expensive…. $700 for a door. I’m not sure if I’m inputting measurements correctly, but that seemed awfully high and before shipping.
Sandra says
It seems like you may have entered something incorrectly. Unless it’s a GIANT door. 🙂
jill says
Does your face framing trim cover part of the cabinet and part of the wall? I’m building shoe storage into a crawlspace behind my closet and am trying to decide the best way to add a door.
Sandra says
Yes, my cabinet is flush with the walls so the faceframe covers both. That way it covers the gaps between the cab and wall (because you don’t want it to be TOO tight a fit).
Jody says
I LOVE the whole linen cabinet, especially the large hamper drawer! I was wondering what the depth of the cabinet is. Thanks!
Sandra says
I don’t remember but I think it was 18″.
Paul Mears says
Your site is a very information rich. My shelves will be 19″ deep x36″ wide, made of 3/4″ plywood – supported on the sides and back by pins. Will they need reinforcement on the front edge? I am worried about them sagging in the middle from the weight of towels and sheets.