Hey there Sawdust Girl Friends! It’s been a really long time it seems since I was here sharing a project with you all!! I am excited to be back and sharing some great knowledge that I gained recently when Sandra pushed us all out of our comfort zones and challenged us to try a new joinery method!
First, I must confess that shamefully I am someone who will get so excited to try something new…only to quickly talk myself out of it, and put it off. Then sometime days, months, possibly even years later…I will find the courage to try it out, only to then wish I would have done it so much sooner! Ugh, yeah it’s hard to deal with me sometimes! Lol!!
Thankfully, Sandra has allowed me to be part of her amazing mentor group and pushed me to tackle new techniques, all the while knowing that she is just a quick message or call away if I need any help or have any questions. Plus, she is such an inspirational woman (so cliche, but seriously), she truly encourages us to just go for it…fail or win she doesn’t care, she just wants us to give it a shot! It is just the confidence boost I need to just jump in with both feet and try! Well, guess what, I tried and successfully accomplished three half lap joints on my latest project! Boom! Thanks Sandra!
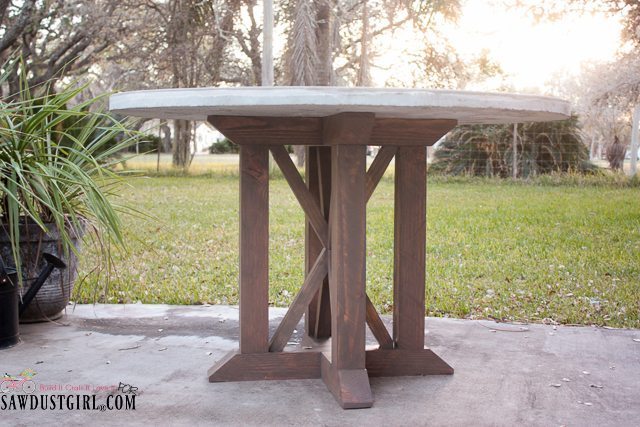
Ever since I first drew a sketch for this table, I knew two things: one was that I wanted a round concrete top on it. Two, I knew that a sophisticated joint was in order to make sure the concrete was supported properly!! Heck, in that moment I also knew, it would be a while before I gathered the courage to try and build it!! Lol!! I use a lot of pocket holes in my projects and I am comfortable with them, but I knew they weren’t going to be a good fit for this project! That is something Sandra has also already taught me, there is a place for pocket holes, but not on every piece of furniture! Lol! Time to rip the band-aid off and try something new! Eeeekkk!!!
I used the table saw to cut my half laps, but there are several ways you can accomplish half laps if you don’t have a table saw. You can use a router, a circular saw or even your miter saw to accomplish great joints!
Measuring and Saw Setup
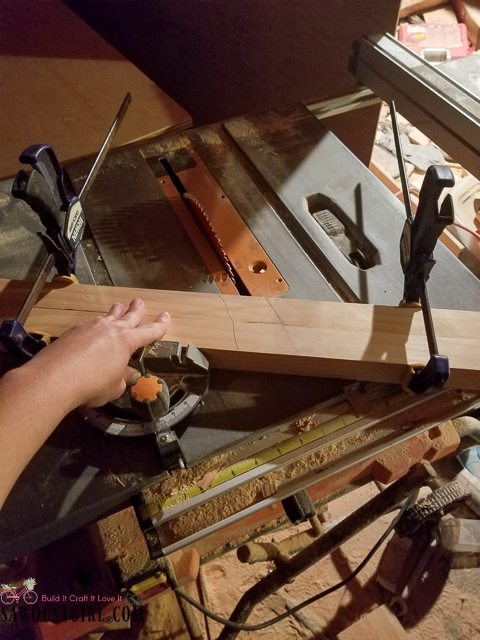
Measuring is one of the most important parts to getting your joints just right! You need the depth and width spot on. Just for reference I am using 4x4s that I ripped down to 3x3s (actual measurement is 3″x3″). I found the middle of each board, laid the other board on top and just traced it to easily measure the width! To find the depth, you just want to cut half way through the board, since my board was 3″, I marked the boards at 1 1/2″. Once the measurements are marked, the blade height on the saw can be set. The blade is set to the same measurement as your depth, so 1 1/2″ for this project. I like to play it safe and stay slightly under my measurement marks, you can always take off more if it isn’t enough…but you can’t add any back if it’s too much!
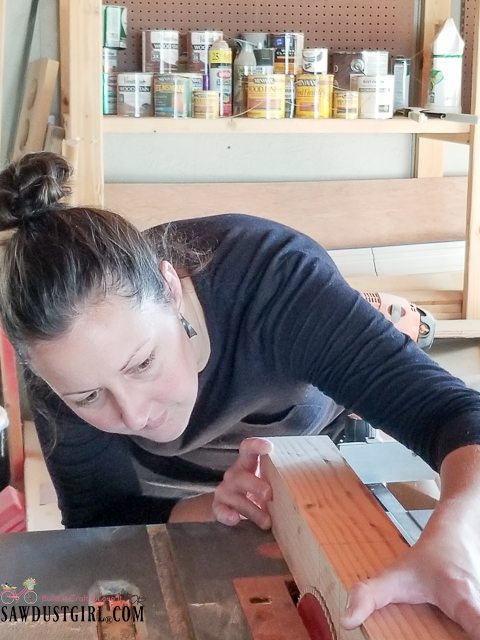
Note: I was checking the height of the blade without the saw even being plugged in. I also did have to remove my riving knife to make these cuts, if you are not comfortable doing this you may want to try creating half lap joints by one of the other ways I mentioned above!
Once the height is correct, I set up the fence. I clamped a small scrap piece of wood to the fence, you want this piece of scrap wood to come right up just far enough that when you slide your board, it will leave the scrap board as it meets the saw blade. This will give you 3/4″ between the actual fence and your board to keep from allowing the board to get in a bind while making the cuts. I did not take a picture of this setup as I should have, but I found a photo that sort of shows you what I am talking about. Hope that helps a little!
I marked all the way around all four sides of my board so that I could see my lines no matter where I was looking while cutting!

Cutting the Half Lap Joint
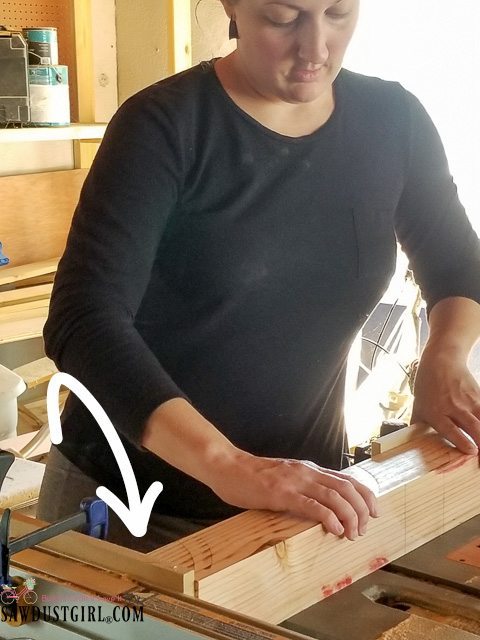
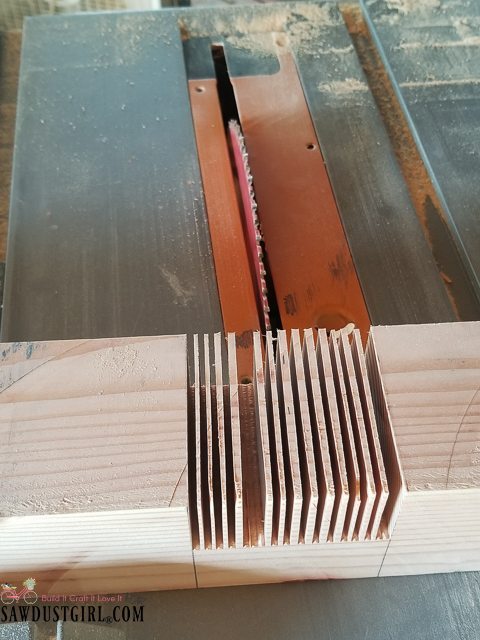
Alright, with the saw set up and ready to go, cutting can commence! Starting on one marked side of your board, and making small cuts over and over across the board until you get to your other mark is all you have to do!
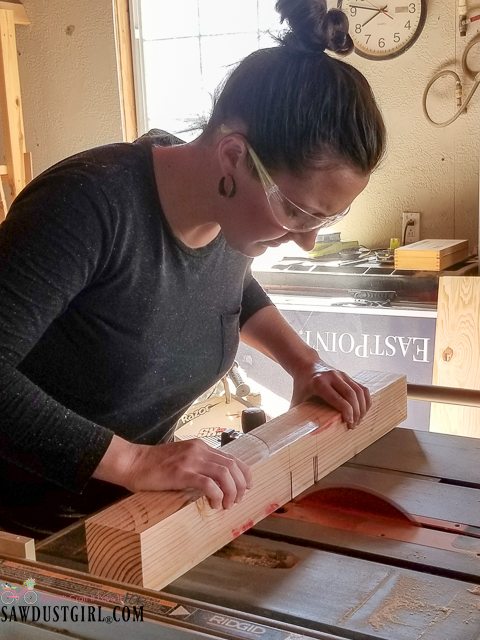
I chose to cut both the lines I had marked first so that I could make sure and just stay in between the two lines and not have to worry as much about when to stop.
Note: Using a dado blade would be much quicker, but seeing as I didn’t have one, I was still able to make it work! A cross cut blade would have been better than the one I was using, but not as great as a dado! I work with what I have a lot of the time, it may not be the BEST way, but it gets the job done!
After making a few cuts across the board, it should look something like this!
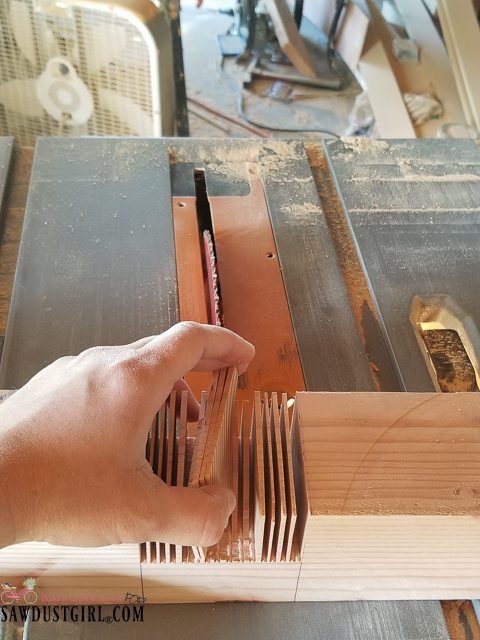
Break out the slivers by hand, or hammer.
Next use a chisel or flexible hand saw (I think they are actually called flush cut saws) to smooth the inner surface of any leftover pieces.
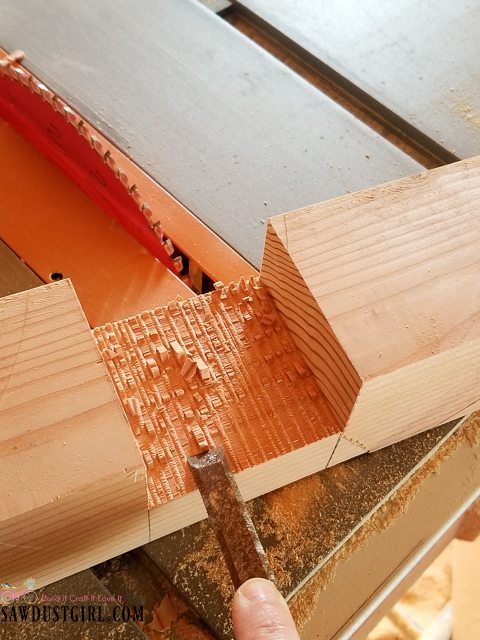
Try not to laugh at my rusty ole’ chisel! Lol! Believe it or not, it was still sharp enough to clean this board up…and my kids were threatened with everything they own, that I better not catch them digging in the dirt with my chisels and leave them outside to be rained on again! I mean where was their mother?! Sheesh! Lol!
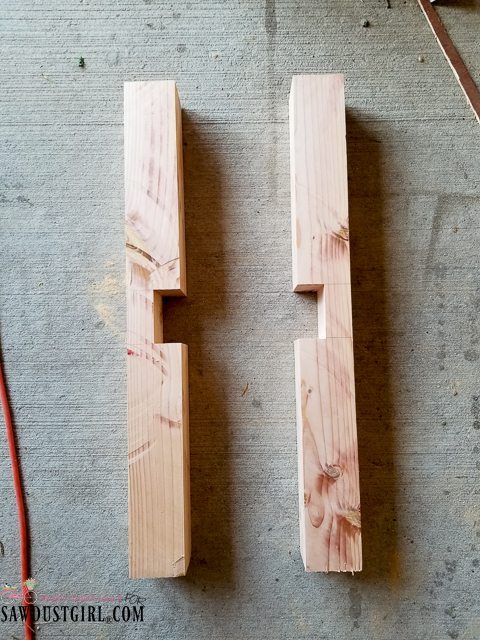
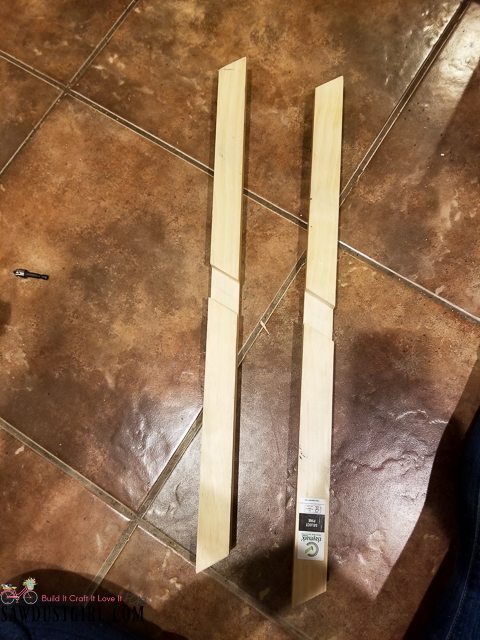
Moving right along, repeat this same process on the next board to make the top or bottom of the table base! If you measure and cut correctly they should fit something like the picture below!
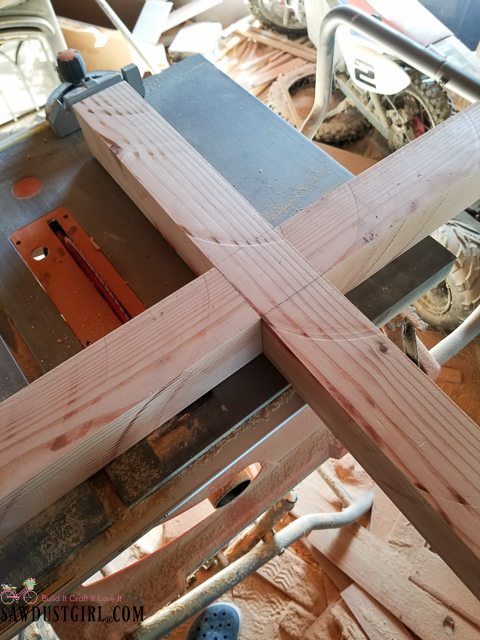
Say what?! For my first joint I was shocked it fit so great, I really expected a large gap or something! Lol! Take them apart and this is what you have!
Want to build the table base…make sure and complete the steps above one more time to make another X!
Creating an X Using Half Lap Joints
We aren’t quite done yet! What about the X in center of the base of the table?! Well, I’ll show you how I cut that as well!
Angles can get really tricky, but once you have done the math, ahem…I mean traced the board with the angles you need, it’s pretty simple!! Lol!
I started building the table base so I could get an accurate measurement for the boards that would create the X. 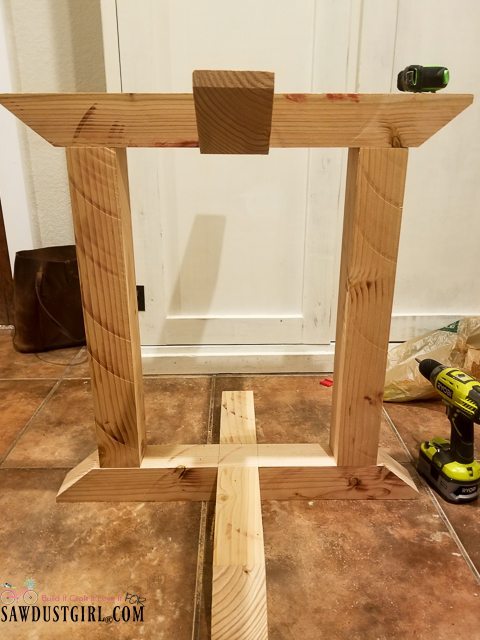
It was mighty cold for this Texas girl, so all building was brought inside for a few days, which essentially has turned into months! Lol!
Once I had the legs in place, I was able to hold my 2x2s up to the frame and draw the lines of where they needed to be cut. I then took them out to the table saw and using the lines, I was able to determine the angle! A wee bit backwards but it works!
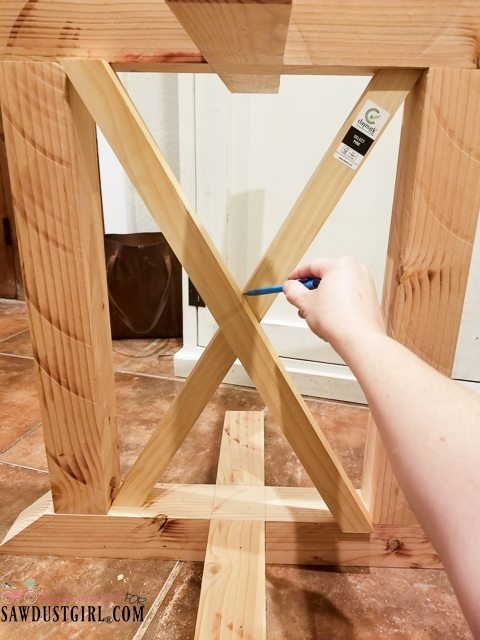
The boards for the X are cut the same as the previous boards, only the blade is lowered since this board is only 1 1/2″, the blade is set at 3/4″ and the miter gauge is changed to the angle you are cutting. Just for reference, I cut the middle of the X’s at 30 degrees off square. Since the ends of the boards are angled, make sure that they are facing the same direction before cutting, the ends should look like one wide board when held together!
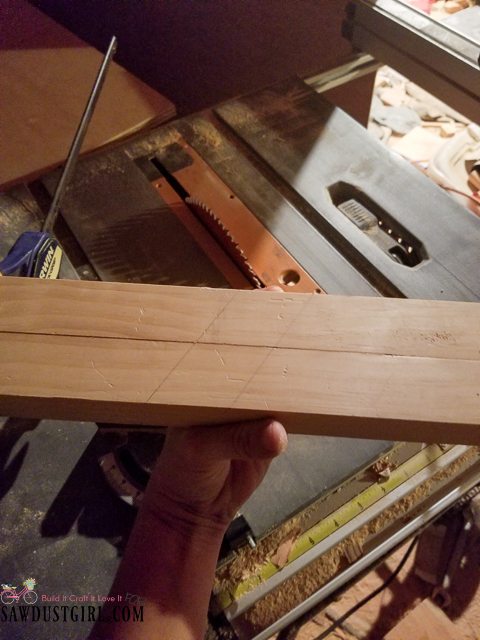
I cut both pieces at the same time, this was a method that I thought would work so great, but ultimately it didn’t lead to any greater outcome than if I would have cut them separately.
Once they have been ran through the table saw, you have your two boards ready to lap each other and create an X!
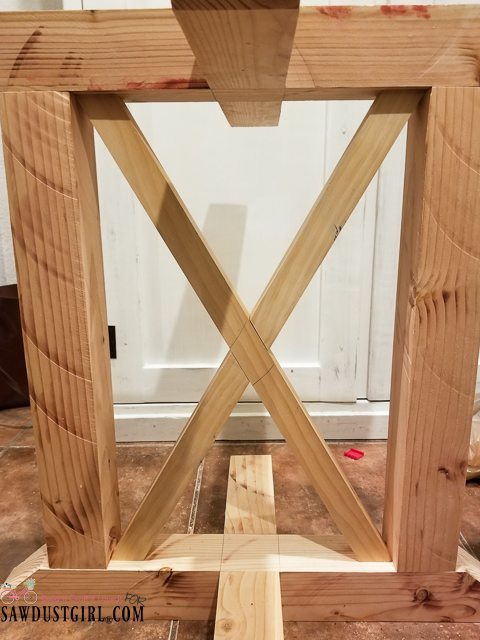
Not bad, and now there is slightly more strength for the concrete top, them fine X’s aren’t just for looks!! Lol! Well, one of the X’s is just for looks because as much as I wanted to lap and interlock it with this X, my brain couldn’t even begin to figure that out, so the second one looks good but doesn’t add any strength! Lol!
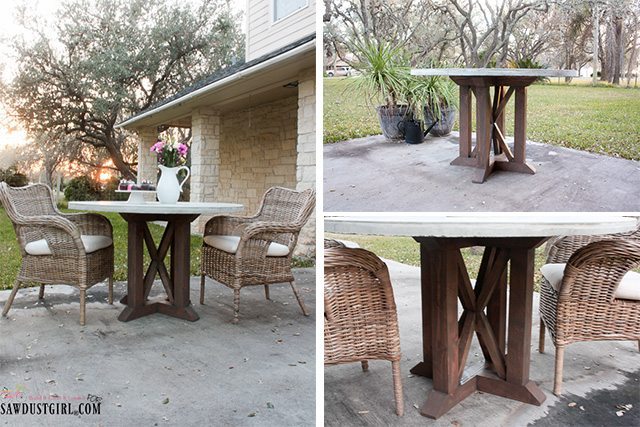
Want to find out how I added the last X to this beautiful table, or see how I created that round concrete top? Head on over to my blog for the full tutorial and free printable plans for this Round Pedestal Dining Table! Can’t wait to see you there! Thanks so much for reading!
Have you tried any new woodworking joints or methods recently? I’d love to hear about your experiences in the comments below! See you next time!
Ken Widel says
I watch very few blogs but this is a great one. As a former woodworking teacher I can only add one thing that would be included in my lesson on the half lap. I always worried about kickbacks and pulling a board back through a turning blade can do that if the board has shifted slightly. So for the first two outside cuts I asked the kids to push all the way through and not bring the board back. Later cuts have more space and the slivers as you showed aren’t that strong. I don’t see how you could have added all that to your post and I want you to know this blog is fantastic. Thank you
Nigel William says
Do you have any tips on how to make precise cuts? I always struggle with that.