I’m installing plywood plank walls in the Jack and Jill bathroom as well as both bedrooms in my current remodeling project. I’m using the same technique I used on my studio ceiling to achieve the look of 3/4″ V groove, tongue and groove, Pine planks.
The underlayment was about on fourth the cost of the actual Pine planks.
However, the underlayment had tons of voids, the veneer was really thin and bubbly, and the edges were super rough even before I beveled them. It took a lot of extra work to make it look really good when finished. This time, I’m using 1/4″ Purebond plywood. It’s is more expensive than the underlayment but is still half the cost of using the Pine planks. There are hardly any voids, the veneer is thicker with no bubbling and the edges are pretty dang smooth, before and after beveling.
I bought 4×8 sheets of 1/4″ Birch plywood and used my track saw to rip them into 6″ wide strips.
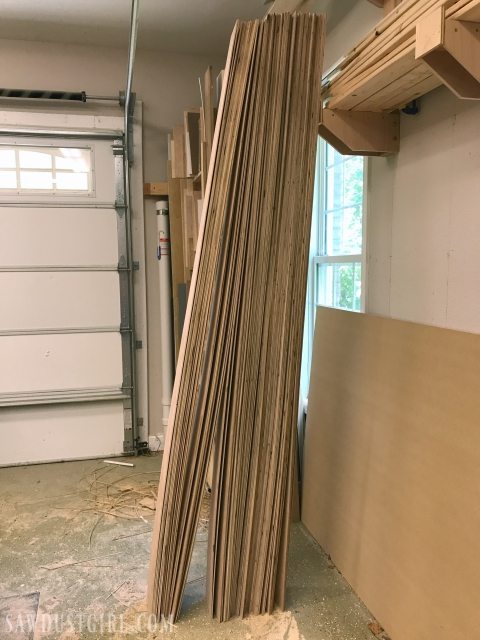
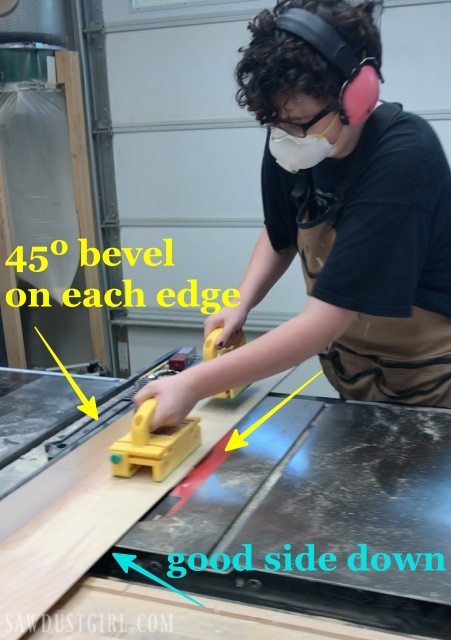
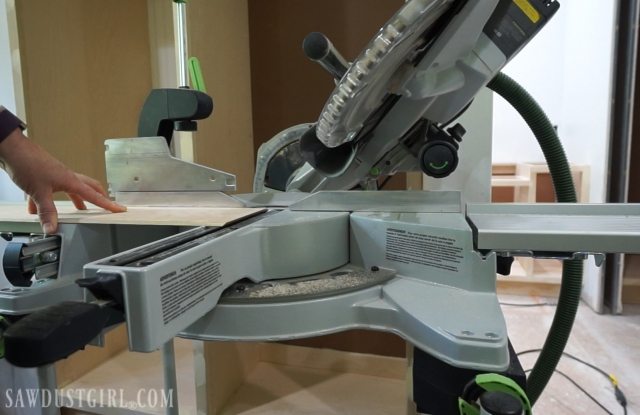
Then Madison spent a few hours at the table saw, beveling the edges.
- Make sure the best side of the plywood is face down on the table saw.
- The blade is set at 45º.
- Bevel one edge then spin the plank around and run the other edge through — good side still face down.
- Use push blocks to keep your hands away from the blade. Madison liked the MicroJig GRR-Rippers.

Installing V-Groove Plywood Plank Walls
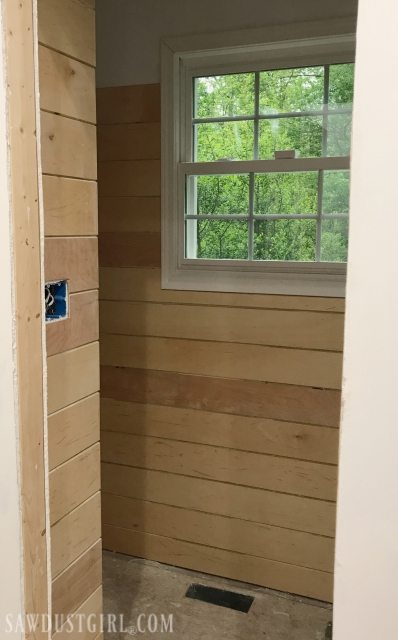
First, I used a stud finder to locate and mark all the wall studs.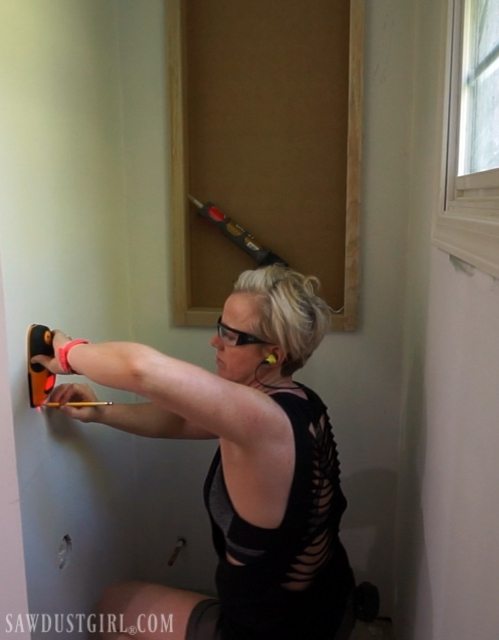
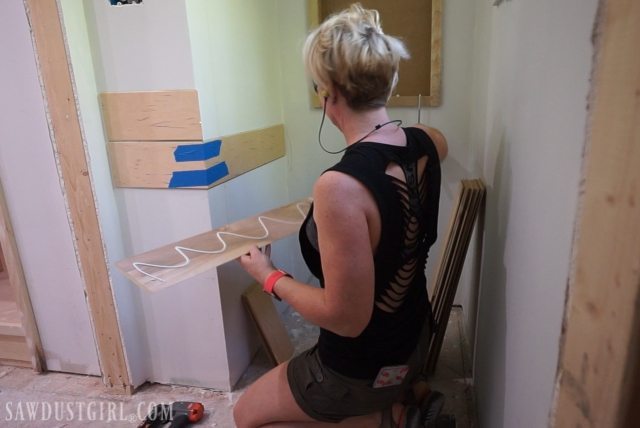
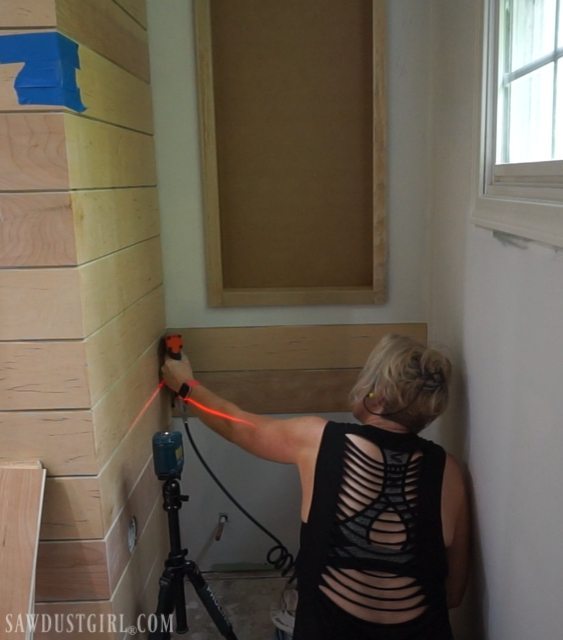
A laser level is a great tool to ensure the plywood planks are level on all walls! To secure the plywood planks to the walls, I used construction adhesive and 23 gauge pin nails.
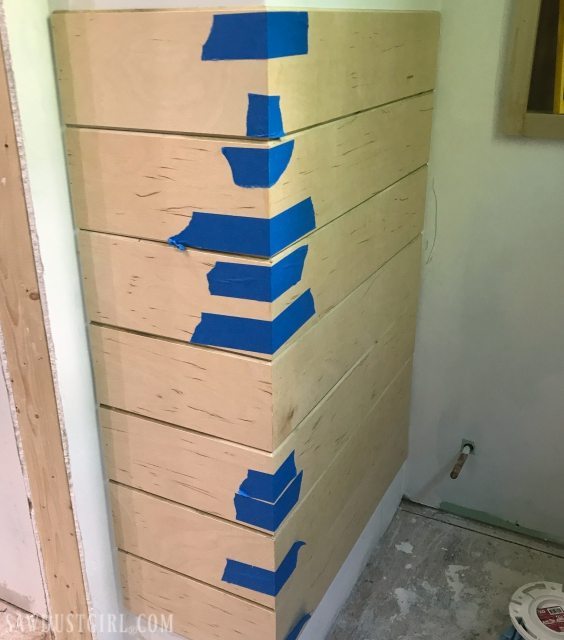
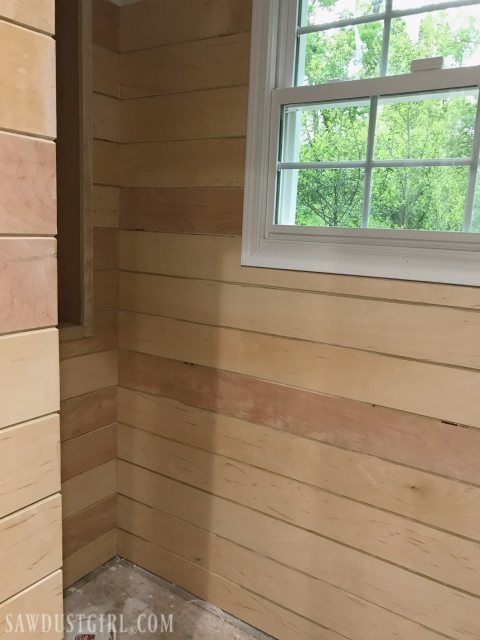
 For the outside corner, I beveled the ends of the adjoining planks.
I applied Titebond Quick and Thick Glue and used painters tape to pull the planks together into a tight joint.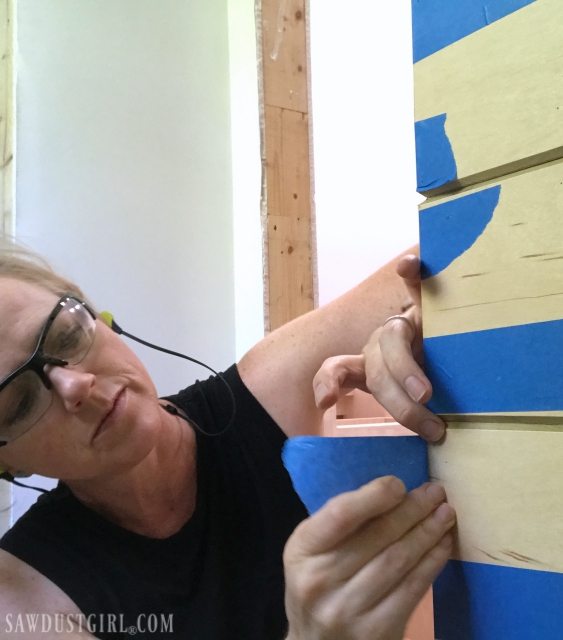
Then I secured each side of the corner with pin nails.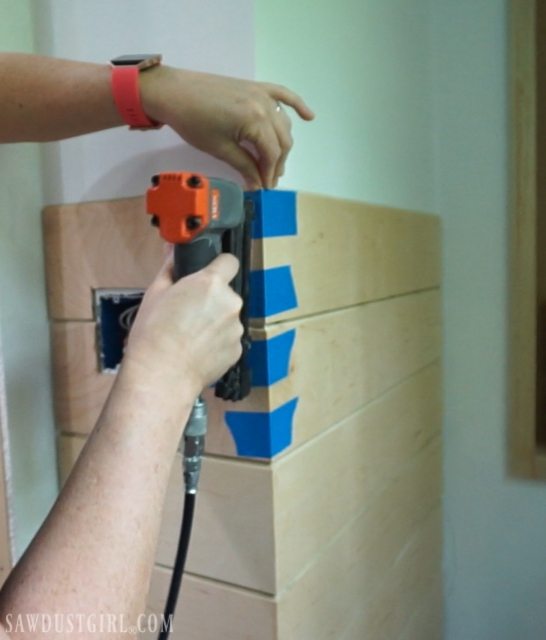
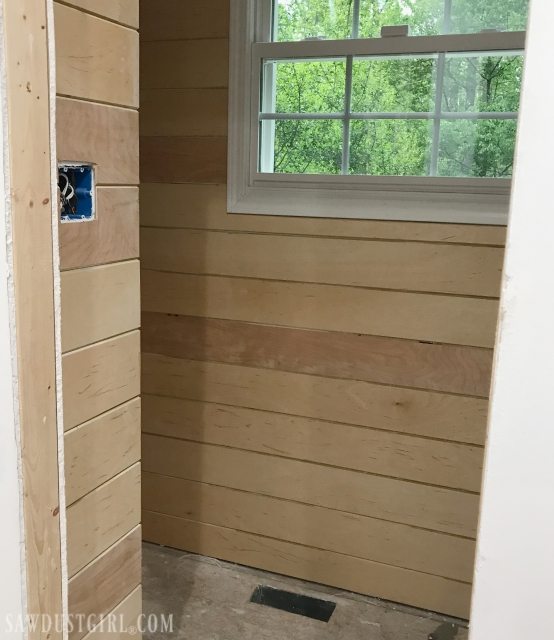
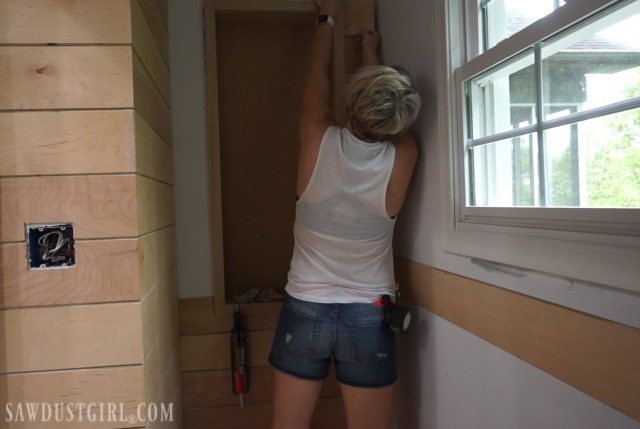
I used an oscillating multi-tool to cut out for the junction boxes.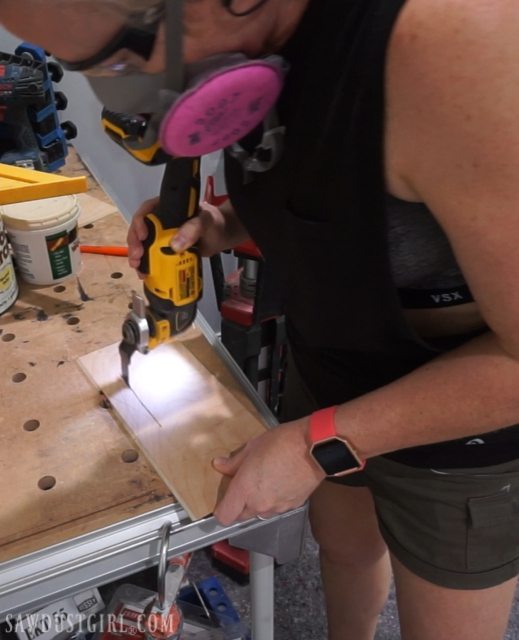
I trimmed the bottom row of my plywood plank walls about 1/2″ off the floor so they won’t get wet if water ever gets under the base. The base will be installed before painting so that portion of the planks won’t have any protection against water.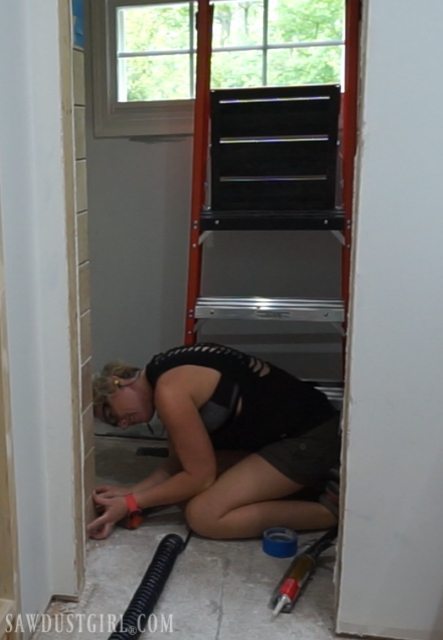
I set the laser level at the center of the V-Groove on one row of planks on the first wall to move on to the next wall. That line is where I started the first row on the new wall.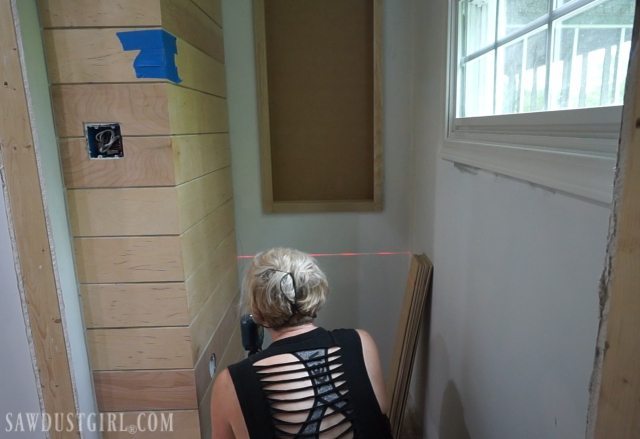
I continued my way around the room with the laser level, adhesive and nails.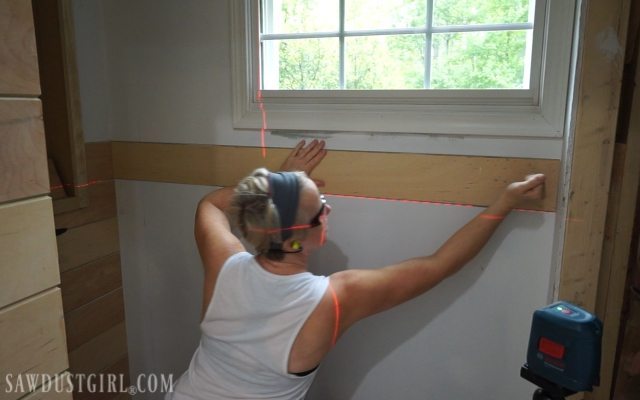
Every 5 or 6 planks I would move the laser level to make sure I was maintaining level with the plywood plank walls.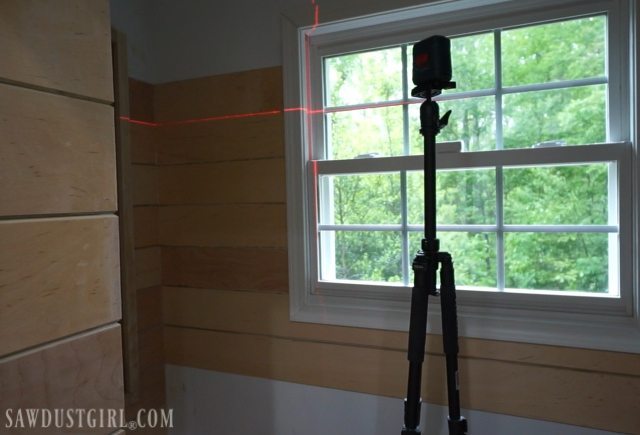
 I know some of y’all love the look of the wood but I will be painting. YOU can leave your plywood plank walls unpainted if YOU want to. But I have a vision for my space and it involves white walls. 😉
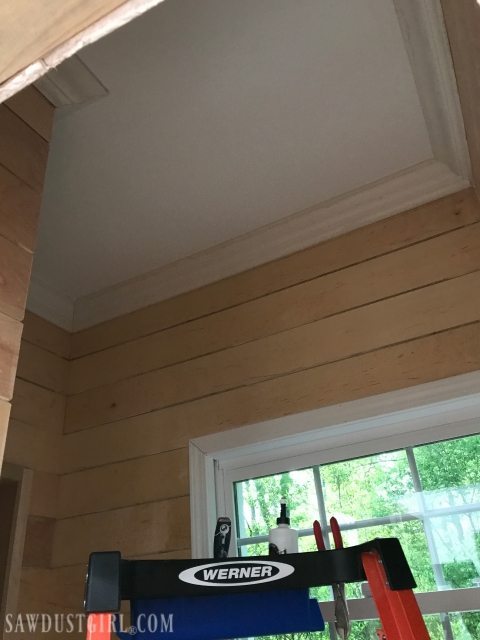
 I installed crown moulding which is a bit of a controversy in the “bathroom renovating” space. I am installing a high tech ventilation fan in this room so I’m not concerned about humidity. However, installing crown moulding in a bathroom is definitely something you should research before you make an informed, personal decision.
I’ve installed quite a few Pine plank walls and ceilings in this house. The thing I don’t like about painted solid wood planks is the visible movement at the V-Groove. You can caulk it when it’s contracted but then it expands again and the caulk gets squeezed out and you have to scrape it away. Plywood is more stable so I don’t expect to have that kind of noticeable movement at the V.
Visibly, the two installed products look very similar. Which is why I go to the trouble of ripping and beveling the 1/4″ plywood. The pine plank (left) is 3/4″ thick but only the top 1/4″ creates the V-Groove.
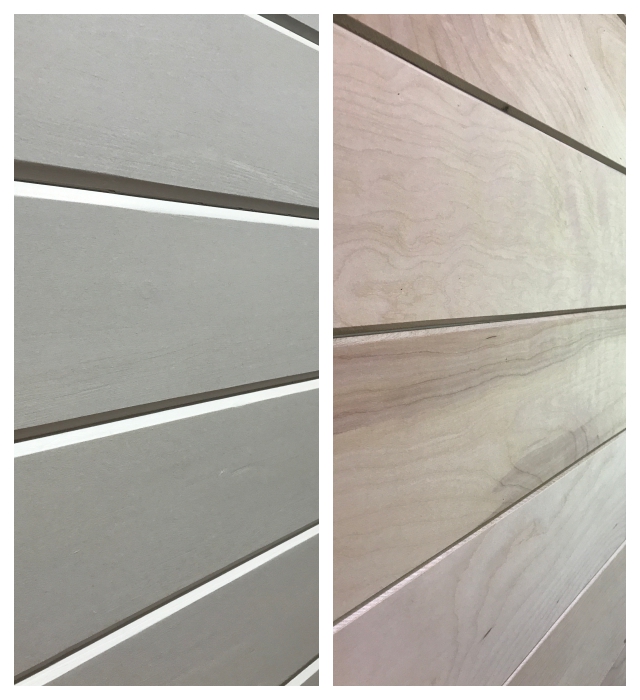
Because the entire side of the 1/4″ plywood is beveled, the depth of the V-Groove on “real pine plank walls” and on 1/4″ beveled plywood plank walls are about exactly the same. For 1/2 the price. A lot more work but hopefully no movement. If anyone EVER wants to remove the plank walls they’re have to completely reface the drywall because of the construction adhesive. I don’t plan on ever tearing out a V-Groove plank wall. It’s a classic architectural element! 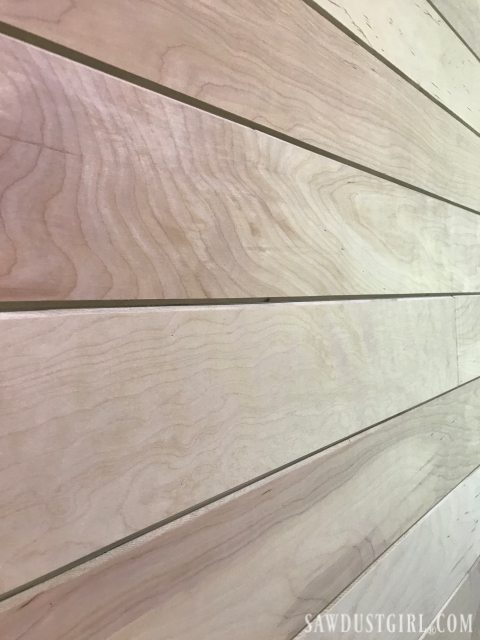
Christen Geron says
I’m laughing at your crown moulding controversy. I can’t tell if you’re being sarcastic, but it seems too silly a concept for you to be serious. Is it really that difficult a decision? I’ve never considered putting crown in a bathroom, but I wouldn’t rule it out. Yours looks very nice here and has inspired me to try it in my master.
Sandra says
Totally serious. Lots of people are adamant about it being a bad idea because the moisture will inevitable cause issues. Others say they have done it and it’s been fine. As always, everyone has to make their own decisions about their own situation.
Louis Goaziou says
You could have just routed grooves in a whole sheet of plywood, equal or random widths, and installed it faster. You can also router vertical cuts to appear to have random size planks. You would not know the different. I’ve done this several times. Not much trouble to cut out the electric outlets or windows. For windows just remove the original moldings, then reinstall.
Sandra says
You could rip 1/4″ deep V grooves in a sheet of 1/2″ plywood but taking several passes for each groove in full sheets of plywood sounds like more work than what I did. Then there’s the issue of uniform seams. Ripping 6″ planks allows you to stagger the joints. There are always a dozen ways to do most things…just have to pick the one that works for you!
John Petersen says
I used this method in my laundry/mudroom. I ripped my plywood at 5 7/8 on table saw and then bevel cut at 45° just as you did. I am very pleased with my results. The planks look like nickel spaced shiplap after painting.
Sandra says
I don’t think it looks a thing like nickel spaced “shiplap”. I think it looks almost exactly like 3/4″ pine, tongue and groove plank walls. If shiplap is the look one wants there is no reason to bevel.
Darlene says
I would imagine that you are very happy about the progress you’ve made!
Catharine says
If you had to do it again, would you use the 1/4″ on the ceiling?
Sandra says
In the studio? I used 1/4″ plywood on the studio but it was inexpensive underlayment plywood which had all the issues I explained in the first or second paragraph. I didn’t want to use that again which is why I paid more for the nicer PureBond plywood this time. On the studio, I spent $400 when Pine planks were going to cost me almost $3000. If I could do it again, I would spend the extra $400 on the nicer plywood!
Cat "like meow" H. says
Thanks! I’m gonna go with the PureBond then!
Zovesta says
Gorgeous!! I’m thinking of doing this eventually, stained and installed vertically. 😀 Thanks for the tutorial!
Brad says
Did you use the pin nails throughout or just in the corners (using the adhesive)? If throughout, did you fill the holes? I have never used/seen pin nails so curious.
Thanks, looks great.
Sandra says
I nailed in all the studs. The 23 ga nails are so small you can hardly find where they are. They should get covered/filled with prime and paint.
Zoe says
Gorgeous! I’m so jealous because I’ve always wanted to use power tools but have no one to instruct me and I’m very afraid I’d cut a finger (or worse) off. In all seriousness, you are awesome and even though I’m sure you get frustrated, I cannot imagine the satisfaction in seeing the job completed. You rock!
Sandra says
Thanks Zoe. Are you in the states? If you have the desire to learn, there lots of places that offer classes. Rockler, Woodcraft, Home Depot. You could go to a DIY conference. Don’t let fear stop you from trying. Maybe start with a jigsaw and not a table saw.
Liz says
Could you please share your “high tech ventilation fan?” We’re looking for a new one, and I’d love to hear what you’re planning to use.
p.s. I really enjoy how frank and direct you are in your comments; it’s refreshing!
Sandra says
It’s in a box somewhere in this mess. I hope to be digging it out by Saturday and installing it. I think I bought a Yamaha? I’ll definitely share (once I find it) and remember why I bought it! I can tell you it has a humidity sensor so it turns on any time the humidity is over …whatever you set it at. There are some ventilation fans that have the sensor in the fan and some that have one in the wall switch. I can’t remember which I purchased.
Val says
I also would like to know about your high tech ventilation fan and where to buy online if possible.
Please
Sandra says
As soon as I find it and install it I’ll let you know what it is. I can’t remember. I bought it about 5 months ago when I thought I’d be done with this project in February! LOL
Lisa Murphy says
Hi! This is a great tutorial – thanks you for sharing and all the pictures! One question, when you go to bevel the edges do you loose much of the width of the wood/how do you make sure with beveling the edges all the pieces stay the same width? I love this look and think it looks wonderful! Great job!
kat says
Sandra, I am remodeling my bathroom from scratch and am slowly making my way to the drywall soon. I have the purple board but was thinking about vinyl beadboard because it’s a bathroom. My 1974 ranch does not have a fan, but a window in the shower/tub. Installing a fan is not out of the question, but if I don’t install one, it’s a no go with the Purebond if I do something like what you have done? I’m only installing beadboard or some other covering 4 feet up with trim moulding then drywall above it.
Sandra says
Sorry for the delay Kat. I missed your question. I personally don’t think the plywood will be any worse off that drywall with humidity. It’s sealed with paint so… ?
Deanne says
This is exactly the kind of solution I was looking for. Well done!
Did you still need to use that fancy sander for the v groove and caulk the v grooves with this better Purebond plywood?
For your table saw blade what did you use?
What adhesive did you use?
One of the bigger problems with using the expensive tongue and groove wood boards is finding enough of them in good shape at local box store. Using this stable plywood instead that is very common to find is a better approach if you plan to do many rooms. I don’t like to buy too much plywood at one time since it warps if it sits for too long so using this Purebond seems like a more reliable material to use and easy to find a buy besides the fact it is way cheaper! I love the way the beveled corners meet so no need for corner trim. I really think it looks super custom the way you lined up the corners. I was going to do vertical boards but after seeing how nice these horizontal boards look and the nice corners I am thinking maybe going with the horizontal. But it looks like you can go either way with all the sides beveled.
Sandra says
I did not need to use my special sander. The edges were nice and clean. If you prime with water borne primer then it’s going to raise the grain and make it rough. I used an oil borne primer to avoid that. I don’t have any idea what specific blade I had on my saw at that time. I generally have a combination blade so I can rip or crosscut and get clean cuts. I’m not sure what brand construction adhesive I used either. One for wall paneling. I just buy whichever one the best price and I bought it in cases of 12.
Matt says
Very appreciative that I found your video. I plan on installing vertical planks using your methods. Do you think it would be possible to install with pin nails only using the 1/4″ plank strips ? I’m concerned about future changes (my wife is a serial remodeler).
Sandra says
I wouldn’t go smaller than 18 ga nails (not sure what you consider a pin nail. That’s what I call 23 ga nails.) I think nailing through the tongue is the normal way to do it so you don’t see the nails. With the pine planks, you’ll get expansion gaps throughout the year. More and more companies are making pre-primed composite planks now. (Like MDF).
Julia says
Not sure if you’re still answering questions on this post. but … Did you bevel the inner corners too? Or just the outside ones? Also, looks fantastic!
Sandra says
Yes they have to be mitered or the V groove will have a big gap.
heidi says
Exactly! I am doing 8″ planks, with a nickle gap, out of 1/4″ purebond, but in a vertical application (guest room). Looks just like a feature wall I did, with solid FJP, at a fraction of the cost.
Jennifer Brewer says
This is exactly the info I needed to get started on the backside of our kitchen island! Great tutorial. Did you decide to caulk the grooves before painting? Thank you again for all the hard work you put into your posts.
Sandra says
I generally caulk after priming and sanding. (So before painting)
Mary says
Looks good! Do you bevel the inside corners? Meaning the butt end of the boards that meet up on the inside corner, wondering if the ends each board are beveled? Thanks!
Sandra says
On the inside corners one plank covers the other. Both ends are cut straight, no need to bevel.
Sean says
Did you have any issues with the beveled edges of the plywood looking rough and frankly, like the edge of a piece of plywood, after priming and painting? I love this idea and am considering doing this instead of tongue and groove plank in a new townhouse I am buying, but am concerned about the v-grooves looking like beveled/cut plywood. I want the grooves to look completely smooth inside. Thanks!
Sandra says
No I didn’t because I sanded and caulked them before painting. If you left the wood raw, it would absolutely look like plywood (because it is).
Larry says
Well done! How are the planks holding up after 3 years or so? Anything you would do differently today?
Sandra says
I don’t own or live in that house anymore but they still looked great when I left.