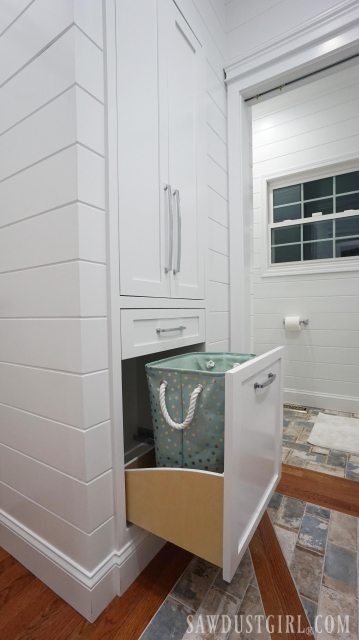
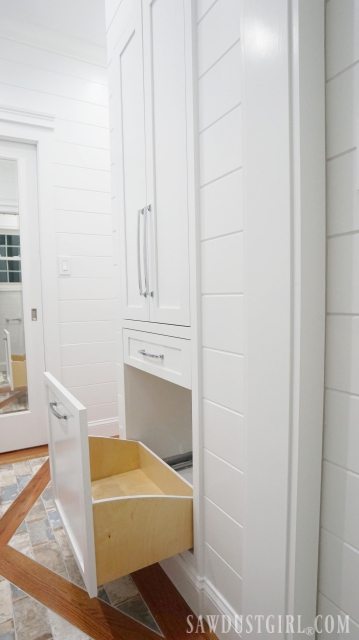
I showed you the pull out hamper in my linen cabinet but I saved the construction details for that drawer for a separate post. It’s a little different from any of my other drawer tutorials because of the curved side detail. I built it with curved sides to transition from a taller front to shorter back. When a drawer pull is located at the top of a tall drawer front — and it pulls out a shallow drawer located at the bottom of that drawer front, there can be some tipping, tilting, wonkiness…when you pull the drawer open. 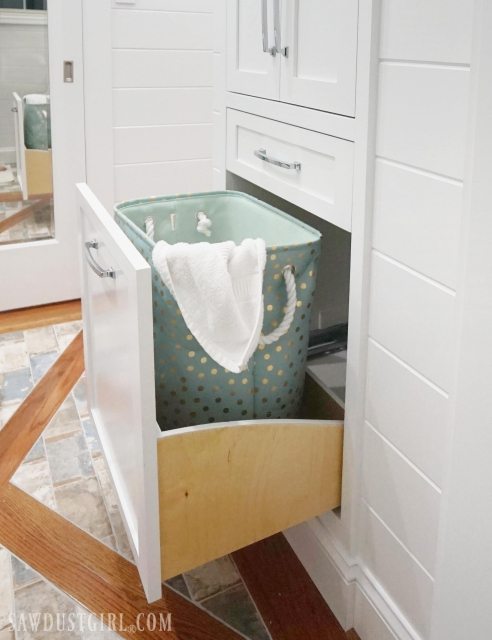
Other Drawer Options
- To prevent the “tipping” that requires a “taller in the front” drawer, one could simply build a drawer that is as tall as the drawer front.
- I didn’t want a really big, heav drawer. They require more expensive, heavy duty drawer slides to handle the extra weight.
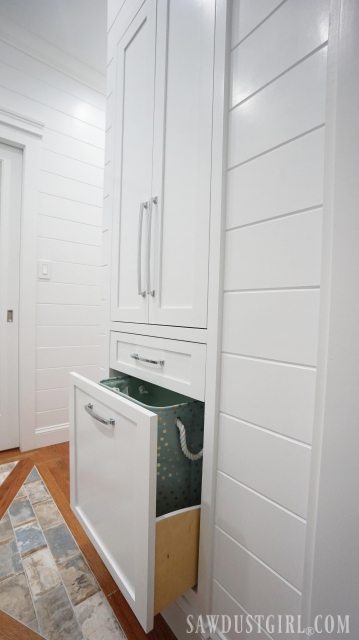
- I still may have gone that route if I couldn’t have found a clothes hamper to fit in my drawer. I would have made a removable canvas liner. But a hamper I already had fit perfectly in my drawer space.
- Build a “taller in the front drawer” but don’t worry about curving the sides. Go with a simple, straight diagonal line from the back to the front.
I doubt the overall appearance of my linen cabinet would change if I had not used the curved detail on my drawer sides. Probably because I do a lot of cabinet making and drawer building, I wanted to do something a little different. So I curved my drawer sides. It added maybe an hour to the process. (I can afford an hour to make a task interesting instead of mundane.)
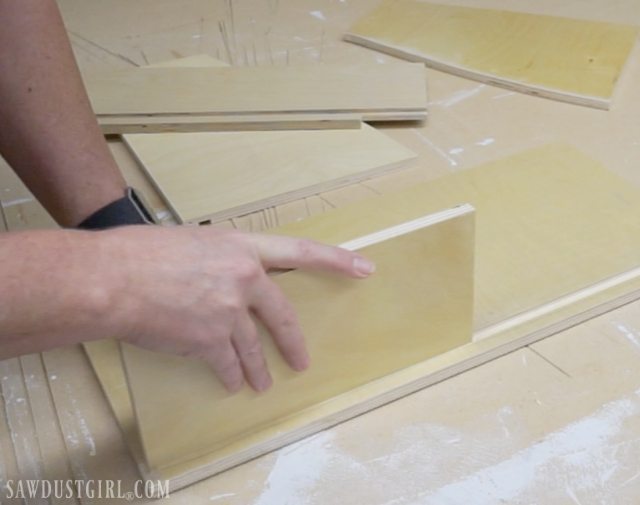
Creating Curved Sides
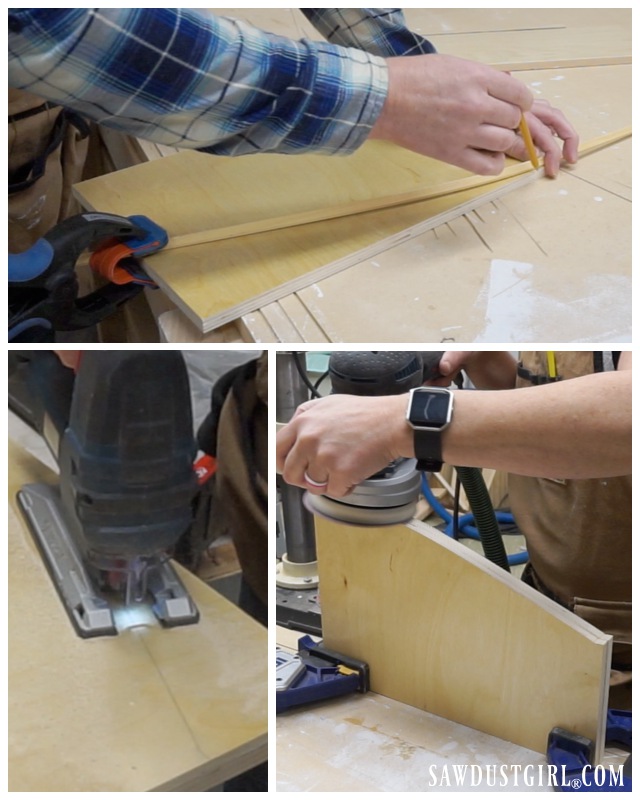
I use a thin strip of wood or metal to create an arch that I can trace and cut out. I clamped both drawer sides together so I could cut and sand them at the same time.
- My drawer sides started out as 15×10″ plywood.
- I marked the back end at 6″ then clamped a wood strip on that mark.
- I held the other end of the strip with my hand which allowed me to play around with the shape of the curve.
- trace the curve with a pencil
- Use a jigsaw or bandsaw to cut along your line
- Sand until you have a smooth and even curve
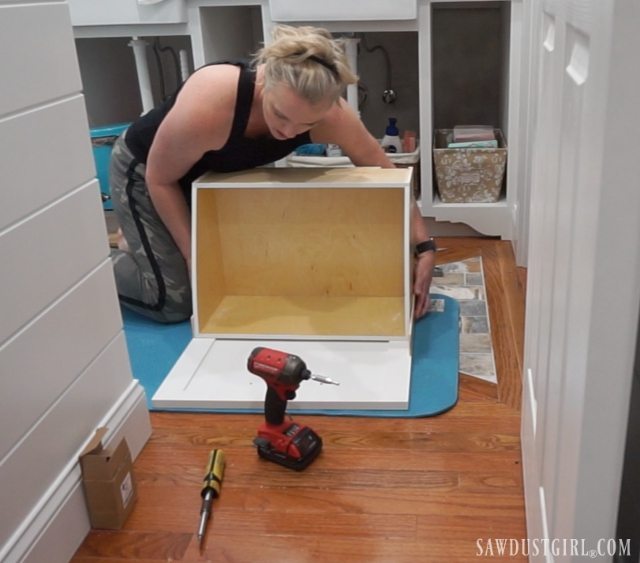
Building a Hamper Drawer
- This entire drawer is made of 1/2″ plywood, including the bottom. When the hamper is full it be too heavy for a normal 1/4″ drawer bottom. I used pre-finished plywood. It is sprayed with polyurethane on both sides at the factory. I purchase it at a local building supply warehouse.
- Drawer measurements are always based on the requirements of the drawer slides. Different drawer hardware require different side access so get your hardware before building your drawer. I’m using Blum drawer slides for my hamper drawer.
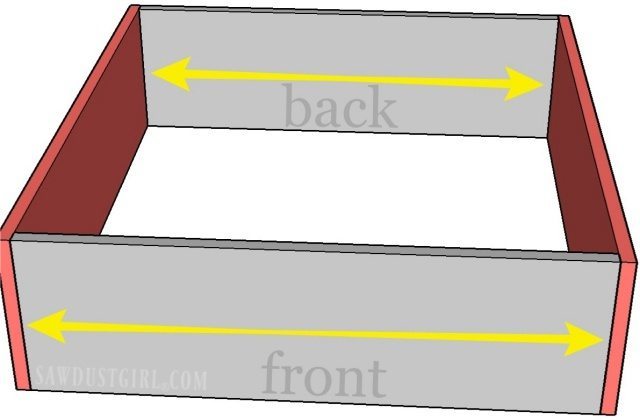
- Drawers should always be build so the “front and back” are captured by the “sides”.
- Height
- Front of the drawer is 10″
- Back is 6″
- Drawer sides are 10″ at the front edge and curve down to 6″.
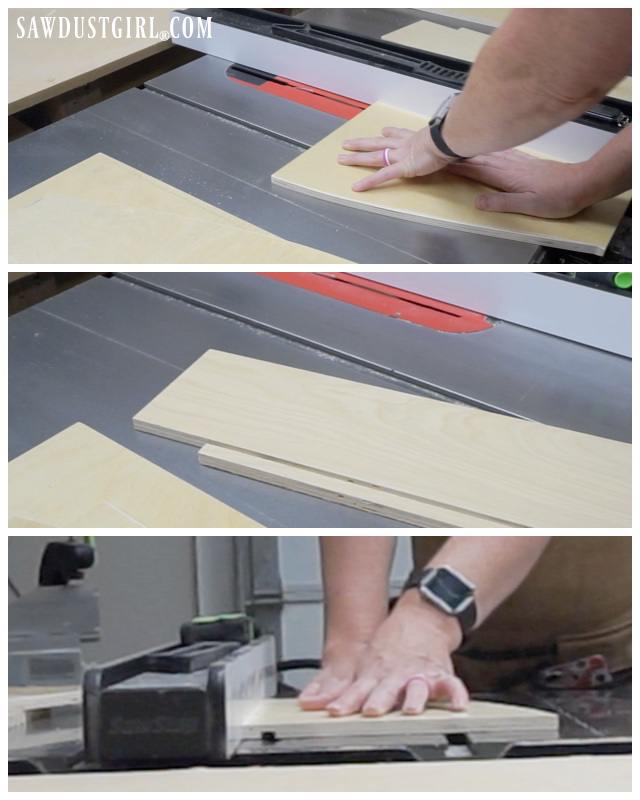
Cutting Grooves
You can cut grooves with a router or a table saw, like I did. Only making one drawer, I didn’t bother putting in a dado stack.
- Set blade height to 3/16″.
- Start grooves 1/2″ from the bottom edge then tun each drawer piece through.
- Move the rip fence over a blade width and tun all the pieces through again.
- Repeat this until your groove matches the drawer bottom.
- Make sure to test your bottom piece as you’re getting close so you don’t make the groove too wide.
Joinery
I’m using Festool Dominos to build my drawer.(affiliate link) Check out these tutorials for using pocket holes, or locking rabbets if you don’t have a biscuit joiner or Domino. 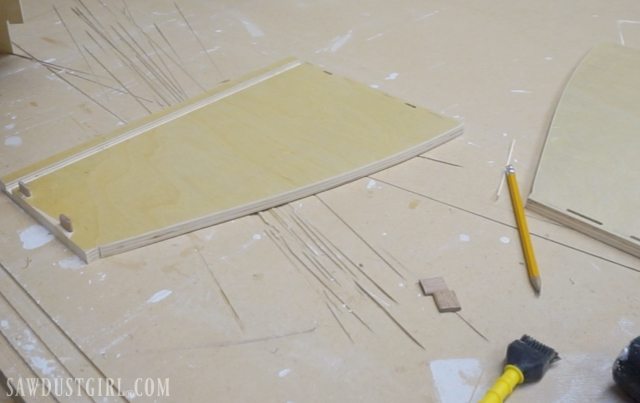
I secure the “front” and “back” to one “side”, slid in the “bottom” and then attached the last side.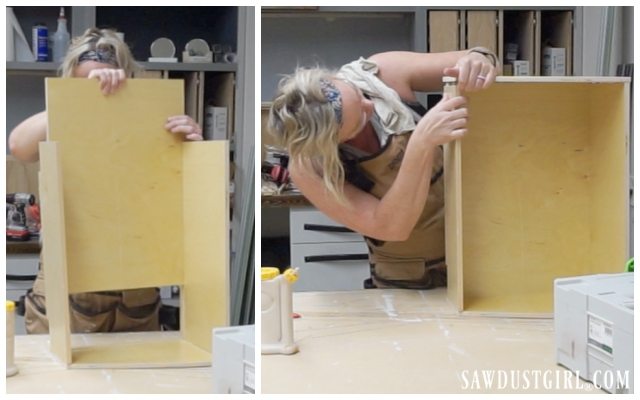
I use Bessey clamps to hold the drawer parts securely until the glue sets. (affiliate link)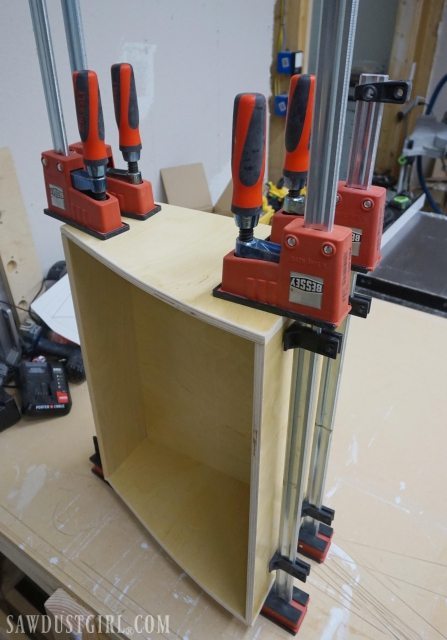
Sealing plywood edges
There are several ways to seal the plywood edges.
- Edge banding
- Clear coating
- Paint
With either clear coating or paint, the order of business is to sand. I definitely don’t like rough or sharp edges on drawers. I sand the top and ever so slightly round over so there are no sharp corners.
Painting
Obviously I decided to paint. I did a couple steps first.
- I filled any voids with my favorite wood putty.
- Sanded again.
- Taped off the sides to keep my primer off the parts I didn’t want it to adhere to.
- I used a razor blade to cut the tape along my curved side
Then I used a small roller to prime and paint. Since my wood patch is water borne, I’d already sanded down the “raised grain” so I didn’t have to sand after priming. Just moved right on to paint. I used the same semi gloss Pro Classic that I used for the cabinets and doors and drawer fronts.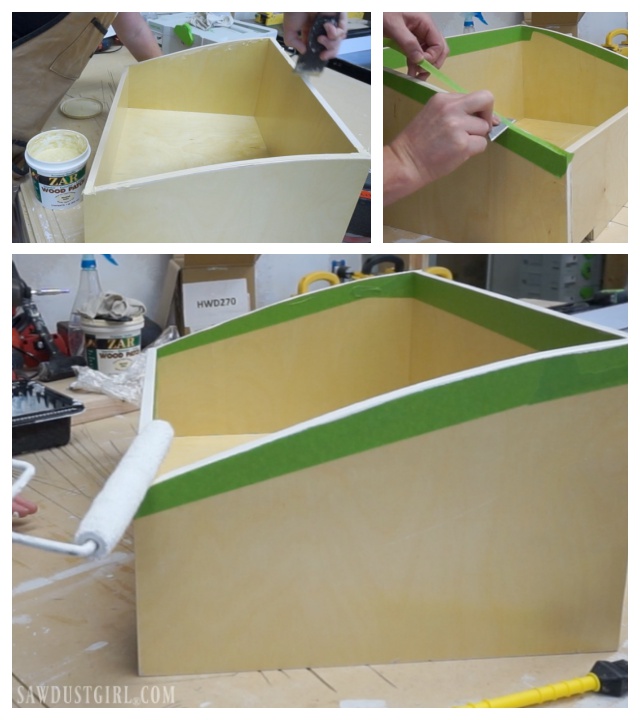
I installed both drawers in the linen cabinet (as covered in my last post). Since the pull-out hamper drawer is shorter than the drawer front, that one was trickier than most drawer front installations.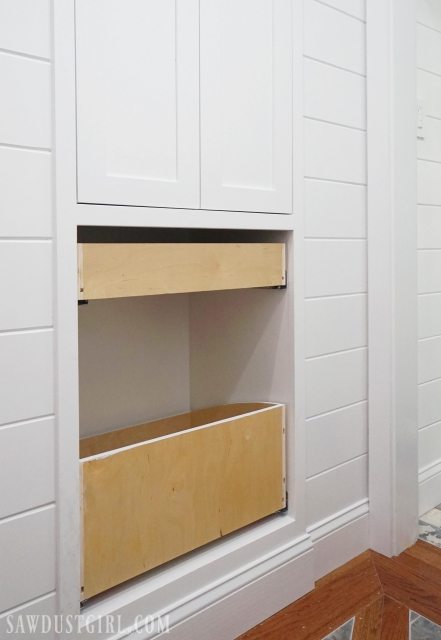
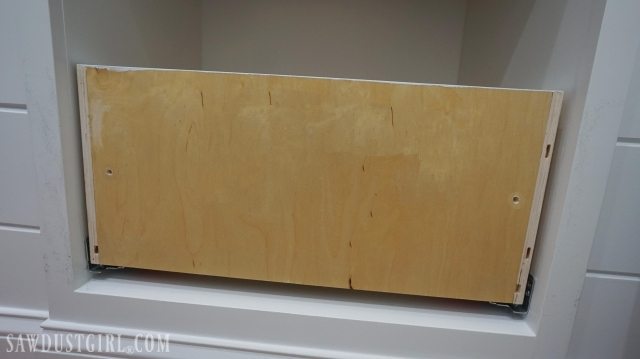
Installing Hamper Drawer Front
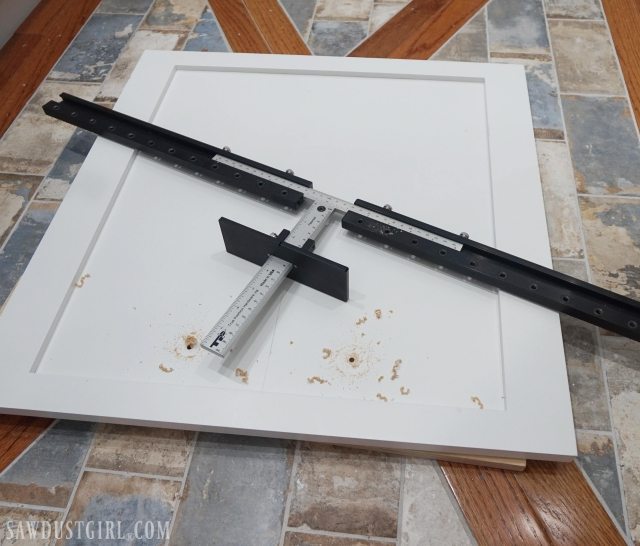
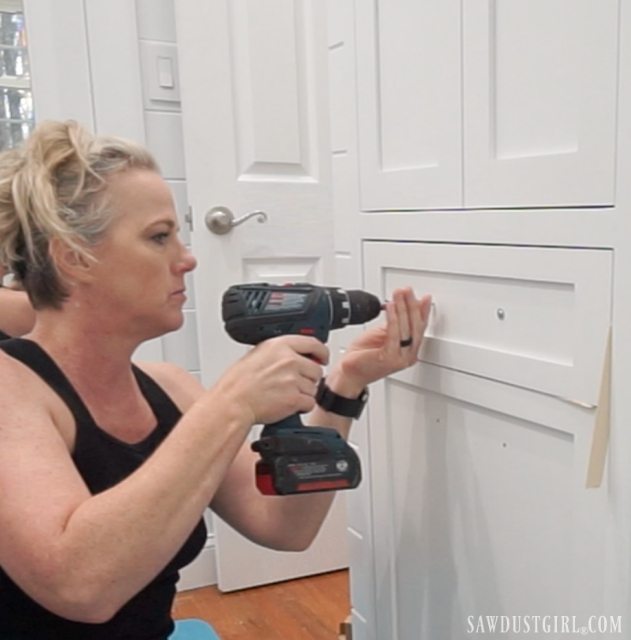
I drilled two 5/16″ holes in the drawer. These holes need to be toward the outer edge of the drawer but not too close. The hole placement should be:
- close enough to the drawer edge that they will be covered by the stile of the drawer front
- not so close that you don’t have room to maneuver a screw driver to secure a screw through that hole
Determine what hardware you will be using and drill holes in the drawer front for that hardware. It’s easiest to drill these holes while the drawer front is laying on a horizontal surface.
Drill Cabinet Pull Holes
Use whatever door hardware jig you like. I have several but my favorite so far is the True Position Cabinet Hardware Jig. (affiliate link)
Drawer Front Attachment Options
Now that all the holes are drilled, it’s time to attach the drawer front to the drawer.
In normal drawers I utilize the drawer pull holes and secure the drawer front to the drawer from the outside with drawer front adjustment screws. Like in this Easiest Way Ever to Install Drawer Fronts tutorial.
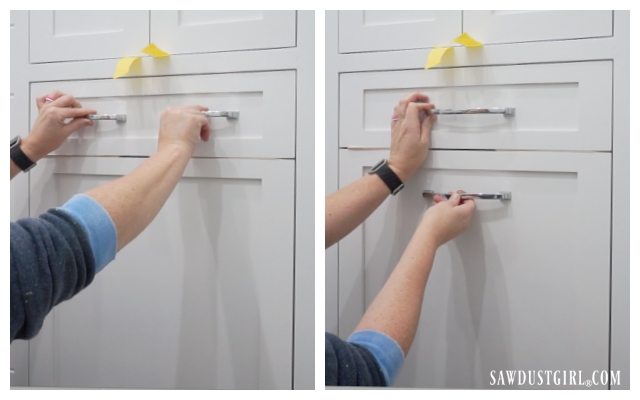
That doesn’t work here because the drawer is well below where the pull is located. The next best thing would have been to install the drawer and put the drawer front in place, sitting on spacers. Then reach inside the drawer and drive the screws through the holes in the drawer– into the drawer front.
However, with only the space for a 4″ drawer above this hamper, I could only get one hand in there. Not two hands or one hand and my face – so I could see what I was doing. I could not, for the life of me, get the the screw to stay in the hole, get the bit into the screw head and then drive the sucker in!
I tried. Many times!
Here’s what worked.
- With the drawer in place, I measured the distance from the bottom of the drawer to the cabinet bottom.
- I subtracted 1/8″ for the reveal. (I’m not going for 1/16″ on this one.)
- Then I removed the drawer placed it onto the drawer front which was laying on a yoga mat. (To protect the door and my knees –but my knees definitely needed that mat to be doubled up.)
- I used a combination square to make sure the bottom reveal was correct all the way across. Two 1/8″ thick strips of wood allowed me to feel that the side reveals were even.
- Then I secured the drawer front to the drawer with two “drawer front adjustment” screws through the holes in the drawer.
After all that, put the drawer back in place and check the reveals. The Blum drawer slides allow you to make minor adjustments without having to adjust the actual drawer front. Sometimes that’s enough. Sometimes not. This is when those drawer adjustment screws really come in handy! I had to adjust my drawer front several times before I was able to achieve (close enough to) perfection. 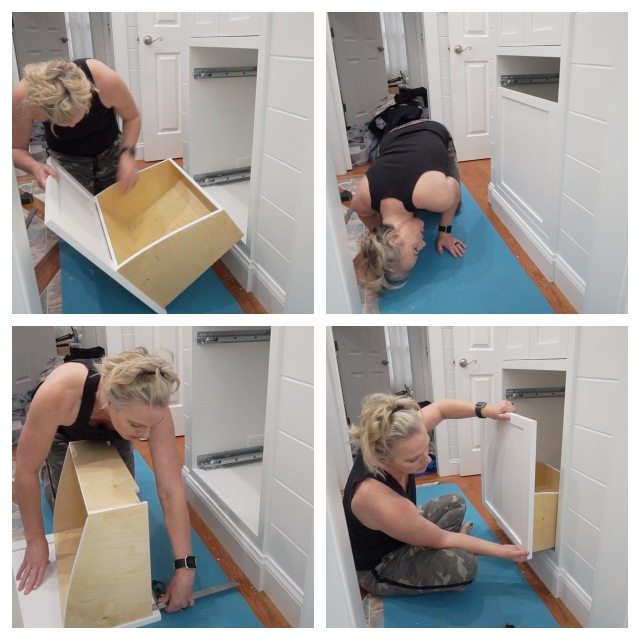
THEN I moved on to the little 4″ drawer which was EASY in comparrison.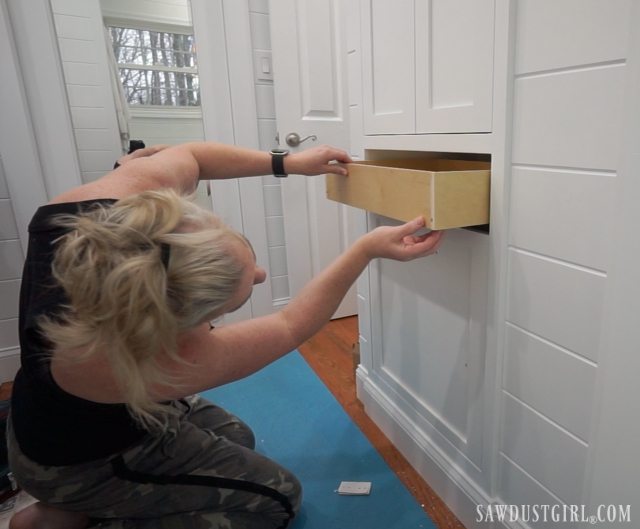 Using my preferred method of driving screws through the drawer pull holes from the outside –where it’s nice and comfortable.
Complete!
Kind of a lot of work for a pull-out hamper that may remain empty for the duration of it’s existence. OR, it may turn out to be the greatest invention since sliced bread.
If I were the one using this bathroom, I would love it. (Because I hate dirty clothes on the floor.) But I am not the one using this bathroom – and teenagers’ brains aren’t fully developed so there’s no point in even trying to decipher the “why’s” to their living conditions. 😀 At least it poses for a pretty picture! LOL
As soon as I’m done with the whole Jack and Jill bathroom project, I’ll rarely go in there. So it really doesn’t matter to me whether or not it gets used.
Designing a space and then bringing my vision to fruition is what I love. And then I move on to the next project. AND I’m loving looking at the fruition to this vision (and hard work). 😀
Adam says
Hello friends! I’m working about woodworking project and I tried world’s largest woodworking collection and it’s about 16,000 woodworking plans.I suggest you to see these plans , check the link below;
https://goo.gl/CH3q9q
Ishtar says
That is awesome Sandra. Thanks for the tutorial.
Now I’m really hoping that I’ll be able to find prefinished drawer material around here.
And… that they don’t act too weird when I, as a woman, walk in to buy some… I live in a very small town, and sexism around “women can’t use power tools” is still very much alive and kicking around here.
Anne marie says
You make it look so easy 😉 amazing!
Mina Hong says
Hi. I love your hamper. It looks beautiful as well as sturdy. May I ask what brand and model of hardware did you use for the pull out hamper? My space is 24” wide and 22” deep.