Today I’m showing you how to build a drawer with a Locking Rabbet Drawer Joint. This method requires a table saw or router table. If you don’t have access to one of those, you can build drawers with pocket hole screws or loose tenons using pre-finished drawer material.
I’ve been building a lot of drawers lately. I just built 28 drawers that were only 2 1/4″ tall. That seamed like a LOT of pocket hole screws or loose tenons if I were to use my Festool Domino. A biscuit joiner might be a good option for drawers that small but I got rid of mine years ago and didn’t want to go buy another one. I just wanted an easy way to put these little drawers together without running in to town to buy anything. Using a dado stack in my table saw, I cut 1/4″ wide grooves, 1/4″ deep, 1/4″ from the material edge. These grooves and a little wood glue is all you need to build drawers with a locking rabbet drawer joint. No fasteners required.

How to Build a Drawer with a Locking Rabbet Drawer Joint
I use a dado stack in my table saw to cut the 1/4″ grooves required for this method. Alternately, you could use a 1/4″ slot cutting bit in a router table. I’ll be referring to a table saw, rip fence and dado stack in this tutorial.
We are making 2 assumptions in this tutorial:
- You will be applying false drawer fronts
- You will be using 1/2″ drawer material
Sizing drawers
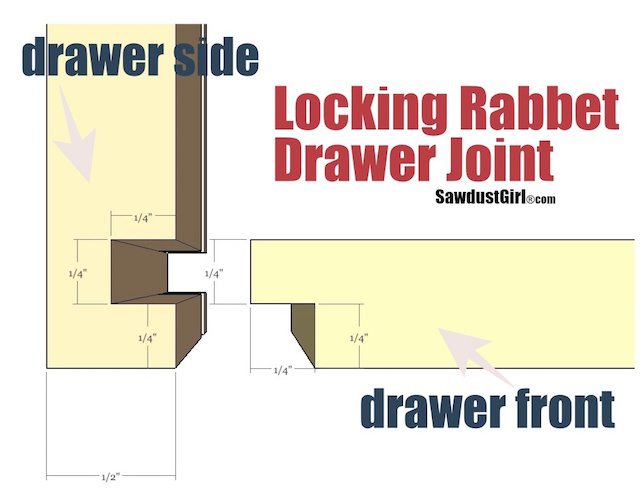
The grooves used to make up the locking rabbet drawer joint are 1/4″ deep. The grooves will be exposed and we want those to be hidden by the false drawer front. The front and back pieces are the “captive” pieces (locked into the sides).
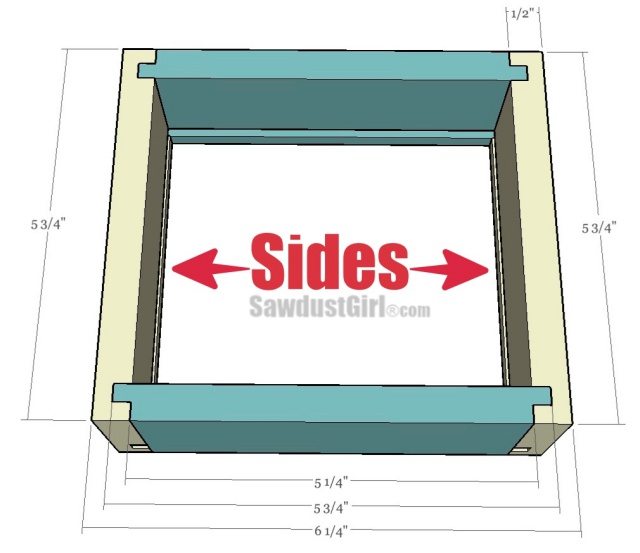
With 1/2″ drawer material, you simply subtract 1/2″ from the desired drawer width. Depending on your drawer hardware, it may be important to know if your drawer material is truly 1/2″ or if it is undersized. If using the Blum Tandem drawer glides it won’t matter if your drawers end up slightly smaller than you planned. Regular, side mount hardware is not as forgiving.
Once you determine the sizes you need for your drawer sides and front/back pieces, cut all four pieces.
Set up your 1/4″ Dado Stack
You should be using a 1/4″ dado stack raised to cut exactly 1/4″ deep groove. A digital height gauge here can be really handy.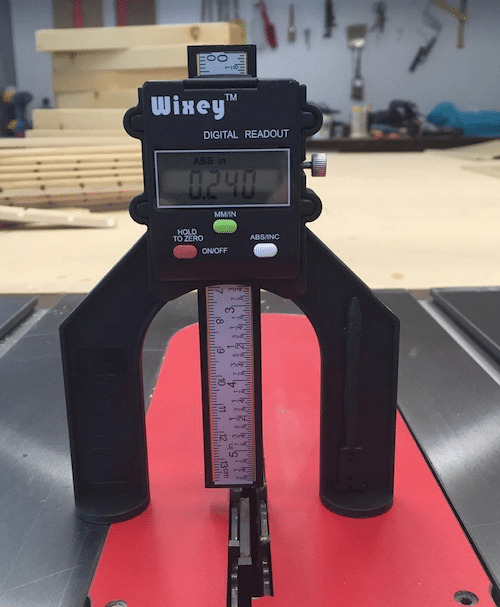
Set your rip fence 1/4″ away from the dado stack. Run all four drawer pieces through, lengthwise to cut the groove for the drawer bottom.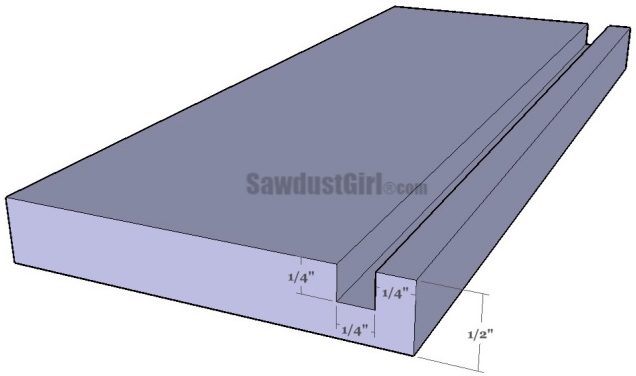
I use my Micro Jig push blocks to hold down and push these small pieces through the cuts.

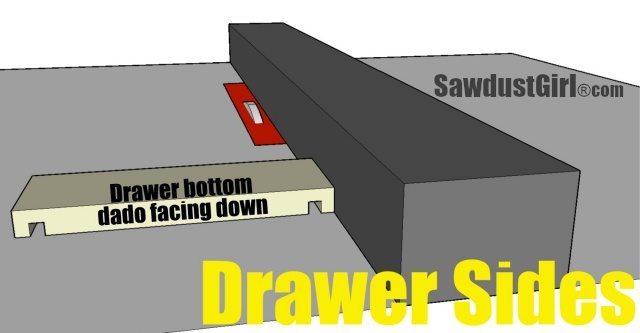
Drawer Sides
Next, with the fence in the same position, cut your drawer sides next. Cut grooves on the ends of the drawer sides with the drawer bottom dado facing down. So all the grooves are cut on the same side of the drawer sides.
I create a little jig with my miter gauge to safely and securely push these pieces through the cut. 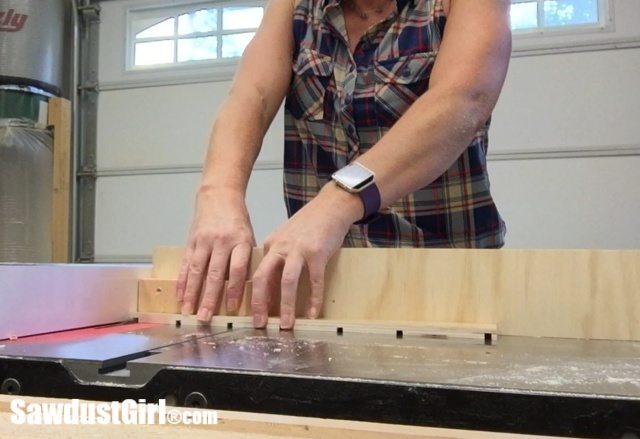
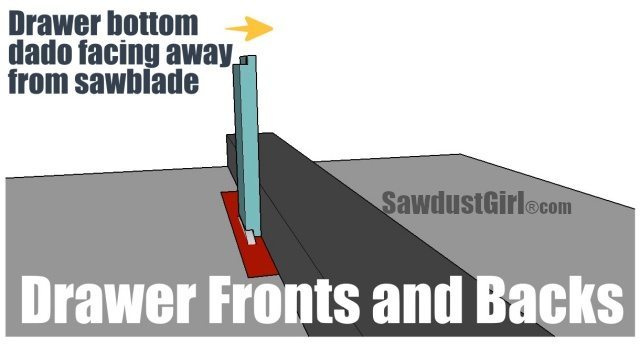
Drawer Fronts and Backs
Next it’s time to cut the rabbet on the drawer fronts and backs. The drawer bottom dado will be facing away from the sawblade. So the side grooves and bottom groove are on opposite sides of the drawer piece.
These can be cut two ways.
1. Cut with the drawer pieces standing on end.
 It’s safest to build a little jig to hold these pieces securely and keep your hands away from the blades if using this method.
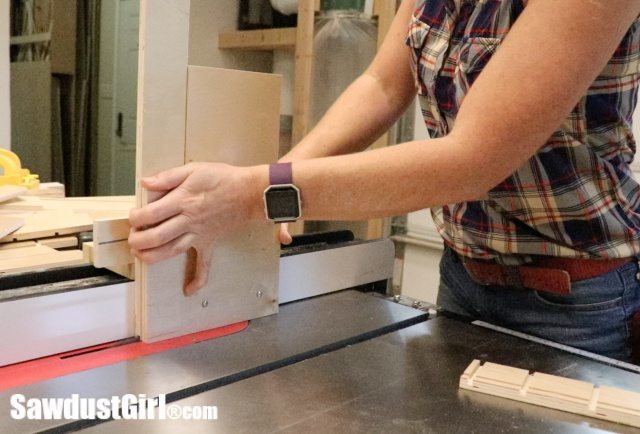
2. Attach a sacrificial piece of 1/4″ wood to the rip fence, taking up the space that had currently been between the blade and the fence. Now you can run the drawer fronts and backs flat on the table saw. Make sure the drawer bottom dado is facing up if using this method.
*Use the miter gauge and sacrificial wood scrap to make sure the material stays square to the fence as you push it through the cut.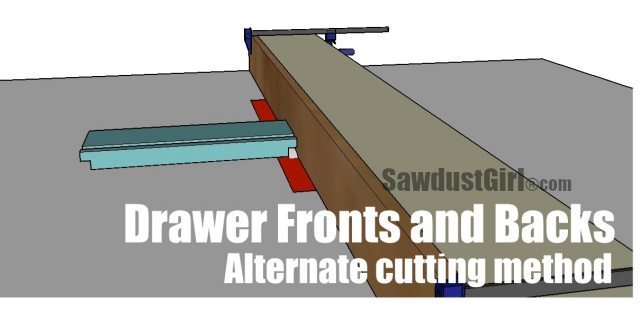
Assemble
The rabbets on the drawer fronts and backs now slide into the dados on the drawer sides. Make sure your drawer bottom dado is facing IN while attaching all your drawer parts.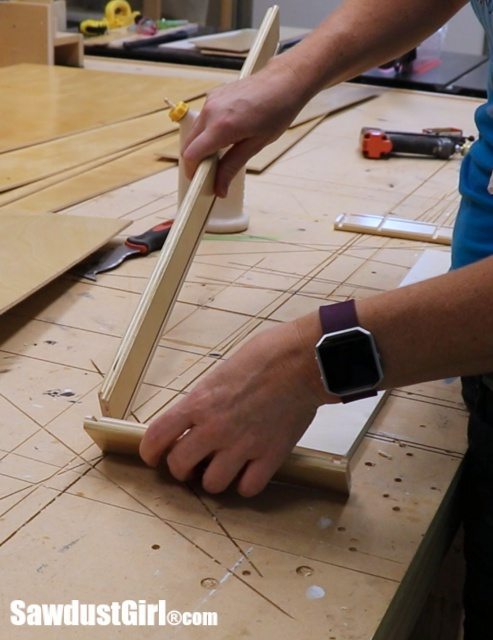
Spread wood glue on the joints before assembling. Attach the drawer front and back pieces to one drawer side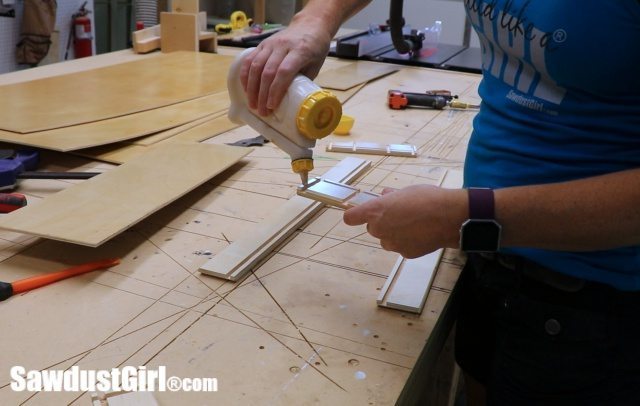
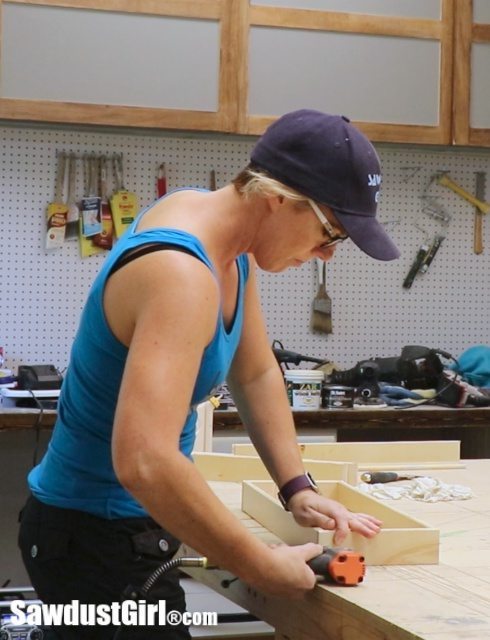
I use a little 23 gauge nail gun to hole things together while I continue assembling the rest of the drawer.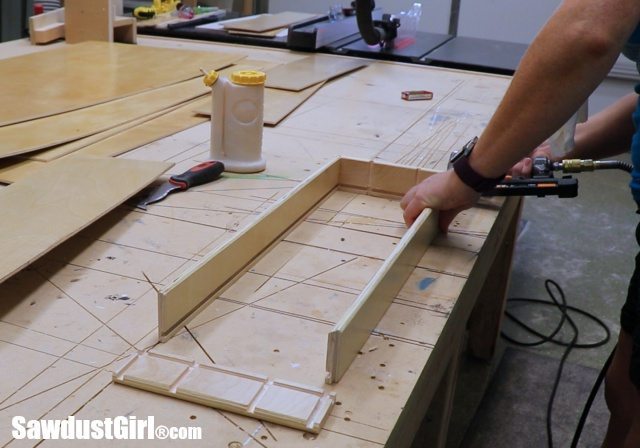
Slide the drawer bottom into place.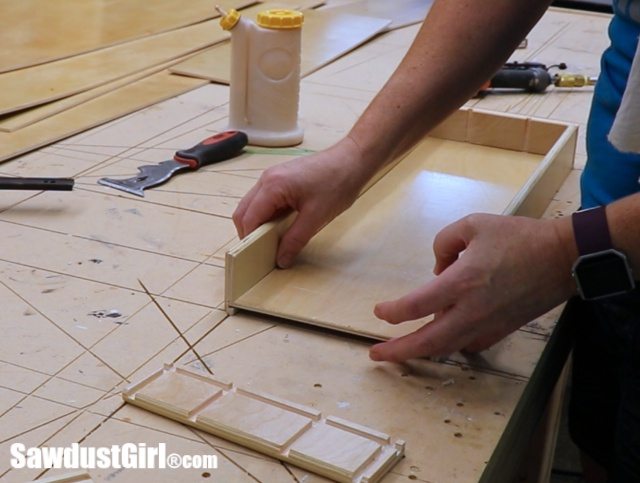
Then attach the second drawer side. 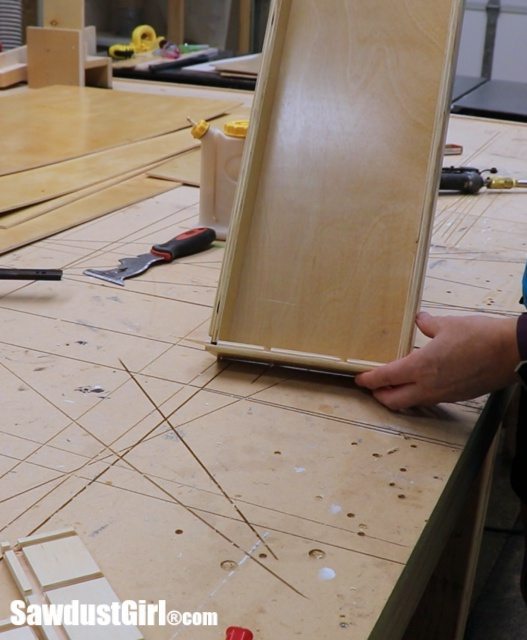
I secure the second side with more nails to hold the pieces together while the glue dries.
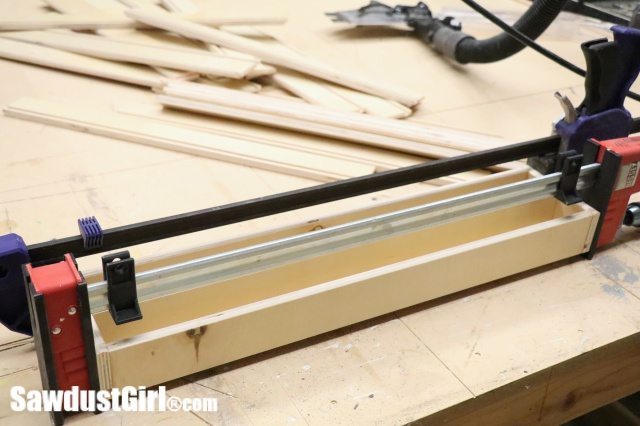
If you don’t want any nail holes, use clamps to secure your drawers while the glue dries. Or you can use nails and clamps. Whatever you want to do!
A note about my drawers: they have additional grooves cut into them for drawer dividers. Also, they are odd sizes because they are for a shallow, angled cabinet.
I hope that all made sense. The locking rabbet drawer joint is a pretty easy method for drawer building if you have a table saw (or two). I seriously am considering buying a small, second table saw. It would be nice to have one dedicated for a dado stack so I don’t have to switch blades constantly. I don’t cut the drawer bottoms until I’m assembling the drawer because those pieces never fit based on paper figures and tape measure and eyeball measurements. Drawer bottoms are always a “cut/test fit, cut again/test fit again, and maybe one or two more times until I get it right” kind of activity. For me. Not saying it will be for you but it almost always is for me. I just embrace the journey.
That’s it for today! See you next time.
[email protected] says
I’ve been making drawers like that for years, much better than butt joints and screws. I hope you’ve convinced more people to use that method. You did a great job showing the process!
Sandra says
Thanks Julie. It’s such a great method with no need for special jointing tools.
Matthew G Mooar says
Beginner woodworker here and just purchased a new table saw. Delta T2 from lowes. But coming from a guy some of the best tutorials on woodworking are all females !! Thanks for the help i also bought your cabinet making guide your awesome !
Sandra says
Thanks so much for the support Matthew! I hope you enjoy your woodworking journey!!!
Danielle says
Hey, I know you meant your comment in all kindness, and I hope you’ll take this in the same way; “females” is kind of a not-nice way to refer to “women.” Men who have a lot of contempt for women have taken that word and run with it like they stole it, and now a pretty big number of us get a bad taste in our mouths when someone refers to us by that word.
Your commnt is like a year and a half old, so you’ve probably learned that by yourself by now, but I guess I’m in one of those moods where you respond to year-old comments and go “Hey man…” today.
Summer says
Wonderful job! Happy Thursday ♥
summerdaisy.net
Scott says
I like your description on the Locking Rabbet Drawer Joint. I need to make drawers for a shop cabinet I am making. I want to use this technique but when I go to Home Depot or Lowes I never am able to get lumber perfectly square or flat. I do not have a jointer or planer so how can I make sure I am making square drawers? Will this technique work if I use plywood instead of pine 1 x 4 or 1 x 6 boards?
Sandra says
Locking rabbets will work with plywood. Most of my drawers are built out of plywood and this is how I do it. I hear you about finding flat lumber…which is why I like plywood.
Greg says
We have several drawers in our kitchen cabinets needing repair after 20 years of use. I was going to invest in a jointing machine, but I am going to give this a try. Thank you!
Ray says
I have a 1/4″ (.250) kerf saw blade which I plan to use for cutting all the grooves needed for making 20 lock rabbet shallow, long drawers for a baking/bread delivery cart I found at a swap meet/flea market. I did find a instructional video that shows what you have detailed here. I did like that your drawers have dividers. Thank you for a wealth of info.
Joe says
Great method. Any suggestion on cutting without a dado stack? My plywood is a bit under 1/2″ thick, thus the cut must be under 1/4″. But the 2 blades alone add up to 1/4″.
Sandra says
I don’t know if you can use one blade and a 1/16 cutter without that additional outside blade. Check into that?
josh says
You could try a regular blade and a jig to take multiple passes that add up to your dado/groove. MicroJig makes the Dado Stop, but you can make something similar yourself, too. May not be as clean on the bottom.
You can also just buy a dado blade built for 1/2 plywood from infinity tools.
Richard says
Just found this. Very helpful. What do you recommend when using “almost” 3/4 inch average sheet 5 layer plywood. Do you ensure you do, or do not, cut the middle ply layer when cutting the groove? How deep should the groove be (measured in full or partial layers) ? I cannot be sure but from what I see in the article, it looks like you do not go partially into the next layer. So you agree? Thank you very much
Richard in Toronto
Sandra says
I just do 1/4″ deep by 1/4″ wide- regardless of if the plywood is undersized or not.
Lisa says
Am I missing something?
No picture of the finished unit? Going to get on youtube and join your channel