This is the third installment of the Cara Collection built-in office furniture. I’ve already posted plans for the Base Cabinets and the Upper Bookshelf. This post includes for the Printer Storage Cabinets. You could add adjustable shelves or drawers to use this triple wide cabinet for other storage. Alter any dimensions you need to in order to fit your needs.
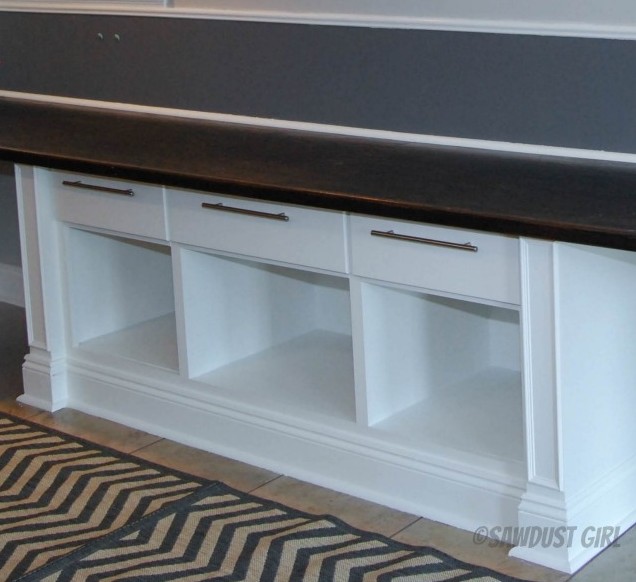
Printer storage cabinet
Materials:
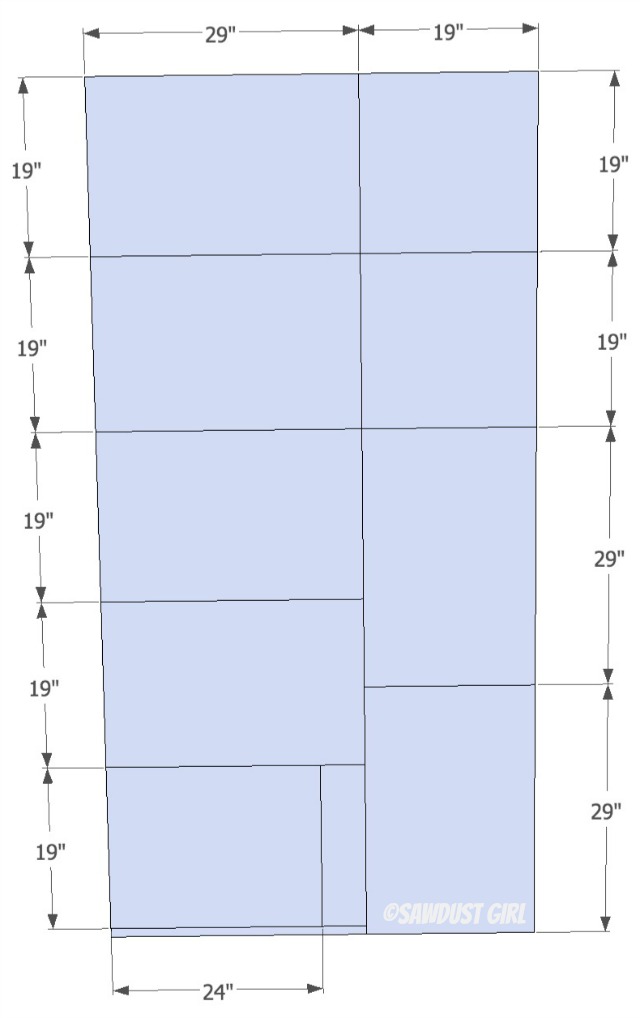
- 1 Sheet of 3/4″ Cabient Grade Plywood or MDF cut as shown
- 1 sheet of 1/4″ plywood, hardboard or beadboard for backs
- 1 3/4″ wood screws
- wood glue
- 3/4″-1 1/2″ staples or #6 wood screws
- 1×2 poplar for faceframes
- 2 1/2″ – 3″ plywood or hardwood scraps for cleats
1. Build two 20 1/2″ wide cabinets
- Use wood glue and 1 3/4″ SPAX screws to assemble 2 cabinets to the specifications shown below. Adjust the height of the bottom of the cabinets to work with your specific baseboard as talked about in the post for the Bookshelf Base Cabinets.
- Screw directly into the side of the cabinet to secure the cleats and bottom shelf to the sides. Make sure you sink them just below the surface of the wood. The screws will be hidden by the “legs”.
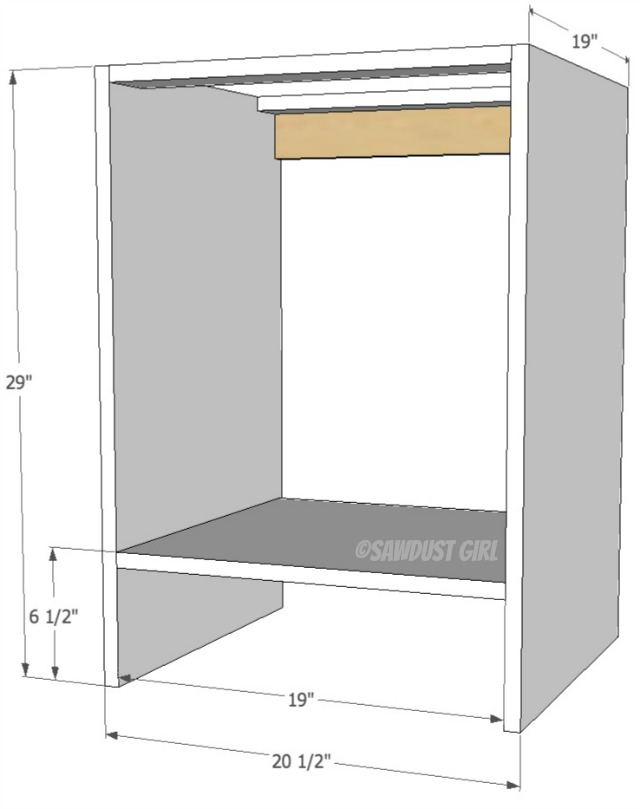
– Square up and attach back with staples or wood screws.

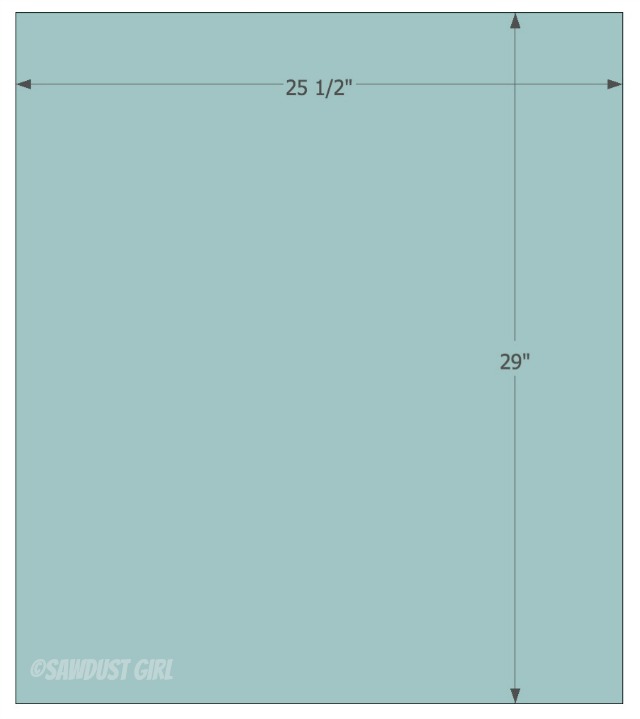
2. Build one 25 1/2″ wide cabinet
- Same instructions as in other cabinets
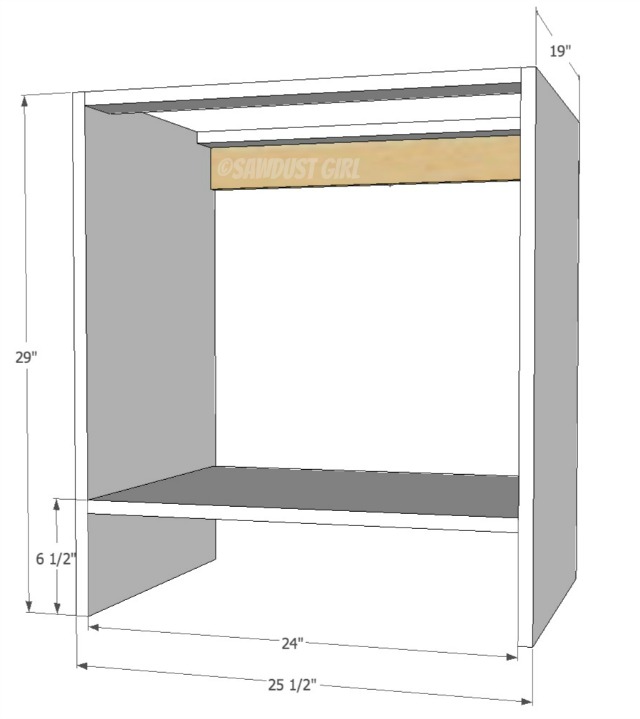
– Square up and attach back with staples or wood screws.
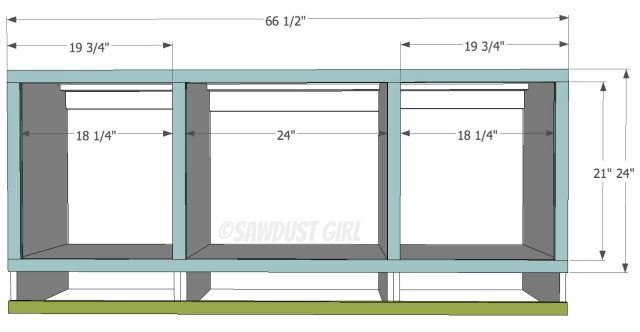
3. Attach all three cabinets together
- Two 20 1/2″ cabinets flank the wider cabinet.
- Use same method to secure cabinet to each other as given in the Upper Bookshelf plan
4. Build and attach face frame
- Use pocket hole screws to build face frame as dimensioned below after making sure it will fit your joined cabinets. You want the outside stiles of the face frame to be flush with the cabinet sides with no overhand this time. The cabinet sides will be hidden by the legs. (Plans provided in the next post.)
- Use wood glue and finish nails or pocket hole screws to attach face frame to joined cabinet trio.
- Add a cleat that is the same thickness as your face frame material to the bottom of the cabinets to ensure the baseboard sits flush when it is attached.
- You may choose to add an extra rail if you want to add the 4″ drawers for storage.
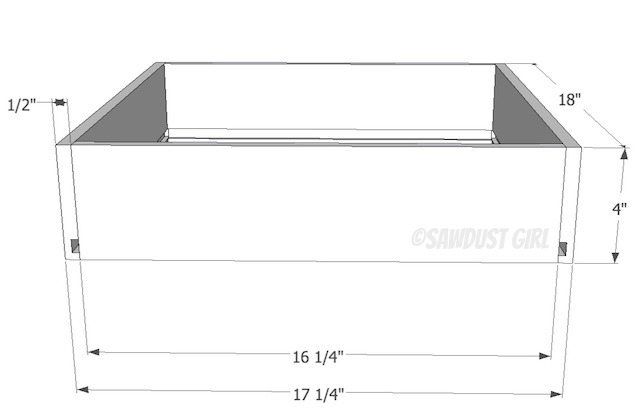
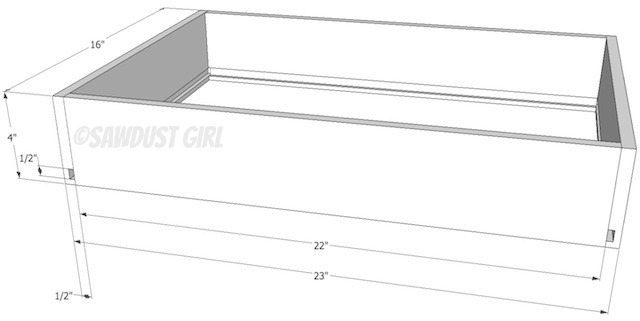
5. Build drawers (optional)
- These drawers should fit leaving 1/2″ clearance on each side for a drawer glide. Make sure you check the actual cabinet opening for your cabinets as they are often not exactly what you planned on them being. Adjust the drawer to be 1″ more narrow than the width of the cabinet opening.
- Follow instructions in How to Build a Cabinet Drawer post.
- Follow these instructions for help with Installing Cabinet Drawers
– Drawer for the outer 2 cabinets.
– Drawer for center cabinet.
6. Build drawer fronts (if you built drawers)
- These 4″ drawers are too short for rail and style fronts. Cara just used a solid piece of MDF or Poplar for her drawer fronts.
- Follow This tutorial for attaching drawer fronts to drawers.
You can get the rest of the Cara Collection office furniture plans here:
And read all of Cara’s project update posts here: part 1, part 2, part 3, part 4, part 5, part 6, part 7, the Reveal
Naomi J says
Thanks for taking the time to make these tutorial/plans for us! They are really great, and I know they’ll come in handy someday. It’s really wonderful that you’re so willing to share your hard-earned knowledge with the rest of us without a second’s thought! thank you so much! You’re awesome!
Victor Manuel Mendoza Jr says
Love your work, I wanted to know what you used for the top of the Clara Collection, love the brown stain!