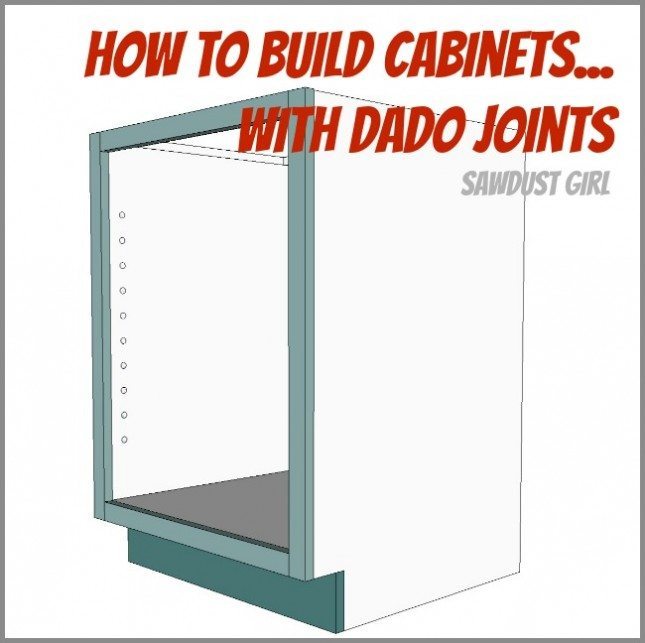
The next method for building a basic cabinet in my three part series is using dado joints which requires more tools than the more basic methods. This method of building cabinets gives you strong joints and the cleanest look. It’s definitely a more advanced method so if this is your first cabinet building experience, maybe start with either the butt joints and wood screws or the butt joints and pocket hole screws method.

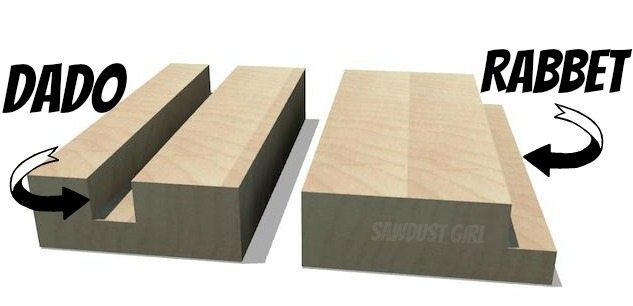
Technically we’re using Dado and Rabbet joints. The difference is only WHERE in the wood you route (or cut) your groove — I’m just referring to ALL grooves in this post “Dados”. You can cut a “through dados” with a table saw but you really need a plunge router and guides to do the “stop dado”– safely.
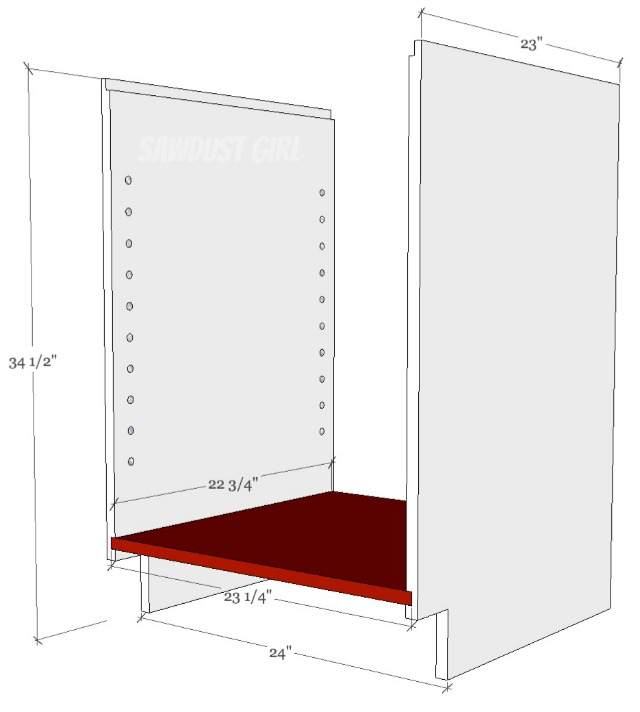
How to Build a Cabinet with Dado Joints
Materials:
- 3/4″ for sides, bottom and shelves
- 1/4″ for back
- wood glue
- clamps
Step 1: Cut your dados
- Use a plunge router and guides to ensure your dados are straight.
- Use the correct sized bits for the material thickness. Material should fit snugly inside the dado.
- Look at each diagram for dado placement and sizing
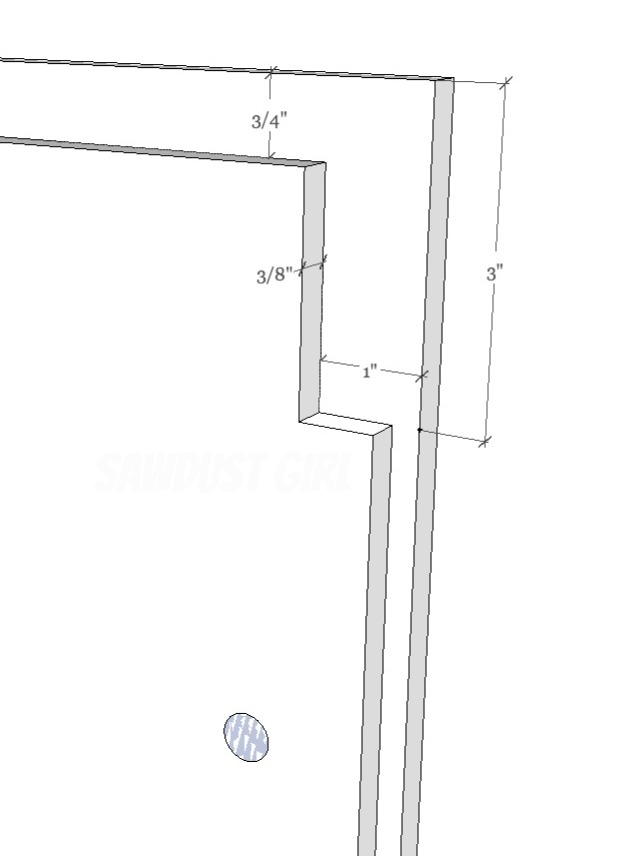
For bottom shelf
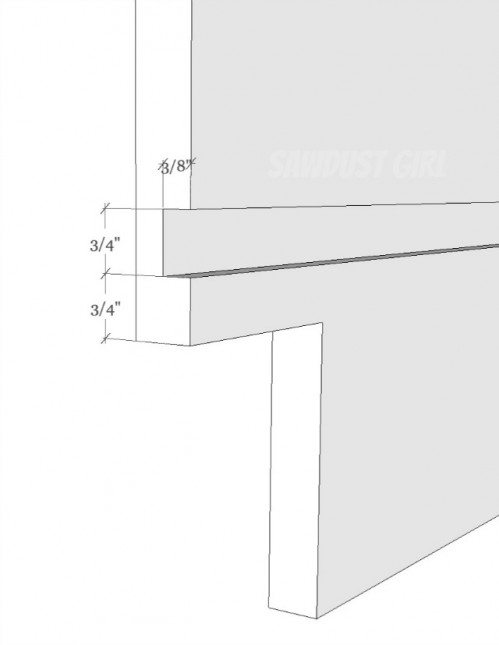
For Back Panel
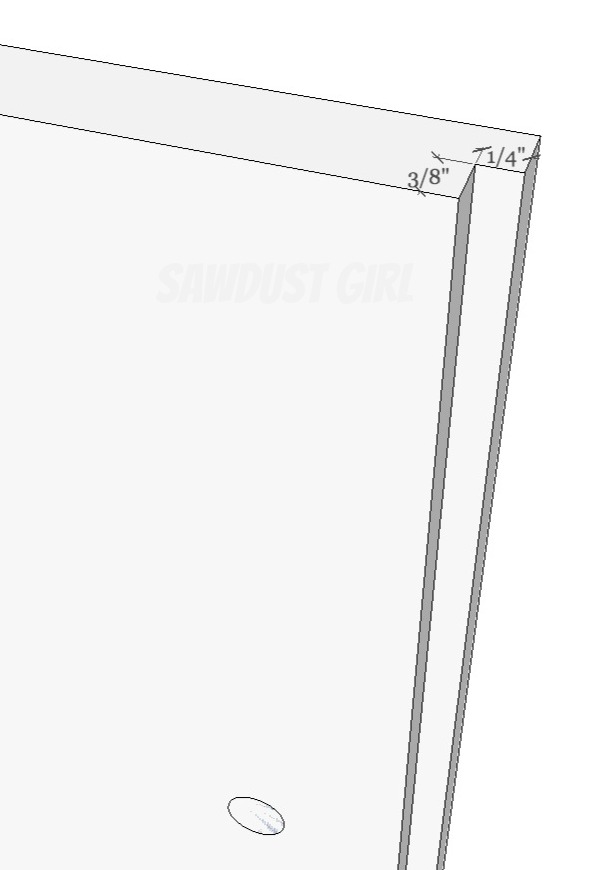
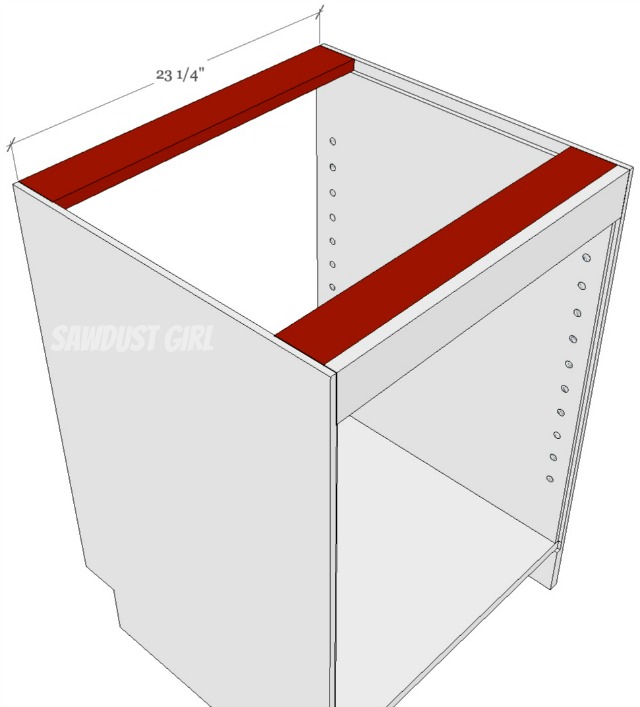
For Back and Top Cleats
Step 2: Attach bottom
- Apply wood glue to dados for the cabinet bottom making sure to coat all three sides of the cutout.
- Insert cabinet bottom into dados and use clamps (pipe clamps are what I generally use) to hold securely until glue dries.
Step 3: Attach Back Cleat
- Use wood glue and clamps to secure back cleat in place while glue dries
- Make sure the cleat is pushed forward into the dado as far as it will go so there is 1/4″ of space left for back panel.
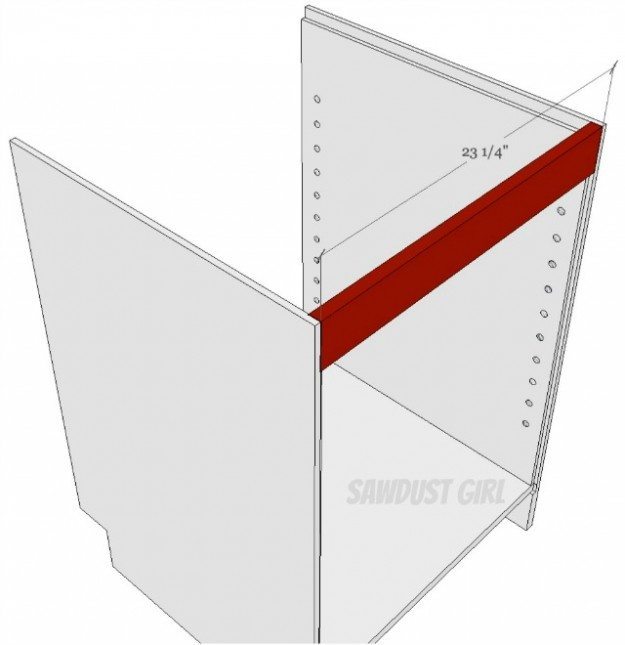
Step 4: Attach Top Cleats
- Use wood glue and clamps to secure top cleats in place while glue dries.
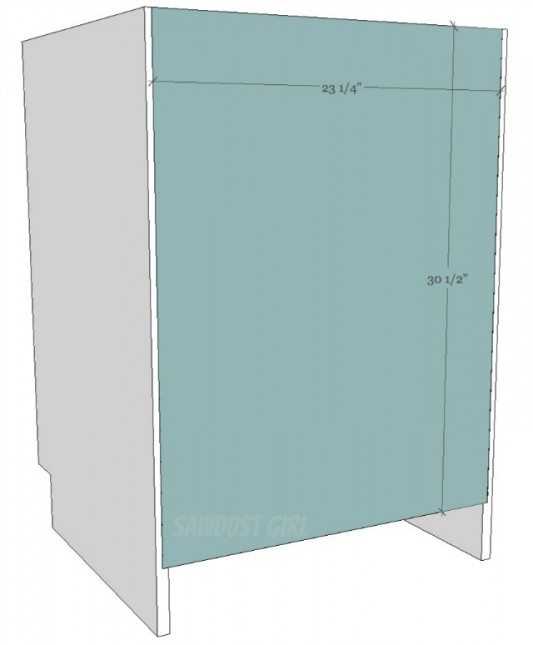
Step 5: Attach Back
- Square up
- Lay back panel into the recess
Step 6: Build and Attach Faceframe
A whole tutorial in itself which you can find right here.
Get all my cabinet building tips in one place in my Cabinet Building 101 eBook. You can download it and keep it on hand!
$9.99Add to cart
Julie @ follow your heart woodworking says
This is how I build, but I use my table saw with a dado blade to make the dados and rabbets.
Sandra says
Julie do you cut your stop rabbet on your table saw too? I do the through dado and rabbet but the plunge router is my preferred stop dado/rabbet method.
Julie @ follow your heart woodworking says
I try and avoid them, but have done them on the tablesaw as well as the router, depending on the application. For something large like a cabinet side, I find the tablesaw more accurate and easier to manage for the through dado.