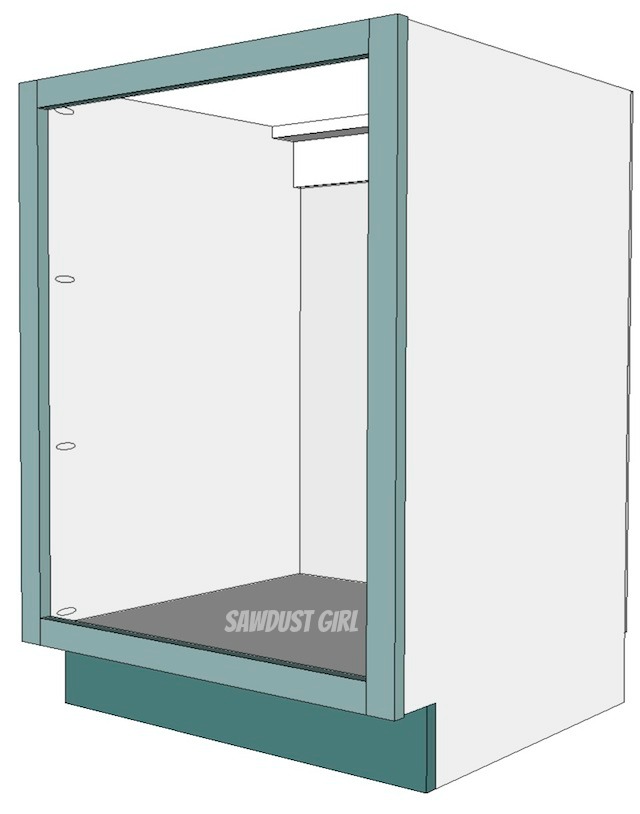
In the last posts I explained three methods for building cabinets and basic techniques for cabinet building. This post applies to building and attaching a cabinet face frame which is the next step to building a cabinet. There are several methods I use to ATTACH the face frame but I generally always BUILD the face frame with pocket hole screws.
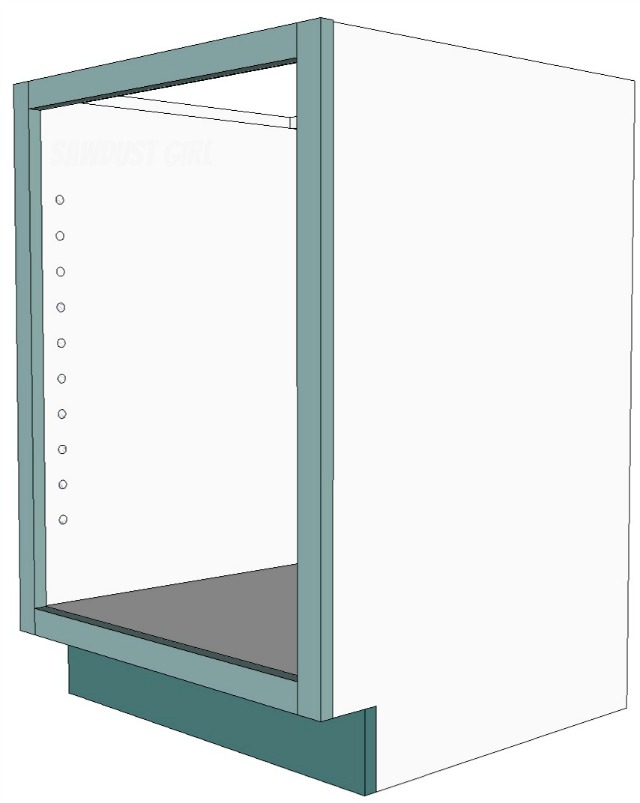
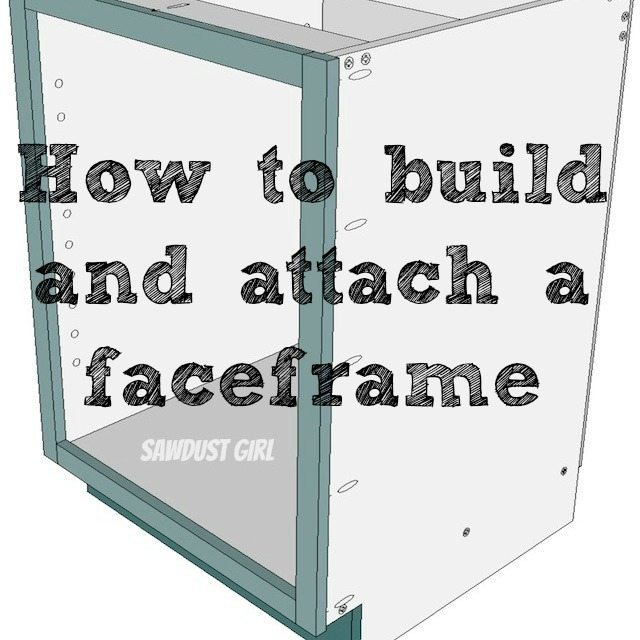
How to build and attach a cabinet faceframe
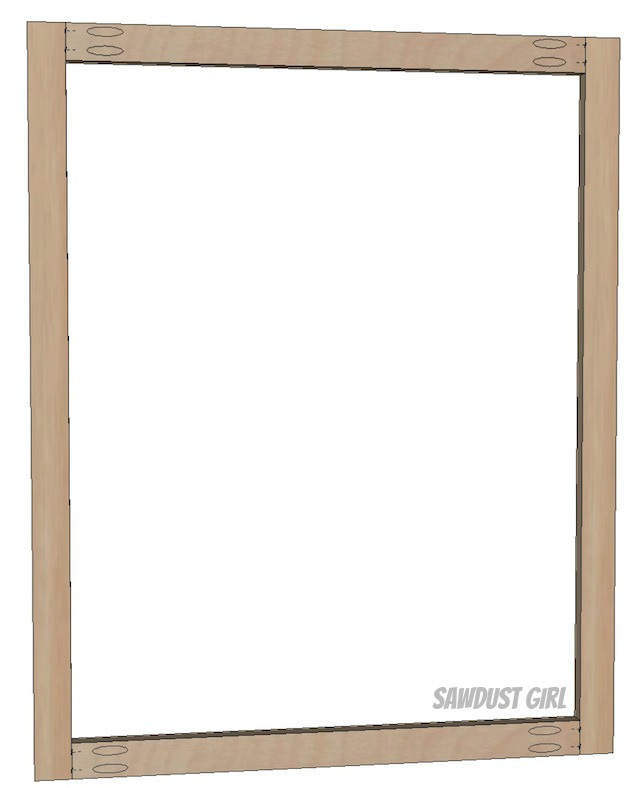
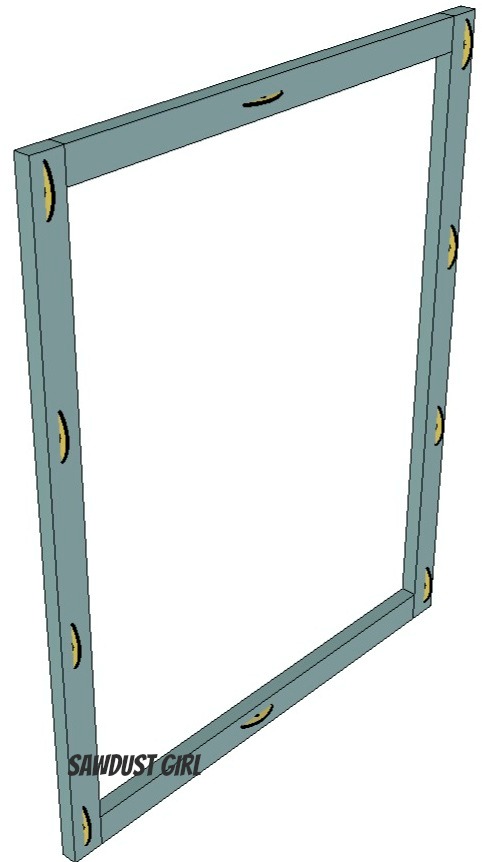
Build Faceframe
- I generally always build my face frames out of 1×2 poplar when painting. If staining your piece you want to match your face frame wood as closely as possible to your carcass lumber.
- I use wood glue and my K5 Kreg jig set for 3/4″ material and use 1 1/4″ coarse thread pocket hole screws. EASY! Make sure you clamp down the pieces as you drive your screws.
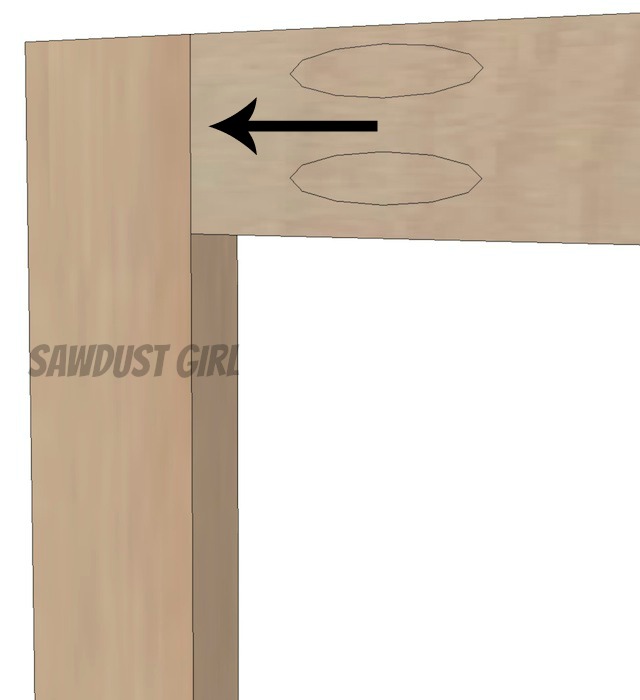
*The important thing to know about using pocket hole screws when working with wood is you want to DRILL the holes INTO the END GRAIN and DRIVE the screw into the CROSS GRAIN. It will hold better and be less likely to split.
End grain = grain runs in the direction of the pocket hole you are drilling.
Cross grain = screws drives in perpendicular to – or across the grain.
Attach Faceframe
There are several ways to approach attaching the face frame.
Glue and Nails
If I’m painting my face frames I don’t mind using filler to hide nail holes and it’s quick and easy to use only glue and nails to attach a face frame. I’m talking finish nailers NO bigger than 16 gauge. 18 is preferred IMO.
Wood glue is VERY strong and it’s a suitable method. It’s not the strongest joint so if possible, I like to sure it up with fasteners of one sort or another. BUT, in some situations, I don’t want visible pocket holes (and I don’t want to plug, trim, sand and patch a bunch of pocket holes either) and on built-in pieces where the face frame is huge and would be impossible to build as a unit and then install with biscuits this is how I do it.
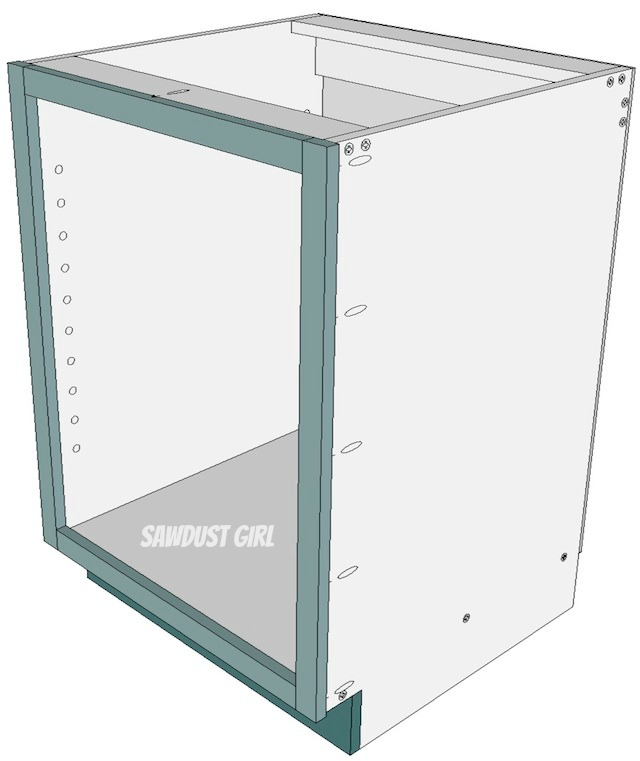
Pocket hole screws on the outside of cabinet.
- Wood glue
- pocket hole screws
If your cabinet sides are not visible and you used the wood screw or pocket hole method to build your cabinet, you can use pocket hole screws to attach your face frame. It’s fast and secure. Apply some wood glue and drive your screws into the pocket hole.
Pocket hole screws on the inside of cabinet.
- Wood glue
- pocket hole screws
If your cabinet sides will be visible and you took the extra time and effort to hide your fasteners, you most likely don’t want a bunch of pocket holes drilled in the side of your cabinet. This is great if you are putting drawers in your cabinet because the pocket holes will not be seen at all.
Invisible joinery with biscuits
- Wood glue
- biscuits
Using a biscuit joiner will hold the face frame on securely without any visible fasteners at all.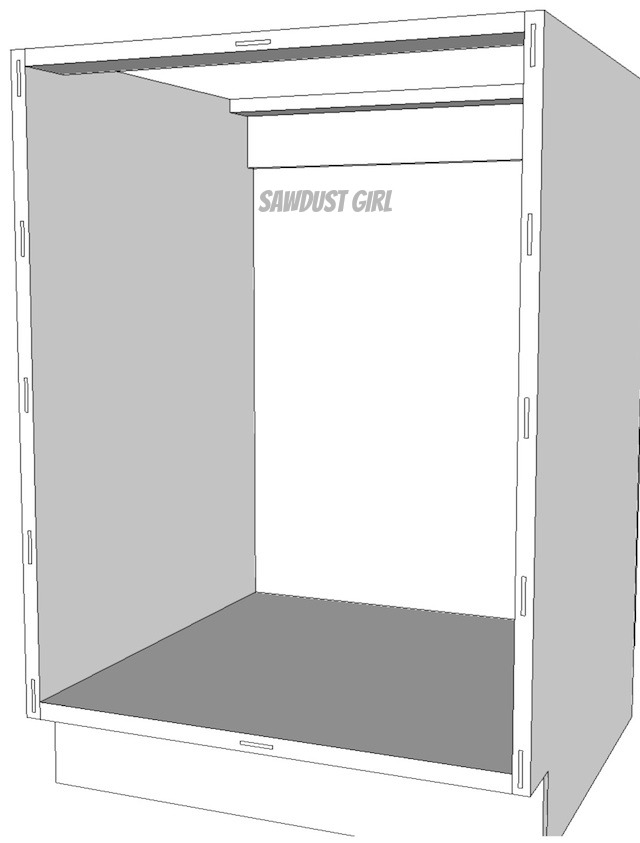
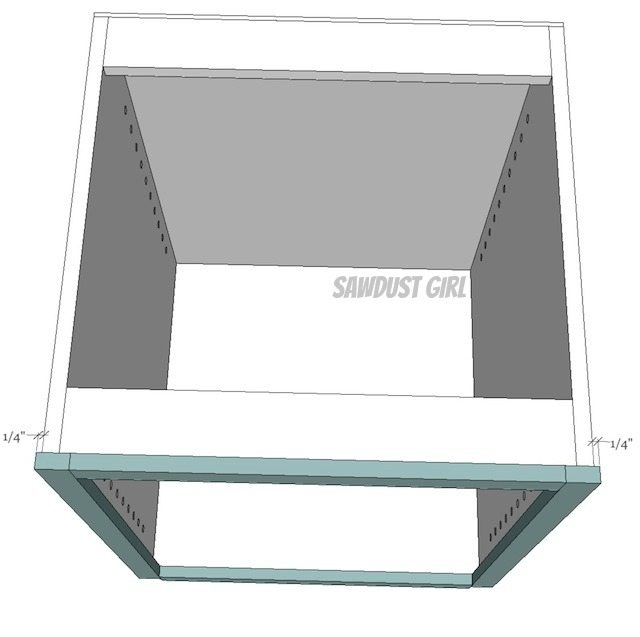
Hiding fasteners with false side panel
I generally go with pocket holes on the outside of the cabinet or nails (I use wood glue in all methods) and if I’m going to see one or both sides of a cabinet I size my face frame 1/2″ too wide so I have an extra 1/4″ hanging over each side that will hide my false panel after I attach it, which I usually do with caulk.
Get all my cabinet building tips in one place in my Cabinet Building 101 eBook. You can download it and keep it on hand!
$9.99Add to cart
Nancy says
Great tutorial!
One question…if you have several cabinets in a row, do you double the width of the vertical pieces to cover the faces of two cabinets that are butted up against each other?
Sandra says
When I’m building kitchen or bath single cabinets, I put a face frame on each one separately and then attach the cabinets together.
angela says
These are really helpful thank you for posting. It is really hard to find clear and concise instructions on cabinet building that doesn’t require fancy methods. I hope you will be posting more!!
Sandra says
Thanks Angela.
Paul says
What size timber did you use for the face frame? Love your work mate really easy to follow.
Sandra says
1×2 Paul. Thanks.
JulieW says
I’ve been having problems with the face frames for my cabinets. My Kreg Jig doesn’t drill into the poplar as well as it does into white wood and if I try to screw into the pocket hole it splits the wood. My Kreg Jig is calibrated properly and I have a new drill bit so why is it splitting before I can get half the screw in?
Carl Liebno says
Julie Are you using the right size drill bit for your screws
JulieW says
Thank you for replying Carl but are you asking if I’m using the correct screw that correlates with the Kreg Jig? That answer is no. Simply because I live in BFE and the nearest big box is over 30 miles away and they are always out of those particular screws. My local hardware store only carries the basic screw. So I am using a 1.5″ wood screw because that’s what I can get.
Carl Liebno says
Hi Julie
Got your reply. Maybe try a #6×1 1/2 course drywall screw. In building a lot of my shelves and stuff that is all I use. Let me know how that works
shells says
Just chiming in with a thought Julie, Kreg screws are self tapping so that no pre-drilling is required, that’s why they don’t split the wood. If I use Kreg or Spax screws I don’t predrill (regardless if I’m using a kreg jig or not), but if I don’t predrill with regular wood screws they will almost always split the wood. If you don’t have a Kreg screw supplier near-by, Home depot offer free shipping with orders over $45 and I think you can get them on amazon as well.
Sandra says
I would try a fine thread screw if it’s splitting. 1 1/4″ long for 3/4″ material. Try dipping your screws in soft wax before you drive them in. Let me know if this solves the problem.
shells says
Great tutorials!! I was wondering though why you seem to favor face frame rather than frameless construction for the cabinet carcases. Is it just a personal preference, or for aesthetic or structural reasons?
Sandra says
It’s both structural and aesthetic.
Carl Liebno says
Hi Sandra
Thank you for all of the posts. they are really helpful. Hope that you are feeling better after your surgery. Take it easy and let everything heal up before you go back to work.
Mike says
Long time viewer, first time commenter. Love your site and I’m in the process of doing a master closet built-in. Just curious to know how you would handle face frames for cabinets butted up against each other in a built in. Also, if you attach the face frames to each cabinet individually, I assume the frame and side of the cabinet are flush? You don’t talk about measurements in this post.
Thanks in advance for any help on this.
Michael Hua says
Hi Sandra,
I built my built in wardrobe cabinet face frame out of 1/2″ MDF wood due to the space I had left available before hitting a light switch (the “not perfectly straight walls behind the wardrobe” got me. now I’m struggling to find the right self closing, hidden hinges that I can attach to my 1/2″ MDF frames. Do you know what hinges will work for my issue? Thanks in advance for the help.
Sandra says
I would not attach hinges to the 1/2″ mdf faceframe. Are you doing inset doors? Assuming that a regular thickness faceframe was going to hit the light switch, an overlay door would hit that switch. If doing inset doors, that’s an easy fix. Block out behind the faceframe so the block is flush with the faceframe. Then you can use frameless hinges that you attach to the wall of the cabinet. (You might be able to do that same thing for overlay doors but I’ve never done it…so I’m not sure.)
Andrew says
Once you have the face frame cabinets assembled. Assuming all the edges are flush . How do you deal with hinges ? I want to use concealed European soft close but always found I had to double up the stock on the edges to use regular inset hinges. ? The face frame concealed hinges that exist from Blum leave a 1/8” gap on the hinge side. So my question is how do you get your doors flush with concealed hinges ?