• Home
  • About
    • Personal Posts
  • Privacy
  • Shop
    • My Account
    • Checkout
    • Email
    • Facebook
    • Instagram
    • Pinterest
    • Twitter
    • YouTube
Sawdust Girl®

Sawdust Girl®

Renovation, cabinet building and woodworking plans and tutorials. Build like a Girl®

  • My Home
    • Clinton TN House
      • Clinton TN House in Progress
    • Maryville TN House
      • Maryville TN House Tour – Completed Rooms
      • Maryville TN House in Progress
        • Basement
        • Basement Storage Closet
        • Bedroom Office
        • Craft Room
        • Dining Room
        • Entry
        • Garage
        • Guest Bedroom
        • Hallway
        • Jack and Jill Bathroom
        • Kitchen
        • Kitchen Entry
        • Laundry Room
        • Library
        • Living Room
        • Loft
        • Madison’s Room
        • Master Bedroom
        • Master Closet
        • Pantry
        • Porch
        • Powder Room
        • Wes’ Office
    • Illinois House
    • Calderwood Cottage
  • My Workshop
    • Clinton Workshop
  • Build & Breakfast
  • Cabinet Making 101
    • Cabinets
    • Doors
    • Drawers
  • Projects and Plans
    • Countertops
    • Beds
    • Benches
    • Bookshelves
    • Desks
    • Gift Ideas
    • Holiday
      • Christmas
      • Halloween
    • Home Accessories
    • Kids
    • Kitchen Cabinets
    • Lockers
    • Nightstands
    • Organization accessories
    • Recipes
    • Sewing
    • Tables
    • Vanities
    • Wardrobes
    • Woodworking
      • Wood Finishing
    • Workshop
    • Workshop Storage and Organization
  • Remodeling 101
    • Baseboard and Trim
    • crown molding
    • Demolition
    • Door and Window Casings
    • Door Installation
    • Drywall
    • Electrical work
    • Flooring
    • Home Maintenance
    • Painting
    • Plumbing
    • Resources
    • Safety
    • Tile
    • Wall and Ceiling Treatments
  • Sawdust Squad
  • The Sawdust Diaries
    • Andrea
    • Ava D.
    • Beckie F.
    • Cara C.
    • Courtney B
    • Fawn T.
    • Jenn D.
    • Kelly C.
    • Kristy K.
    • Lara T.
    • Malisa B.
    • Marnie D.
    • Robin C.
    • Val F.
  • Tools
    • Products
    • Tool Reviews & Overviews
    • Inspiration & Ideas

Adding Decorative Legs to Cooktop Cabinet

All Posts, Kitchen, My Home, Tennessee House

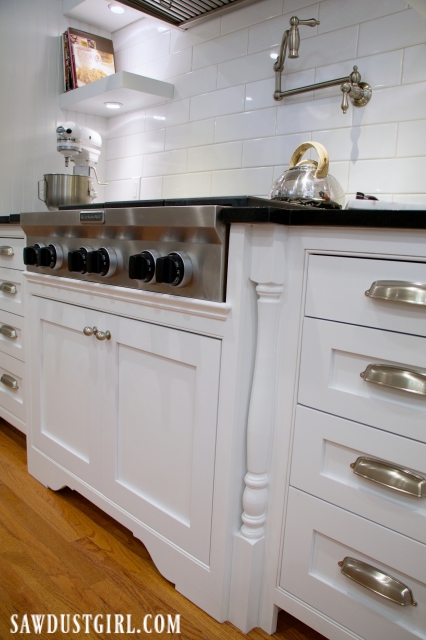
I finished off my cooktop cabinet by adding decorative legs. This was always my intention and something I had to plan for when getting my granite pieces cut and installed five years ago.

Kitchen reveal with cooktop cabinet decorative legs

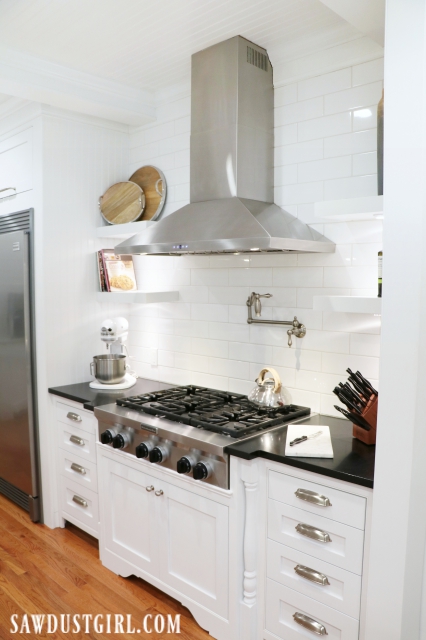
Back then, I had no idea what I would end up using as spacers, but I figured I’d find some kind of decorative legs that would work. OR I would build a pretty square leg (mimicking my decorative columns).

Finishing cooktop cabinet

Adding Decorative Legs to Cooktop Cabinet

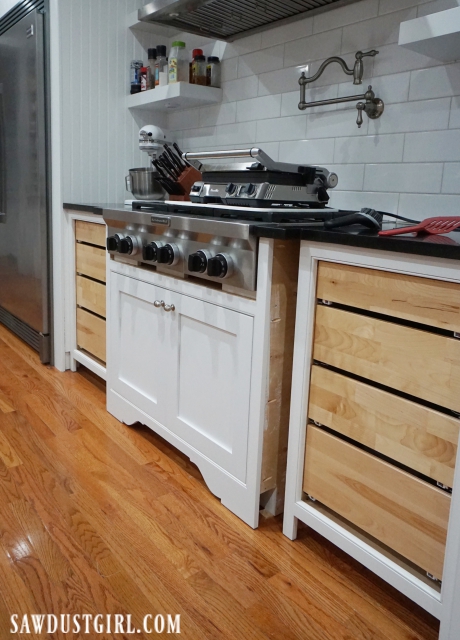
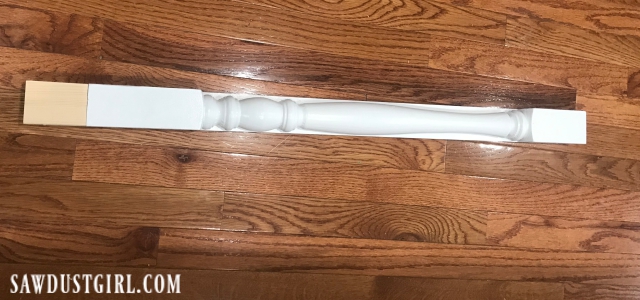
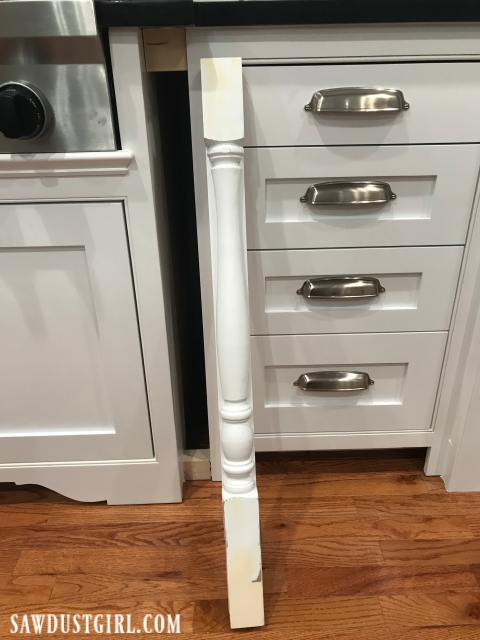
Fast forward to last week when I was ready to tackle this project. I brought up two decorative legs I had purchased back when Julie and I were working on Calderwood Cottage. While scouting around for baseboards at a local salvage store. I found a huge pile of spindles and legs (of all sizes and shapes). The owner said I could have them for $2 each! I picked out a handful, none of which I had any purpose for but they were too good a deal to pass up. I’d figure out a way to use them at some point. One of them was nearly perfect!

Decorative spacer for cabinet installation

It needed a bit more height but the width was great. I decided to add the additional height to the bottom — because that’s what made my eyes happy. The legs would need to be attached to a backing to close off the gap around the rounded parts.

Cut spindle in half, add height and backing

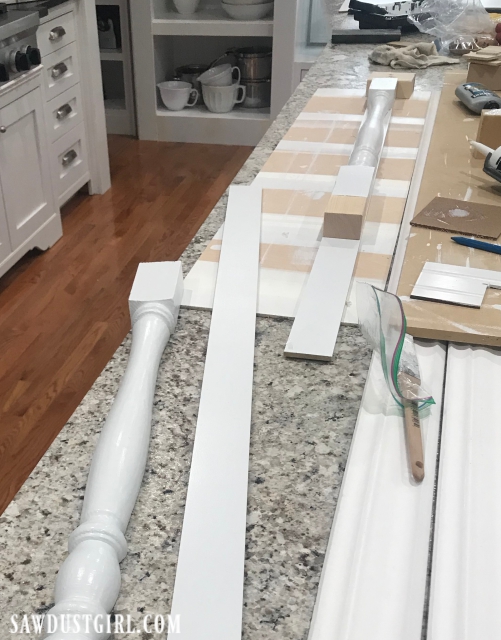
First I used a track saw to cut a bit off the back of these legs. I didn’t cut them in half, but cut a bit off the back so it was flat. This made it easier to attach it to the backing, a strip of 1/4″ MDF.

Creating decorative legs for cooktop cabinet

Titebond Thick and Quick made quick work of fusing the new piece to the leg. Then I used caulk to stick the whole new leg to the backing and secured it with nails through the back.

Adding height to decorative legs
Decorative legs

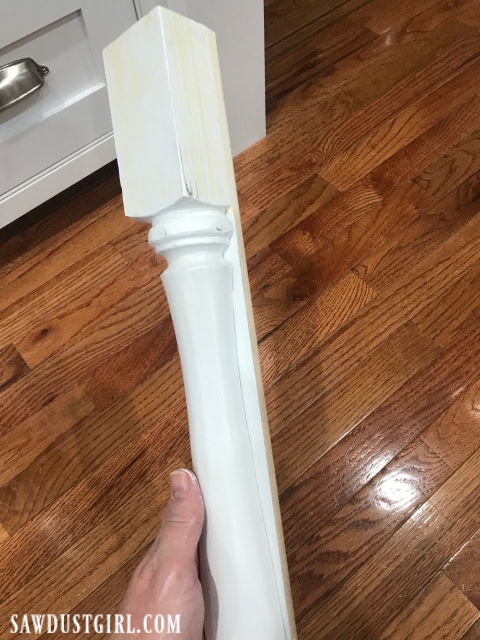
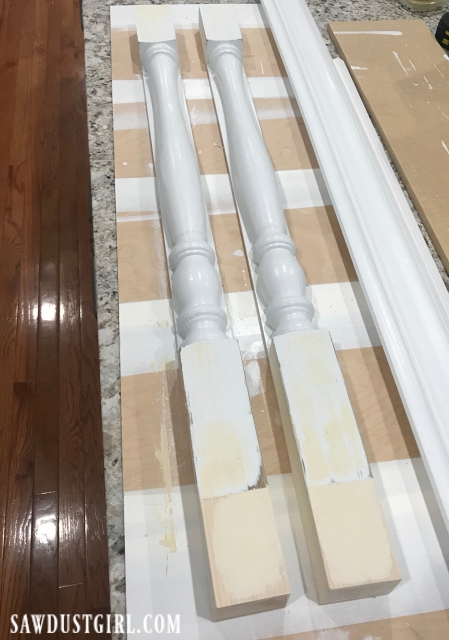
After applying wood patch and letting it dry, I sanded the legs smooth.

custom legs for cooktop cabinet

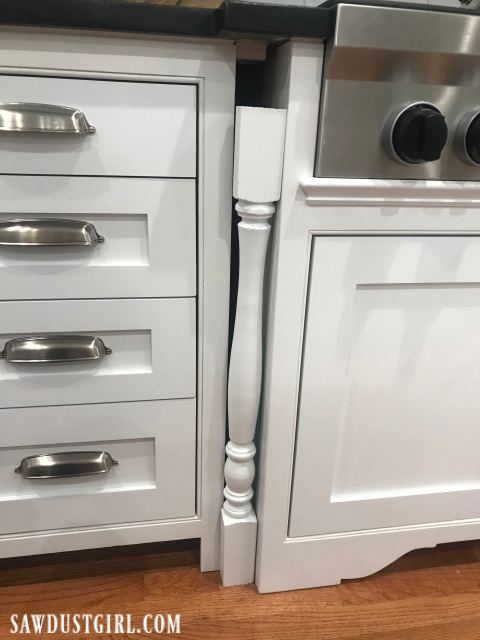
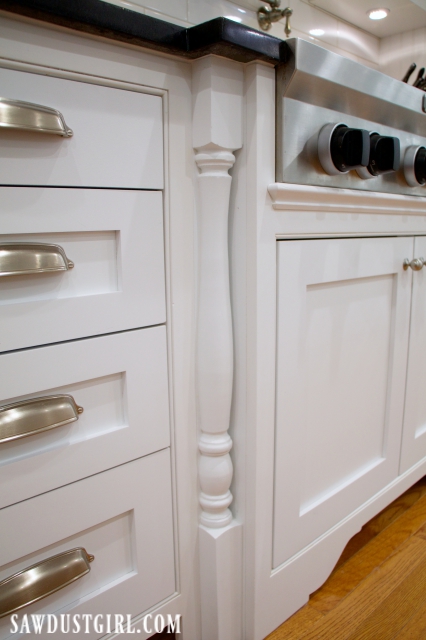
To install the legs, I attached blocking 1/4″ back from the front of the side cabinet. The backing on the leg fits perfectly into that space. Caulk is a favorite of mine, I used it to secure the blocking inside the cabinet cavity AND to secure the leg to the blocking.

Adding decorative legs around cabinets

Then I used more caulk around the newly installed decorative filler. That thing is in for good. I have to say, $4 looks pretty good!

Decorative legs on cooktop cabinet
Cooktop cabinet with decorative legs
Kitchen reveal with cooktop cabinet decorative legs

January 21, 2019 · 15 Comments

« How to build a cabinet with pocket hole screws
How to Build a Cabinet with Dado Joints »

Comments

  1. Nancy Williams says

    January 21, 2019 at 9:26 am

    Hi Sandra,

    It’s really coming together! I still use the cabinets in my dormer windows everyday that you coached me through!

    Can’t wait to see your finished kitchen!

    Nancy Williams

    Reply
    • Sandra says

      January 21, 2019 at 3:26 pm

      It’s so good to hear from you Nancy! Glad you’re still enjoying your built-ins.

      Reply
  2. Donna Weigel says

    January 21, 2019 at 9:48 am

    Fantastic job! I’m currently planning my own kitchen remodel and this just may be the answer to my farm sink base cabinet. Thanks for sharing!!

    Reply
    • Sandra says

      January 21, 2019 at 3:27 pm

      You bet. And if you want to drive to Maryville, TN I can hook you up!

      Reply
  3. Kendra Cameron says

    January 21, 2019 at 9:50 am

    It looks fantastic!

    Reply
    • Sandra says

      January 21, 2019 at 3:28 pm

      Thanks so much Kendra!

      Reply
  4. Karen says

    January 21, 2019 at 12:24 pm

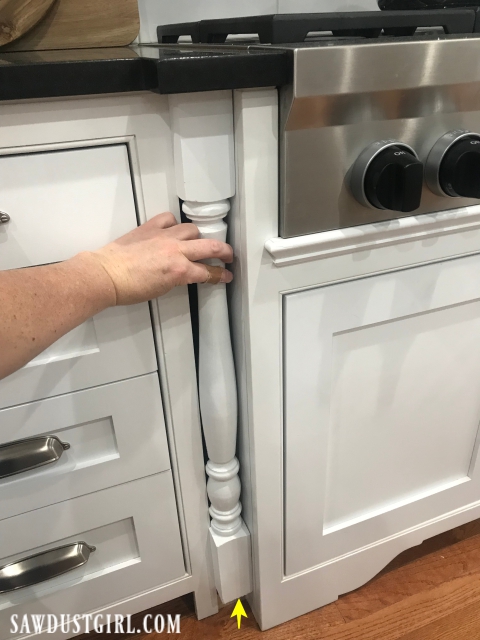
    Did you caulk along each side of the leg, in between the sides of the cabinets and the sides of the legs-especially along the curves? Thanks. Your kitchen is a dream and you are so talented!!

    Reply
    • Sandra says

      January 21, 2019 at 3:16 pm

      I caulked where the leg is attached to the backing before I pushed the backing in between the cabinets. It’s a snug fit so no more caulk was needed.

      Reply
  5. Darlene says

    January 21, 2019 at 12:35 pm

    I learn something from every one of your posts! (pun intended, but I really do) Thanks!

    Reply
    • Sandra says

      January 21, 2019 at 3:15 pm

      LOL Thanks! Glad to be a helpful reference.

      Reply
  6. Claudia says

    January 21, 2019 at 2:40 pm

    Love it!!! Was there not enough room to add spice pull outs behind the decorative fillers? Its kind of hard to see on my phone.

    Reply
    • Sandra says

      January 21, 2019 at 3:10 pm

      There wasn’t quite enough for that…or I just didn’t want to deal with that intricate of a project now that I’m finishing to sell. One or the other of those answers. LOL

      Reply
  7. Guerrina says

    January 22, 2019 at 6:15 pm

    Your creativity never ceases to amaze me! Love it!

    Reply
    • Sandra says

      January 22, 2019 at 6:35 pm

      Thanks. We all have our talents and I guess I found one of mine.

      Reply
  8. Maria Bingham says

    January 25, 2019 at 12:58 am

    I want to do this same bump-out on my sink cabinet when we remodel so your post is very timely. I love the look and intend to use a similar solution for a sink bump-out.

    I have two questions for ya. How far out from the wall is the stove and if I do this to the sink cabinet, what pipes need to be moved besides the length of the water pipe?

    Maria B.

    P.S. I admire your tenacity and work ethic and I have learned so much from you. Thanks for sharing.

    Reply

Leave a Reply Cancel reply

Your email address will not be published. Required fields are marked *

Categories

New Post email notification signup

You Subscribed!

Legal Stuff

Terms of Use

Privacy Policy

Disclosure

Recent Posts

  • Lodge Update – Floors, Cabinets, Countertops, and Appliances
  • Lodge Kitchen Cabinet Progress
  • Halloween Mad Gab – Halloween Party Ideas
  • Concrete Backsplash or Vertical Wall Treatment
  • Building and Installing a Giant Faux Beam on the Ceiling

Disclaimer:

Although it is my intention to provide accurate plans and clear instructions, not all plans have been tried and tested. Using plans or information found on SawdustGirl.com indicates that you agree with the Terms of Use policy and will accept full responsibility for the process and outcome of any project you attempt. All plans are for private use only. Plans and information published on SawdustGirl.com may not be reproduced, republished or distributed in any manner without written permission from Sandra Powell, Sawdust Girl. Actual projects built using Sawdust Girl plans may be published on your own site without instructions or "tutorial" as long as you provide a link to my original post with full post title or "SawdustGirl.com" as link title.

Copyright © 2022 · anchored theme by <a target="_blank"