There are lots and lots of different ways to build diy kitchen cabinets because there are so many different ways to join wood. You can use different methods for joining the face frame as well as the cabinet carcass. I have A LOT of projects to finish and don’t really want to spend extra time on fancy methods. Fancy techniques may look cool but with modern advancements in tools they are not necessary. You can build strong joints and nice looking pieces with simple methods. I generally use only a few different joints. I like to keep things as simple, easy and fast as possible.
How to Build DIY Kitchen Cabinets
Every project is different and some situations call for creativity in order to “Make it work”. Sometimes I can build fast and easy and other times I have to spend more time on a specialized project because the situation calls for it.
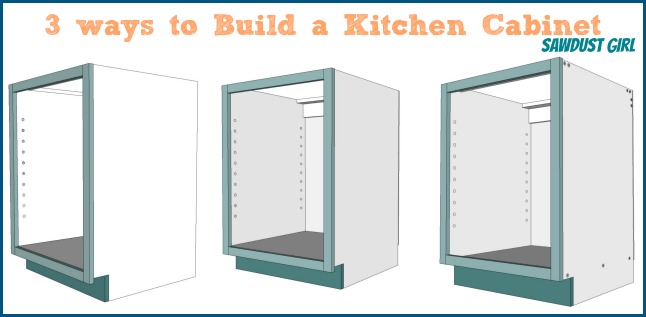
I’ve created three different plans for the same 24″ kitchen cabinet using three different techniques to show different methods and talk about when and why I might use one method over the other. Also, sometimes experience and available tools dictate what method you use but that doesn’t mean you can’t create a beautiful project. You just have to take the extra steps to ensure that your END RESULT looks awesome which means you need to plan ahead and figure out which parts of your cabinet are going to be visible after all is said and done. Then pick the method that works for you.
1. Butt Joints and Wood Screws
Building cabinets with butt joints and wood screws drilled in directly through the sides is the fastest way to build a cabinet carcass and requires no special tools. You need a drill/driver to drive in your screws and that’s it! I build a LOT of cabinets and built-ins this way. I use wood glue and good fasteners. I have found this method sufficient for most of my projects, especially painted projects. Once the face frame is on and everything is filled, caulked and painted no one can tell what type of joint method you used and unless you take a hammer to your shelf (with some power in your swing) your cabinet will most likely hold up as well as any.
The issue with this method that the fasteners are visible on the sides of the cabinets. Not an issue if you plan ahead. You can hide the fasteners several ways:
- If you make sure to countersink your screws you can fill them with wood filler or putty and they will be hidden once painted.
- You can cover the sides of your cabinet. I often cover my cabinets with 1/4″ beadboard. (I adjust my face frame to account for this)
It won’t matter if the screws are visible if the sides or your cabinets will not be seen. If attaching cabinets together to fill a wall to wall space, the sides will not be visible.
Pros: Fastest and simplest method. No special tools required.
Cons: Fasteners and back panel are visible from the sides
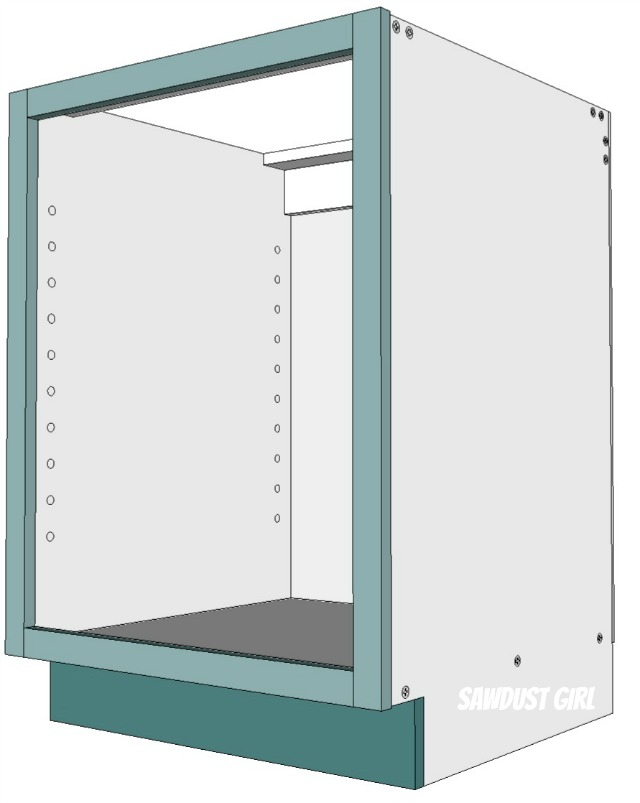
2. Butt Joints and Pocket Hole Screws
Using pocket hole screws to build your cabinet is also an easy method of joinery. It does require you to have a special jig to drill the holes but I almost always use pocket hole screws to join my face frames so if you follow my plans, you’ll need one anyway.

Pros: Very easy method and fasteners are not visible from the sides.
Cons: Back panel is still visible from the sides. It takes a little time to drill all the pocket holes. Requires a pocket hole jig.
3. Dados
Cutting dados that allow the back panel, cabinet bottom and fixed shelves to recess into the cabinet sides is definitely a little more time consuming and trickier method but it pays off in appearance. It requires specialized tools like a table mounted router or a table saw and a little more patience.
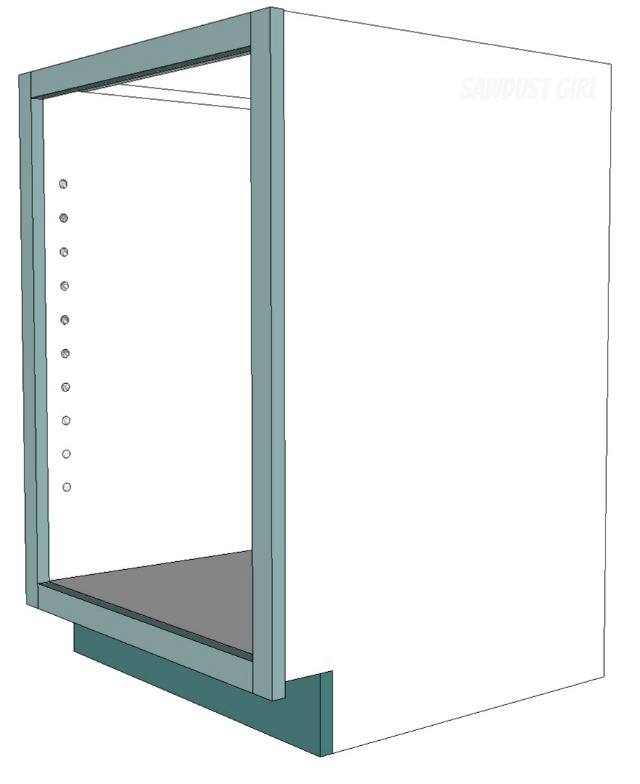
Getting your dados exactly the right width is sometimes tricky, especially when material thicknesses fluctuate. When building a piece you plan to paint, you don’t have to worry as much about precision as you do with natural or stained wood. Caulk can be your best friend.
Pros: Very clean look. No visible fasteners or back panel.
Cons: Cutting the dados is time consuming and requires precision and the necessary tools which include either a table saw or a table mounted router. Probably not a beginner project.
Faceframes
After you decide how you want to build your cabinet carcass, you can build and attach your faceframe. There are several methods for that too but their all in a single post. 😀
Get my Cabinet Building 101 eBook. All the information in one place that you can download and keep on hand!
$9.99Add to cart
Clay Reed says
I really love your video and I love your work, I am inspired to do my own projects thanks for sharing. Can you show a video on how to crown moulding and how you piece together the crown moulding with the wains coating?