Recently I’ve been creating lumber storage solutions to increase productivity and maintain my sanity!
Pure chaos
Right before I left on vacation I built a lumber rack in my workshop. If you follow me on Instagram of YouTube, you’ve probably already seen that finished product as well as some additional messes I have yet to clean up. What you haven’t seen is the mess in my previous lumber storage hallway. I can’t blame it all on the minor FLOOD from a FAILED PLUMBING JOINT — but that certainly didn’t help. 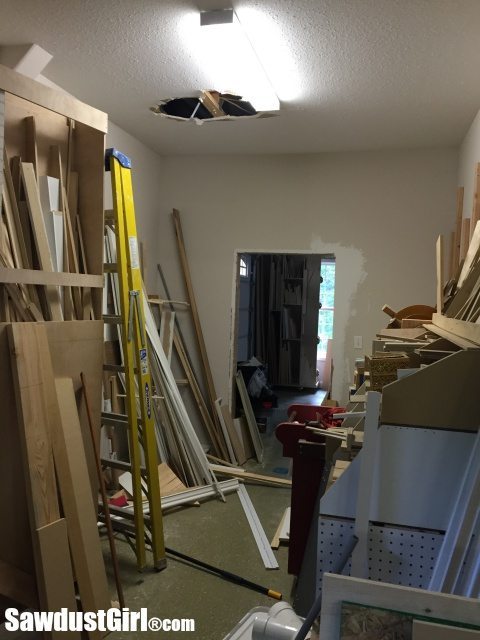
Storage needed
My scrap wood was already starting to take over the world again and I was going to have to address it as soon as I found the time. Then one fine day I walk into my wood storage hallway and see a little pond of water on the floor and water escaping out of the ceiling above. I dealt with the water issue which is a whole other story that I won’t go into except to admit that, at that moment, I couldn’t care less about the shape of the “exploratory hole” I tore into the sheetrock. Also, I may have thrown fistsful of moulding and poplar and everything else I had stored there out of my way so I could set up a ladder, tear into the ceiling, and find the water leak!
This happened a few weeks ago while working in the studio and I just didn’t have time to deal with it beyond getting the leak fixed. After that, I started piling my scrap wood over in a corner of my shop, instead of in the lumber storage hallway. (I think I had a temporary, subliminal dislike for that hallway.)
Lumber Storage Solutions
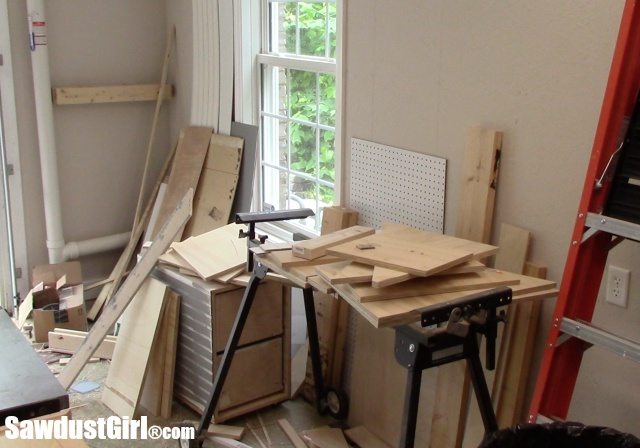
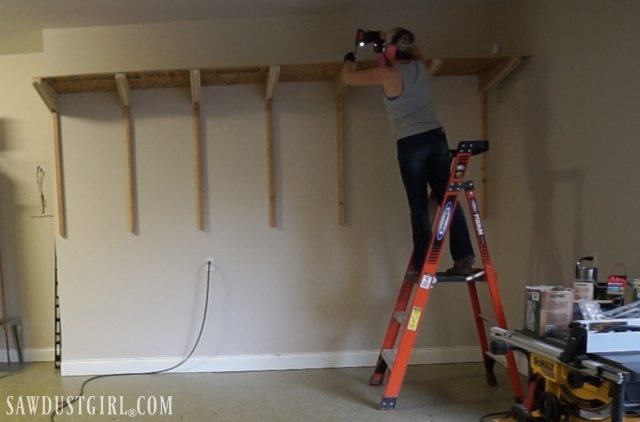
This is what this side of my workshop looked like 2 days before I left for vacation. I’d just finished the floating shelves in my studio closet and didn’t want to start something new right before I left. I decided it was a good time to spend a few days cleaning up and organizing.
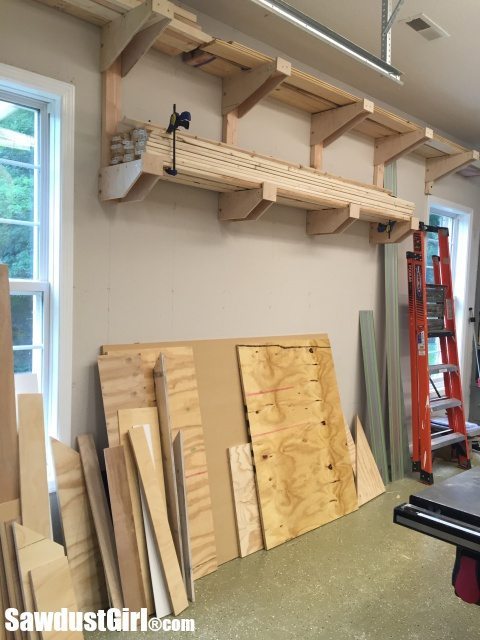
I started by building the hanging lumber storage rack to store all my construction lumber.
Then I went on vacation and came back and decided to keep cleaning for just a few more days! I built a lumber cart for the corner of the shop, right next to the table saw.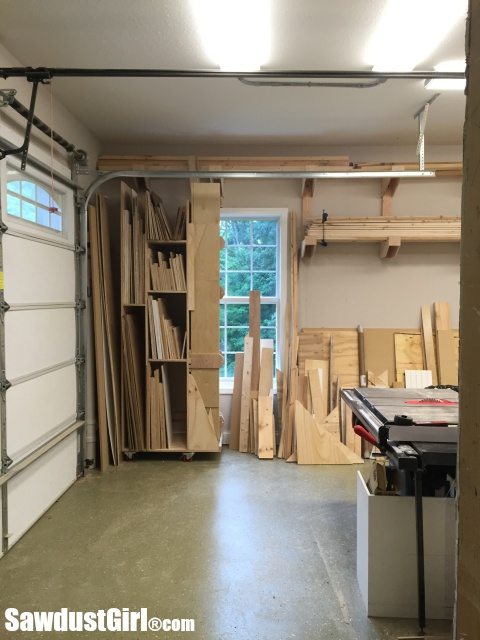
Now I can put all the “cut offs” directly onto the “Scrap Cart” right after I cut them. It makes so much sense! One side of my cart allows vertical storage of long pieces with brackets that secure the material tightly together to help prevent warpage.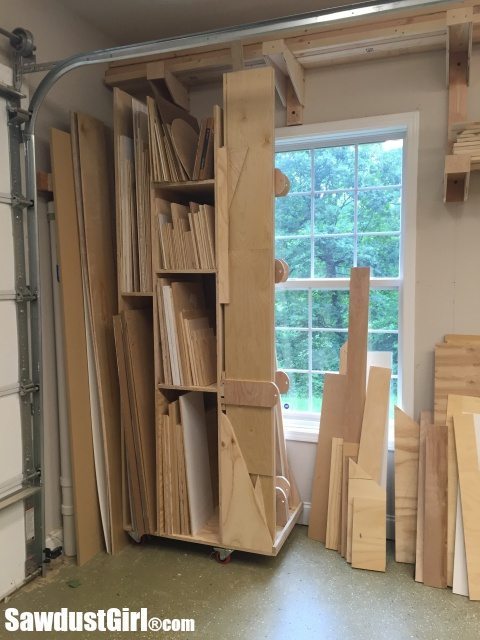
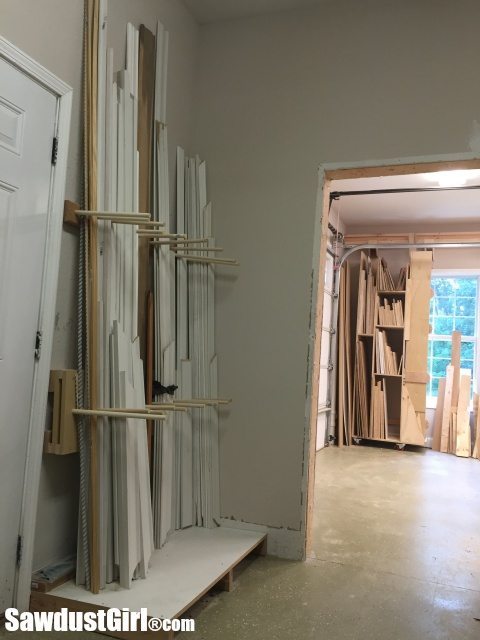
Then I cleaned up my hallway. I moved all my poplar and pre-finished drawer material to my new lumber cart and organized my moulding into neat little rows. 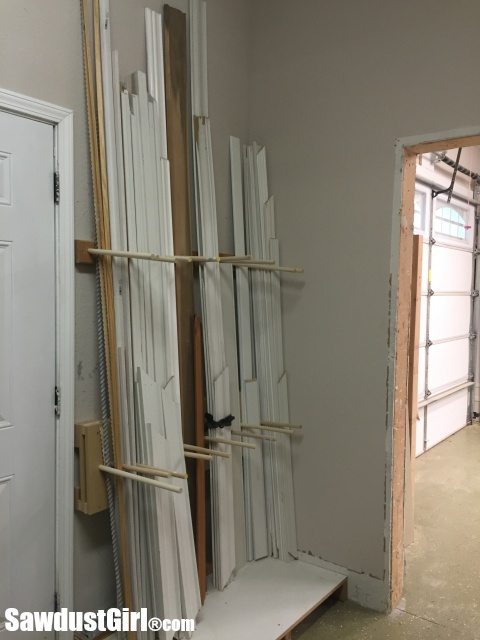
This storage area is made up of 2×4’s and MDF. The top rail is a 2×4. The bottom rail is stacked MDF and 2×4’s. The bottom is thicker than the top, creating an angle when it’s mounted on the wall. The angle is to provide support to lumber stored vertically. I drilled holes in both rails to accept 1″ dowels that act as dividers.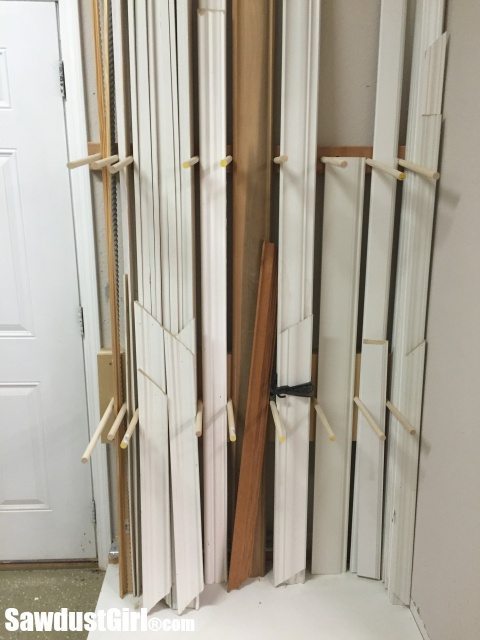 The hallway also houses this narrow lumber cart that I built ages ago. It holds full and half sheets of lumber and beadboard. I may or may not keep this. Time will tell…
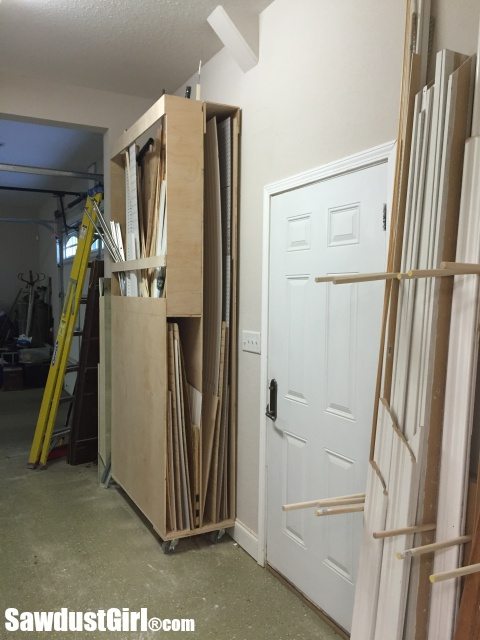
I still need to build one more lumber cart for narrow strips and smaller scraps as well as a clamp storage cart that will go where the ladder currently is. I may have to wait on the clamp storage though… …because I’ve decided to give myself this week to clean up my workshop, find lumber storage solutions and get organized. I’ll be happy with whatever I can complete by the end of day on Sunday.
Come Monday I’m back to work in my studio! I just HAD to take a few days and clean up and create a more functional shop so I can be more productive (or at least more sane) while I work.
Added
I’ve recently built some additional garage shelves. I’m not using them for lumber storage but they sure could be used for that.
Nancyinnortheastiowa says
Sandra, I understand about wanting to clear up some of the clutter in your work area. I quilt, and fabric, batting, etc tends to get piled everywhere, making it hard to find what I need, when I need it. Chaos isn’t conducive to being creative and pretty soon, it seems like I can’t get anything done. Like you, I have to take time every so often and go through things and organize what I have so I can find it. A clean workspace makes it so much easier to get things done.
Sandra says
Completely agree. Too much chaos makes me irritable and cranky. When I have 20 things going on at once there is going to be an element of chaos in each room I’m working in but when it get to a level that effects my sanity– I have to address it.
laura {not a trophy wife} says
Looks great! I need this! It’s like a mini Depot aisle! laura {not a trophy wife}
Sandra says
Nice. I need things to be that organized. I can’t functions well in chaos and find myself feeling super irritated and unhappy for no reason until I clean up/organize and then. 🙂
MICHELLE says
Ugh, this is exactly what my work area needs. I think I can duplicate two of your three solutions, but can you zoom in on that nifty “cut-off” lumber cart? I’d love to see how you put that together. =) Thanks for sharing…I am always impressed by your skills and projects. Go girl!
Sandra says
Thanks Michelle. I’m going to share a specific post about that lumber cart because those brackets I made for the end need a lot of pictures to explain. LOL I’m sure I made it WAY more complicated than I needed to –but I made it work.
Mindi says
I am so excited you have been doing this Sandra! I am following your good example and trying to make my work space useable right now it is a mess of scrap wood and totally NOT functional! My space is a postage stamp compared to yours, but these solutions will be a huge help! Thanks!