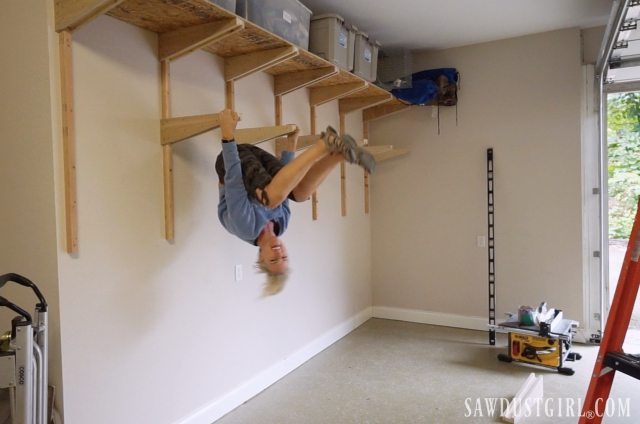
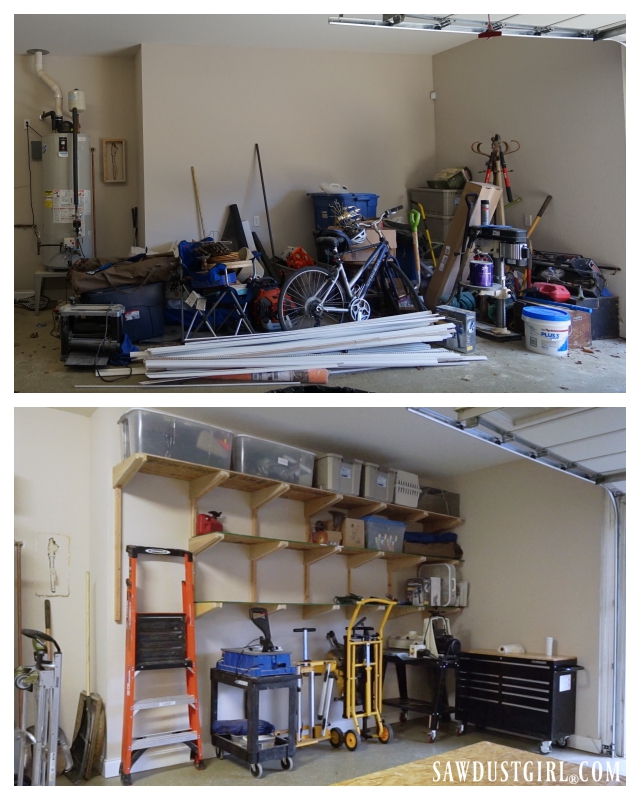
There is a ton of extra room on the side of this garage that has been accumulating piles of crap since we moved into this house. To better utilize the space and organize the crap so things can be found when needed, I decided to spend a few days building garage shelves.

Supplies needed for Shelf Brackets
These shelf brackets are really strong because of the cantilever design. I used all scraps and supplies that I had on hand.
- 2×2 wall cleat (length will depend on how many shelves you want and the spacing you want in between them. Mine are about 36″ long.)
- 3/4″ plywood (8×22)
- 2×6 (about 26″ long)
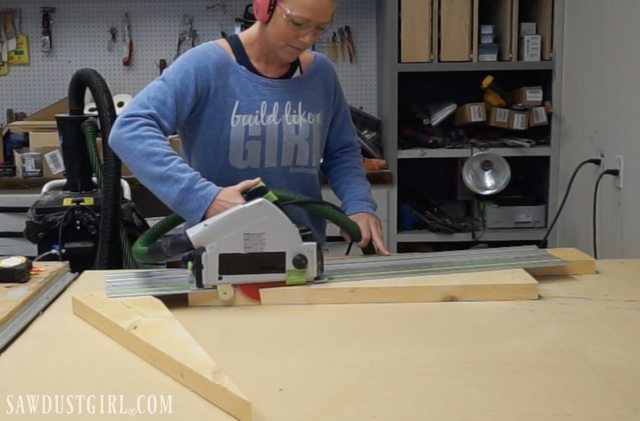
Cutting angled matching sides
Each 2×6 board and 3×4″ plywood board will be into two equal, angled sections (as shown in the photo below).

Plywood:
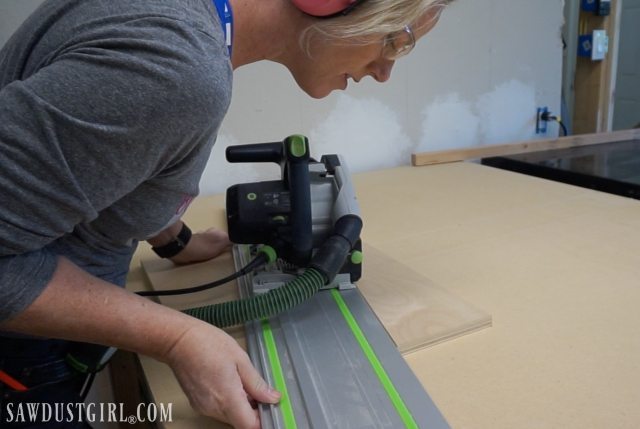
To make two sides out of the one 8×22″ piece of plywood, measure 1 1/2″ up from the bottom right, and 1 1/2″ down from the top left. Then use a saw (I used my track saw) to cut along that diagonal line.
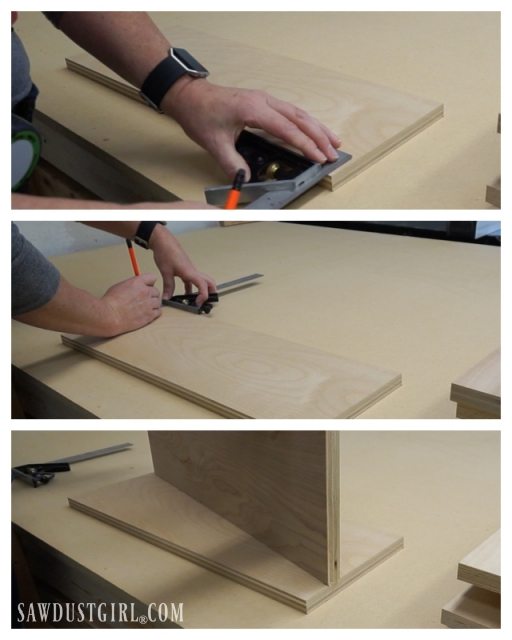
2×6:
Use one of the plywood pieces to traced the diagonal line onto a 2×6 and then cut it.
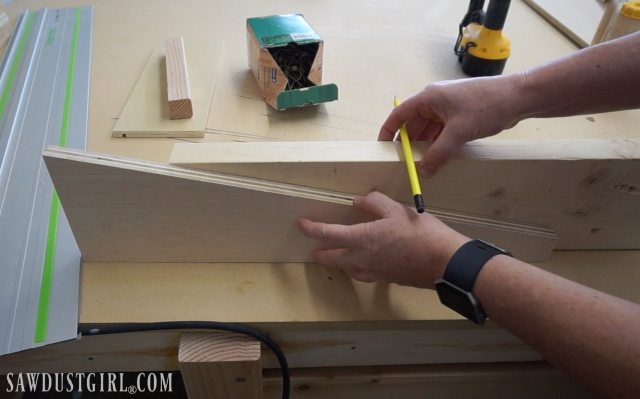
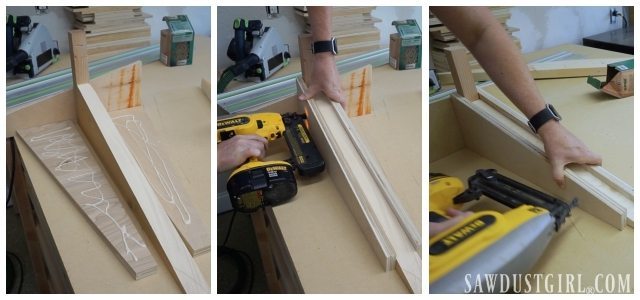
Building Cantilevered Shelf Brackets
To put the brackets together, I used scrap wood and a small scrap of 2×2 as backer to keep the sides even and move the center forward exactly 1 1/2″.
- The top of the shelf is flat and all three pieces are even on the top. (The brackets are upside down while being built.)
- generously spread glue on sides of plywood and press them against the 2×6
- nail everything together so things stay put and then let the glue set.
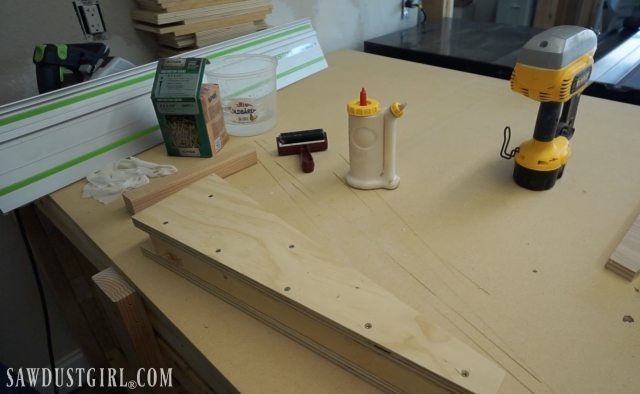
Using plenty of 16 or 18 gauge nails would probably be sufficient but I like to add clamps or screws to make sure the surfaces are contacting really well while the glue sets. I didn’t have enough clamps to hold 19 brackets together so I used plenty of 2 1/2″ screws.
Here is an up-close look at how the bracket will attach to the the wall cleat.
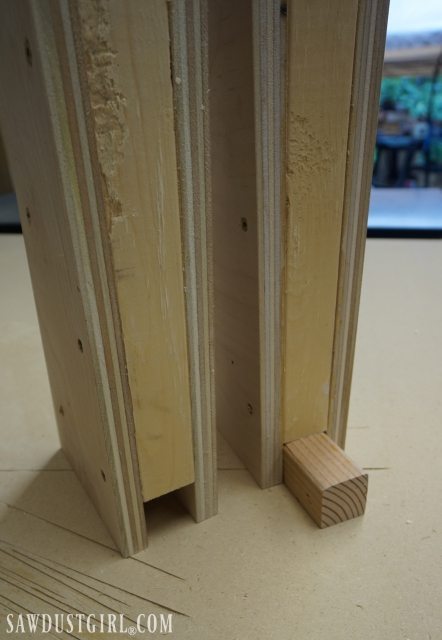
Use a miter saw to trim off any pointy ends on the 2×6, after the brackets are built.

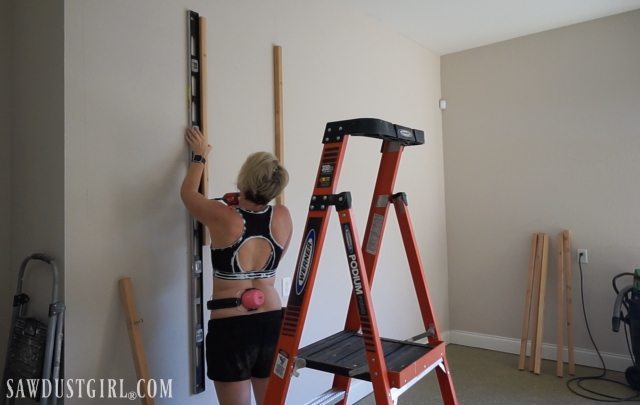
Attaching 2×2 cleats to the wall
I secured my 2×2 cleats to the studs with lag screws. The stud spacing in my basement is 24″ and I attached a wall cleat to each of those studs. With my 10′ tall basement ceilings, I have plenty of height for three rows of shelves. I installed the cleats 24″ down from the ceiling.
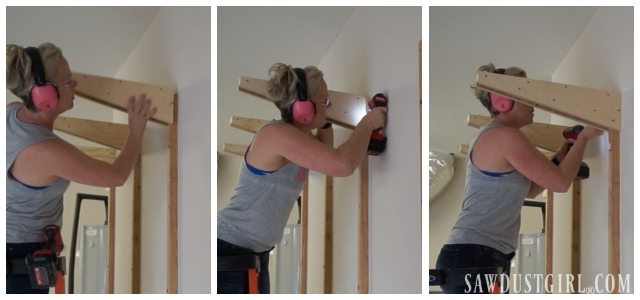
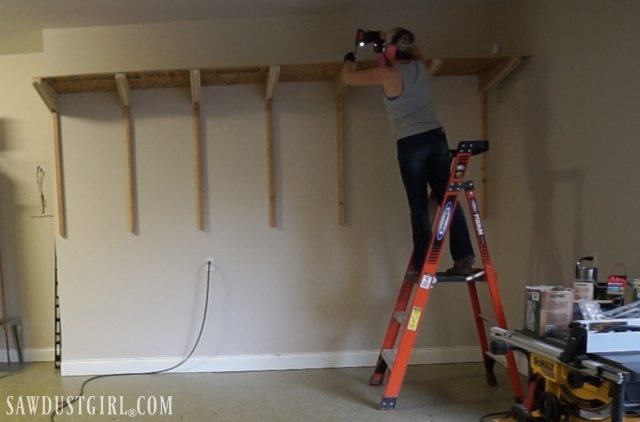
Installing shelf brackets
Press the brackets over the wall cleat so they are snug to the wall, then secure them to the cleat. Drive 3″ lag screws through both sides of the plywood sides of the bracket into the 2×2 wall cleat. I used 2-3 screws on both sides.
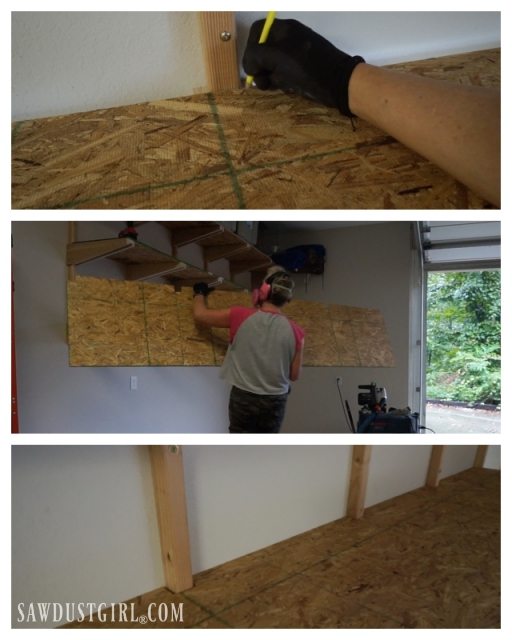
Adding shelving to the tops of brackets
I had 3 sheets of OSB taking up space in the garage so I used that, though I would prefer plywood. This wall is 12′ long so I had to have a seam in the shelve. This isn’t a problem, if you make sure the seam is on a bracket. The length of each shelf piece will be determined by spacing of your wall cleats. I made my shelves the same depth as my brackets.

I secured the shelves to the brackets with 1 1/2″ screws, adding shelving top to each row of brackets as I moved down the wall.
The top shelf was flush against the wall but each subsequent row had to be notched out around the wall cleats.

I installed the brackets and then placed my shelving material in place to mark the location of the cleats, used a jigsaw to cut out the notches and then installed the shelf.
You can configure your shelving to best meet your needs. I left room for my ladders and theres still room on the floor for tool carts, bikes and a lot of other stuff.

It took me two days to build these garage shelves and wish I would have done it 6 years ago.
Darlene says
Yes, I need this! Thanks so much. I love where you keep your ear protection when it’s not in use! I’ll have to remember that!
Sandra says
Thanks Darlene. I often store my ear protection on my waist or leg. LOL
Steve says
I love your folding table-legs that you brought out 3:20 into the video to use your jigsaw. Where can I pick one up?
And congrats on finishing another project. I hope to say the same one day soon.
Sandra says
Thanks Steve. That is the Centipede Sawhorse: http://bit.ly/2vU6uoR
G says
Hope it works out better than that toilet issue you did.
Sandra says
I assume you’re talking about my recent “sewer saga”? The plumbing that was done by the builder and now I’m having to fix it?
Carlos Domenech says
Awesome. I will be building these. I’m also tired of looking at mess. Thanks for sharing with us.
Sandra says
Sometimes you just have to manage those messes. 😀
Joe says
Hi. What size lag screws did you use to secure the cleats to the wall and how many per cleat? Thanks.
Sandra says
I would use the longest ones you can. I used three 3″ lag screws (but I would have used 4 1/2″ lags if my walls were actually 2×4 like normal walls. My basement walls are 2×2’s.)
Jimmy says
What board are you cutting into on your workbench, when you cut the brackets? (..with the circular saw.)
That’s a good idea. You get some marks on it, but if it lasts for a bit, the work goes much faster.
Sandra says
I top my workbench with MDF. When it gets too many marks, I replace it.
justin livengood says
do you have to use such a long cleat on the wall? will just using a 6′ cleat work?
thanks!
Sandra says
You can use whatever size cleat you want. It would depend on the number of shelf brackets you want and how much space between them.
Eric Moulton says
Will the cleats/brackets combo span 48″ or would it be better to attach to every stud @ 16″ trying to plan this for my garage. We have 13 ft ceilings in the garage and trying to plan for 4 shelves 8′ x 2′ using 3/4″ plywood and similar plans you have. great plan and execution btw
Sandra says
You’ll have to decide on spacing depending on the weight you’ll be putting ON the shelves. I think my garage studs are 24″ OC so I used one on each.
Shariq says
Bracket size you made 22″, I want to make 12″, what is the best calculation for cutting the wood?
Thanks,
Sandra says
You can use the diagram that I shared, which shows the height and depth of the board I used to cut two triangles. Just make your depth 12″ instead of 22″
Ruben Martinez says
Def. Going to make these.
What lag screws did u use to seccure bracket to the cleat?
Sandra says
SPAX
Andy Turrett says
I like these shelves a lot. What are the actual dimensions of the cleat? Did you just rip a 2×4? Or are they 1.5″ x 1.5″? Thanks, Andy
Scott Bakker says
Love the idea of these shelves. I’m just about to mount my cleats to the wall and I’m curious as to the spacing of your cleats. The studs are 16″ inches on center in my garage. Did you skip a stud in between?
Sandra says
Yes I did every other stud.
Dennis R Dening says
Very helpful video! I would like to make and install these in an unfinished garage. Would I need to extend the sides of the brackets to be as deep as the exposed studs?
Sandra says
Nice. Having exposed studs saves you a step. You could definitely extend the brackets to be a bit deeper. You don’t have insulation in the way?
Dennis R says
Currently there are no plans to insulate. All I see from the inside are the studs and the wall sheathing.
Joey says
Really great write up, I’m glad I came across your blog. I’m planning on making an “L” shelf in our garage. One of walls is hollow block and one side is finished drywall. Would you still use a 2×2 brace to support the cantilevers on the hollow blocks?
Thanks in advance for any help you can provide.
Sandra says
I doubt I would.
Randall W Saunders says
More of a question than a comment.
Just want to confirm that the cleats were centred on existing studs correct?
Found the video to be great and gave me some storage idea for my garage/workshop.
Sandra says
That is correct.
p0n2000 says
What size & brand of screws did you use to screw the 2×2 into your studs ??
For mounting the cantilever into your wall cleats, I see that you used 3in lag screws…
Sandra says
It’s been a while but I believe I used 6″ lag screws.
Brian says
Would using 2×4 studs and 1/4 ” osb in the construction of the cantilever still provide enough support?
Andrew says
Hi. I’m just making this project at the moment and wondered if you glued the brackets to the vertical boards or just screwed them. I was thinking of bolting them right through in case I ever want to change the shelf height / spacing but this mightn’t be as secure as gluing the entire surface if that’s what you did? Thanks for the write up and video!
Sandra says
No I didn’t glue them to the vertical support. Just using lag bolts (or lag screws) will allow you to relocate the brackets in the future.
Andrew says
Thanks. I finished the project on the weekend and am very happy with it. I added beefy floor supports so it is more or less free standing. I did use bolts although realised afterwards that the holes I drilled won’t be straight enough to replicate if I want to change the height of the brackets, so hopefully I won’t need to do that :). Thanks for your help!
Sandra says
I’ve drilled holes that didn’t end up working out for shelf supports before too. 🙂 We learn from every project we tackle.
MattM says
Great idea! I may try this, but I have a question.
Why such a long cleat? Why not 6″ 2×2 cleats? It seems this would have also saved some trouble as you would not have had to cut the lower shelves around the cleat and just mounted it the same way you did the top shelf.
The main reason I ask is because I likely only need a top shelf the entire border of my garage which is finished in white peg board, so finding the studs is easy.
Sandra says
You could certainly use a shorter cleat if you’re only doing one shelf. I wanted multiple shelves and so used the long cleat so the weight would disperse over a larger area.
Rejean Perrault says
Is there a reason (calculations, load bearing, etc) that you went with 8″ x 22″ dimensions for the shelf supports? 8″ x 24″ would make for less wood waste with almost all of the construction material and would give approx 2″ more depth on the shelves
Sandra says
It’s been a few years since that project so I don’t remember what factors went in to my choice for shelf width. Possibly the scrap plywood (OSB or whatever I used for the shelves) I had laying around.
Michelle says
Thanks for these plans! I recently used them to build shelves for my garage, adjusting to 24″ depth. I needed shelves that were supported without going to the floor. These are great since the brackets aren’t in the way as much as the basic 2×4 triangle designs. I’m more of a beginner and this was all totally doable once I got comfortable with how I was going to cut the diagonals without a track saw nor a table saw! (Used the Kreg guide with a circular saw)
Steven says
Great post, thank you for the idea! It’s exactly the solution I’ve been looking for. I’m currently batching out 96 brackets for a 24’ wall. A table saw and jigs for the bracket pieces made everything a breeze as laying out and cutting each piece with a track saw would have taken me days.
Sandra says
Wow 96 brackets! Sounds like creating jigs was a good choice!
Chris says
This is such a great project, and your design details, measurements, materials, and photo’s made it so easy to follow. Great design, great ideas, and such a helpful post. Thanks so much!
Jimmy says
Very helpful post, thank you for making this!
Carl says
Thank you so much for this guide! Im a beginner interested in getting into wood working, and this made a early terrific project, particularly coupled with the extensive pictures, and completely detailed written directions. Managed this job with only a circular saw, and while i can see how more tools would make it significantly more precise, the design of this build seems tolerate, rather than punish some imprecision. Appreciate it!
Sandra says
Carl I started out with only a circular saw and a drill/driver too. Almost everything can be done with basic tools though it does get easier and faster (and easier to get precise cuts) with more advanced tools. Some projects don’t require precision. I’m totally good with “good enough” with most things.