My workshop cabinets are done! For the most part…I say that a lot, don’t I? This has been an on-again-off-again project. I started it on my “down time” when I wasn’t building my custom master closet. Basically, I snuck away to work on these garage cabinets while my closet paint was drying, and I was waiting for hardware to arrive. So, it’s been in the works for months, and boy, oh boy, I can’t tell you how excited I am to finally be done!
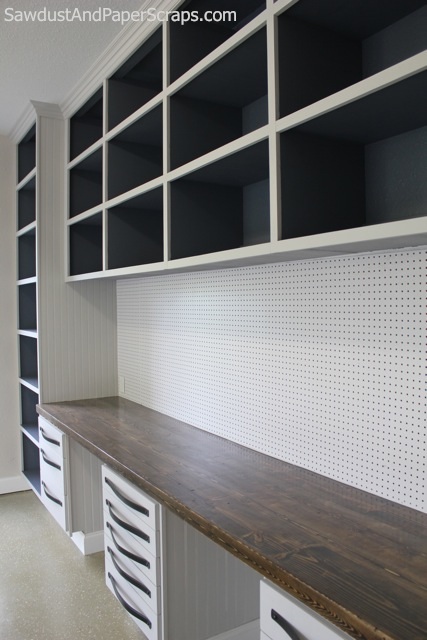
Look at all that storage! I might just be dreaming, but I think I’m going to be very organized from now on.
A New Lease on Life
One of the most important additions I wanted was my pegboard backsplash. I’m sure you’re all familiar with the traditional workshop ‘look’, but I wanted to make sure I was still going to have an aesthetically pleasing area. Part of the key to keeping my spaces organized is, well, wanting to keep it clean. If my space is ugly, I have a harder time cleaning up because I feel like even when I get everything neat and tidy, I will still have a gross, ugly space. By making sure my workshop is pretty as well as functional, I’m giving myself an extra boost to be able to actually put away my tools and supplies after I use them.
So, back to the backsplash! I’ve got a 12′ foot pegboard backsplash that I painted white to give it a cleaner, neater look that I can now use to hang all my every day tools on.
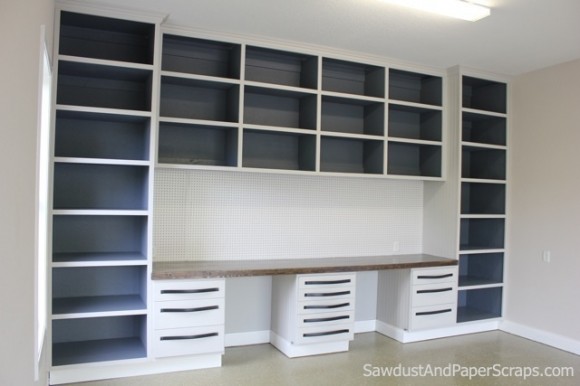
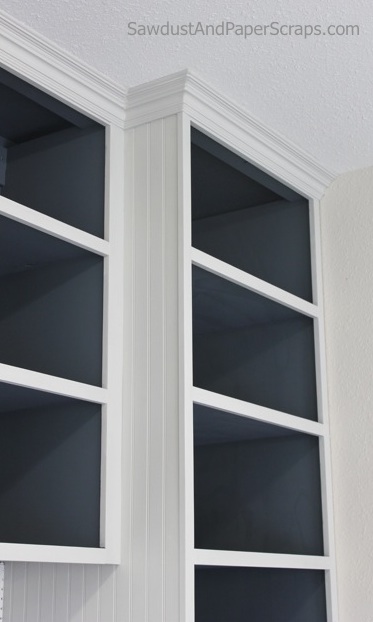
I’m sure I’ll put everything away in it’s proper place after each use. I mean, how could I not after making these beautiful cabinets! You can see I really went all out–I don’t know if I was just excited to have a break from the closet and to be doing something different, but I really pulled out all the stops on this space! I added my signature fancy crown molding and siding to not only make it prettier, but also tie it in to the rest of the built-ins in this house.
I also went with a darker color for the inside just to give it a harder color pop. The darker paint will also make it feel a little less cluttered inside when I’ve got all of my tools in there, and it also will hide the dust/dents/inevitable dirt that my tools and supplies drag in. I use all of my tools in adverse environments, so all of the paint, mud, caulk, and other dirty little bits my tools and equipment pick up will likely end up on my cabinets, no matter how much I clean both them and my tools. This way I can have a little bit extra time of sanity before the dirt starts to get to me!
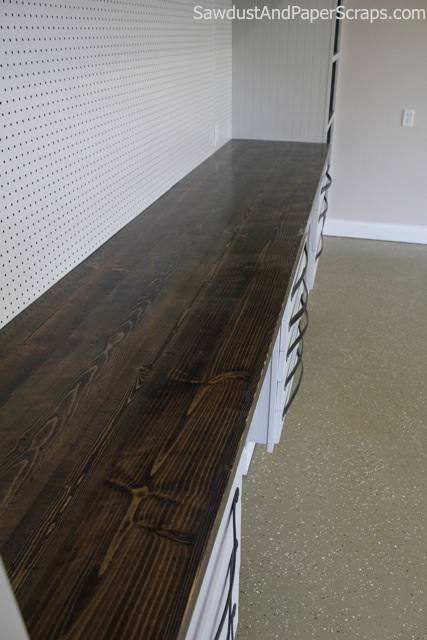
I’ve showed you guys how to make this kind of stained countertop before, and I have to say, I really enjoy this look! It adds a harder look to the space while still having that polished, sophisticated look. In addition, any scratches or scrapes it get will be relatively hidden, and cleaning this kind of countertop is fairly easy to do!
One of the other unique features I implemented in this build was the leather drawer pulls I added to the cabinets. I’ve never thought to use leather as a drawer pull, but I have to say, I really like how they turned out! I messed around with some other metal bars and pulls of various lengths and sizes, but for my workshop, I liked the balance the leather pulls brought in. They’re also so easy to use! (And all I have to do to clean them is just wipe them down!)
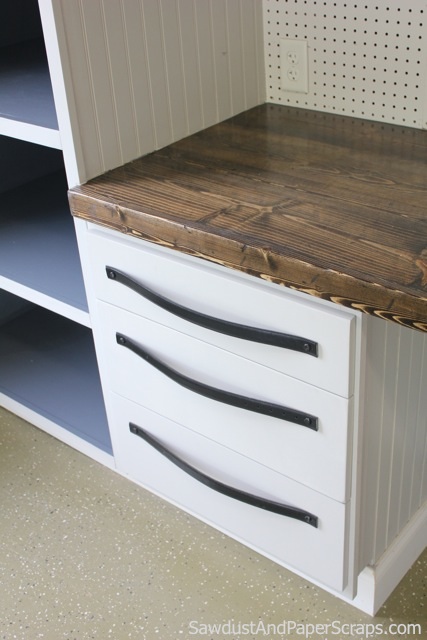
Ok, so, I know myself pretty well, and while I know it’s fairly likely that I’ll still not be any better at putting my tools away–it really feels like I’m constantly being sucked into a whirlwind of chaos with my projects–at least now I’ll have the option of being organized. I have a fighting chance at keeping it all neat and tidy. Or at least somewhat organized. There’s not really enough storage here for ALL my tools, but it’s a start. I have more plans to add onto my workshop storage, mainly with some more wall cork boards and a nice big workshop counter for cutting, assembling, finishing, etc.
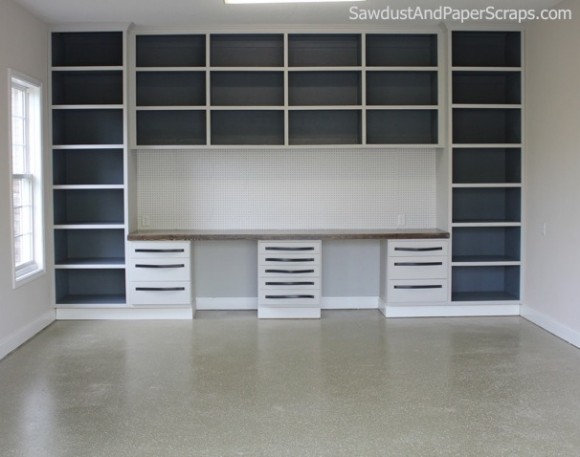
While there is still a lot to do in here before I would consider my workshop done, I am really happy with the progress I’ve made. Plus, it was nice to take a little break from my closet remodel. Stay tuned as I continue to fix up my workshop while I move onto the next venture in my house remodel, but if you are looking to make your own version of the cabinet storage I made here, you can purchase my plans here! Until next time, guys!

Maureen says
Sandra,
You are AMAZING! Are you sure you can’t come to my house and build things for me? 🙂 Can’t wait ofr the next posts!
Maureen
Sandra says
I’ll be right over Maureen! LOL
Maureen says
Sandra,
My fingers got too excited – the third word of the last sentance was susposed to be for not ofr. Do you see NOW why I want you to come and build things for me? I can’t even type! 🙁
Maureen
Val says
A-W-E-S-O-M-E! And that could totally pass for a craft space too! Nice job!
Sandra says
If not for all the sawdust. My craft supplies would revolt! LOL
Joan says
SWOON! I’m in love!
Sandra says
Thank you Joan.
[email protected] says
Sandra – You are a rock star with wood. You need your own TV show – Sawing with Sandra! You are soooooo talented. I am beyond impressed. I want that wall in my family room or home office, let alone my garage 🙂
Sandra says
Oh Diane, you’re too sweet! If I did have my own show it would be called “Figuring it out as you go – with Sandra”.
Haha (totally serious)
😀 Thanks
Chantelle - ThousandSquareFeet says
Well, now, if I can make my in-house built-ins look half as nice as your workshop, I will be very happy! Beautiful, as always!
Sandra says
Chantelle, you and I both know you can and will! 😀
Liz says
Ok, someone please hand me a tissue. I’m drooling over here.
LOVE, LOVE, LOVE IT!!! And I agree with Diane…you need your own show!
Sandra says
Ha, you and Diane are hired! (To be in charge of finding someone excited to produce a show called “Don’t worry if you screw it up, caulk and wood putty are a girls best friend”. You think we’ll get any takers?
I appreciate your sweet comment!
Wendy says
I love your workshop! Can’t wait to learn about all the wonderful tools too! Who do we need to talk to at DIY about that tv show???? 🙂
Sandra says
Thank you so much. I’ll try to be very thorough whilst covering those tools. See reply to Liz’s and Diane’s comments about the TV show. 😉 LOL
Karen says
AMAZING. I could only hope for my closet to look half as nice as your workshop! Good Job Sandra!
Sandra says
Thanks Karen. I hope your closet looks twice as nice as my workshop. ‘Cause you won’t have to “man it up” so it will appeal to the male population when you sale your house. (Always thinking about resale here.) LOL
Erin says
I am having some workshop envy right now, but that’s probably because it’s empty and looks like you will have TONS of space for everything. Clutter is the biggest problem in my workshop.
Sandra says
I’ve only filled the drawers and pegboard and it already looks too cluttered for my liking. Looks like doors are in my future. Sigh…but not until after I get some more IN HOUSE projects done first. It’s definitely good enough for now.
Trissta says
Good lord, woman. You continue to amaze me. I’ve been asking for an air compressor with a load of attachments on it, along with a radial arm saw for the last few months so I can attempt a few projects inspired by you. If I ever get the money and spare time. Keeping my fingers crossed.
Much Love,
Trissta
Sandra says
Woohoo. I’ll keep my fingers crossed for you too. That sounds exciting! Why are money and spare time so hard to come by anyway? LOL
B's Mommy says
Amazing!! Your craftsmanship is beautiful. YOU have a gift!!
Sandra says
Ahh, thanks so much.
Paula says
My first thought was that I could NEVER have gotten a pic with everything empty and beautiful, because to stay organized, I’d have had to fill stuff up as I finished each section! It is a great workshop, though!
Sandra says
Paula, you should see my other garage and driveway right now. It would probably make your hair stand up straight! It’s taking WAY longer to put everything away than I thought. (Why does that surprise me?)
Dacia says
It’s so pretty!!
Liz VanKirk says
Wow – It came out awesome. Can’t wait to hear about the details & also your favorite tools. What is the paint color on the cabinets? Def. motivates me to get some more projects done!
Sandra says
Thanks Liz. The cabinet paint color is SW “Light French Grey”.
Jean says
Wow! I need this! You are an awesome builder! I wish I had those skills.
Sandra says
Thanks Jean.
m @ random musings says
I don’t have enough words in my vocabulary to indicate how impressed I am with your work. I love especially how the dk grey makes it look totally modern. Can’t wait for the tute regarding drawer pulls!
I know you keep saying “I worked on it on and off” for many of your projects, but it would be super helpful if you could be share how you are able to balance building, being a mom and fun stuff. I secretly think you have discovered a working version of Hermione’s time-dialation necklace….. I sat down earlier this week and figured *if* I give up all non-essential activities (tv, emails, workouts, crafting, relaxing with the bf) I have ~ 15hrs/week to fix my house, and it seems like a lot of your projects take more time than that…. Thanks for sharing!!
Sandra says
Well thank you. I really don’t think I have mastered the balancing act. Actually, I don’t think anyone ever has it mastered. My life, as everyone else’s, keeps changing and I constantly have to adjust my routine to keep up.
I just do the best I can. Work when I can and let go when I can’t.
I have to constantly remind myself that I can’t put life on hold until I “just finish this project”. Nonessential things like working out and getting a haircut have a way of not making it on my Top Priority list until it’s REALLY necessary but I try to make sure that I take care of the important daily stuff like preparing meals, picking Madison up from school…stuff like that. LOL
I’m a work in progress!
Gina says
You’re my idol…I know I’ve told you that before…but you are! You are simply amazing! I love every inch of it!!! I can’t wait to see more!
Sandra says
Thank you Gina. You’ll never hear me complain that you say it too often! LOL 😀
Kristi @ Addicted 2 Decorating says
Absolutely AMAZING! Leather pulls? Brilliant!
Sandra says
Thanks so much!
DogsMom says
Serious envy happening here.
Amanda says
Sandra,
It’s beautiful! Another fantastic project!
pamela says
One question. Can you come live with me?
Sandra says
I could be your live in Home Improvement specialist? LOL
Ryan says
Wow, fantastic. Congrats.
Julia Andersen says
I LOVE YOU! I love all the projects you do! I love the way you inspire me! I sound like a girlfriend but I am just an avid blog follower! If you ever come to Utah let me know and I will lend you my car, let you stay with me and even make you your meals! Skiing? Yellowstone? This is all in trade for your expertise advise on my home of course 😉 You are the best!
Sandra says
You’ve got a date. LOL
Can you believe I grew up in Idaho and have never been to Yellowstone? I can’t. I’m not much of a skier but I’m sure we’d have a good laugh on the bunny trail together.
Pine Tree Home says
I can’t wrap my head around that these are “workshop” cabinets. I can only dream for something like this. Great job!
Sandra says
Thanks. They look nice now but as soon as they’re full, they’ll look like workshop cabinets. LOL
Becca says
Sandra, I am so impressed with your attention to detail. So often in workspaces it’s just “get some shelves up and call it good.” Yet you go out of the way to trim, accent paint, stain like and mad woman, and can I just say “holy canoli” with the leather pulls and I, like so many, cannot wait to see how you did that. We’re building an addition next month, and I mean, WE’RE pretty much building this two story thing. Your tut for cabinet bases is in my pinterest folder for the kitchen island because it’s going to be massive and I’m pretty sure I couldn’t afford someone else to build it. Thanks so much for all of your posts. You are an inspiration.
fx says
I love your workshop. How do you build up the beatiful profile of the crown moulding? I would love to have that in our home.
Also, we have a curved wall. Any way to put up crown moulding on the curved wall?
Thanks.
Monica says
Sandra,
I found your blog through pinterest linking to your remodeled closet. I must say as I’m going through your posts I am amazed at all the work you have done!
We are about to move into a new house and all though I don’t think Ill be breaking down walls and remodeling I am excited to build a craft room for myself.
Thank you for posting and being so inspiring 🙂
kim massa says
Would love to see photos of your cabinets and peg board filled up with tools!
Beverley says
Fantastic job, well done you. Forget Utah come and organise us here in sunny Brisbane Australia.
Caroline @ The Home Depot says
Sandra,
This garage workshop is simply amazing! I can’t wait to see it with all of your tools neatly tucked away. Fantastic job with all of these built-ins. I don’t think I’ve ever seen a prettier garage!
If you don’t mind, I’d love to pin this to The Home Depot’s Storage and Organization pinboard?
Cheers!
Caroline
Senior Editor, homedepot.com
Monika says
Sandra what did you use for your garage floors? And did you do it yourself? IF so, how long ago? Any issues such as peeling from hot tires?
Sandra says
We priced it out and it wasn’t worth doing it ourselves. We hired a painter who cleaned, taped off and did the floors for not much more than if we had done it ourselves. The product is from Sherwin Williams or Home Depot. I can’t remember what we chose. It cleans really easily. I can’t speak to hot tires because we rarely park in there. But it’s made for garage floors so I assume it would hold up.
Alice @ Just Alice says
Sandra, do you have a post on how you’ve organized this space? I’m in the process of organizing all our tools. DH and I have differing opinions on what to keep and how to organize (mostly b/c he rarely uses the tools except for the occasional screw driver – which he can’t find. lol) I’m looking for guidance on how to store all our drill bits, screwdriver bits, etc. It seems like the plastic cases things come in break quickly… And then you have multiple sets… at least we do. What a mess.
Sandra says
I still can’t ever find anything in here.
Hope says
I love your craft area! You should be proud of yourself and even prouder by keeping it clean and uncluttered. I’m rooting for you!
Again, job well done.