• Home
  • About
    • Personal Posts
  • Privacy
  • Shop
    • My Account
    • Checkout
    • Email
    • Facebook
    • Instagram
    • Pinterest
    • Twitter
    • YouTube
Sawdust Girl®

Sawdust Girl®

Renovation, cabinet building and woodworking plans and tutorials. Build like a Girl®

  • My Home
    • Clinton TN House
      • Clinton TN House in Progress
    • Maryville TN House
      • Maryville TN House Tour – Completed Rooms
      • Maryville TN House in Progress
        • Basement
        • Basement Storage Closet
        • Bedroom Office
        • Craft Room
        • Dining Room
        • Entry
        • Garage
        • Guest Bedroom
        • Hallway
        • Jack and Jill Bathroom
        • Kitchen
        • Kitchen Entry
        • Laundry Room
        • Library
        • Living Room
        • Loft
        • Madison’s Room
        • Master Bedroom
        • Master Closet
        • Pantry
        • Porch
        • Powder Room
        • Wes’ Office
    • Illinois House
    • Calderwood Cottage
  • My Workshop
    • Clinton Workshop
  • Build & Breakfast
  • Cabinet Making 101
    • Cabinets
    • Doors
    • Drawers
  • Projects and Plans
    • Countertops
    • Beds
    • Benches
    • Bookshelves
    • Desks
    • Gift Ideas
    • Holiday
      • Christmas
      • Halloween
    • Home Accessories
    • Kids
    • Kitchen Cabinets
    • Lockers
    • Nightstands
    • Organization accessories
    • Recipes
    • Sewing
    • Tables
    • Vanities
    • Wardrobes
    • Woodworking
      • Wood Finishing
    • Workshop
    • Workshop Storage and Organization
  • Remodeling 101
    • Baseboard and Trim
    • crown molding
    • Demolition
    • Door and Window Casings
    • Door Installation
    • Drywall
    • Electrical work
    • Flooring
    • Home Maintenance
    • Painting
    • Plumbing
    • Resources
    • Safety
    • Tile
    • Wall and Ceiling Treatments
  • Sawdust Squad
  • The Sawdust Diaries
    • Andrea
    • Ava D.
    • Beckie F.
    • Cara C.
    • Courtney B
    • Fawn T.
    • Jenn D.
    • Kelly C.
    • Kristy K.
    • Lara T.
    • Malisa B.
    • Marnie D.
    • Robin C.
    • Val F.
  • Tools
    • Products
    • Tool Reviews & Overviews
    • Inspiration & Ideas

How to Change a Shower Head in 5 Minutes

All Posts, Home Repair, Plumbing, Remodeling 101

I’ve been DIY-ing and remodeling for so long, but sometimes I forget that the simple things can be tricky, too! I get so focused on all the new skills I’ve learned that I forget that there are some great tips I could share about some of the quicker home improvement tasks. The other day my daughter Madison asked me how to change a shower head which made me realize that there are probably quite a few people out there who don’t know how to change a shower head either; hopefully, this quick guide will help you change that!

How to Change a Shower Head in 5 Minutes

How to Change a Shower Head

Luckily for us, there are no complicated plumbing skills required to change a shower head. Spending a few minutes doing this quick and easy home improvement task can make a huge difference to the look and feel of your shower! First, make sure you’ve got all the right stuff.

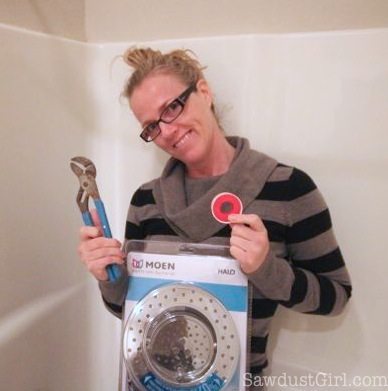
Gather your supplies:

  • Teflon tape
  • an adjustable wrench
  • an old rag
  • a new shower head
How to Change a Shower Head in 5 Minutes

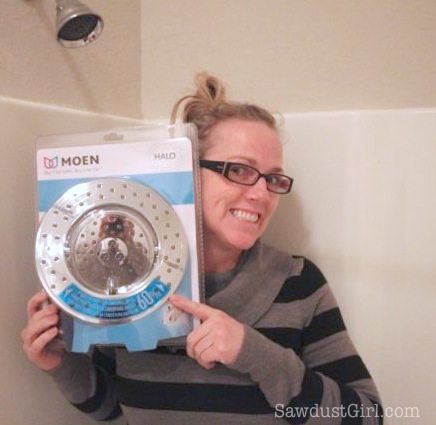
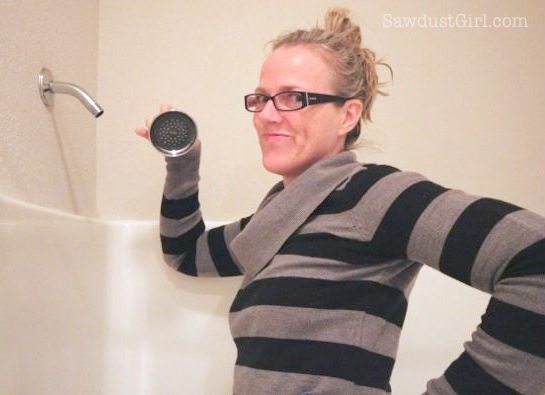
Step 1: Choose an Amazing Shower Head

For my purposes, I am updating my guest bathroom shower head to a Moen Halo.  I changed our shower a few months ago, and I love it!  The center part has massage settings and the outer ring is the “rain shower”. It keeps your whole body warm at the same time! If you know me, I’ve gotta have my toasty showers.

How to Change a Shower Head in 5 Minutes - Shower head installation - it's easier than you think!

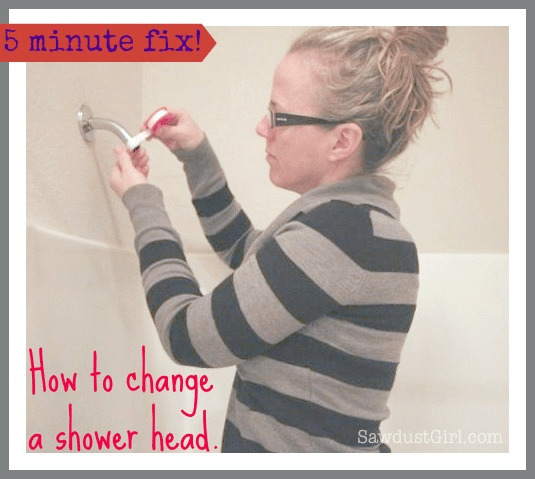
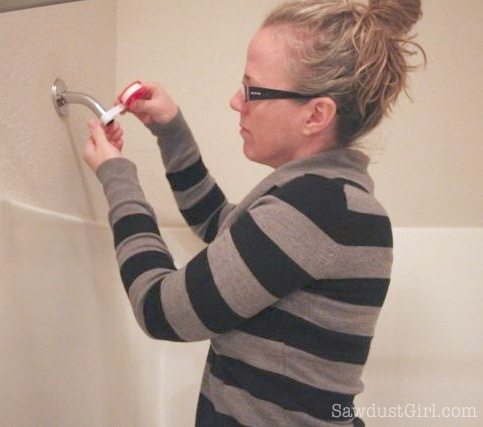
Step 2: Remove the Old Shower Head

To remove the old shower head, you just need to unscrew it. Remember: lefty loosey. Sometimes you can get it with your own muscle power, but other times it’s stuck like Chuck.

How to Change a Shower Head in 5 Minutes

If it gives you any trouble, grab the adjustable wrench and either an old rag or washcloth. The rag protects the finish on the shower arm. The wrench gives you some more umph! Also, remember: lefty loosey. Turn counter clockwise to loosen. I’ve accidentally ended up tightening something when I wanted to loosen it, and boy, does it make it even harder to unstick!

How to Change a Shower Head in 5 Minutes

Got it!

How to Change a Shower Head in 5 Minutes

Don’t do this project while wearing nice clothes.  If it’s been used recently, there will be some water that leaks out.

How to Change a Shower Head in 5 Minutes

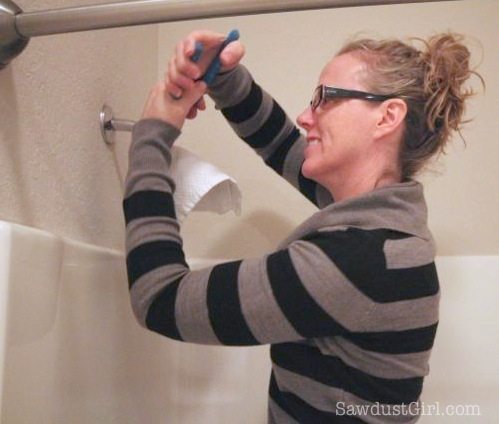
Step 3: Prepare the New (Amazing) Shower Head

The necessity of Teflon tape is debatable because new plumbing fixtures have rings and gaskets that are supposed to prevent leaking…but I like to take the extra 30 seconds to do this step just for the fun of it. Because it is fun! And, in the event that the new-fangled rings and gaskets don’t work, Teflon tape is an extra step to preventing leaking.  So why not? I’m not one for wasting time, but this is worth it in the long run to have some peace of mind.

Wrap the threads of the shower arm. Make sure you’re wrapping in the direction that you will be screwing on the new shower head. Again, that is going to be righty tightey, or clockwise if you like thinking of it that way. I know that this is not a new concept for some people, but I want to make sure I cover all the basics just in case this is new information for anyone. Plus, I have been known to mess up my rights and my lefts every now and then–it can’t hurt to overemphasize!

How to Change a Shower Head in 5 Minutes

Step 4: Install the New (Amazing) Shower Head

Screw it on. It needs to be snug, but don’t over tighten.  If you really feel you need to get it a little tighter, then you can use the rag and wrench again by hand. Just DON’T over tighten. If your shower head happens to be plastic, you could crack it.

How to Change a Shower Head in 5 Minutes

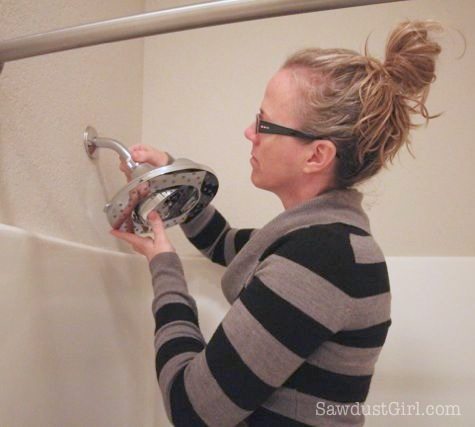
After everything’s all snug, turn on the water to check for leaks at the joint where you just applied Teflon tape and screwed the bugger on.

Then, enjoy!

How to Change a Shower Head in 5 Minutes

It’s probably best to wait until you’re not fully clothed.

How to Change a Shower Head in 5 Minutes

As you can see, it takes about 5 minutes to change a shower head — and most of that will be just getting the packaging open. Hopefully, this guide was helpful to you, and if you are interested in learning about other quick tips, you can take a look around my blog. Do you need to know how to patch drywall? I’ve got you covered.

How to Change a Shower Head in 5 Minutes

You can check these posts out too!

  • How to change a toilet
  • Tiling a shower
  • Waterproof Wallboard

February 19, 2021 · 7 Comments

« A Guide to Winterizing Your Home with Pipe Wrap Insulation
How to Build Built-In Workshop Cabinets in Garage »

Comments

  1. Karen says

    February 19, 2013 at 3:47 pm

    You are too funny!

    Reply
    • Sandra says

      February 19, 2013 at 9:10 pm

      I try! 🙂

      Reply
      • Louise says

        March 6, 2013 at 3:58 pm

        I Agree !! Made me laugh on the master closet video !!!
        http://www.howtodiyright.com

        Reply
  2. JackH says

    February 19, 2013 at 4:42 pm

    I just did this two weekends ago. Had to use three quick squirts of penetrating oil though because the fixture had been on the arm so long.

    Reply
    • Sandra says

      February 19, 2013 at 9:11 pm

      Good to know. I think my vanity faucets needed some of that in my last house. Those babies were rusted ON!

      Reply
  3. Malisa says

    February 21, 2013 at 12:40 am

    I bought the Kreg Rip Cut thing you suggested on one of your posts (which I like, btw). Getting the package open however, was terribly difficult and it all ended with a cut finger.

    Reply
  4. Kristen @ Pink Toes and Power Tools says

    February 23, 2013 at 9:27 am

    We tried removing a shower head a few years ago that would not budge. We suspect this is because of the awful, hard water we have around here and gave up. I’m going to try the penetrating oil you mentioned–so hope it works! I would love to have a better one that the builder grade that came with the house.

    Reply

Leave a Reply Cancel reply

Your email address will not be published. Required fields are marked *

Categories

New Post email notification signup

You Subscribed!

Legal Stuff

Terms of Use

Privacy Policy

Disclosure

Recent Posts

  • Lodge Update – Floors, Cabinets, Countertops, and Appliances
  • Lodge Kitchen Cabinet Progress
  • Halloween Mad Gab – Halloween Party Ideas
  • Concrete Backsplash or Vertical Wall Treatment
  • Building and Installing a Giant Faux Beam on the Ceiling

Disclaimer:

Although it is my intention to provide accurate plans and clear instructions, not all plans have been tried and tested. Using plans or information found on SawdustGirl.com indicates that you agree with the Terms of Use policy and will accept full responsibility for the process and outcome of any project you attempt. All plans are for private use only. Plans and information published on SawdustGirl.com may not be reproduced, republished or distributed in any manner without written permission from Sandra Powell, Sawdust Girl. Actual projects built using Sawdust Girl plans may be published on your own site without instructions or "tutorial" as long as you provide a link to my original post with full post title or "SawdustGirl.com" as link title.

Copyright © 2022 · anchored theme by <a target="_blank"