I really wanted to get that Scandinavian Knotty Pine look for the ceilings in the Lodge. I didn’t want to paint them white and I equally didn’t want banana yellow wood ceilings. After doing hours of research on how to white wash pine, I deduced that I didn’t want to use any of the products or methods I came across. Lye or bleach? No, thank you. Many tutorials out there are simply using watered down paint and then a poly clear coat. After reading “help me” posts in forums about that finish chipping off, I didn’t want to go that route. I kept searching and finally found a product marketed for flooring that seemed to be exactly what I was looking for.
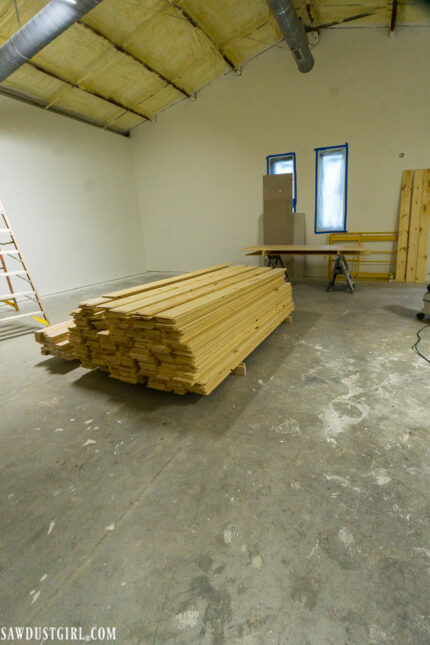
With nearly 300 8″x8′ pine planks to hand finish, I wanted something that would be as simple as possible and easy to get a uniform finish.
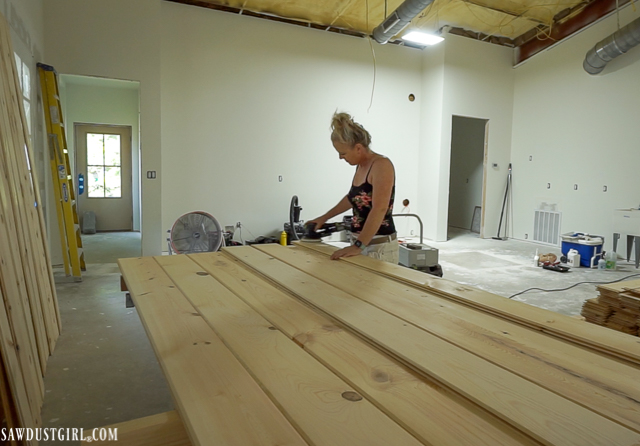
The first thing required was cleaning off the shoe prints and black marks on a lot of the boards. For the marks that wouldn’t sand off, I used vinegar water in a spray bottle.
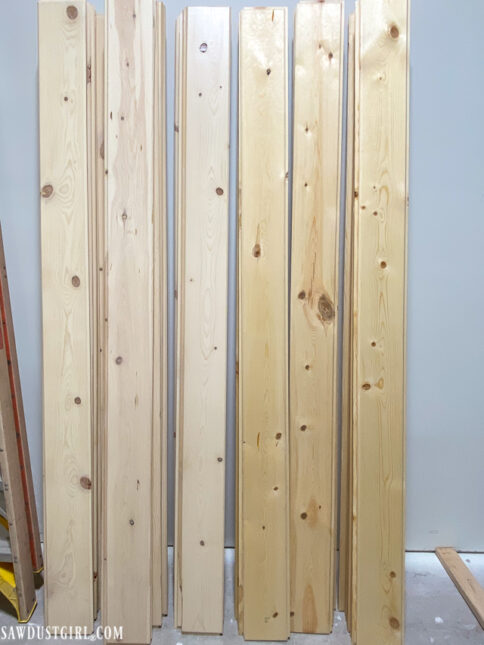
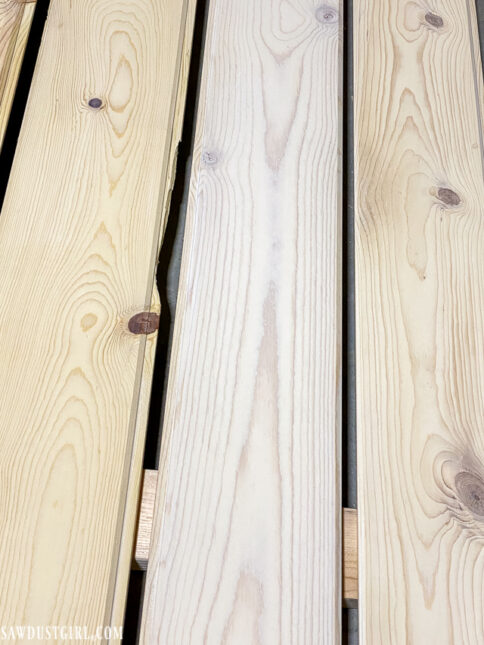
As you can see, the difference between the two is pretty stark. I wanted to keep my boards that natural pale color, instead of the banana yellow that occurs from exposure to light. I just had to figure out how to stop my boards from soaking up that light again and turning my ceiling into a fruit basket instead of a cozy lodge.
You can see in the picture below that the sanded boards are still pretty yellow, just not as banana-y as when they had soaked in all that light. The boards on the left are coated with sealer and they have that pale, white Scandinavian finish I want in the space. The boards on the right are the sanded and ready the sealer. Not as bad as before, but they definitely look better with a couple of coats of the sealer on them!
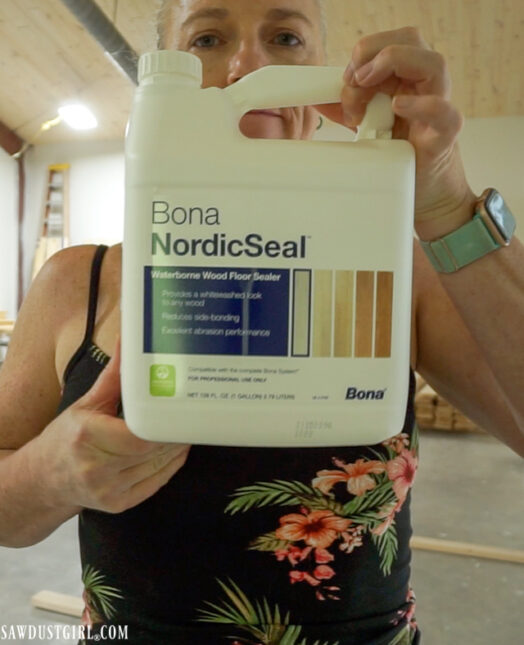
The magic sauce I finally decided on is Bona NordicSeal. It’s actually a flooring product, so I took creative license with how I used it. I think it turned out great and shouldn’t chip off like some of the diluted paint and top coated projects I read about.
I ordered it online after finding the best price and availability (which will undoubtedly be different for you now than it was for me then, so make sure you look for your best source). However, if it’s helpful, I found it at Panel Town & Floors which is a brick and mortar store in Columbus, OH. As you know, I don’t live anywhere near Columbus, OH, but the good news is they ship. I’ve actually ordered quite a bit from them because their prices are fair, and they ship quickly!
I applied it with a paint pad. The key is to completely cover the wood with the sealer. I ended up with lots of dripping off the edges, so make sure you cover your floor before you begin! It’s not like stain, where you don’t want excess–you definitely want to make sure this bad boy is covered, or the banana will return! You don’t want puddles of it, either. It’s more like a paint, where you spread it on and then leave it to dry. Luckily, it dries pretty fast, so you can do multiple coats quickly.
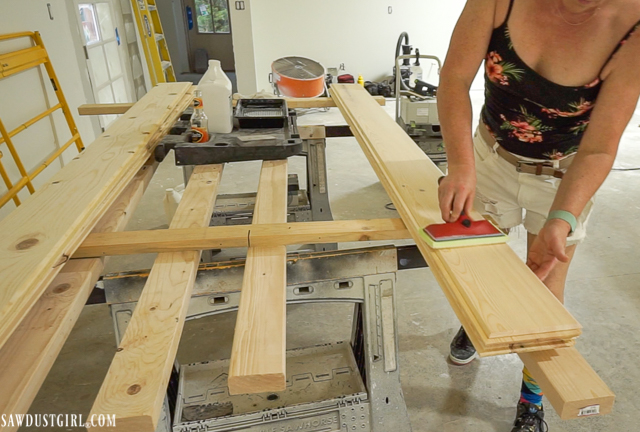
You can do as many coats as you want. It all just depends on how “white” you want the wood to get. The sealer was really easy to use and even, so I could get the color exactly how I envisioned it in my head.
To kind of give you an idea for how versatile this stain is, I laid out 3 boards at different stages in the process. The board on the left is only sanded, the middle board has two or three coats, and the right board only has one coat. As you can see, even after only a couple coats, the board is already looking pretty white!
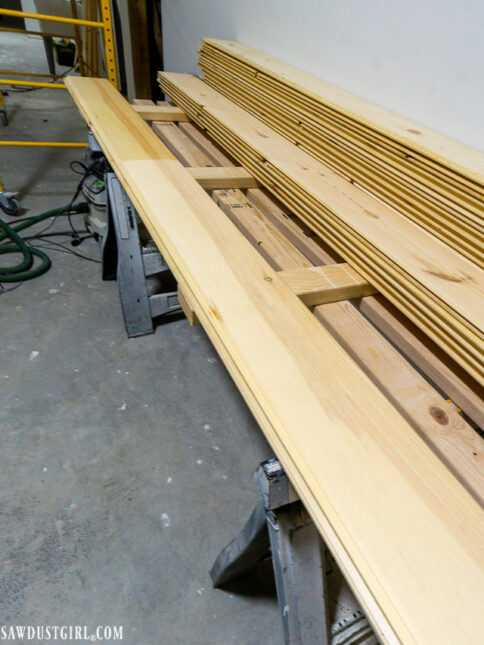
The sealer was so easy to apply that the trickiest part of the process ended up being finding enough space to lay all the boards out to dry! Luckily they dry pretty fast, but it was a little tricky getting around for a while!
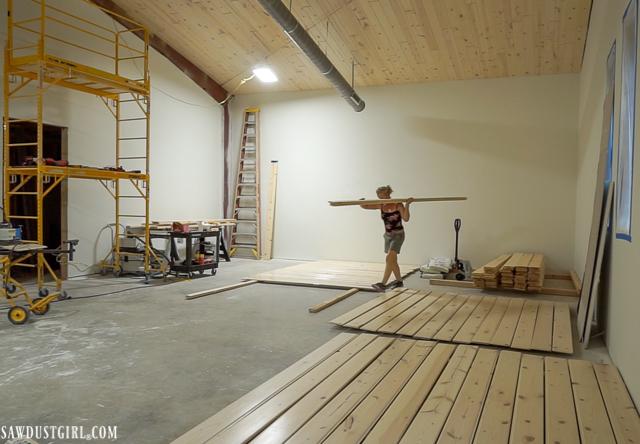
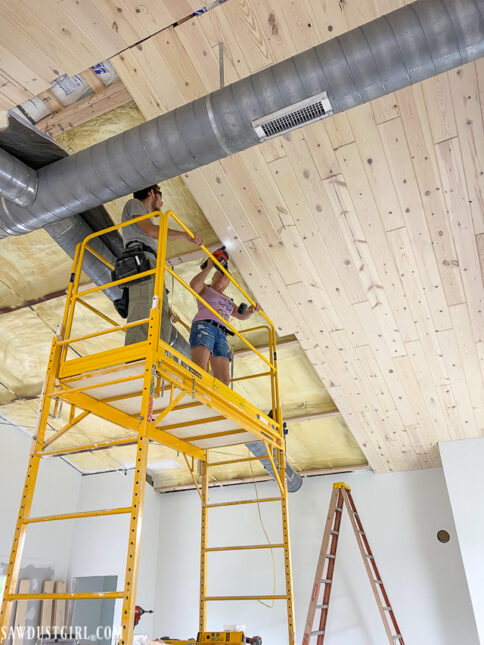
I ended up only doing enough planks to cover half the ceiling. I had help installing it with two little worker bees over the weekend. I had two people on the scaffolding and then one of us was down below to hand up the wood and move the scaffolding around.
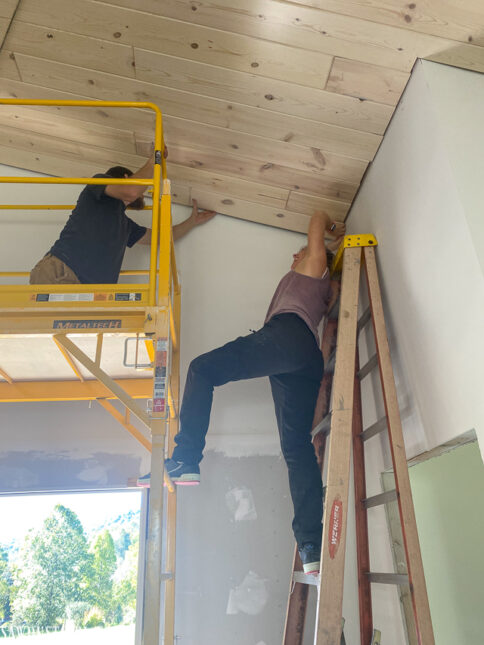
Once half of the ceiling was done, I had to finish coating the rest of the wood. I finished installing it the very next weekend! Towards the end, I was a little nervous because it looked like we might not have enough boards…
But we actually ended up having a little extra! Here’s us installing the last piece of wood, and after so many frustrating setbacks in other areas of the Lodge, it was nice to have something go pretty smoothly!
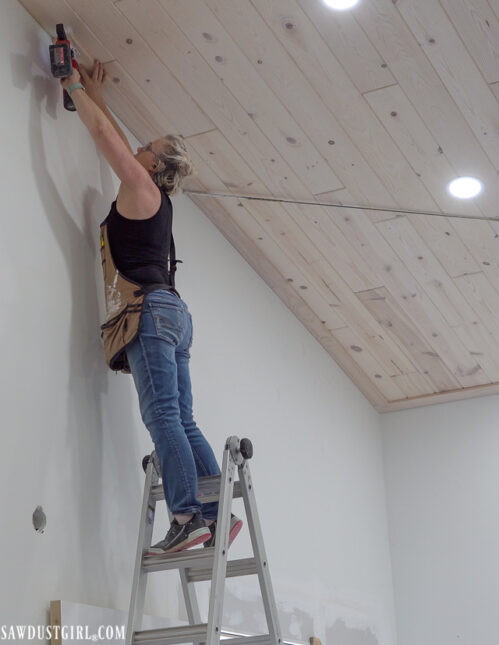
I ended up installing a simple trim around the room. I made it from a 1×3 that I finished with NordicSeal to match the boards. I’m still not sure what I’m going to do about the ridge, but I am so happy with how this sealed ceiling turned out. No banana yellow here!
Because I have to do everything in sections, I am waiting to trim out the other half of the room until I decide on the kitchen vents. I’m also waiting on the windows for the deck to be installed. There’s a lot of waiting for one thing so I can finish another, but it feels really nice to have basically finished the ceilings in here. Lately I’ve been feeling like I needed a win, so this hit the spot!
In case you missed it (I know I’ve been a little M.I.A.) you can see what I’ve got planned for our house and the lodge. I’ve gotten all of the framing (parts 1, 2, 3, & 4) and drywall done, as well as crossing some of the cosmetic stuff off my to-do list.
Also, check out the enormous faux wood beam I installed to cover the ceiling ridge!
John says
Can’t wait to see how you handle the ridge, this step has me waiting to do my master bedroom.
Barbara H. says
Congratulations! This was a HUGE job and I’m sure it’s a relief to have it done. Glad you found the solution for the look you want on the ceiling.
JW says
Yes 🙌🏻 to a WIN!!
Darene Pungercar says
Sandra, you told me about that new finish you had found. Looks like a keeper! I’ll have to try that on my next round of T&G. No caulking either? Right?
Sandra says
No caulking. You need to let the wood move as it wants to.
Dorothy says
Beautiful! Such a BIG project, but so work it. I’m glad you have a win. I look forward to every installment of your progress. Thanks for sharing.
Patt Boley says
Very impressive!
Guerrina says
So good to hear from you!!! The ceiling looks amazing – perfect!
Excavating Contractors says
Great job! Such a huge project indeed! I love the way it turned out. Thank you for sharing.
myra says
Looks great! Did you seal the back and ends of your planks with anything (for sealing) or you sealed only the panels front facing area? I’ll be using the Bona Natural Seal (contains half the amount of white pigment as nordic… debating if I should seal back and ends with clear water-poly)
Sandra says
I only sealed the face that was showing. Like if you installed the planks and then coated them – I just did it backwards.
If possible to do it, I would think coating/sealing all sides would be a good thing. I did not.
lohi karhu says
Hi;
for your readers in Europe, I think that this product is
WB250620001
Bona White
available across Europe, as far as I can tell…
Sandra says
thanks for the additional info
Hara says
Apologies if this is a silly question. I’d like to try this on a solid pine bed, but would I need to use a primer first?
Sandra says
These ceiling planks are solid pine. This product is not used with a primer. It’s a sealer with white pigment that whitens the wood more with each coat.