• Home
  • About
    • Personal Posts
  • Privacy
  • Shop
    • My Account
    • Checkout
    • Email
    • Facebook
    • Instagram
    • Pinterest
    • Twitter
    • YouTube
Sawdust Girl®

Sawdust Girl®

Renovation, cabinet building and woodworking plans and tutorials. Build like a Girl®

  • My Home
    • Clinton TN House
      • Clinton TN House in Progress
    • Maryville TN House
      • Maryville TN House Tour – Completed Rooms
      • Maryville TN House in Progress
        • Basement
        • Basement Storage Closet
        • Bedroom Office
        • Craft Room
        • Dining Room
        • Entry
        • Garage
        • Guest Bedroom
        • Hallway
        • Jack and Jill Bathroom
        • Kitchen
        • Kitchen Entry
        • Laundry Room
        • Library
        • Living Room
        • Loft
        • Madison’s Room
        • Master Bedroom
        • Master Closet
        • Pantry
        • Porch
        • Powder Room
        • Wes’ Office
    • Illinois House
    • Calderwood Cottage
  • My Workshop
    • Clinton Workshop
  • Build & Breakfast
  • Cabinet Making 101
    • Cabinets
    • Doors
    • Drawers
  • Projects and Plans
    • Countertops
    • Beds
    • Benches
    • Bookshelves
    • Desks
    • Gift Ideas
    • Holiday
      • Christmas
      • Halloween
    • Home Accessories
    • Kids
    • Kitchen Cabinets
    • Lockers
    • Nightstands
    • Organization accessories
    • Recipes
    • Sewing
    • Tables
    • Vanities
    • Wardrobes
    • Woodworking
      • Wood Finishing
    • Workshop
    • Workshop Storage and Organization
  • Remodeling 101
    • Baseboard and Trim
    • crown molding
    • Demolition
    • Door and Window Casings
    • Door Installation
    • Drywall
    • Electrical work
    • Flooring
    • Home Maintenance
    • Painting
    • Plumbing
    • Resources
    • Safety
    • Tile
    • Wall and Ceiling Treatments
  • Sawdust Squad
  • The Sawdust Diaries
    • Andrea
    • Ava D.
    • Beckie F.
    • Cara C.
    • Courtney B
    • Fawn T.
    • Jenn D.
    • Kelly C.
    • Kristy K.
    • Lara T.
    • Malisa B.
    • Marnie D.
    • Robin C.
    • Val F.
  • Tools
    • Products
    • Tool Reviews & Overviews
    • Inspiration & Ideas

How to Install a Wood Floor with Tile Inlay

All Posts, Flooring, Jack and Jill Bathroom

Today I’m sharing how I installed a wood floor with tile inlay in the vanity area of my Jack and Jill bathroom. I’m using the same product and technique to install tile flush with hardwood that I shared in my last post.  Wood Floor with Tile Inlay

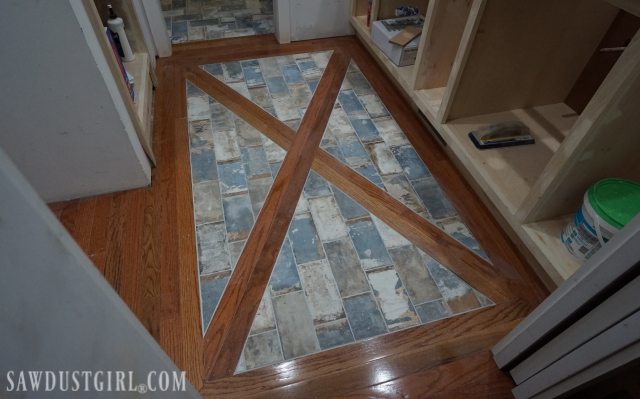
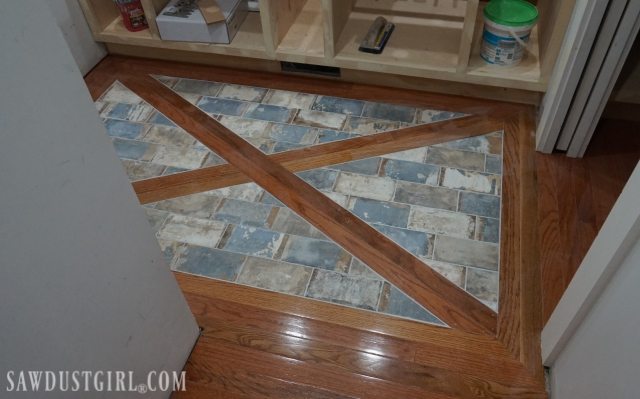
If you’ve been following me for long, you know I don’t love my red oak floors.  BUT, there’s a lot of them in this house so I gotta’ work with them.  I don’t like harsh, blunt flooring transitions.  I like blended transitions from one type of flooring material to another.  Both bedrooms that share this bathroom have hardwood floors, so I wanted to incorporate the wood floor with tile inlay in the shared vanity area.  I started this project last month when Julie was out for her short visit.  We played around with some different designs to find what would work.Wood floor with brick tile inlay
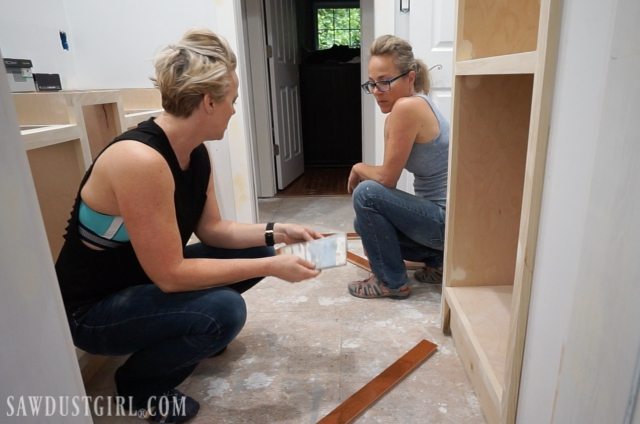
We chose to do a picture frame rectangle with an interior X. However this same technique could be modified to many different designs, such as a diamond or grid pattern. Really any wood-tile combination that suits your fancy and your space.
Wood floor with brick tile inlay


Wood floor with brick tile inlay

Wood Floor with Tile Inlay

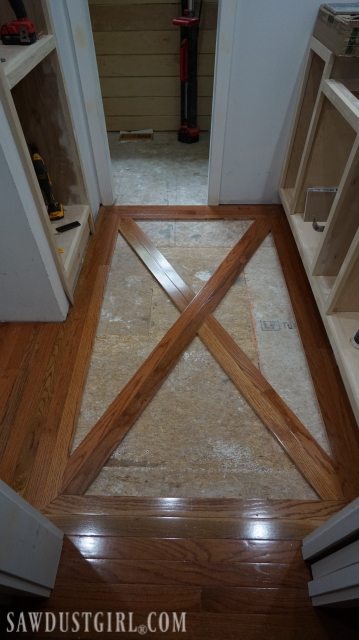
I installed the same STRATA_MAT XT and brick tile that I put in the water closet.  First I cut and dry fit the STRATA_MAT XT into my inlay areas.  It cuts with a basic utility knife or a pair of heavy duty scissors.Wood Floor with Tile Inlay

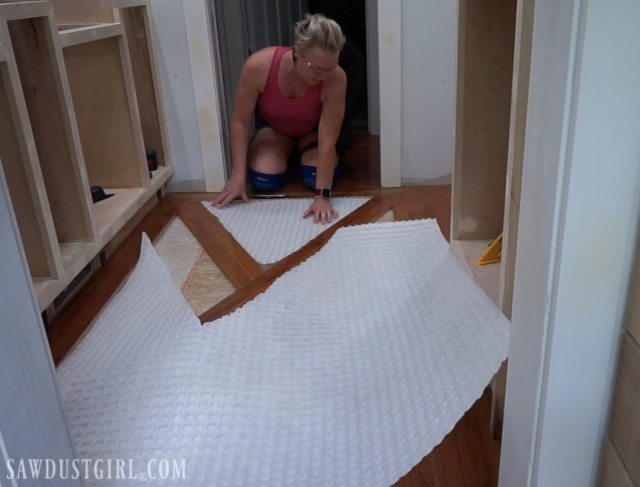
I taped off the wood to try to keep it clean from mortar before installing my  STRATA_MAT XT and tile.  I didn’t win at that!Wood floor with brick tile inlay

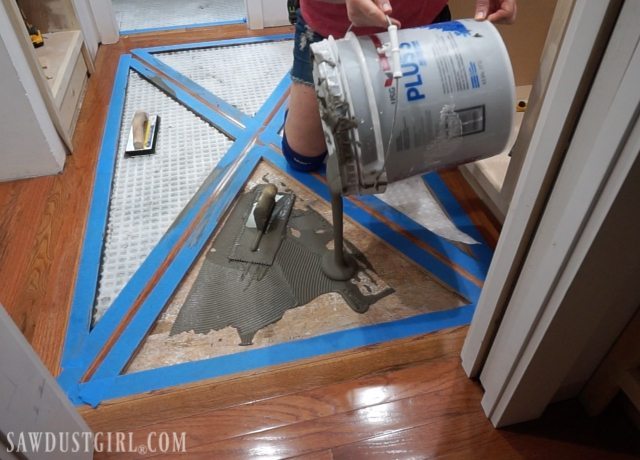
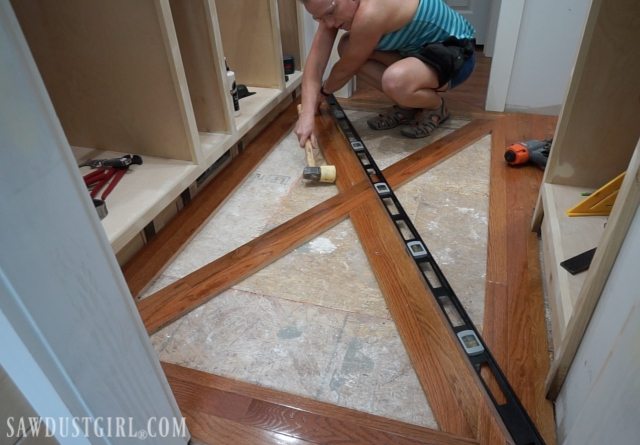
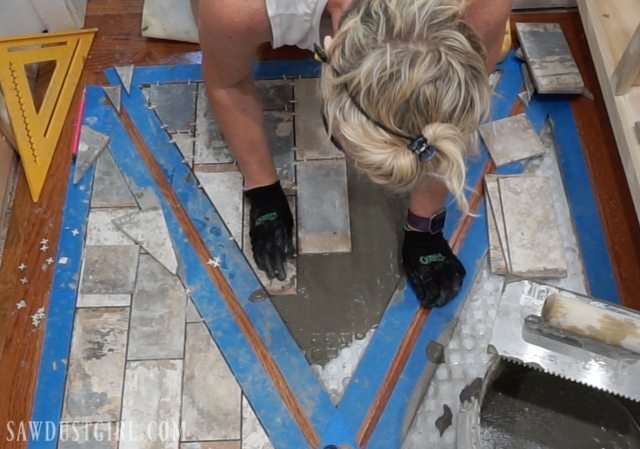
I used a  laser  to keep my brick tiles lined up through each section of the whole design.Wood floor with brick tile inlay

Wood Floor with Tile Inlay

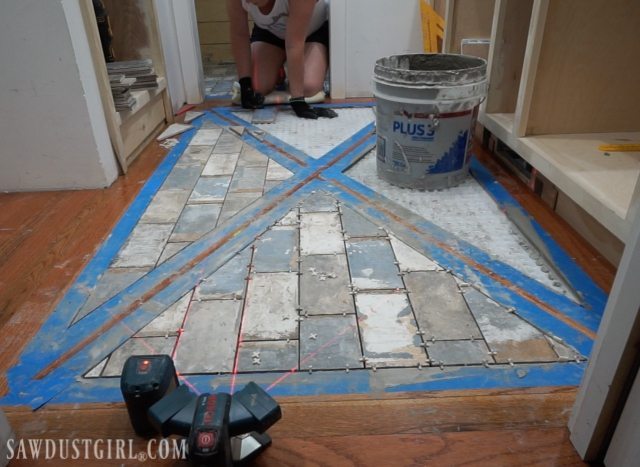
After the mortar set up overnight, I grouted.  You can see I wasn’t able to keep the wood free of mortar.  Oh well.  It cleaned up easily.Wood Floor with Tile Inlay

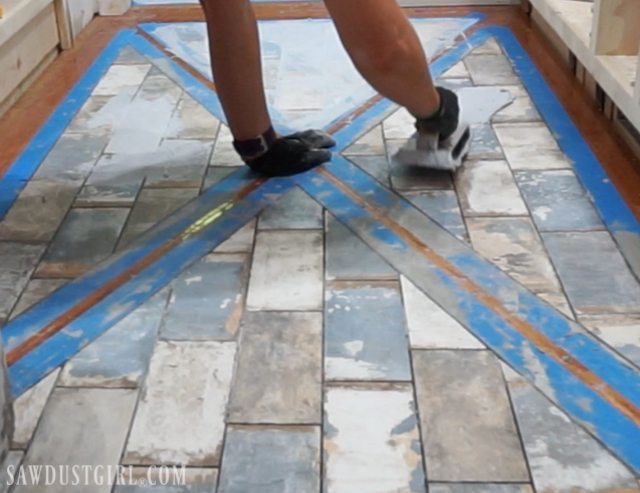
With a grout float, I spread the grout into the grout lines and then wiped up as much as possibleWood Floor with Tile Inlay

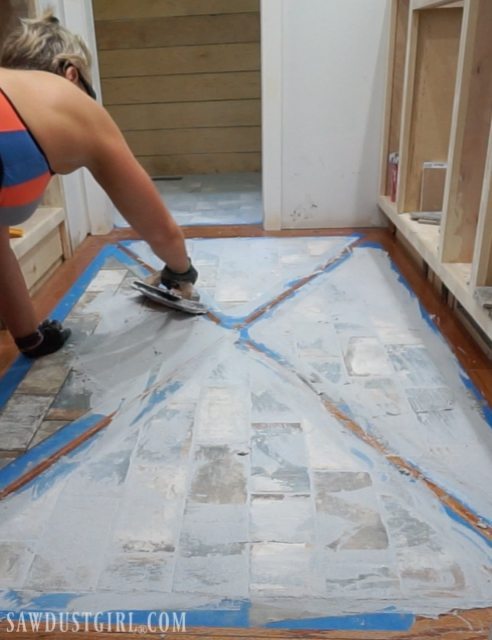
About 10 minutes later…Wood Floor with Tile Inlay

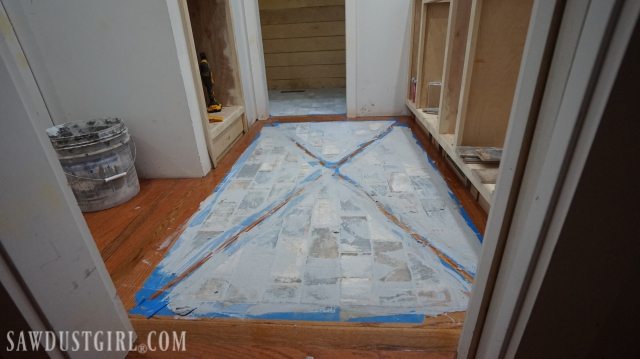
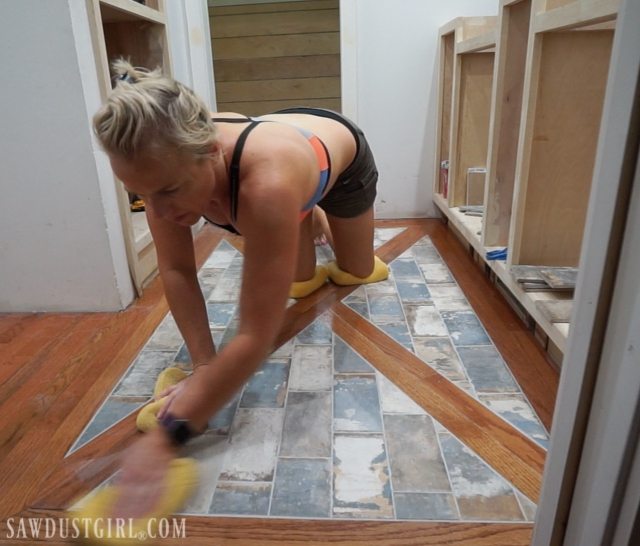
…I wiped up the rest of the grout with damp sponges.  Keep a bucket of water close by to rinse your sponges frequently.Wood Floor with Tile Inlay

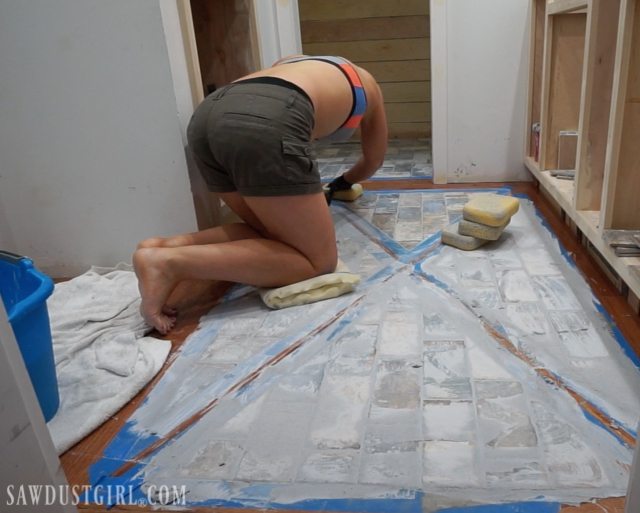
I use 4 sponges; one for each hand and each knee!Wood Floor with Tile Inlay

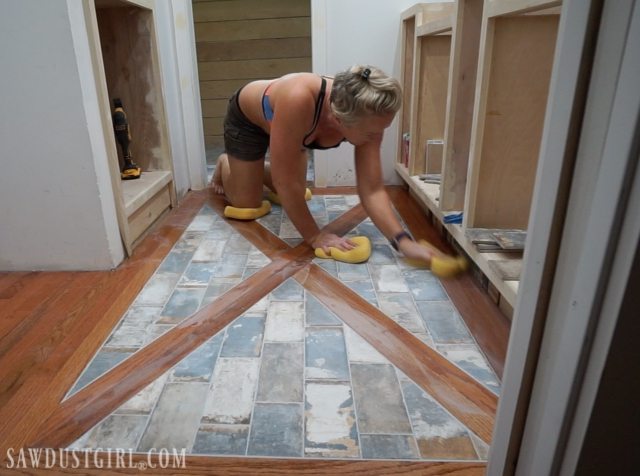
Wipe, rinse, wipe and rinse…

Wood Floor with Tile Inlay

Then the next morning you’ll probably still have some grout haze.  Wood Floor with Tile Inlay

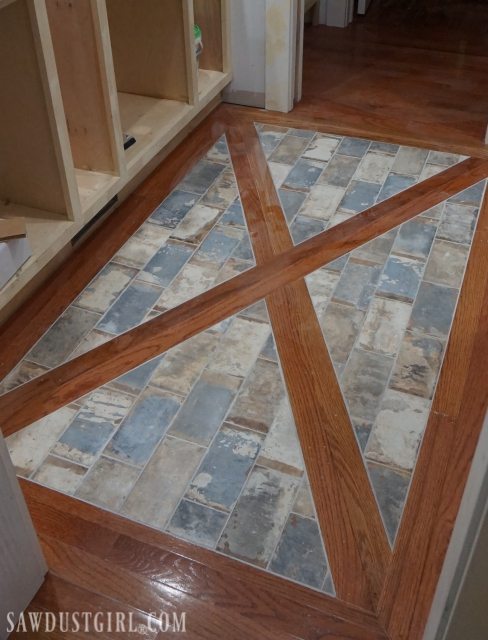
So wipe one more time and then you’re probably good to go!Wood Floor with Tile Inlay

Wood Floor with Tile Inlay

Wood Floor with Tile Inlay

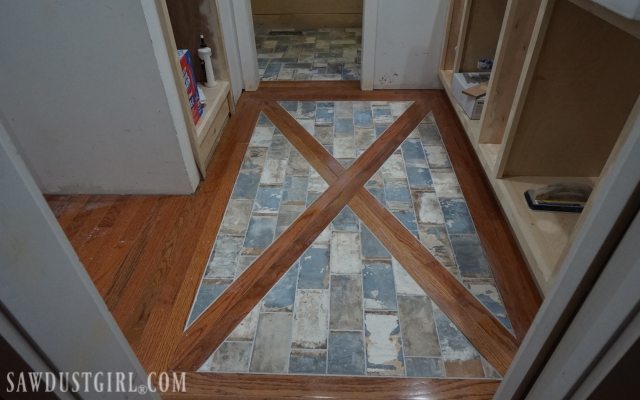
Thank you to LATICRETE for providing the STRATA_MAT XT for this project.

June 27, 2017 · 7 Comments

« How to Install Tile Flush with Hardwood Floors
Plywood Plank Walls – Creating V Groove Planks »

Comments

  1. Teresa says

    June 27, 2017 at 1:43 pm

    Look’n good – what a lovely job. You are just so talented – how did you even decided to come up with the design. Are you going to be echoing the X motif though out the bathroom. Love the colors they are so costal and lovely.

    Reply
    • Sandra says

      April 28, 2018 at 11:11 am

      No just using the X here. Everything else will be shaker.

      Reply
  2. Sharon C says

    June 27, 2017 at 2:09 pm

    Wow, that is so unique and it looks incredible! Amazing design. It’s exciting when it is all coming together. Well done, such a great job.

    Reply
    • Sandra says

      April 28, 2018 at 11:11 am

      thanks!

      Reply
  3. Alex says

    April 27, 2018 at 8:31 pm

    Any issues with wood expansion?

    Reply
    • Sandra says

      April 28, 2018 at 11:09 am

      Not yet. I expect at some point the grout around the X will crack and break out. Then I’ll clean that portion out and use caulk.

      Reply
  4. gina says

    February 3, 2021 at 10:17 pm

    whoa! amazing

    Reply

Leave a Reply Cancel reply

Your email address will not be published. Required fields are marked *

Categories

New Post email notification signup

You Subscribed!

Legal Stuff

Terms of Use

Privacy Policy

Disclosure

Recent Posts

  • Lodge Update – Floors, Cabinets, Countertops, and Appliances
  • Lodge Kitchen Cabinet Progress
  • Halloween Mad Gab – Halloween Party Ideas
  • Concrete Backsplash or Vertical Wall Treatment
  • Building and Installing a Giant Faux Beam on the Ceiling

Disclaimer:

Although it is my intention to provide accurate plans and clear instructions, not all plans have been tried and tested. Using plans or information found on SawdustGirl.com indicates that you agree with the Terms of Use policy and will accept full responsibility for the process and outcome of any project you attempt. All plans are for private use only. Plans and information published on SawdustGirl.com may not be reproduced, republished or distributed in any manner without written permission from Sandra Powell, Sawdust Girl. Actual projects built using Sawdust Girl plans may be published on your own site without instructions or "tutorial" as long as you provide a link to my original post with full post title or "SawdustGirl.com" as link title.

Copyright © 2022 · anchored theme by <a target="_blank"