If you’re just joining in, catch up on Kristy’s bedroom built-ins project diaries here: One, Two, Three, Four.
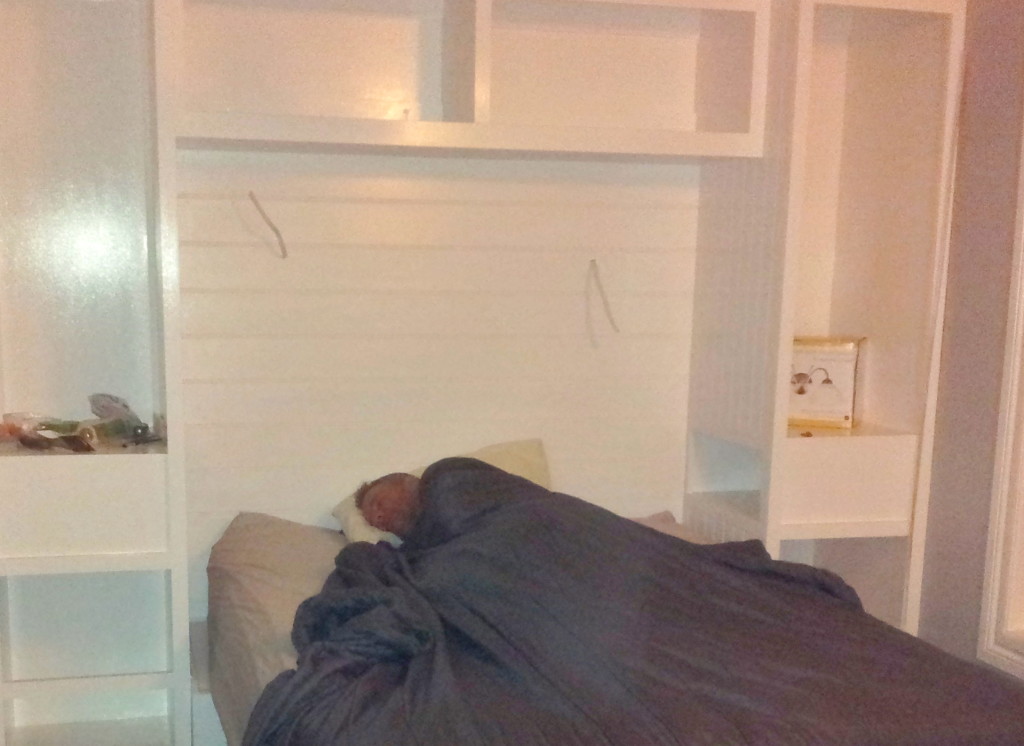
We left off with me having finished the sides of my bed. WELL, as you can see Shane was far too eager to have our bedroom back and he was sooo sick of sleeping on the pull-out sofa that he pushed the sides in together and threw the mattress up on top. Despite the paint fumes and what dust was still present, he claims this was the best sleep he had in weeks and was very sad when I banished him yet again to the lounge room until I am finished with the all the built-ins!
The next step was to attach the sides and create a center between the two which will be the space for my big pull out drawer:
We decided caster wheels would be best for this due to the size and weight of the drawer. I then dutifully measured up and built my drawer about a ¼” too tall…ooops.
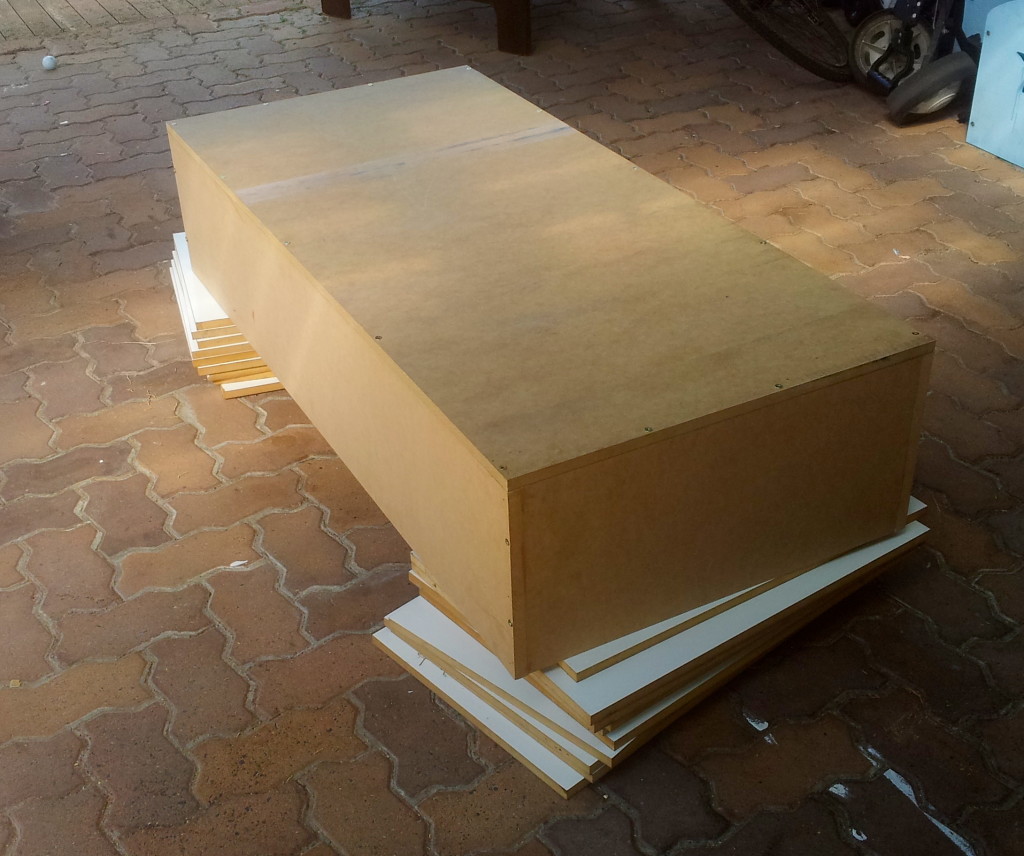
After much thinking (and cursing) I decided to go back to the hardware store and see if they had smaller caster wheels, which they did…. excellent, crisis averted, it fits!!!!
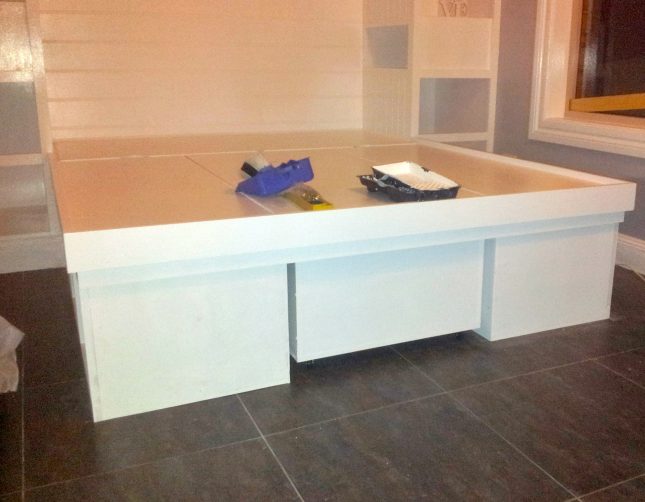
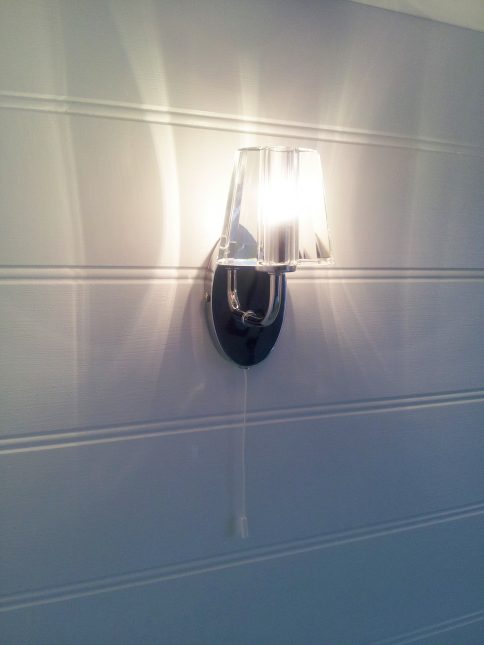
Since the major building part is mostly done now, it is mostly time to make things a bit prettier. That means painting, installing wall lights (finally), adding trims etc. This is actually all really time consuming and I found the more time spent, the better the finish is. Along the way I have been replacing my baseboards and beefing up my window trim too as I don’t want my new fabulous bed and cabinets to put the rest of the room to shame!
So I have now been procrastinating because I am dreading the doors and drawers…. I put off ordering my hinges as I really did not understand all the different types. The terminology is different in Australia, too. So when I went to the hardware store and asked for the type of hinges Sandra suggested, the guys just looked at me like I was talking another language or something. I was also dreading these things called dados and rabbets… WHAT?? Seriously, I am new to this stuff and even after everything I have done so far my brain hurts even thinking about it. I bought myself a second-hand table saw which will come in handy, but then after continuing to procrastinate I went out and bought a router. I felt like I would have more control over this tool.
I spent an entire night thinking about how the heck I was going to do this and decided I need to make some kind of jig that would hold each piece of timber the same way so I could get all my cuts exact. Shane took William out for the morning so that I could concentrate and I went outside and started playing around with my new router. It took me about half an hour to figure it out and create a jig. This job was every bit as hard as I thought it would be but it did get a little easier towards the end…..that is, 2 ½ hours later. I needed ¼” deep dado’s for my door frames and ¼” rabbets for my drawer fronts. I tried doing it in two cuts but (even though it does not sound like much material) the tool was finding it hard to cope, so I started doing three passes until I reached a total of ¼” deep. This made for much neater and more even cuts and was also easier to control the router in my hand.

Tomorrow I am going to pick up my new pocket hole jig (that I wish I had earlier) and beadlock joinery gear to put my doors and drawer fronts together. I was also super excited to receive my beadboard wallpaper in the mail this week which is the closest thing I can get in Australia to actual beadboard. I was skepticalwhen ordering it but now it has arrived I am in love with it and I just know it will look amazing inside my doors and drawer fronts! Not long now peeps we are winding up and I am SOOOO excited to complete the finishes!!! Some of you may have noticed that I have not mentioned anything about building the drawers and installing them on their slides??? That is because it is another job I have put off but I am going to have some beautiful drawer fronts in the next few days so I had better get my A into G and whip up some drawers….watch this space.
Courtney Burge says
Oh my goodness, this is going to be absolutely beautiful!!! Love the wall sconces.
Fawn Teresi says
I love this. I have been debating on a trundle bed for my son…. for when he has his cousins over. Love this!
Jennifer says
Once you had the sides done, how did you attach them. It looks like you have a frame with some additional plywood? I just want to make sure I am doing it right. I am a beginner and I have already made several mistakes. 🙁 I am almost done though. I am now building the middle storage box on casters, but until I know exactly how you joined the two sides, I won’t know if my measurements are correct.
Sandra says
The sides are not connected as the intention was to leave room for the pull out storage compartment. There is a frame and platform laid across the top. The modeled plans are here: https://sawdustgirl.com/queen-pullout-storage-trundle-kristy-collection/