• Home
  • About
    • Personal Posts
  • Privacy
  • Shop
    • My Account
    • Checkout
    • Email
    • Facebook
    • Instagram
    • Pinterest
    • Twitter
    • YouTube
Sawdust Girl®

Sawdust Girl®

Renovation, cabinet building and woodworking plans and tutorials. Build like a Girl®

  • My Home
    • Clinton TN House
      • Clinton TN House in Progress
    • Maryville TN House
      • Maryville TN House Tour – Completed Rooms
      • Maryville TN House in Progress
        • Basement
        • Basement Storage Closet
        • Bedroom Office
        • Craft Room
        • Dining Room
        • Entry
        • Garage
        • Guest Bedroom
        • Hallway
        • Jack and Jill Bathroom
        • Kitchen
        • Kitchen Entry
        • Laundry Room
        • Library
        • Living Room
        • Loft
        • Madison’s Room
        • Master Bedroom
        • Master Closet
        • Pantry
        • Porch
        • Powder Room
        • Wes’ Office
    • Illinois House
    • Calderwood Cottage
  • My Workshop
    • Clinton Workshop
  • Build & Breakfast
  • Cabinet Making 101
    • Cabinets
    • Doors
    • Drawers
  • Projects and Plans
    • Countertops
    • Beds
    • Benches
    • Bookshelves
    • Desks
    • Gift Ideas
    • Holiday
      • Christmas
      • Halloween
    • Home Accessories
    • Kids
    • Kitchen Cabinets
    • Lockers
    • Nightstands
    • Organization accessories
    • Recipes
    • Sewing
    • Tables
    • Vanities
    • Wardrobes
    • Woodworking
      • Wood Finishing
    • Workshop
    • Workshop Storage and Organization
  • Remodeling 101
    • Baseboard and Trim
    • crown molding
    • Demolition
    • Door and Window Casings
    • Door Installation
    • Drywall
    • Electrical work
    • Flooring
    • Home Maintenance
    • Painting
    • Plumbing
    • Resources
    • Safety
    • Tile
    • Wall and Ceiling Treatments
  • Sawdust Squad
  • The Sawdust Diaries
    • Andrea
    • Ava D.
    • Beckie F.
    • Cara C.
    • Courtney B
    • Fawn T.
    • Jenn D.
    • Kelly C.
    • Kristy K.
    • Lara T.
    • Malisa B.
    • Marnie D.
    • Robin C.
    • Val F.
  • Tools
    • Products
    • Tool Reviews & Overviews
    • Inspiration & Ideas

Beckie’s Studio Cabinets – part 2

Beckie F.

Beckie continues building her studio cabinets. Check out part 1 of my studio cabinets build to see why I’m so SORE!  After taking 3 ibuprofen, having a glass of wine, a hot bath and 8 hours of sleep I feel pretty good this morning. Tim, on the other hand, still has a pretty sore back (bad backs run in the family).

So for the sake of marital bliss I decided to set small, realistic goals to get these cabinets built. My husband doesn’t like DIY as much as I do. Winking smile So we decided to shoot for finishing 2 cabinets a day. So that would mean it will take us 4 more days to finish the other 8. Doable, right?

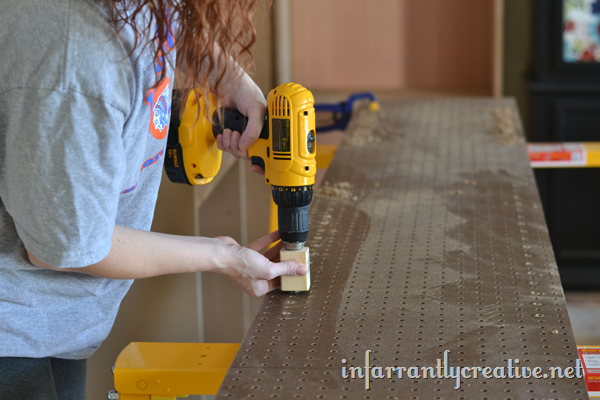
So I spent about an hour and a half cleaning and prepping the work area. I also drilled the holes for the adjustable shelves. I think that is my least favorite part of the build. It is just so monotonous.

craft studio adjustable shelves

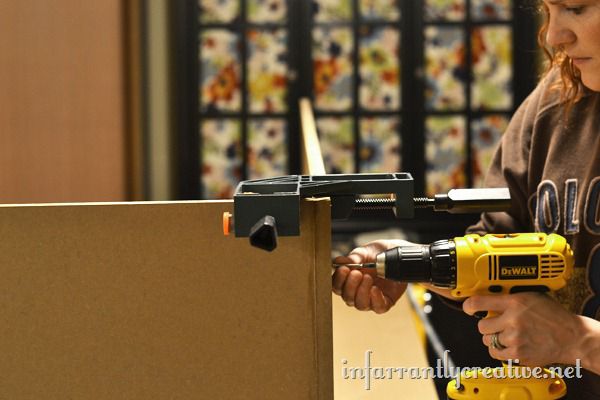
We then waited until the kids went to bed and assembled the other two shelves. The second cabinet took us an hour and half. The third cabinet took us 42 minutes. We are making progress people. Yippee! I am feeling like we can easily knock the other 6 out in three more days barring no crazy emergencies.

using corner clamps on cabinets

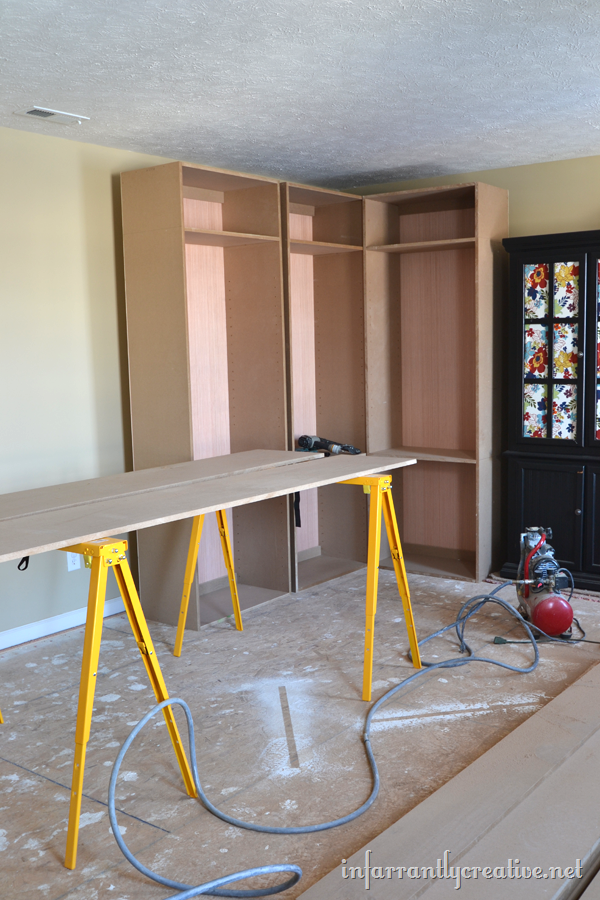
I texted Sandra today and she is also wanting me to build the bases and the face frames. At this point I am wondering if she secretly has plans for me to build the whole thing. There is no way I would have ever agreed to doing it all myself. I think she is just waiting for the right time to say” “I am not coming you can totally do this.” I am sceeeered, we’ll see.

building cabinets

Day 3

I am starting to get excited. With 3 cabinets down I am starting to see the vision. This is going to be such a fun place for not only me to enjoy and work but also my kids to have a dedicated place to create too. I am excited about that.

Things I noticed today…

1. If I screw the corner clamps in slightly it is easier to adjust the shelves than fidgeting with the shelves and then tightening all the way.

2. I love those Spax screws. They are UH-MAZING!

Day 4

I think the next few days are going to look the same. Me measuring, marking and drilling the adjustable shelves out during the day. Then my husband and I spending about two hours assembling two shelves a day. So only two more days of building cabinets. And then we move onto the bases. I don’t know why I feel nervous about that. I guess I feel confident building 100 of these boxes but building a base seems scarier. But Sandra says I can do it, so I am choosing to believe her.

The benefit is my body is used to the work now so it is no longer screaming. I know Sandra said to build the cabinets on the floor but that just wasn’t working for us so we did raise them up on sawhorses. We are being meticulous about measuring and being as perfect as we can. But again, I don’t want to lose my DIY buddy in the process so saving his back is allowing this project to move forward.

Building studio cabinets

Day 4, 5 , and 6

Holy crap are these cabinets ever going to be done?!?!? I know I just said I could build 100 of these studio cabinets but I am so over this. I just want to be done with this part. Everything is going smoothly I just want to move on the to next part.

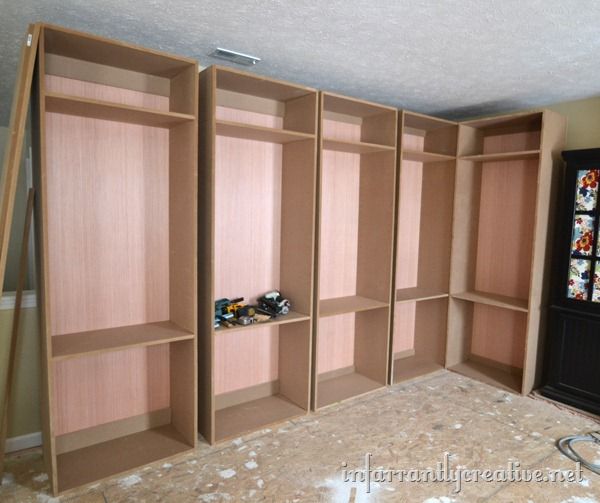
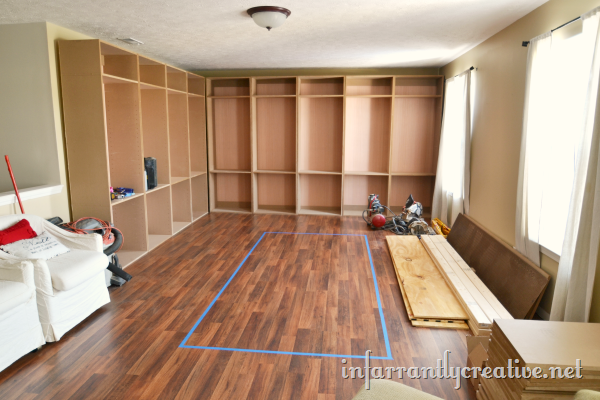
Day 8 We finished them and I couldn’t be more proud of us. Yay Team Farrant! Yah Coach Sandra! So after 8 days of building and two days of installing flooring here is what we have going on.{Squuuueeeeaaalll!!}

Built in studio cabinets

…………

Beckie’s studio cabinets are really coming together.  It’s finally to the point that it looks like something.  I LOVE it when a project hits that point.  It gives you fuel to keep going.  Beckie wrote about why she decided to tackle this project on her blog.  It’s amazing how much money you can save by doing it yourself (even if you have to hire a coach to help you along.  WINK)  See part 3 of Beckie’s studio cabinets.

– Sandra

June 2, 2017 · 2 Comments

« How to install a cabinet base with a floor vent
Beckie’s Craft Studio – 3 »

Leave a Reply Cancel reply

Your email address will not be published. Required fields are marked *

Categories

New Post email notification signup

You Subscribed!

Legal Stuff

Terms of Use

Privacy Policy

Disclosure

Recent Posts

  • Lodge Update – Floors, Cabinets, Countertops, and Appliances
  • Lodge Kitchen Cabinet Progress
  • Halloween Mad Gab – Halloween Party Ideas
  • Concrete Backsplash or Vertical Wall Treatment
  • Building and Installing a Giant Faux Beam on the Ceiling

Disclaimer:

Although it is my intention to provide accurate plans and clear instructions, not all plans have been tried and tested. Using plans or information found on SawdustGirl.com indicates that you agree with the Terms of Use policy and will accept full responsibility for the process and outcome of any project you attempt. All plans are for private use only. Plans and information published on SawdustGirl.com may not be reproduced, republished or distributed in any manner without written permission from Sandra Powell, Sawdust Girl. Actual projects built using Sawdust Girl plans may be published on your own site without instructions or "tutorial" as long as you provide a link to my original post with full post title or "SawdustGirl.com" as link title.

Copyright © 2022 · anchored theme by <a target="_blank"