Today I’m sharing how to install tile flush with hardwood floors, like I did in my bathroom. Can you believe the Jack and Jill bathroom finally has floors? I’m making slow but steady progress. The vanity area of the bathroom has a combination of hardwood and tile. The room that contains the shower and toilet is all tile but it butts up to the wood in the other room. 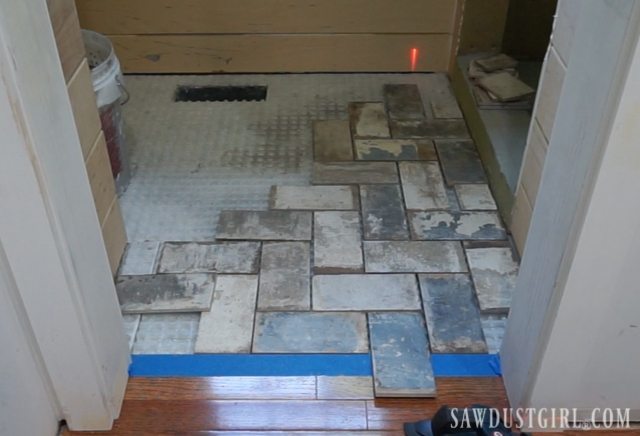
I wanted the tile to be flush with the hardwood floors so I installed the tile on LATICRETE STRATA_MAT™ XT . It helps create an even transition between typical ¼” to 3/8″ thick tile and 3/4″thick hardwood flooring. The STRATA_MAT XT replaces 1/4″ thick cement board — it’s much lighter, easier to cut and installs with just mortar (no screws required).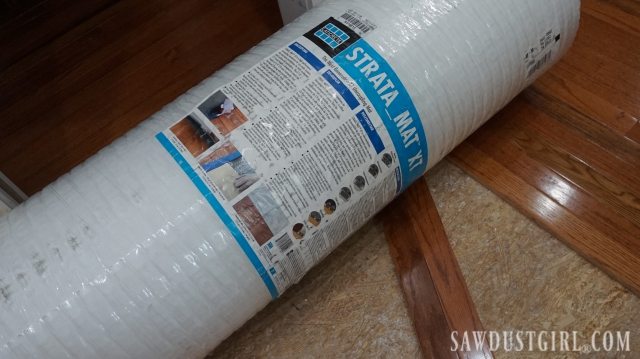
Installing STRATA_MAT XT
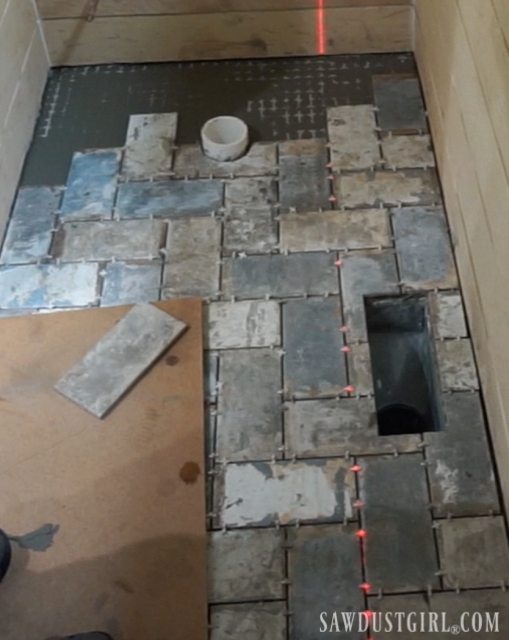
I cut a piece of STRATA_MAT XT to fit in the powder room. Then I test fit that piece and cut out the vent and toilet drain hole. It was a little too short on the “L” but it’s not a big deal. I’ll add a small piece to fill in that spot. It is important to leave 1/4″ between the STRATA_MAT and the walls to allow for movement.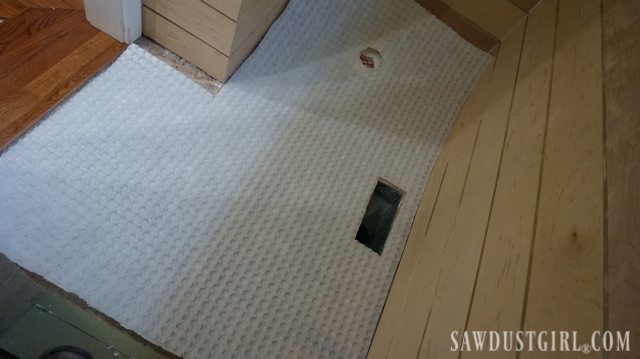 STRATA_MAT is designed so you can install it with the same mortar you’re using to install your floor. You select your mortar based on the type of tile or stone you are using. I’m using porcelain tile so I’m using LATICRETE 4-XLT, a polymer fortified adhesive or “large and heavy tile” mortar.
I started in the back corner and worked my way out of the room, covering the entire floor with mortar.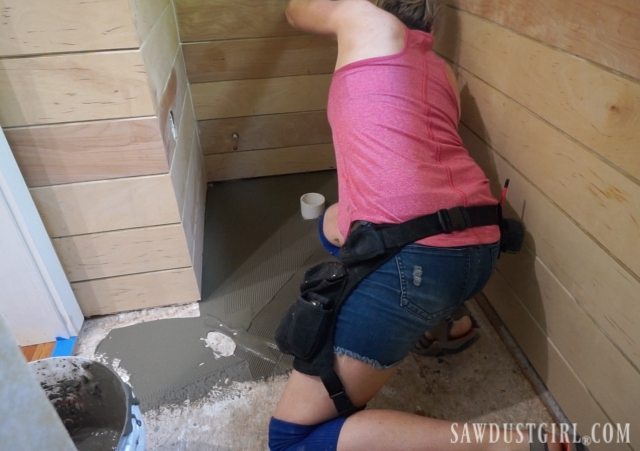 Then I set the STRATA_MAT in place, fabric side down.
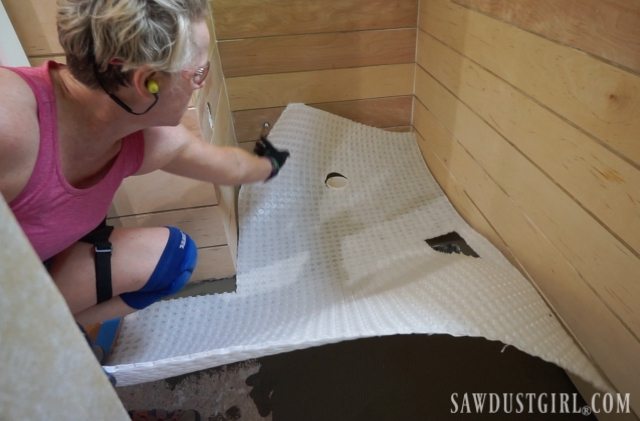 I crawled around on the floor with my grout float to press the STRATA_MAT down into the mortar. Because it is somewhat transparent, you can see when it is properly embedding. The light spots show where the mat is not embedded or there’s not enough mortar.
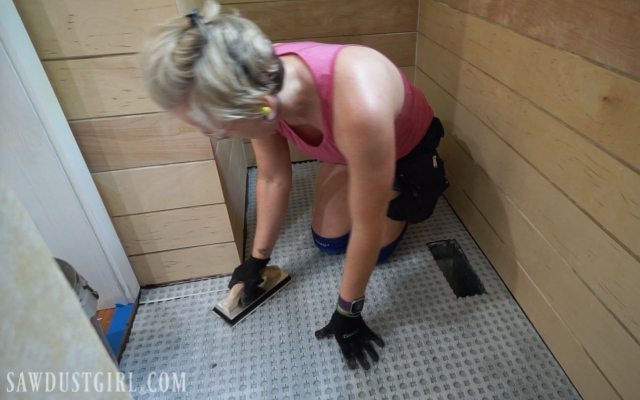 You can pull up a corner of the STRATA_MAT to check coverage. If you don’t have 100% coverage, you need to push harder or add more mortar. 🙂
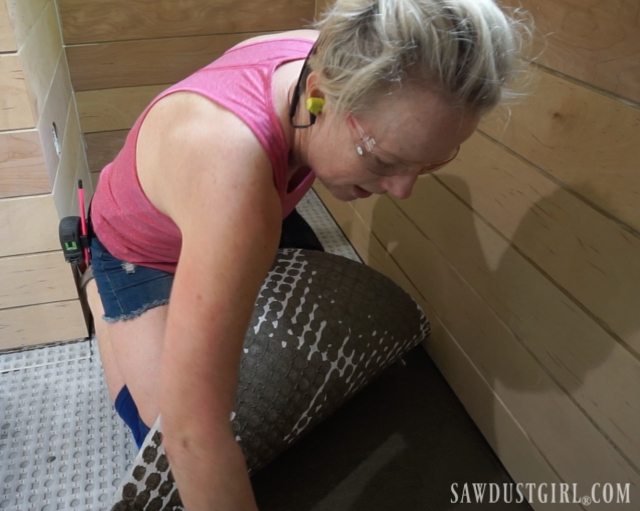 Once the STRATA_MAT is properly bedded in the mortar, you can immediately start tiling. No need to wait for the mortar to dry.
How to Install Tile Flush with Hardwood Floors
First use the flat side of the trowel to fill all the vents with mortar. Then apply mortar with the notched side.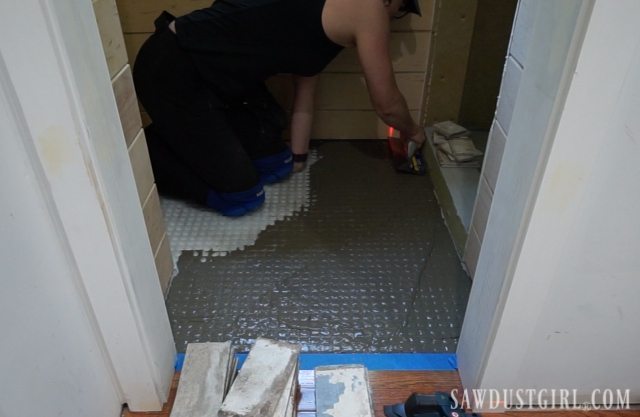 Skim the back of each tile with mortar as well before you lay it.
 The STRATA_MAT XT is 5/16″ (8mm) thick. I’m using San Juan Azul Porcelain tile from Floor and Decor. It is 10mm thick which is 1mm thicker than the 3-9mm which is what LATICRETE recommends in order to install tile flush with hardwood floors. 1 mm is a very small difference so I went with it.
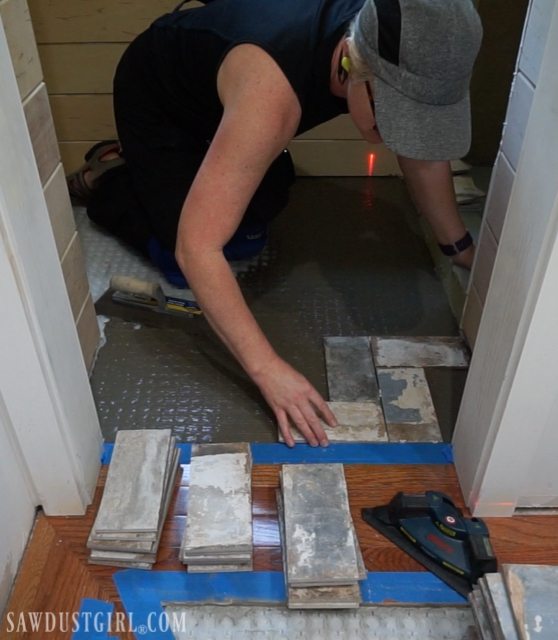 I worked in sections; spreading mortar and then setting tile. That gave me time to make cuts and get all the tile set before the mortar would start to skim over.
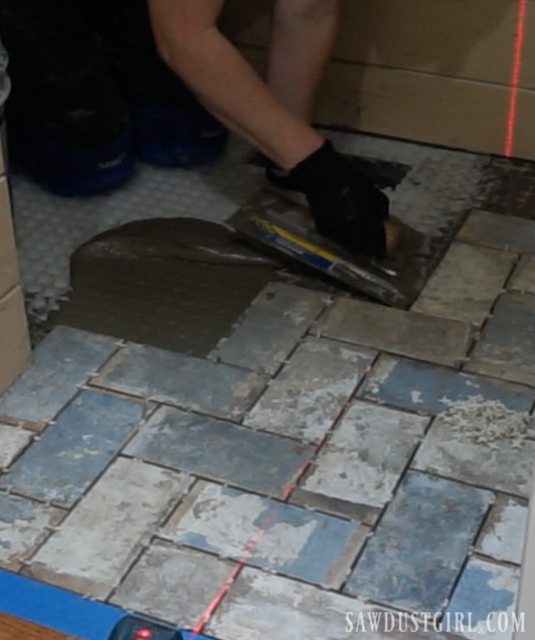
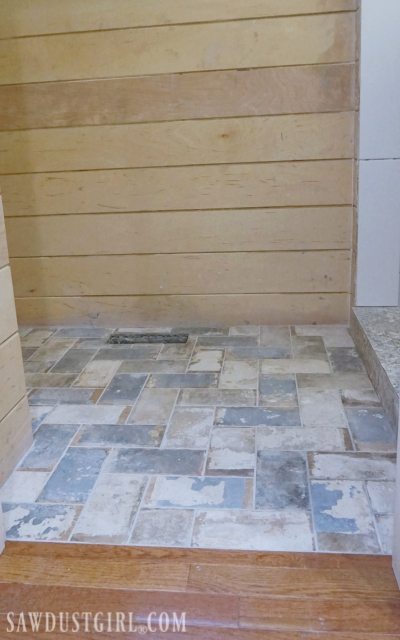
I started tiling at the entrance to the room because that was the most important area. Even though it meant working myself into a corner and having to be a gymnast to get out.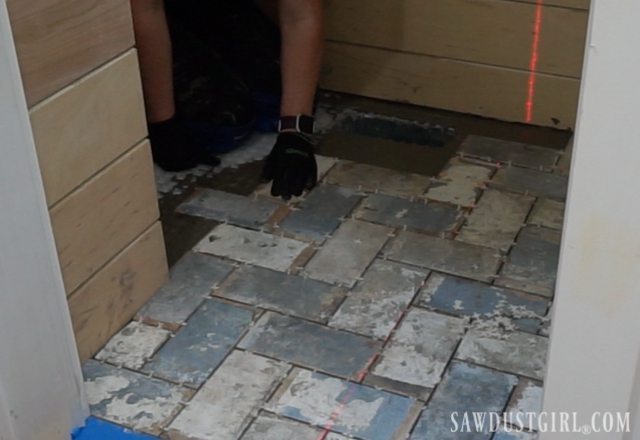
To get to the back corner of the room, I set a piece of MDF on top of the tiles I had already put down. This distributed my weight over a large section of tiles and prevented them from moving much. 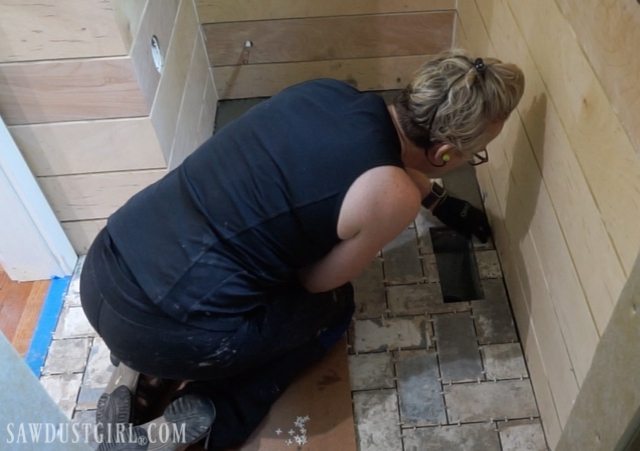
 After finishing the back of the room, I removed the board and adjusted a few tiles that had moved slightly. I let the mortar set overnight and grouted the next day. I grouted right up to the hardwood. As the wood moves, that grout will start chipping away. In a couple years (or when it bugs me enough), I’ll use a sanded caulk that is color matched to the grout to fill the voids.

Thank you to LATICRETE for providing me with the STRATA_MAT™ XT for this project. Please note: STRATA_MAT™ XT is not a waterproofing membrane.
Courtney says
I came across your blog and I love everything you’ve posted! Thanks for sharing your progress, and those hard times. 🙂
Courtney
Sandra says
Thanks Courtney!
david says
looks good learned while doing bathrooms that the tile looks even better if you butt the tiles together. very thin grout disappears you see the tile. looks really good without the damn grout starring you in the face also there is the cleaning thing. prefer to level the floor on paper then lay the tile against the walls and glue bottom of tile set repeat to first cut. discovered that this is the fastest and easiest way to lay on floor or wall.
your one smart woman would like to have a granddaughter like you
david
Sandra says
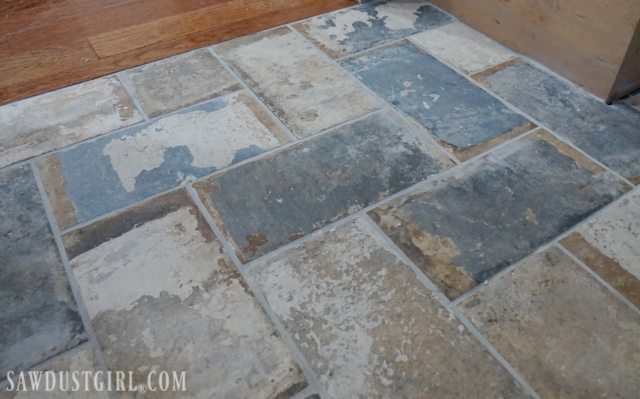
Interesting David. I actually like the grout line in this tile. I actually wish I would have done a wider grout line because I wanted the tile to look like old brick.
Janell says
Excellent technical information. Thanks.
The tile itself is hideous. 🙁
Sandra says
LOL Well, I love the tile …which is why I bought and installed it.
Kathy says
Sounds something like a modern way to do the old-fashioned mud set floors. Might consider something like this to patch my bathroom floor during a remodel.
Robbie Frentress says
I love th tile! Where did you get it?
Ramseylove says
have you learned of any other product like the STRATA_MAT? As the only dealer around me does not sell to residential consumers.
Bob Parisi says
I am removing a section of wood flooring and installing ceramic tile against an outside door to allow incoming traffic not to damage the wood, a transition area approximately 3’ x 7’. Do you need to take any precautions so that the grout does not leech into the wood where they butt together?
Sandra says
I didn’t do anything to my prefinished wood floors. If you’re worried about it you could apply poly to the side of the wood that will butt up against the tile (or grouted).
Joanna Lacman says
I am taking this project on in my kitchen ,,, novice but enthusiastic person here: any tips on removing baseboard in kitchen area and additionally if I reuse the boards I remove do I have to do anything about the groove and lip on them? Or does the grout take care of that?
Sandra says
I have two tutorials on removing baseboard. “type it in the search bar”. You can carefully remove the tongue on wood floors that are already installed with an oscillating tool. (Or a track saw if you have one).