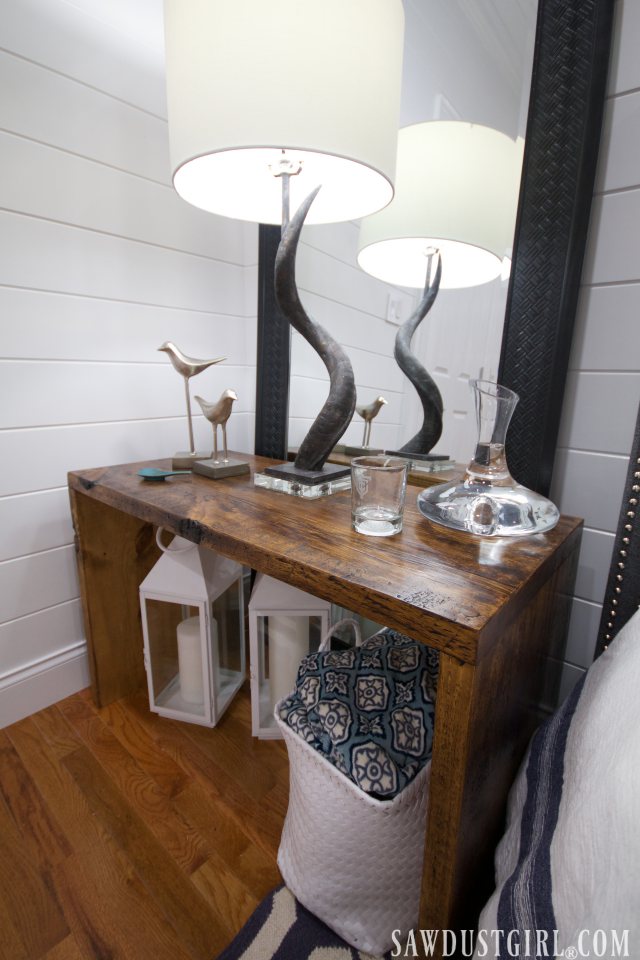
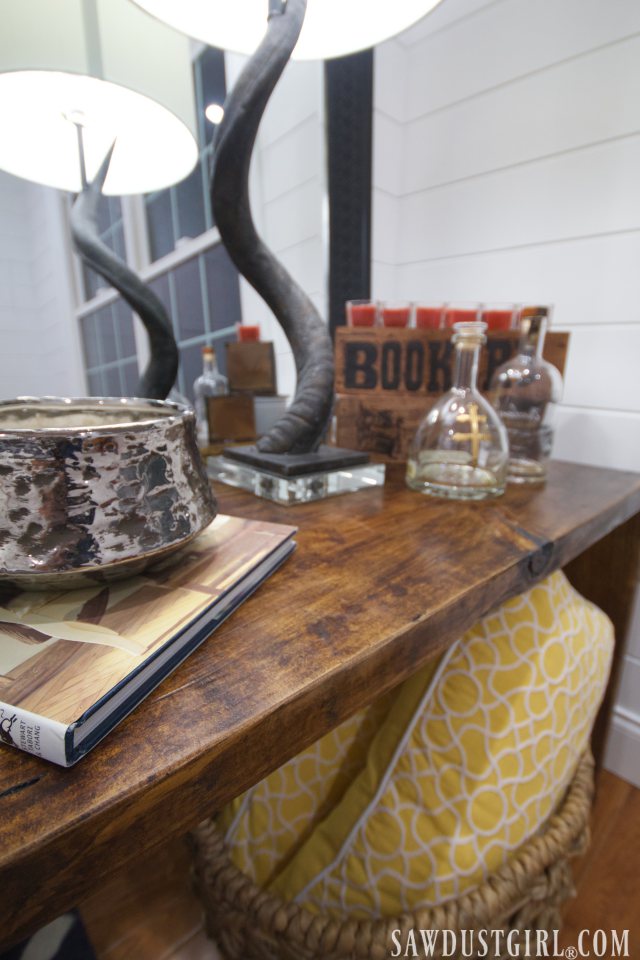
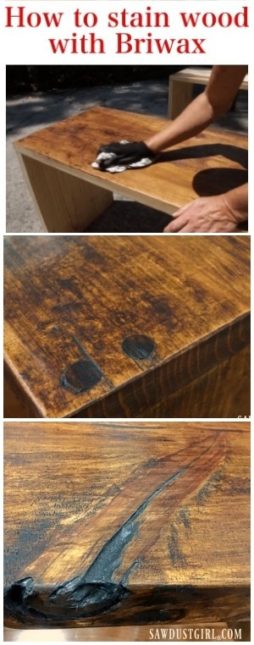
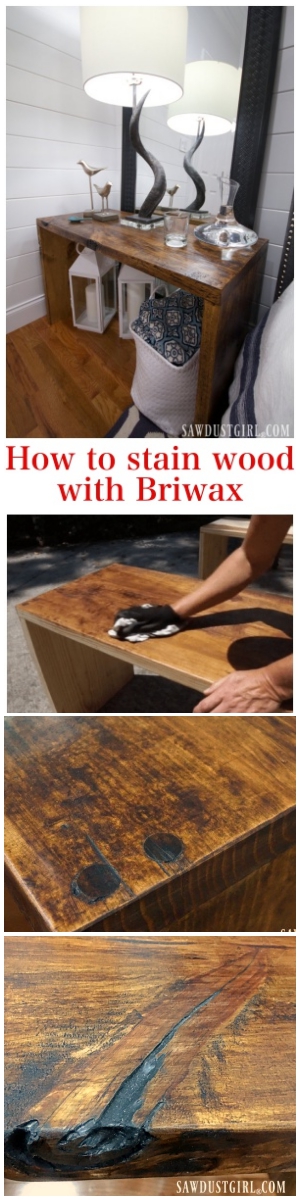
How to stain wood using Briwax for a fast, easy, foolproof finish. We used Briwax to enhance and accentuate the natural character and beauty of the two nightstand DIY tables. We built these tables out of pine which has a tendency to take stain unevenly which makes for a blotchy, streaky, cheap looking finish. Not at all what we had in mind for these gorgeous tables. We chose to stain our wood using Briwax for an all in one stain, seal, and protect finish that is fast, easy to apply, and gives you an old world hand rubbed finish.
 How to Stain Wood with Briwax
 How to Stain Wood with Briwax
I love using Briwax to stain and finish wood, especially pine. It leaves a beautiful touchable luster that enhances the natural character of the wood. It provides a lot of control over adding and removing color and is very forgiving of mistakes. With Briwax it is easy to layer colors and create depth and dimension that would be difficult to achieve with other stains.
However it does have drawbacks:
- Not suitable for wet areas
- Not great for high abuse areas
- Cannot be painted. If you ever want to refinish and paint a piece, the Briwax would need to be stripped
How to Stain Wood: Materials
- Briwax (I used both the light and dark brown on this project)
- Soft white cloths for application and buffing
- Chemical resistant gloves
- furniture or wood to be stained
How to Stain Wood: Step 1 Prep
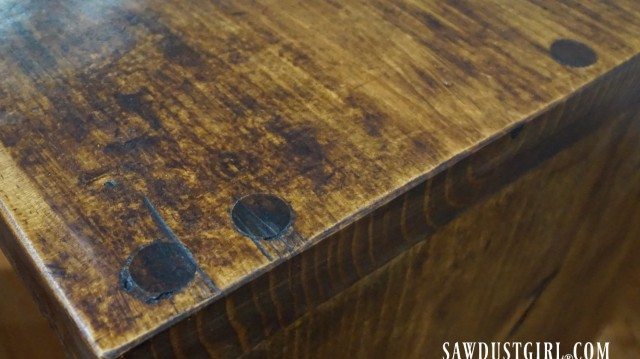
We added some distressing to our tables in areas that needed more character. One thing I like to do when working with furniture created from joined wood, is to extend knots and distress marks from one board into the next. This helps create the illusion that the piece is made from one solid slab.
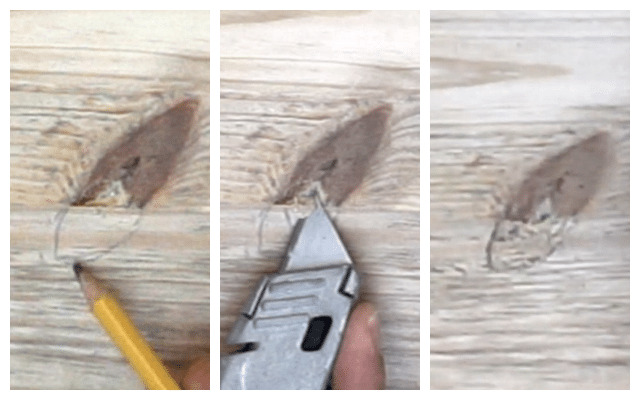
Lightly sketch with pencil the knot or markings onto the connected board. Then use tools to cut and gouge the wood to continue patterns and marks across the seam.
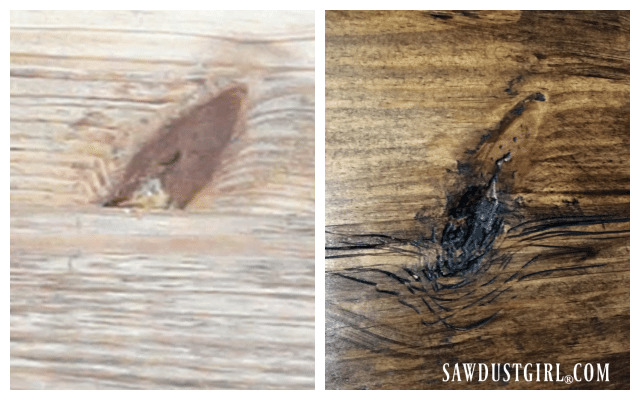
Here is a before and after of the same knot. The added distressing makes the seam almost disappear.
Once we were happy with the look of the piece we sanded lightly to create a touchable surface, without removing the character and beauty of the natural wood. After sanding wipe with tack cloth or mineral spirits soaked rag to remove sawdust. Make sure that any excess glue or other resist material has been thoroughly removed as it will not take the color and will leave light marks.
How to Stain Wood: Step 2 Apply wax
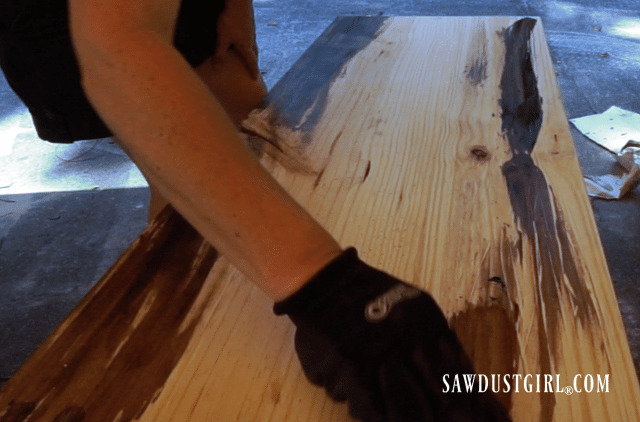
Apply the Briwax with a soft cloth making sure that your skin is protected with chemical resistant gloves. The solvents in Briwax are aggressive and will eat through regular latex gloves quickly! My favorite method of Briwax application is to have the Wood and Briwax in the sun so that the wood and wax are warm. This is not necessary, but results in a richer glossier finish.
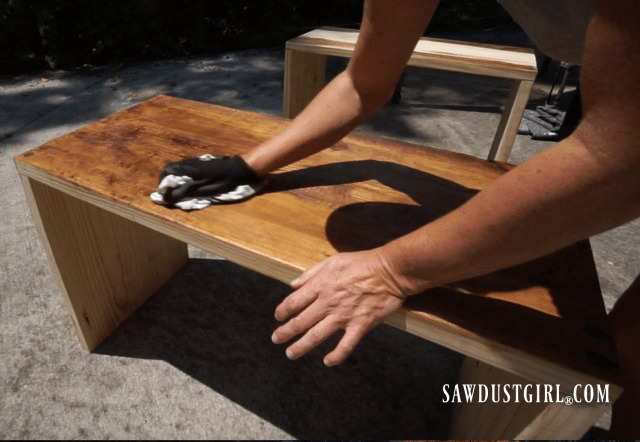
If using two colors, start by wiping the darker color over areas where the grain is wide and the wood lacks interesting features. Let dry for a few minutes and then use the lighter color to wipe over the entire piece up to, and slightly overlapping dark areas. Be careful not to remove the already applied darker wax. Allow to dry until the wax sets up and gets hazey. Usually 10-15 minutes.
How to Stain Wood: Step 3 Buff
Now buff the piece until the wax develops a warm luster and is not tacky to the touch. Step back and view the piece to determine if there are light, or streaky areas that you would like to darken. Wipe. pounce, and dab the darker wax onto these areas and let dry. then buff again.A car buffer works great for buffing, especially if you are doing a large surface area. I like the upper body work out, but after a while my arm felt like it was going to fall off.
Continue to build the color and wax finish up until you are happy with the finished look. If there are areas that become too dark, color can be removed by wiping with the lighter color briwax or mineral spirits.
How to Stain Wood: Step 4 Voids
For small voids and tear outs, simply fill with wax as you are applying and then buff smooth. These imperfections suddenly become part of the character and beauty of the piece.
Larger voids and knot holes can be filled with wood putty and sanded during prep (use a dark wood filler to accentuate these areas). Or, like on these tables, I used black caulk after they were finished. I didn’t want to change the character of the knots so much as just stabilize them. 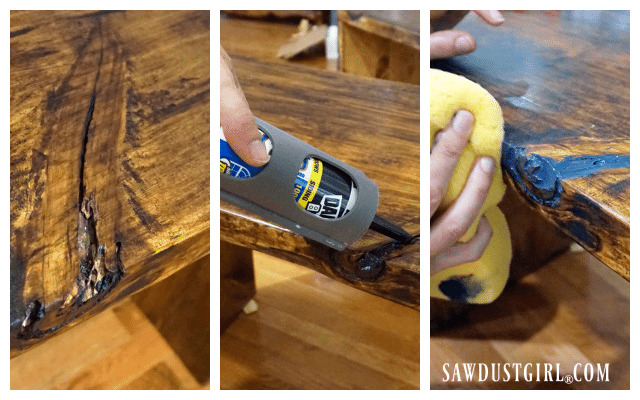
The only tricky part is to not get the finish overly wet. Wring the wiping sponge or cloth to the quite dry stage.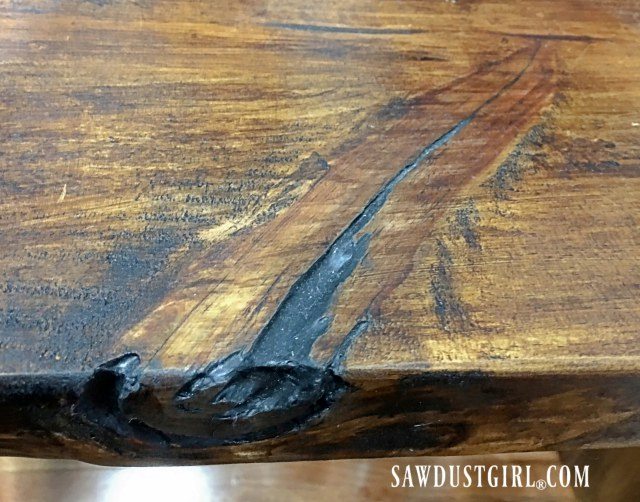
The nice thing about Briwax is that you don’t have long dry times between coats. Simply apply, wait a few minutes, and buff. Immediately see where to add or subtract color and continue to build the finish till you are happy–instant gratification!
Now all that was left was to put them into Sandra’s gorgeous new guest bedroom.
Wendy S Burchik says
Julie,
Your tips are absolutely genius!
I love the one about extending the knots, fabulous!! And filling the bigger ones with the dark chalk, wow, where was this post when I was refinishing a very rustic table for a client earlier this summer? I think I learned more in this one post than I have in reading 10 of others and as a bonus your tables are gorgeous and I can’t wait to try the wax finish on my next project.
Thank you, thank you, thank you!
Julie Anderson says
Wendy thank you so much for kind words. I would love to see how use wax to finish a project.
Kris Scally says
What a great post!! I love your suggestion/and pictures showing how to minimize the areas where you joined the pieces. I also liked the black caulk suggestion. One question – where did you get the black caulk. I have never seen it before.
I have to second the comments of Wendy, as I feel like I really learned from this post and know I can use your tips in projects I have in the future! Thank you!
Julie says
Thanks so much Kris! The black caulk is Dynaflex from Dap and it comes in a lot of colors including white, black, brown gray, and dark bronze. It is easily my favorite caulk and you can get it in most home improvement stores.
Iris day says
I love this look. It is precisely what I have in mind for the open shelving in my kitchen above my new farmhouse sink. The shelves would be far enough above the sink to avoid splashing but will hold our frequently used dishes, glasses, etc. Will this finish hold up?
jcorley says
I love this post!! I do have a question about the caulk – can you caulk the voids prior to applying the wax? Thinking if it’s not advisable to get the wax too wet, could this step be done first?
Sandra says
If you don’t wax first, the black caulk will stain the wood in the areas where you don’t want it to.
Robert Peterson says
Very helpful post. Does the wax solvent have an odor when you are working?
Joy says
Hi Wendy!
LOVE this post! The tables look amazing, and you are quite creative! I realize it’s been a couple of years since this was last active, but I’m hoping since you said you love using Briwax that you might be able to help me. I am redoing my kitchen cabinets using Briwax and LOVING the look. My problem is that my cabinet faces are veneer and are “taking” the wax differently than the cabinet fronts (What are they called? The parts you see right above/beside/below the doors?) I have tried several layers of the wax and it just isn’t working. My cabinet doors look like your tables but the other areas are still orange! Do you have any suggestions of what I can do to those parts to make them blend/take the wax? They are original 1960’s orange colored cabinets that have a polyurethane stain on them. I chose Briwax because I didn’t want to sand. 🙂 Any suggestions? Thanks for sharing your project!
Tina says
Joy, I have your same question and am looking all over for an answer. The sides of most inexpensive cabinets are laminate material and I don’t want orange end pieces showing from my living room! Good luck!