I’m a big fan of drawer storage and I almost always use Blum Tandem plus Blumotion drawer slides. Once you decipher the Blum instructions for drawer sizing, notching and boring, Installing the drawers is super easy! (For help with deciphering the Blum instructions, check out my tutorial for sizing and building drawers for Blum Tandem drawer slides.)
Install the drawer slides to the inside of your cabinet
(Tips for inset drawers here!)
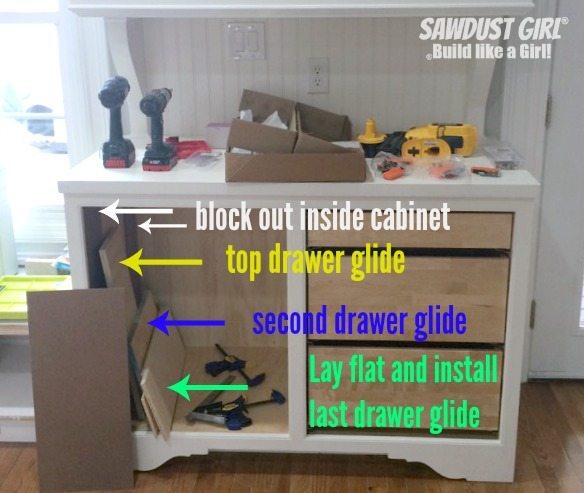
- For cabinets with face-frames you have to block out the cabinet side to be flush with the face-frame. (Or use back brackets if you prefer. I don’t.)
- Cut scraps of wood to support the drawer slides while you install them.
- Cut one board for each drawer slide height. Install the left slide, put the board on the other side of the cabinet and install the right slide. This ensures that each side is in exactly the same location and makes it easy to install multiple cabinets with drawers in the exact same spot.
- Start with the top drawer slide set and move down. (Or the lower slides will be in the way of your boards for the slides that need to be installed above the lower ones.)
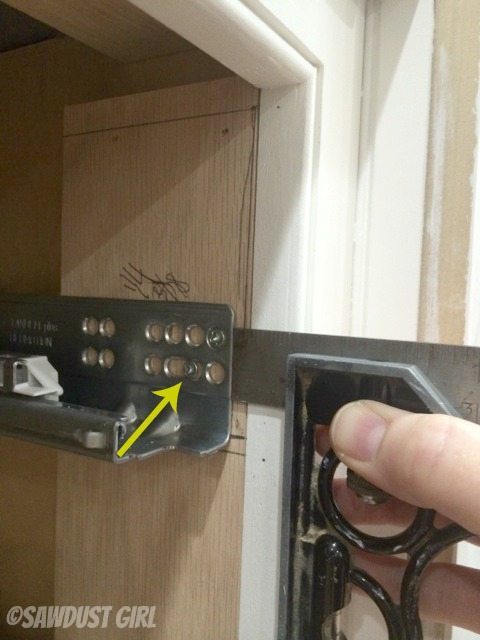
- The Blum instructions say to install the drawer slide 15/16″ behind faceframe for inset drawers, which is what I’m doing. I use a combination square set to 15/16″ to give me an exact measurement every time.
- I loosely install one screw in the slotted hole, hold my combination square in place to ensure my slide is exactly at 15/16″, then tighten the screw.
- For good measure I add another screw above that one!
- Then drive one or two additional screws towards the back of the glide. The instructions actually tell you where to drive your screws if you’re one to follow the rules that closely. (Maybe I am – maybe I’m not. Not telling.)
The blocking isn’t pretty but it does the job. I used scraps of whatever wood I could find that would make my cabinet side flush with the beading I added. (Planning ahead would be great but sometimes I just wing it so I do what I have to do.)

Once you get the hang of it – it goes really quickly. Get all your slides installed on the cabinet and then you can get the locking mechanisms installed on the drawers.
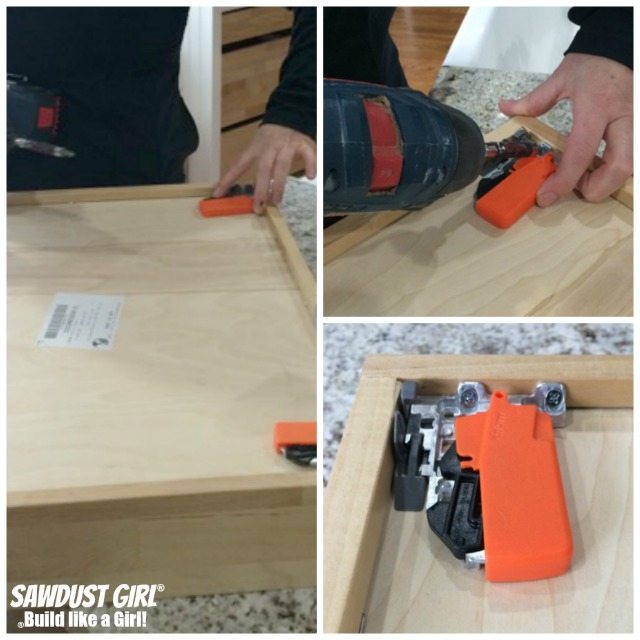
Install locking mechanism on drawers
- Set the right locking mechanism in the right front corner of the drawer.
- Drill pilot holes through the two holes.
- Drive two screws into the locking mechanism making sure not to strip them!
- Do the same for the left locking mechanism on the left side of the drawer.
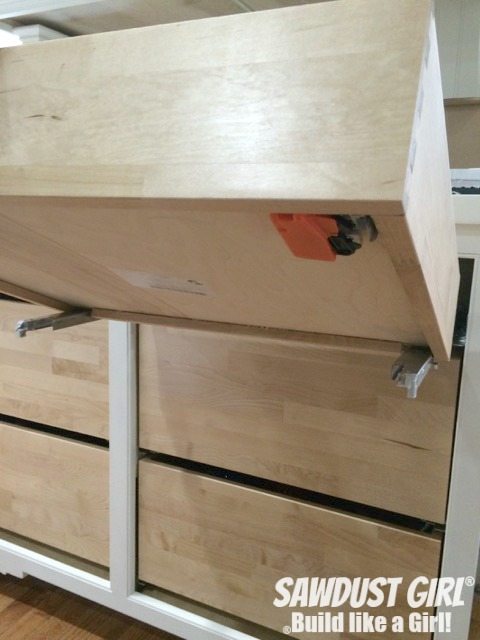
Now you’re ready to put the drawer in the cabinet! The drawer slide passes through the notch in the back of the drawer.
Then push the drawer back into closed position until you hear the locking mechanism click. Then pull the drawer open and you’re done!

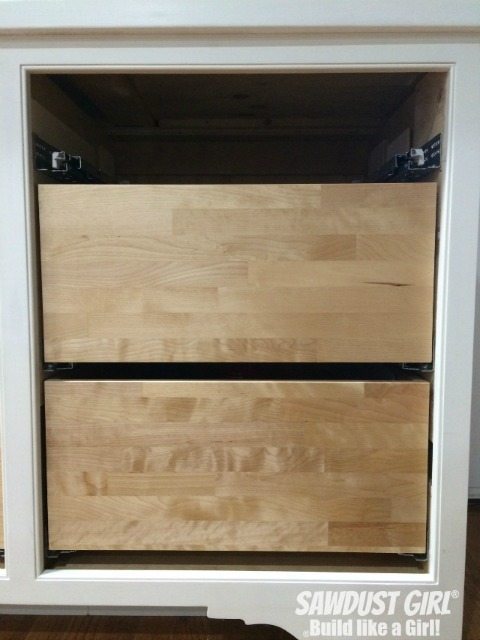
There is a bit of play with these glides so if your drawer and cabinet are not sized EXACTLY perfectly for each other you don’t have to spend 6000 hours, screwing, closing, opening, unscrewing, shimming and starting all over again. If you’ve installed many drawers with metal drawer slides you know what I’m talking about.
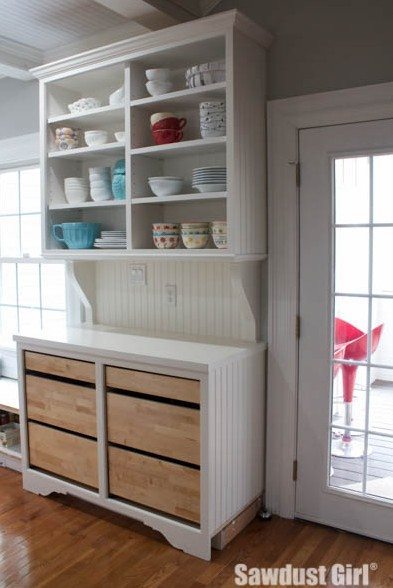
So the drawers are in now and we’re using the China hutch!
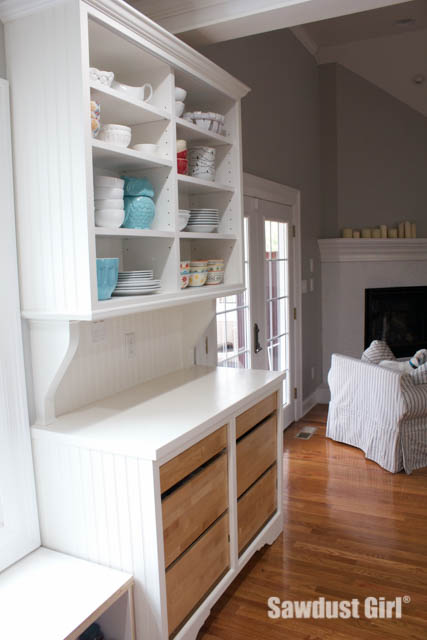
It’s also dressed up with crown moulding, corbels, decorative toe-kick and a beadboard backsplash.
Of course I’m still not finished. I have to address the baseboard and then build my drawer fronts and doors. I’ve been waiting for warmer weather for that part because I can’t “finish” 500 doors in my workshop. I need more space which means “outside” and I need good weather for that. Luckily, I think Spring has finally sprung so I can get to it!
Frankie says
It’s looking fantastic! I’m always so impressed with the beautiful work you do.
Sandra says
Thanks Frankie. We’re really starting to enjoy this kitchen!
Mary R says
Thank you so much for the awesome Blum tutorial, I have a question…..what is attached to the sides of the cabinet or is anything attached?
Sandra says
Yes, the metal drawer glide is attached to the cabinet. The locking mechanisms are the only thing that is attached to the drawers. I added a couple more pictures and descriptions to make that more clear. Thank you for your question!
Val says
Somebody was impatient to put the dishes on the shelves :))) It looks great Sandra!
I have a question about the yesterday topic. You used filler wood behind the side crown moldings. What did you do/are going to do about the bottom edges of the filler wood? Are you going to paint the whole cabinet once it is finished? Or just touch the visible edges of the wood?
Sandra says
LOL Of course! Since that blocking was installed on my “bottom of the crown” line, it’s perfectly flush with the bottom of the crown so all I did was caulk and it looks perfectly invisible.
Sebastian says
You can certainly see your skills within the article you write.
The sector hopes for even more passionate writers like you who
are not afraid to mention how they believe. Always go after your heart.
novec 1230
Riley says
How would you suggest blocking out an existing reach in closet (pantry that is about 28 inches deep)? It needs to be blocked out 4-5 inches on each side. This is a typical closet type pantry with a typical builder grade interior hollow core door.
Im using blum tandem box with the metal sides. (These are left over from prior project).
I know blum makes some sort of rear mounting bracket as well. Just not sure best approach.
Sandra says
It might be easiest to build cabinet boxes to put into the closet. Then it’s square and correctly sized.
Louie Law says
I appreciate the clear explanation of what Blum slides need. Blum makes amazing drawer slides but directions – not so amazing!