Hey, guys. I have another room redo to share. Kind’a. It’s not a re-do as much as re-fresh, but it’s a good one! I mainly just PAINTED but I also tossed the valances and a very odd cabinet duo. Those minor changes made the world of difference. Not only to how the room looks, but also how it feels when you’re IN the room.
This is a sponsored conversation written by me on behalf of Purdy. The opinions and text are all mine. Purdy makes a complete line of brushes, rollers, scrapers and other painting tools.
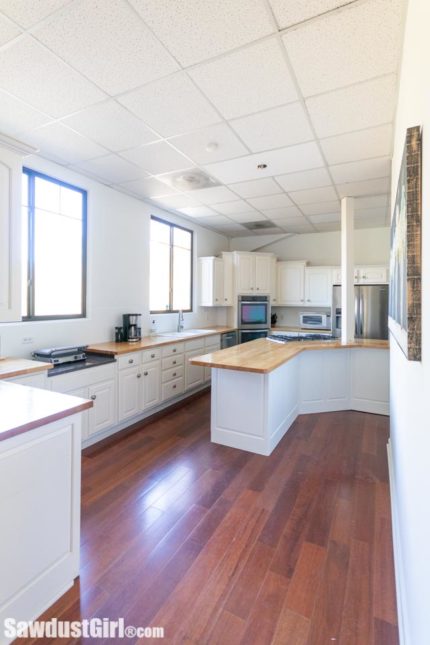
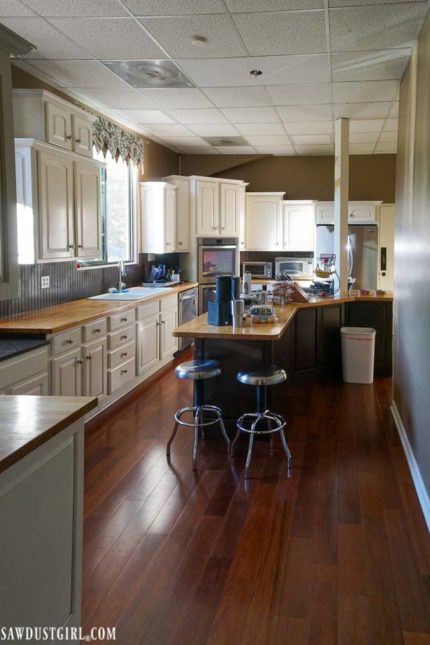
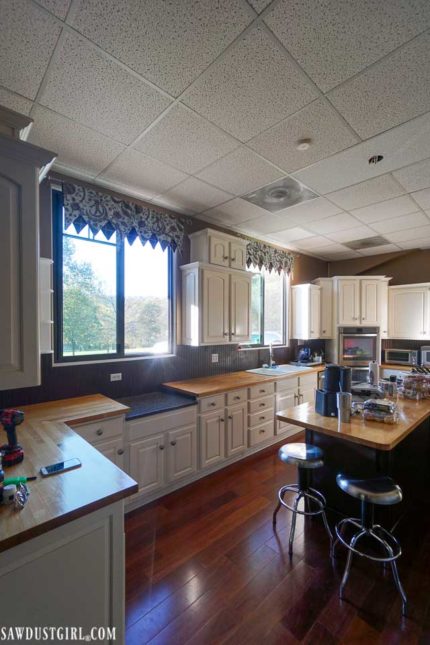
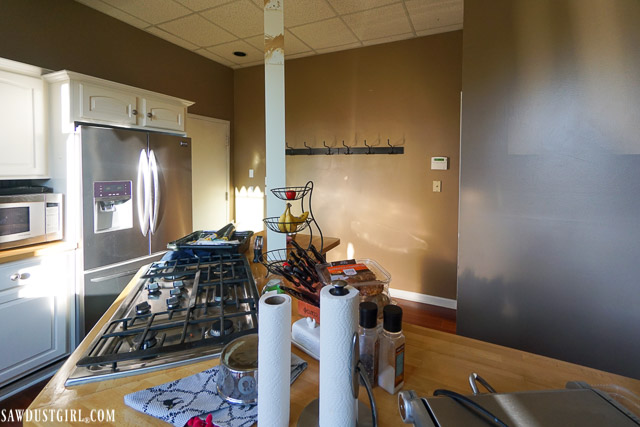
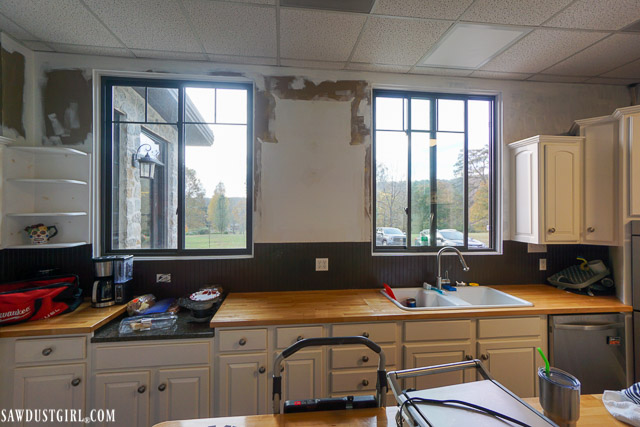
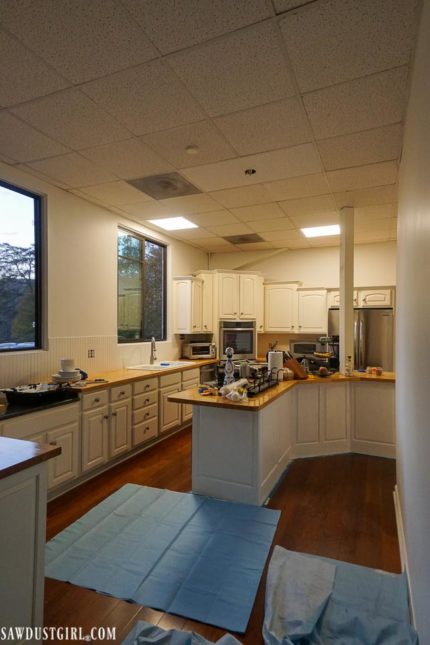
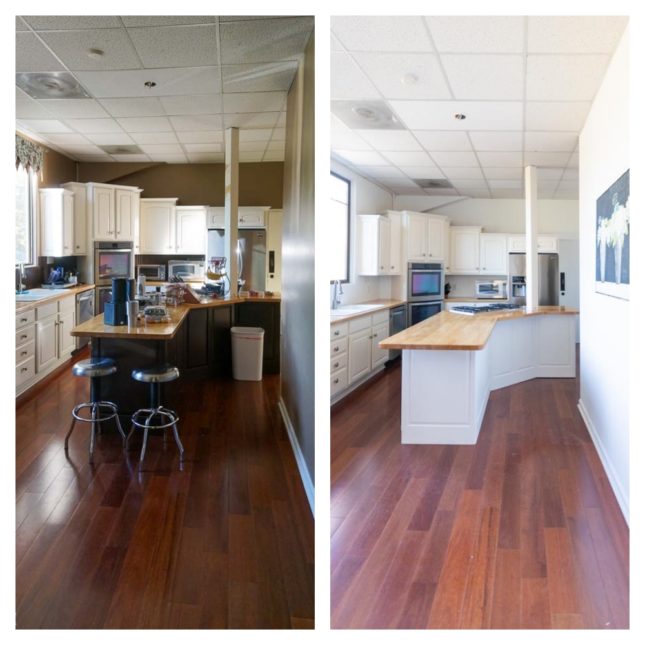
Kitchen Before
If you saw my new house tour post, the whole house has drop ceilings. I changed them out to plank ceilings in my Piano Room, which I love! I’m not changing them out in the kitchen until after I rip out the pantry and I won’t do that until I’m ready to gut the whole kitchen (or build a new one elsewhere). So the ceilings are staying for now –as well as the cabinets and appliances. (For the most part.) Even though I’m not ready to tear everything out and reconfigure the entire space, I knew I could make it better, with just a little effort (but no structural changes).
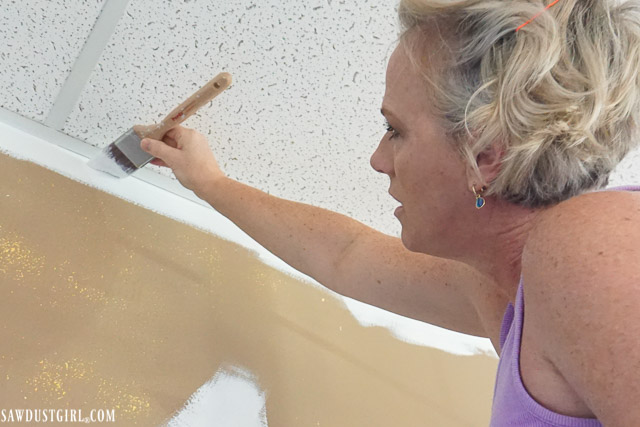
A Fresh Coat of Paint
I learned something from living with ugly paint in the master bedroom for 7+ years and finally painted it — right before we moved out. Once we painted it, it looked and felt so much better to be in that space! I didn’t do anything different to it except for paint. But the paint, by itself helped loads. So, I decided that I’m not going to wait for 7 years to change ugly paint in this house!
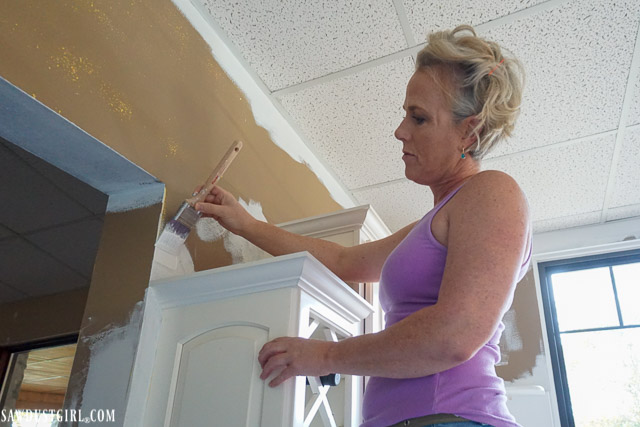
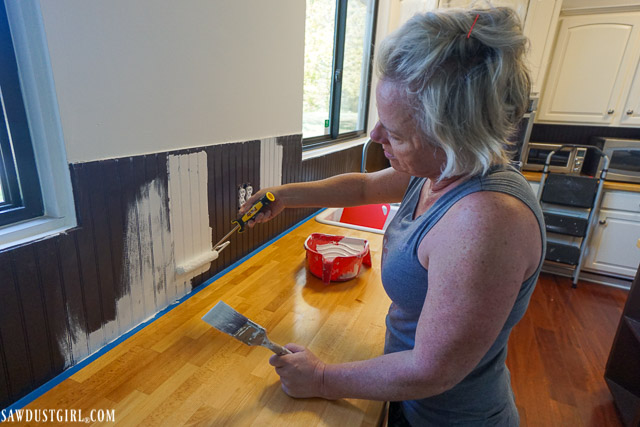
The new kitchen has the ugliest brown/green color I have ever seen as wall paint. The dark color made the small space feel cramped, dated, and dirty. Not the feeling I want to have when in my kitchen.
Purdy Paintbrushes recently reached out to me about partnering for a room transformation, and I thought, perfect! Let’s get to the painting of my FRESH and FANCY new kitchen!

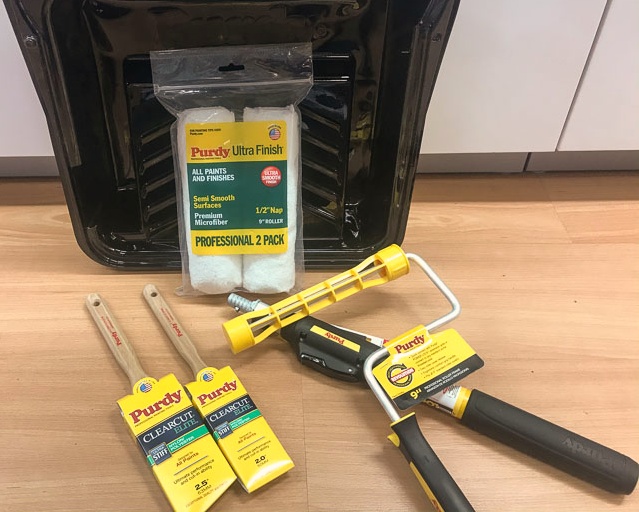
Paint and Materials
For this project, I used Sherwin Williams, Infinity paint from Lowe’s in Alabaster and these Purdy products:
- ClearCut Paint Brushes
- 2.5″ angled
- 2″ flat
- Ultra Finish 9″ x 3/8″ Roller Cover
- Power Lock Extension Pole
- Revolution Frame
- Nest 9″ Tray
- Nest 9″ Tray Liner
- Ultra Finish mini Roller Cover (Not pictured here because it’s something I grabbed from my shop when I decided to paint the island cabinets.)
About Purdy
Purdy was founded in 1925 and makes a complete line of brushes, rollers, scrapers and other tools to serve painting professionals and DIYers who want professional results. Purdy brushes are hand-made in the United States.
Purdy brush makers always “sign” the brushes they make with a sticker bearing their names, so you know each brush meets the highest standards for quality.
To learn what brushes and applicators will work best for YOUR project, check out www.purdy.com/resources/tool-selector/.
There are also some great “how-to” videos that offer helpful tips and tricks for your painting projects, including how to care for your brushes and rollers when the job is done. Check out www.purdy.com/painting-resources/painting-videos/how-tos.
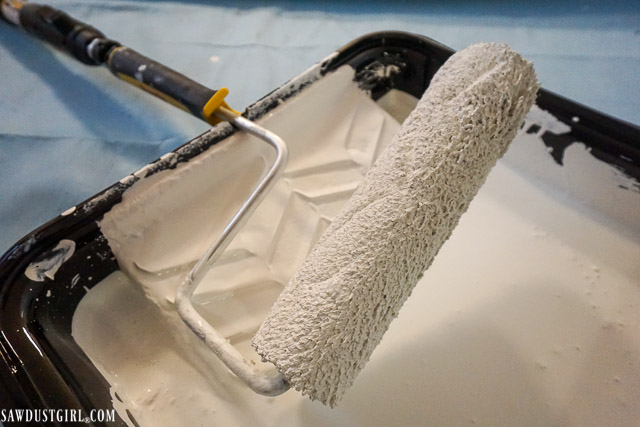
Investing in a high-quality tools results in perfect results from the beginning. With a Purdy applicator, you won’t get brush marks, lint on your walls, or have to re-paint because of a poor finish. Many people spend hours choosing their paint and paint color, but do not realize that a Purdy applicator can affect the paint project’s outcome.
Purdy brushes are handcrafted in Portland, Oregon by skilled craftswomen and craftsmen, many of whom have more than 30 years’ experience. Each brush is “hand-signed” by the maker, who applies a special sticker bearing his/her signature to each brush she makes.
Purdy brushes and rollers are specially designed for different coatings and surfaces, ensuring that you get professional quality results every time.
A few Extras that weren’t planned
After I had painted the large walls and started cutting in above the windows, I realized how much I disliked the odd cabinet duo in between the windows. I decided that had to come down. Proud moment, I actually warned Wes (or asked for his thoughts) before I did it!
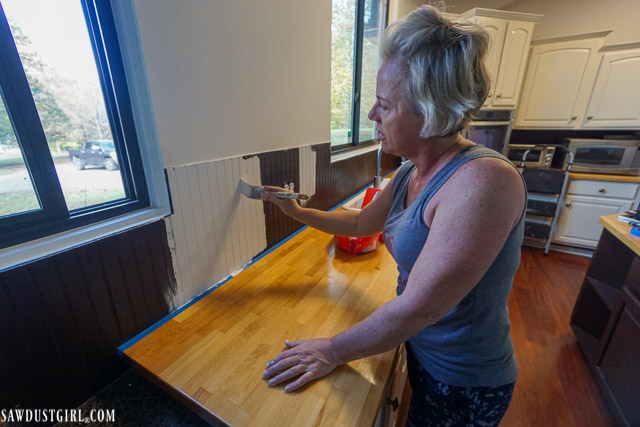
I didn’t plan on painting the backsplash initially but once the walls were white I realized I had to paint the backsplash too. I already had a gallon of Sherwin Williams ,ProClassic in this same color (which I used on the trim in the piano room).
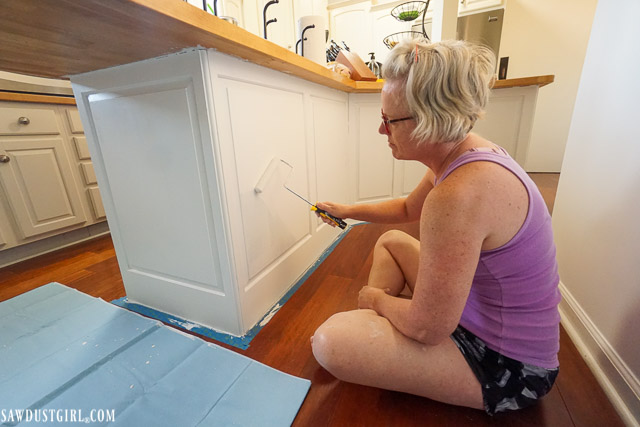
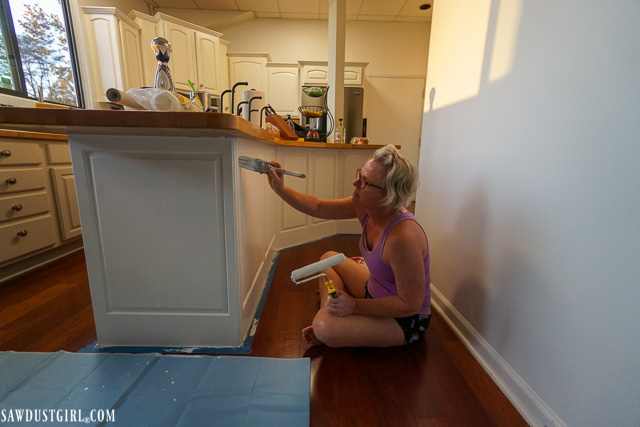
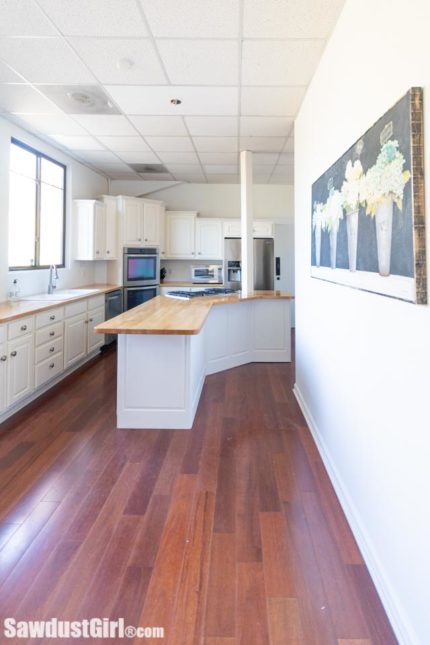
Then I decided I HAD to paint the island as well!
Then the only thing left was to reinstall the 57 (exaggeration) light switch covers! The excessive light switches is another thing that will not get changes until the “Big Picture” renovation happens and I have NO IDEA when that will be.
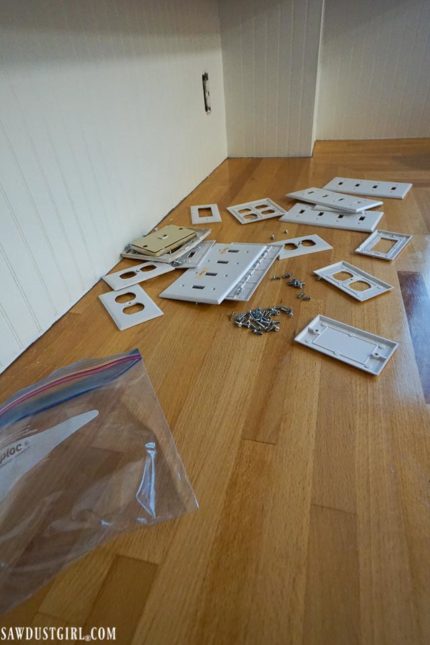
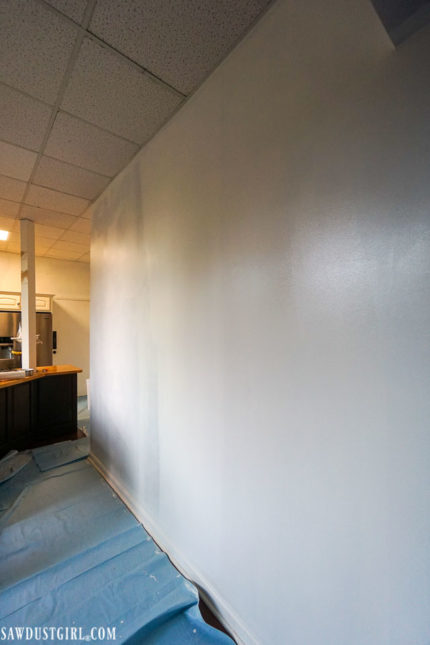
For now, I can live with 8 light switches in each location. What I can’t live with is ugly brown walls. That has to go! Thank goodness Purdy gave me the push I needed to make it happen NOW instead of getting put off for a month or five or a year or five.


It looks SO MUCH BETTER than before, don’t you think?
To help you choose the right brush, Purdy offers an online guide at www.purdy.com/resources/tool-selector/.
Just select the surface, the type of paint or the project you’re working on, and the tool will provide a list of Purdy brushes and applicators that will give you the best results.
Marsha says
I LOVE your results! We are planning to paint our kitchen cabinets when we get home…hope they turn out as well as your island did!?
Sandra says
Best of luck with your cabinet painting adventure! Good paint and good tools make all the difference.
Karen says
makes a big differences so much brighter, like it better with out the cabinets
maybe open shelving.
Sandra says
Thanks. I’m thinking the same thing about open shelving. It will still feel open but will be functional.
Kim says
That will tide you over. I love it, so light and bright now!
Sandra says
Definitely! I’m still antsy to make all sorts of changes but until then, this space is enjoyable.
Rebecca Pitt says
Wow wow wow, what a huge change!!!
I’m a long time reader and I gasped when I saw the power of paint. I hope you enjoy the change.
Sandra says
We are absolutely enjoying the change! For several days, when anyone would walk into the kitchen, the change was a great surprise. Now we’re used to it being changed, but still enjoy it!
Angelina says
Love white paint ! Can’t wait to see more!!
Sandra says
Thanks so much. You know I love white paint too! It makes everything look better. (within reason — lol)
Sandy says
Sooo much better!!
Sandra says
Totally agree! Thanks
Steph says
So much brighter! I’m planning to paint my cabinets but now I think need to do the walls too. I’ve got those darn rounded corners though so if I start in the kitchen I need to do the hallways and the living room and I’ve got 10 ft ceilings – it’s all starting to sound overwhelming. Ugh! You do give me inspiration. 🙂
Sandra says
That’s called the “project creep”. Start with one thing and then decide if you really need to do the other (and generally the answer, as you already know, is yes). Project Creep and I are well aquatinted. LOL
OrangeBlossom says
So much better!!!! Those different upper cabinet heights are driving my engineering eyes crazy!!
Kitchen question for you (planning our own redesign here): Do you like a stand alone stove or separate cooktop and separate oven?
Noticed the corner ovens.
Sandra says
Mine too! Though I tried to not let them get to me, in the end, I’m happy I took them down.
I personally like a gas cooktop and separate, double ovens. I really do not like big angled corner cabinets — especially the ovens. This kitchen is so not functional. It’s tough for more than one person to be doing anything in the kitchen at one time.
Good luck with your redesign. That’s exciting!
Sue says
Did you do anything to prime the already painted cabinets? The newly painted room looks amazing. No longer depressing!!!
Love the hanging on the wall to the right of your pictures. Will you please share where you purchased this. Oh, and one more thing. I love your new header on my email I receive from you. It’s spunky! ?
Sandra says
Glad you like the new emails! (Finally updating things on the blog is as refreshing as it was painting the kitchen!)
I made sure the island cabinets were clean. Then I painted them with the paint and primer in one – wall paint. That stuff adheres really well. I wouldn’t do that in a kitchen that I planned on keeping. But since this is a temporary kitchen I was fine with it.
NORMALLY, I use Sherwin Williams ProBlock primer. Then The ProClassic paint.
Karen says
Pulling down that cabinet…great idea.i looks so much better. I know it will help take the edge off.
Sandra says
Taking the edge off is a great description of the point of this project! We can make it a few more months (to a year) now. LOL
Pam says
White paint always refreshes. How are you planning to change the kitchen layout, or is that too far down the road?
Sandra says
At some point we will add on to the house. I don’t know if that will include building a new kitchen in a new area, or doing something with this one. Until I have the big picture, I’m not doing any major projects. It’s going to be exciting once we’re ready to do that though!
Barbara H. says
It’s amazing – I know about the power of paint but oh my gosh, this is transformed. Project creep – it’s a dangerous thing but can make life more enjoyable in the long run.
Sandra says
The project did grow a bit…but I’m really glad I did all of it!
Guerrina Hernandez says
The power of white paint! Truly a new room! I’ve been putting off painting my orange oak kitchen cabinets only because of how big the project will be!
Sandra says
But when you finally do get to that project it will be so worth it!
Lisa says
The fresh paint and cabinet removal looks great! It’s amazing how much it brightened up the space.
Did you paint the trim on the large wall behind the island?
Sandra says
The trim was already white so I didn’t paint that. I did clean it though! 🙂
Floranet says
Continue your great work!! You are an inspiration
Sandra says
Oh thanks so much!
Catriona Johnstone says
I LOVE Purdy products and so glad we can get them in the UK. We built our last house (2500 square feet) and I did three coats of paint or varnish on every floor, wall and ceiling. I won’t buy anything other than Purdy now as the quality is superior to anything else on the market. Ha I sound like a corporate marketeer, but Sandra you know I’ve been following you for years. I just LOVE Purdy products sooooo much!
The kitchen is looking great, and you are right, if all you can do is paint refresh it will make all the difference.