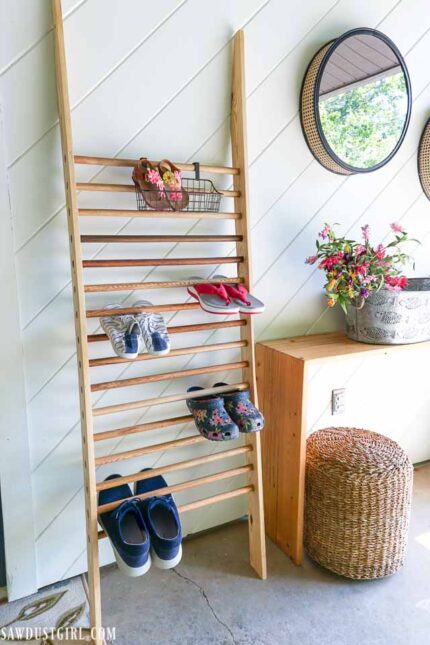
While my focus is 98% on the workshop/B&B progress right now, I periodically take a moment to make our daily living situation a little better. Since I’ll be tearing out and 100% reconfiguring this house at some point, most of my “making life better” projects tackle function and beautification. Shoe management was becoming a big problem so I took a minute and built this cool Shoe and Boot Storage Ladder! (Along with a quick makeover to our carport/entry). This project is sponsored by Danner Boots!
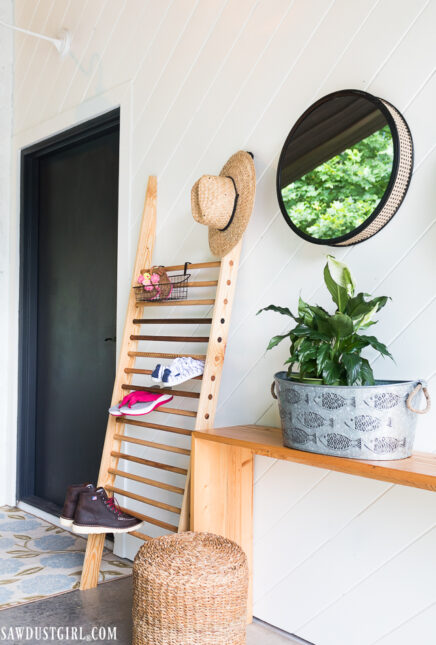
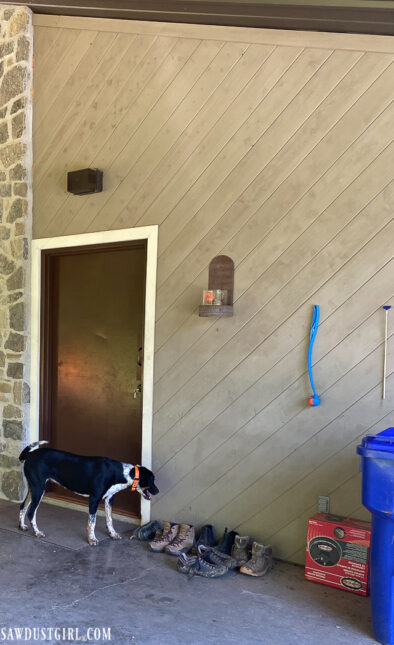
As you can see, we had a big shoe problem in our house. Because of how the kitchen is configured, there is no room for any kind of shoe/boot storage. There’s literally no kind of mudroom or even an “entry”. You just walk from the carport, right into the kitchen. OR, you can entry through the laundry room at the back door…and then walk all the way through the master bath, closet, and master bedroom to get to the living room and kitchen! It’s a very impractical set up – but it is what it is.
Entry Makeover
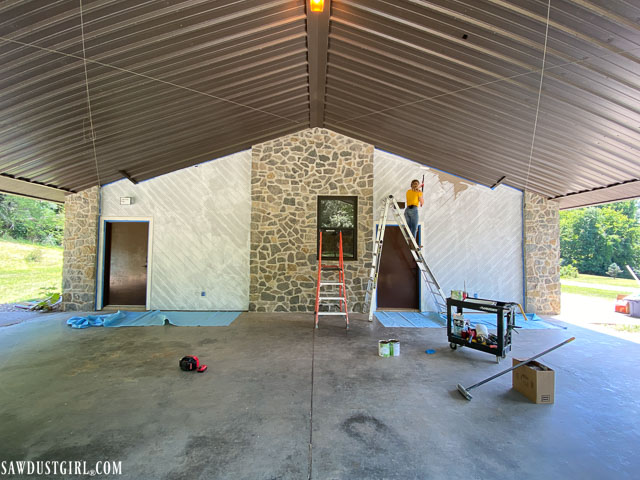
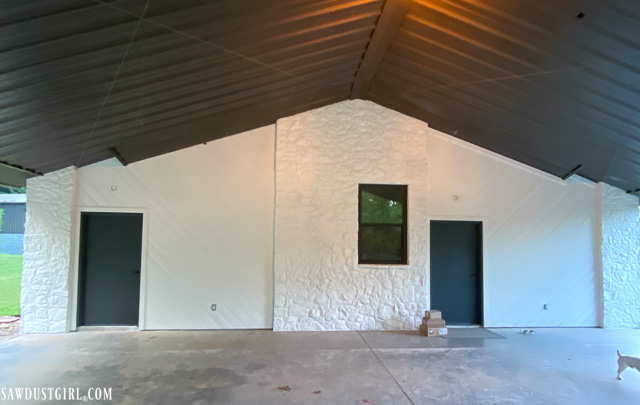
The very first thing I did was paint! The stone and siding are (Sherwin Williams paint but Behr colors) Snowfall White – the doors are Cracked Pepper). Paint always makes such a tremendous difference in making a space feel bright and new. In addition to the paint, I changed out the door handles and lights.
Building a Shoe Ladder
The paint makes the space feel better but the main order of business was to build a couple storage solutions for our shoes and boots. I built two such projects the first of which is this beautiful and super easy DIY shoe ladder.

Materials
- (2) 6′ 1×4’s
- (16) 24″ long wood dowels 3/4″- 1″ in diameter (mine are 7/8″ salvaged)
- Drill bit to match the diameter of your dowels
- wood glue and clamps, double sided woodworking tape
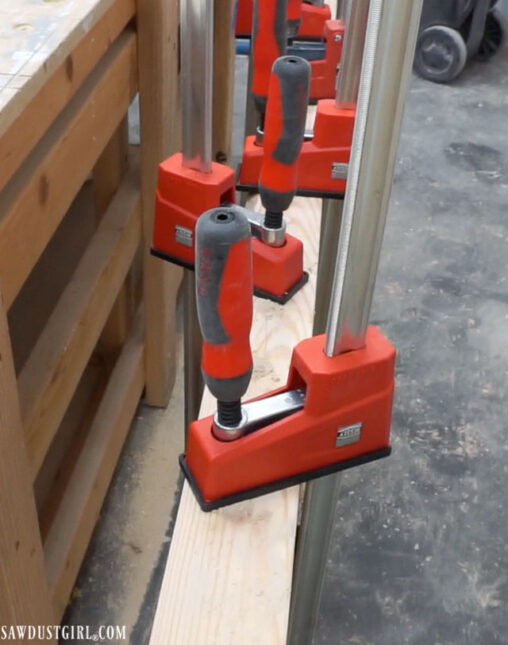
Step 1 – Secure legs together with woodworking tape
Attaching the legs together with double sided, woodworking tape will ensure both ladder legs are cut at exactly the same angles and that the holes are drilled in the same exact location on both legs. When you’re ready, it takes little effort to pull the wood pieces apart and remove the tape.
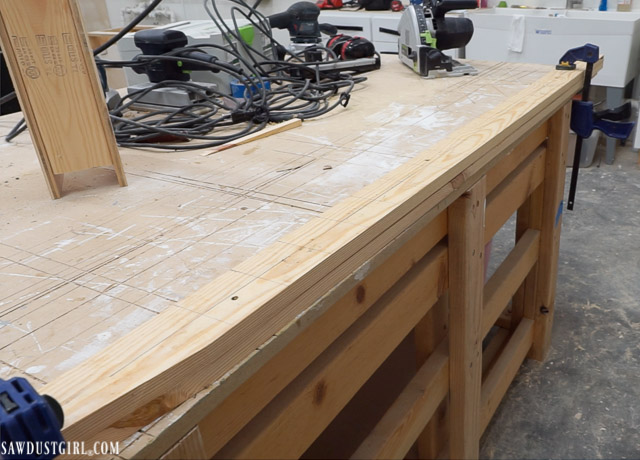
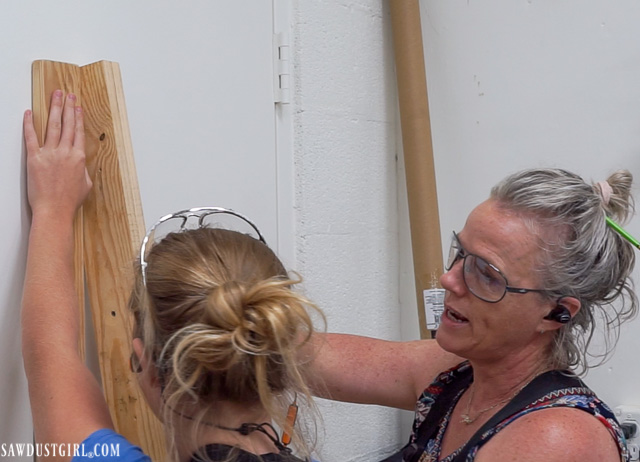
Step 2 – Cut angles
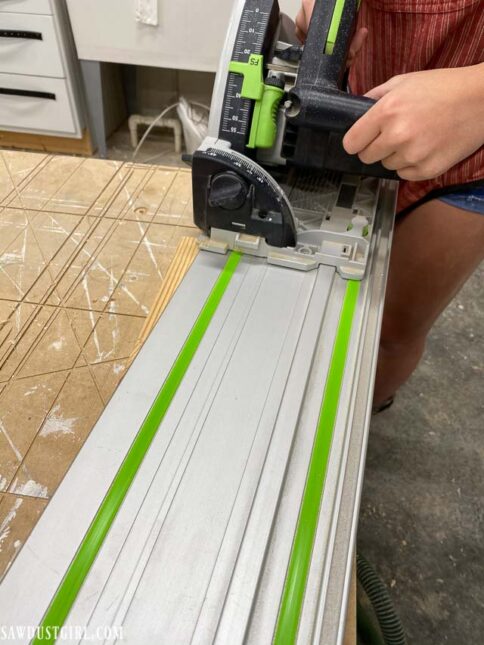
The angles are going to change depending on the length of your legs and how far away from the wall you angle your ladder. I have the bottom of my 72″ ladder legs 12″ away from the wall. The easiest way to find your angle is to lean your “ladder leg” against the wall and then use a wide block to draw a line, parallel to the wall.
Use a track saw, jigsaw or circular saw with a straight edge to cut the long, narrow angled cut on the top of your ladder.
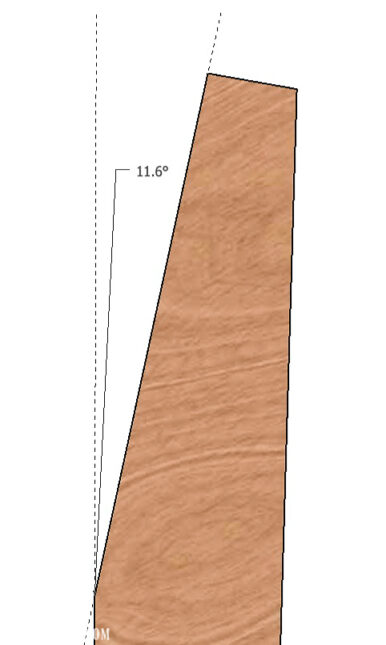
After you cut the top angle, do the same trick with a wide block sitting on the floor, next to your ladder leg while it’s leaning against the wall at the right angle. Then cut the bottom angle.

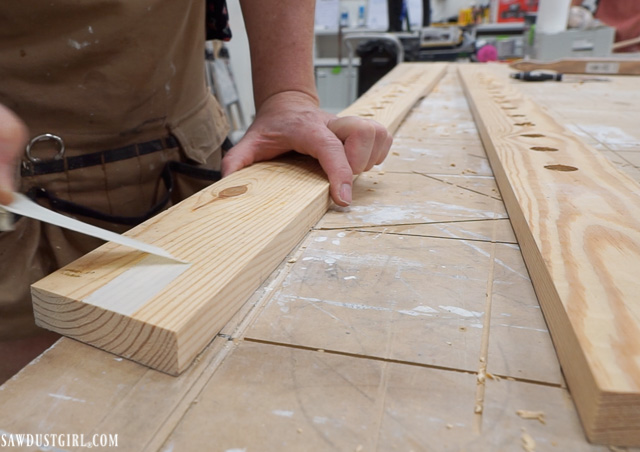
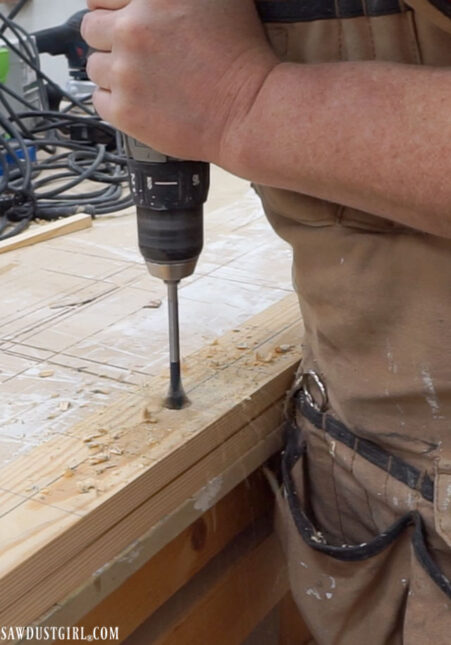
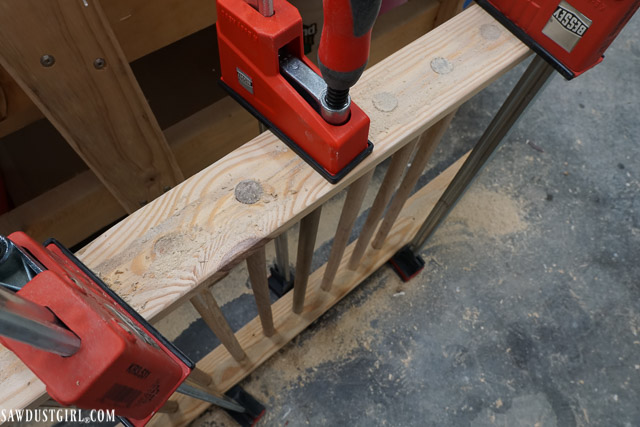
Step 3 – Drill holes
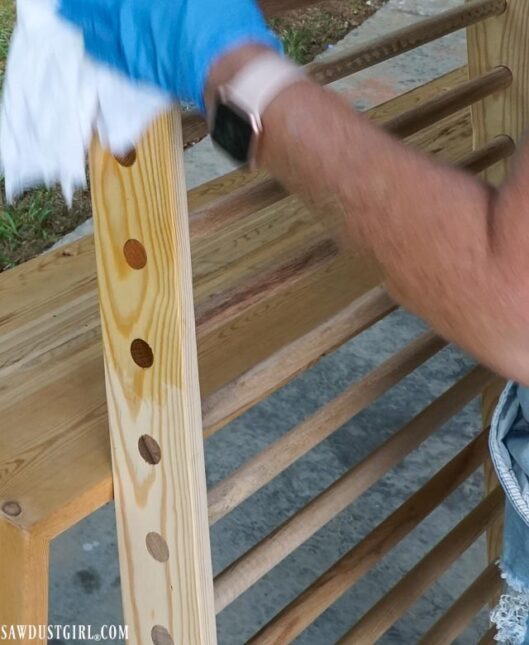
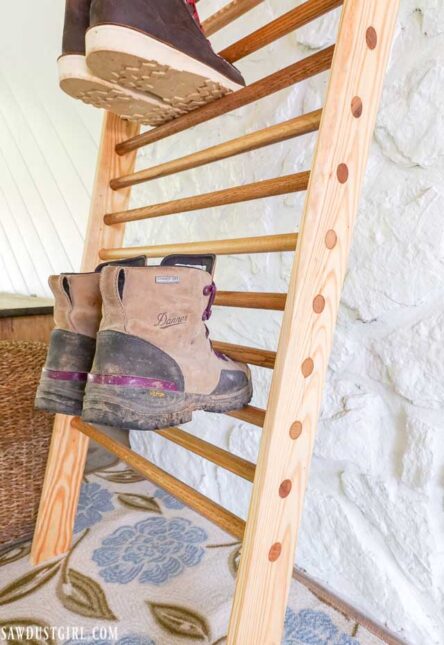
With my two ladder legs still secured together with tape, I drilled 16 holes completely through both boards. I used reclaimed dowels that I purchased at Knox Rail Salvage and they’re all different wood species. I think it’s super cool to see the dowels though the sides of the ladder.
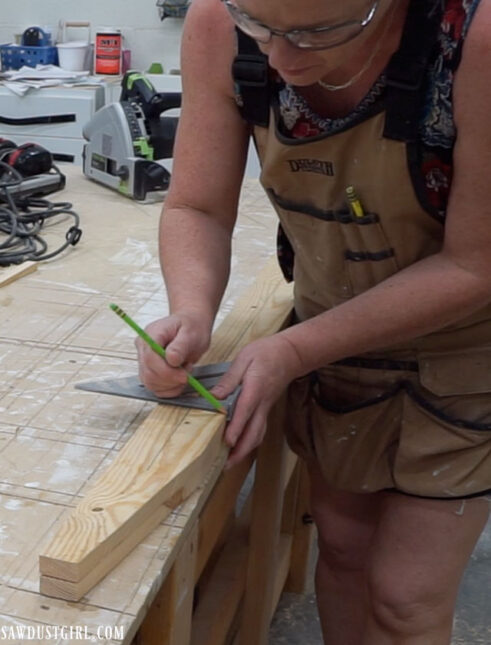
- I used a long straight edge to draw a line down the center of the length of the board.
- I started my holes 12″ from the bottom of the ladder and spaced them 3″ apart (on center).
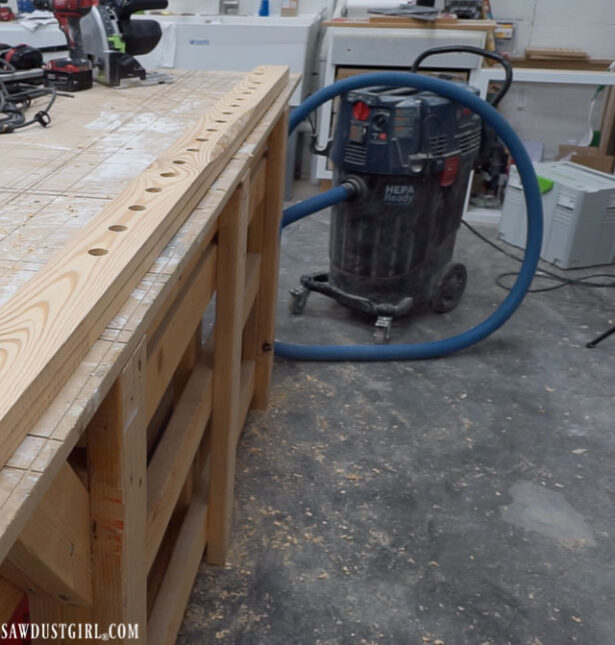
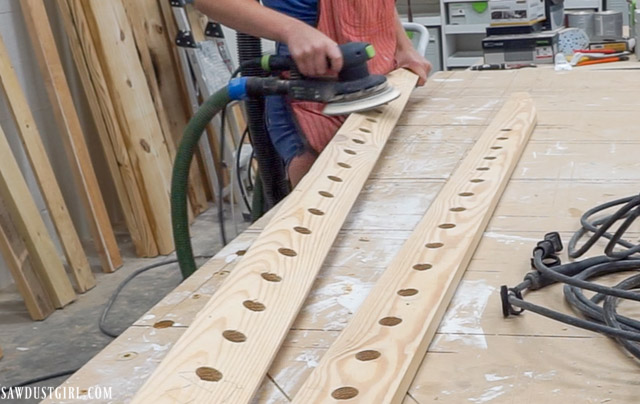
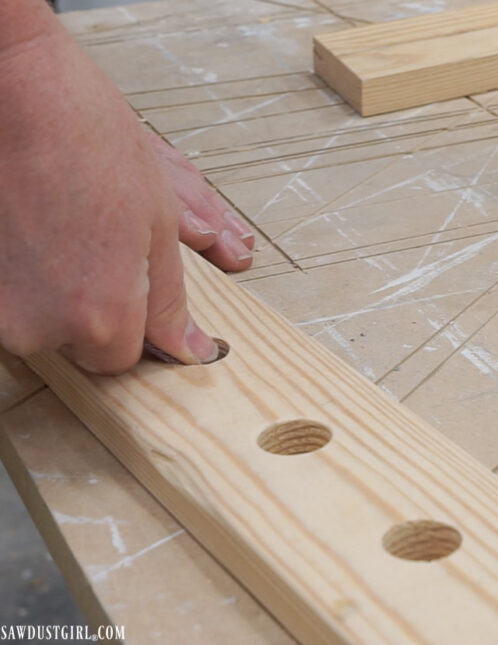
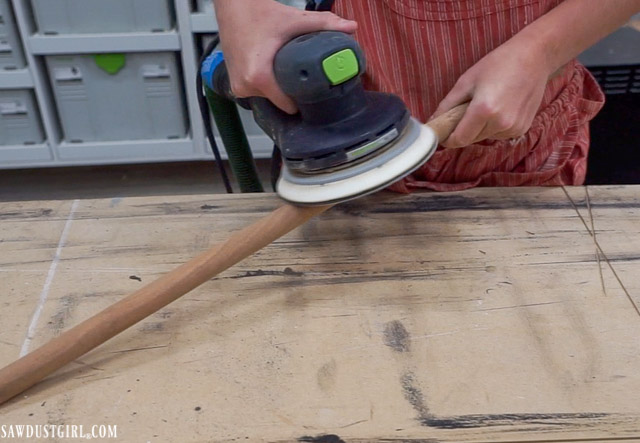
Step 4 – Sand
After the holes are drilled you can pull the two pieces apart and sand them. I’m always particular about sanding edges and removing any possibility of future slivers. I used an electric sander for most of the sanding but smoothed out around the dowel holes by hand with loose sandpaper.
Step 5- Prepare Dowels
If you haven’t already, cut your dowels to the exact same width. Mine are 24″. We also sanded each one to make sure it was smooth to the touch.
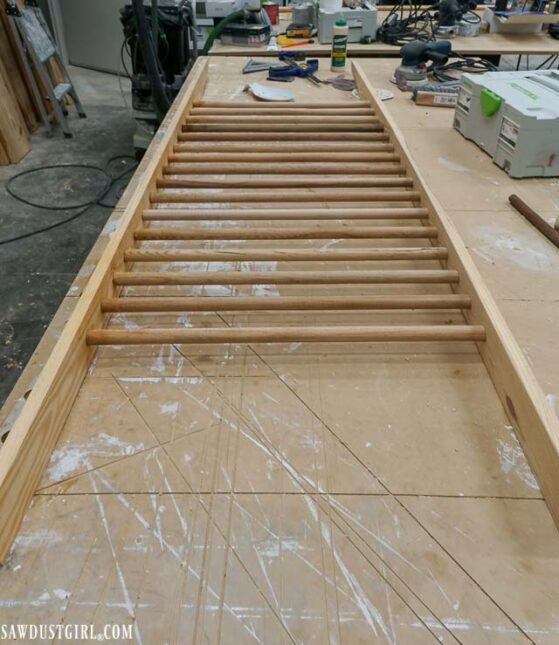
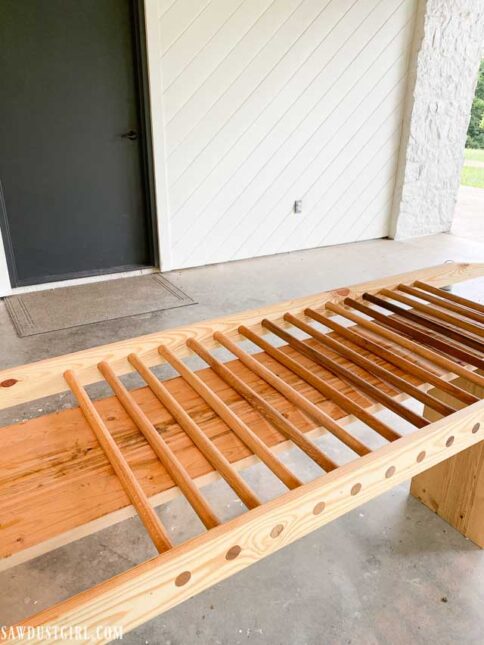
Step 6 – Assemble the Ladder
Kerra and I worked together to get the dowels glued in place in the first leg. I smeared the glue around in the hole and on the end of the dowel and then handed it to her. She pushed, turned and hammered each dowel into place.
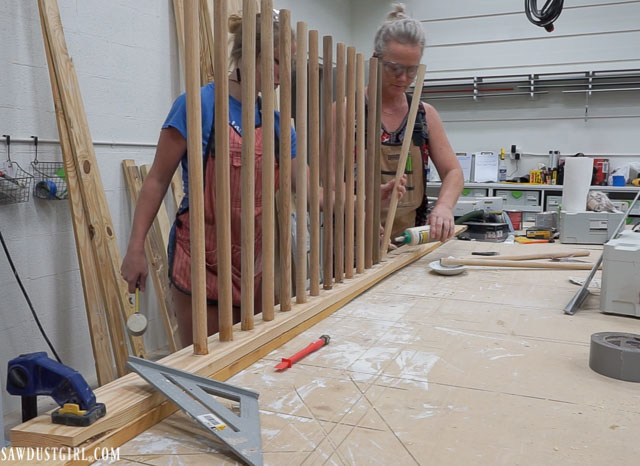
Then we flipped the whole thing upside down and got the second leg in place. Initially, we just put the second leg in place to hold all the dowels straight while they dried in the first leg. Once that was dry, we glued the second leg in place. I “wiped up” the extra glue with a handful of sawdust and then clamped it up and let it set for a day.
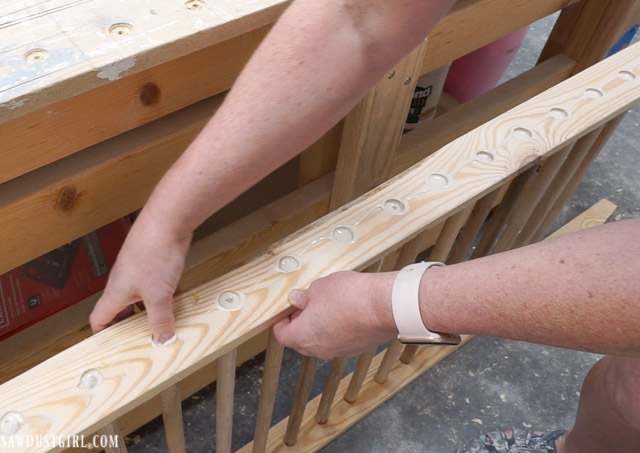
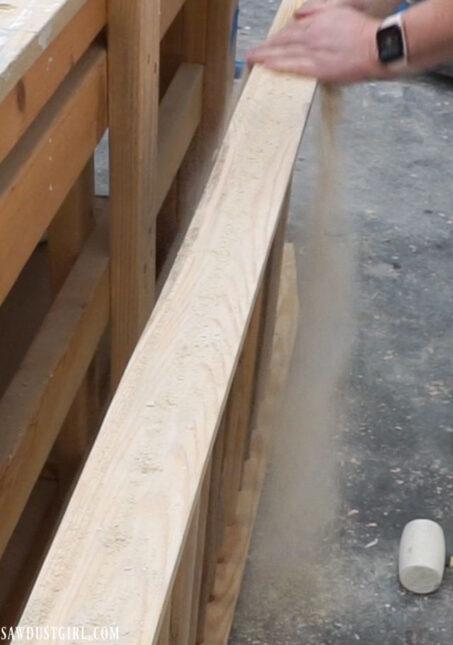

Step 7 – Sand and Finish
At this point, everything just needed to be cleaned up for finishing. Sand off any glue that squeezed out and double check for smoothness and no slivers.
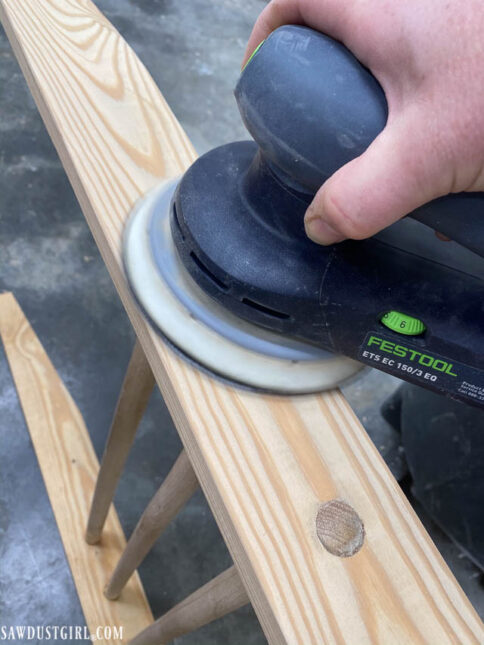
After sanding, wipe the ladder down with mineral spirits and then finish with your choice of clear coat. I used Liberon Finishing Oil.
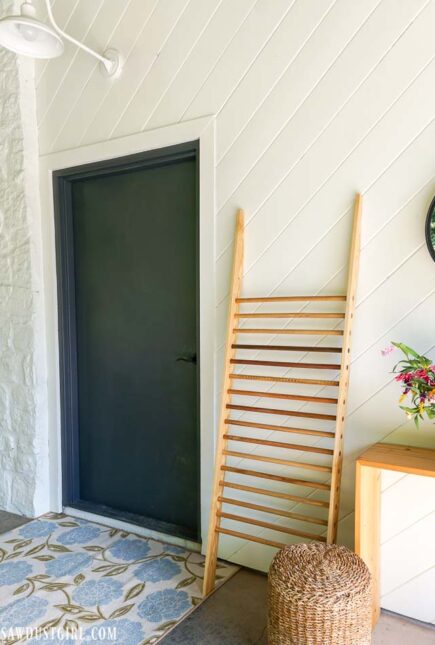
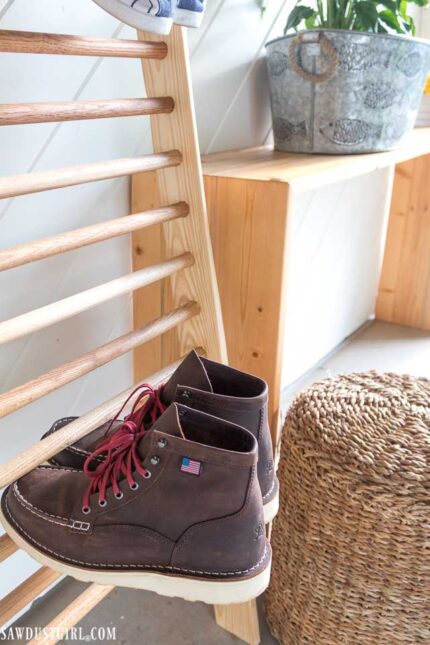
Once your finish dries your ladder is ready to be loaded up with shoes and boots!
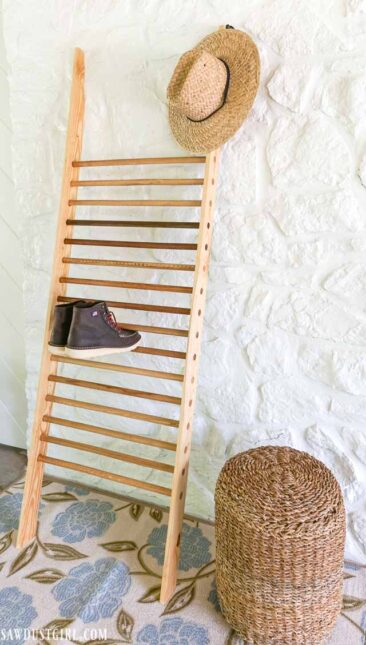
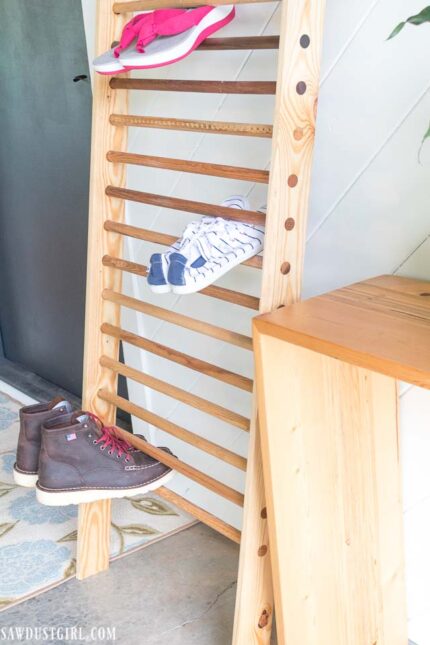
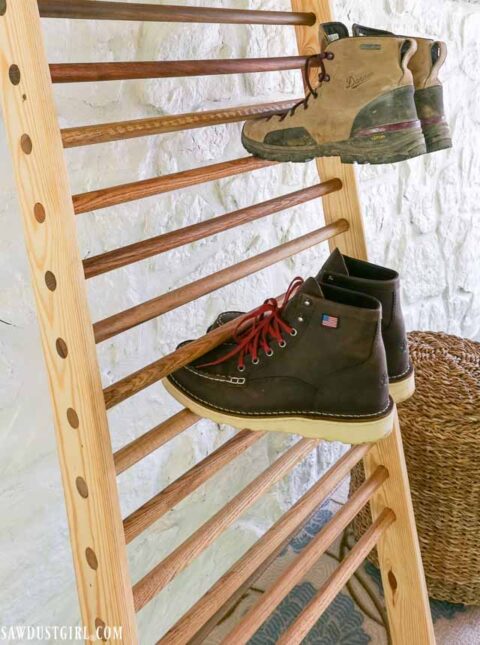
Most our shoes and boots fit in the 3″ spacing. I have a pair of steal toe shoes that are too thick. Also, “over the cabinet door” baskets can hang off the ladder for things like, gloves, stocking caps or for tiny shoes that are way too small for the spacing of these dowels. (How cute is that!)
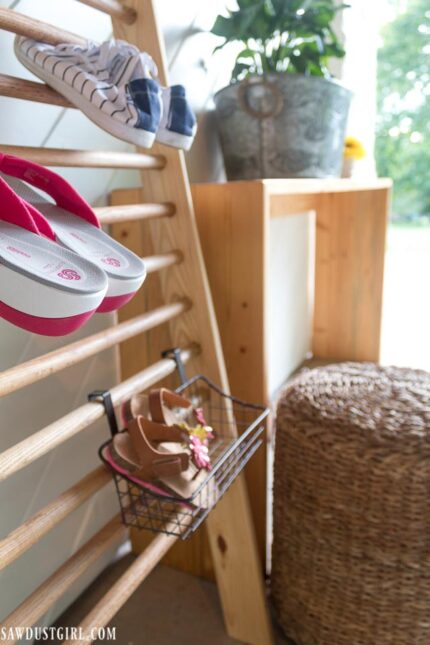
I also placed this table next to the shoe ladder which I think will be a handy place for mail and package deliveries to be placed. (I’m having a friend make a sign.)
Danner Boots
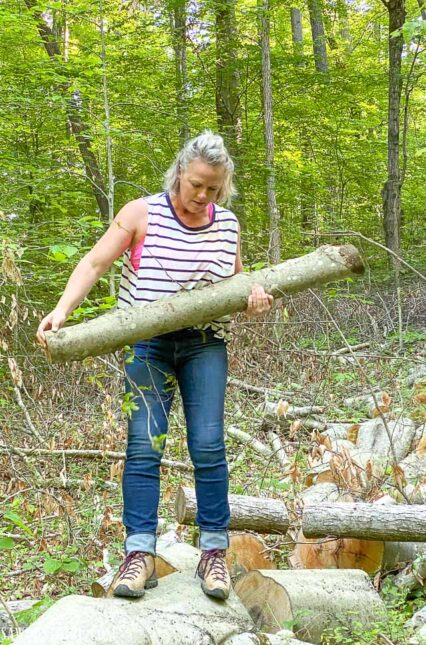
As part of this sponsored project, Danner sent me a pair of Stronghold boots. They were comfortable right out of the box. In addition to the amazing comfort, they have the added protection of a work boot. Danner Boots have an oil-and-slip-resistant outsole which provides traction on wet and dry surfaces. This is especially important to me in my workshop because sawdust on concrete can be a slip hazard. Another feature is the waterproof protection which is great for me because here in Tennessee, it rains about 50% of the time.
Now that we have this big property to take care of, Wes and I both have several pairs of work boots that were piled up outside the entry door before I built the boot ladder. Now we have an attractive boot/shoe storage solution as well as another pretty space to enjoy. Our refreshed carport/entry will make a much better impression on guests…which is basically the mailman right now. 🙂
Thanks to Danner for sponsoring this project and providing me with my new work boots. I’m excited to continue to wear them as I dive in to my next projects. See you guys then!
jan says
Great Idea! Love this post! I sure wish I could Pin it!!
Sandra says
Thanks Jan. I’d love if you pinned it too!
Charisse says
I love this project and will be doing it for my own garage. I have never seen one like this. Will be checking out the work boots as well. And….. this is hard to say, because I love just about everything you have ever done, but I was heartsick and shocked to see that you painted that gorgeous stone walls !!! Oh my, my eyes and the stone are shedding tears. I feel a knife in my heart. I know, drama queen here. Too much white. Oh well, looking forward to all the other projects in the works.
Sandra says
Thanks for the love on the shoe ladder! “Oh well” to the drama of painting the stone. LOL It’s going to get torn out eventually because we’re building an outdoor kitchen here and that is where the door to the living room will be.
Charisse says
ok, my heart can heal. I bet the new outdoor kitchen will be “fantabulous”. Maybe you can use the stone in the project, as a base. Sorry, I just love rock and stone. Enough so that for my birthday, my honey got me a load of huge rocks for the garden. Look forward to all the projects coming up. Best to you and stay healthy and safe!
Erin says
I have a pair of Danners that spent 3 years with me at an industrial construction site. Right up to the end I was getting comments on my “new” boots. They are comfortable all day even as safety toes (which are kind of heavy).
Elpitha says
I too was shocked and sad to see the beautiful stone painted! And sad to hear it’ll be ripped out. Now I want to see a mock-up of this outdoor kitchen 🙂
Abbey Flanary Barnes says
Such a cool idea! Love this. Thanks for sharing!
Sandra says
What a huge difference! Great job, looks really great and the shoe rack instructions look really easy to follow, so I’m pretty sure I could do this! Thanks so much!
By the way, I thought the rock looked better painted😜
Sandra says
Thanks! I was looking at the rock yesterday and totally do too. It’s still going to get ripped out but I like it better now (and for as long as it lasts).