Hey SawdustGirl Readers! It’s Timisha from ToolBoxDivas.com. I am still so stoked to be a part of the SG Squad. I am already learning so much, pushing myself to that next level. This month we were challenge to try a type of woodworking joinery that we’ve never used before. I chose to try out dowel joints. I’d never worked with dowels, but I like the look of exposed dowel detailing. Particularly with contrasting wood types. I’ve learned that dowel joints are one of the strongest types of wood joints. I always thought you needed a whole bunch of fancy tools to use different joinery techniques. However, with dowels, that’s not the case. All you really need is a drill, some dowels, clamps, and glue. A dowelling jig is helpful, but it’s not necessary.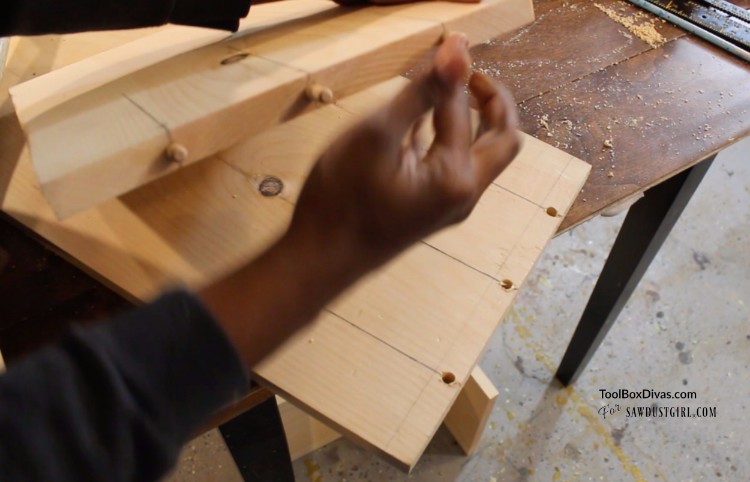
Understanding Dowel Joints
This was actually a real challenge for me because putting everything together took a lot longer than it would normally take me. Normally, I would just use glue, screws and or the nail gun. Bam and I’m done. I had a bit of a learning curve to overcome. Using wooden dowels for the joinery took me maybe three times as long as my normal process. But here’s what I learned: the good, the bad, the ugly of using dowel joints.
The Basics
The diameter of the dowel is determined by the thickness of the boards you are working with. Choose a dowel that is a 1/3 to 1/2 as thick as the thickness of the wood. For example, if you’re working with a board that is 3/4″ thick your dowel size should be about 5/16.” The length the dowel should be twice as long as the thickness of the wood.
Items Needed
- A Drill
- Drill bits – 3/8″ and 5/16″
- Dowel jig (Not required but helpful)
- Mallet
- Clamps – Lots of them
- Wood Glue
- 36″ – 5/16 and 3/8 wooden dowels
- 5/16 and 3/8 Dowel pins
- Japanese handsaw
Using a Dowel Jig
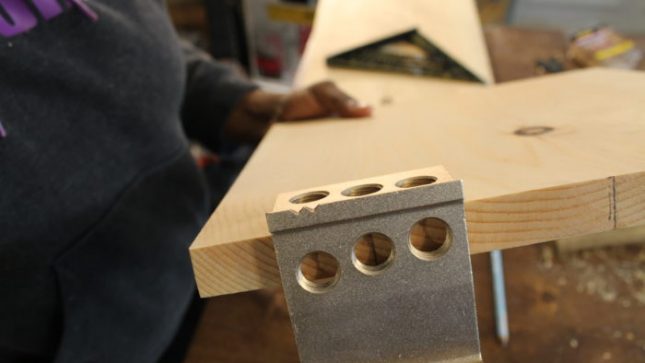
A dowelling jig can make the process of working with dowels a lot easier. It can also slow you down in the beginning because your learning how to use it and its just not muscle memory. But a simple jig can run any where from $8 to $30. I am using a General Tools Aluminum EZ Dowel Joining Jig Kit. I like the jig because it comes with a stop clamp for the drill but and a device that helps guide the drill bit into the wood. Drilling free handed can cause the drill points to be at an angle.

There are also pin markers that can be placed on the ends of the dowels and in the hole of the adjoining piece that will place a pin “mark” or indention into the adjoining wood.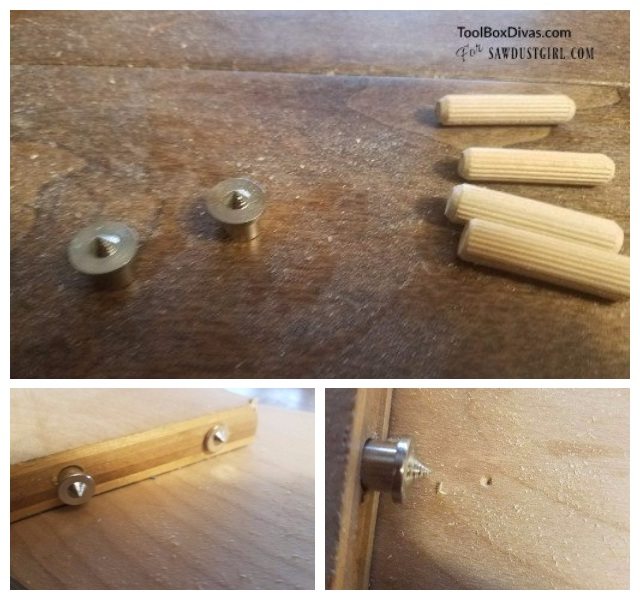
Types of Dowel Joints
Surface to Edge Joint: 
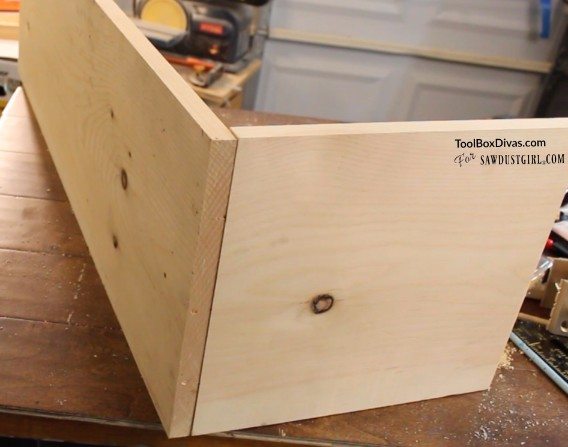
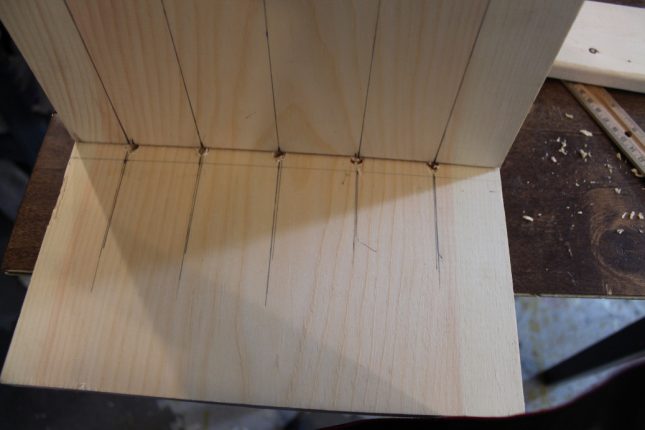
Surface to edge joints are when you secure the end of one board to the surface of another board. In my build, I am making shelves. So I am connecting the shelf board prior to fully attaching the sides of the shelf. Using the jig drill the depth of the jig plus 1/2 inch to the surface board. It is important that all the drill points line up.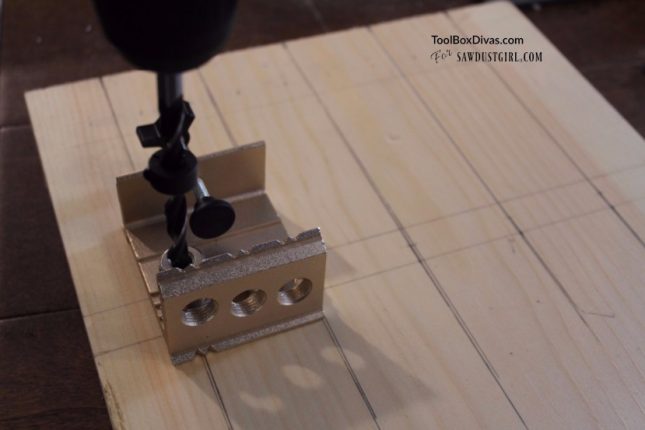
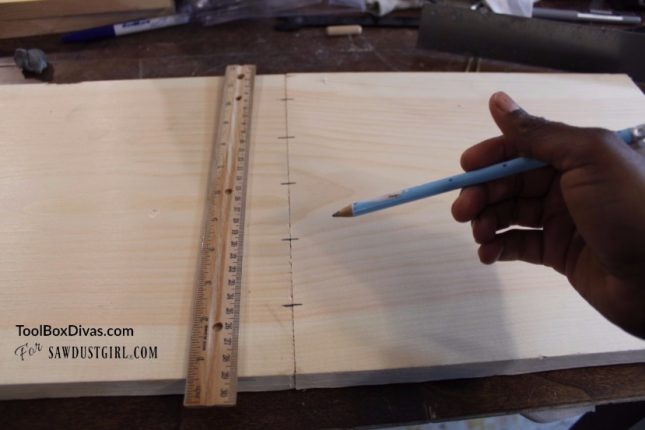
Mark out the drill points on both pieces prior to drilling any holes.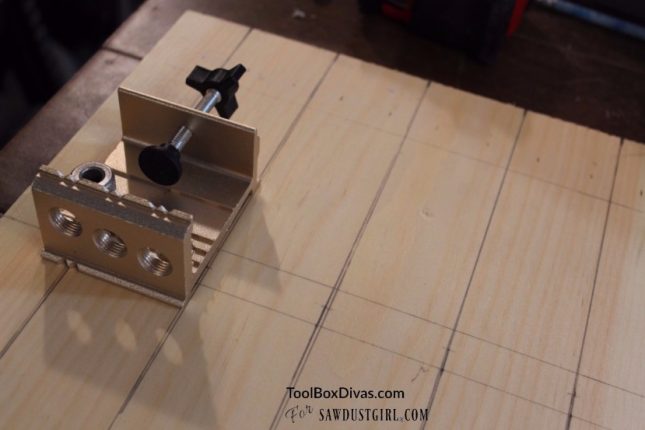
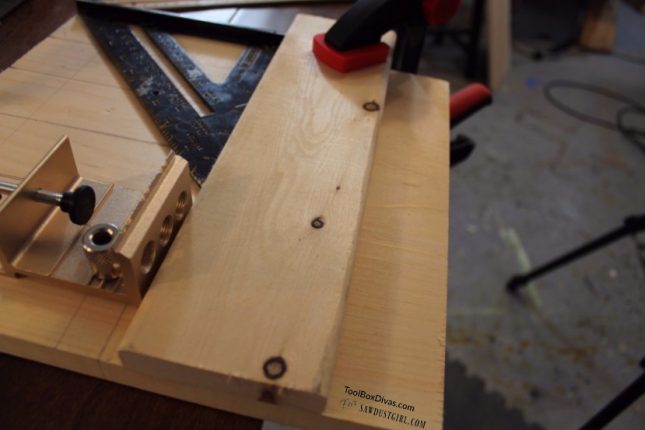
Use a clamp and a scrap board to hold the jig in place while drilling.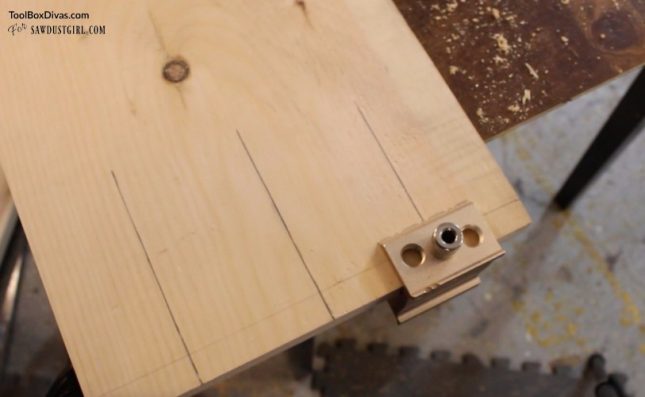
Once all the holes are drilled and everything is lined up insert the dowel pins and connect the two pieces to ensure the fit is nice and snug.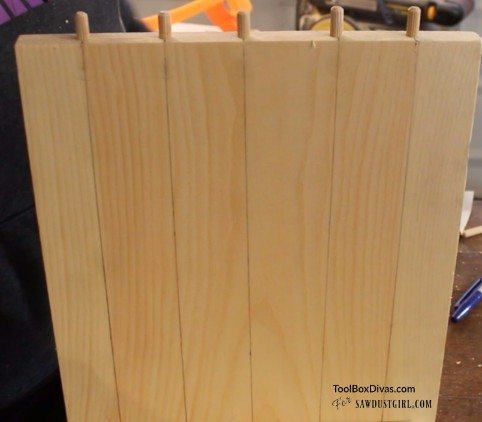
Surface to edge joints create right angles since you’re connecting wood perpendicular to each other.

When drilling into the end piece, the drill point hole will be twice the thickness of the adjoining piece.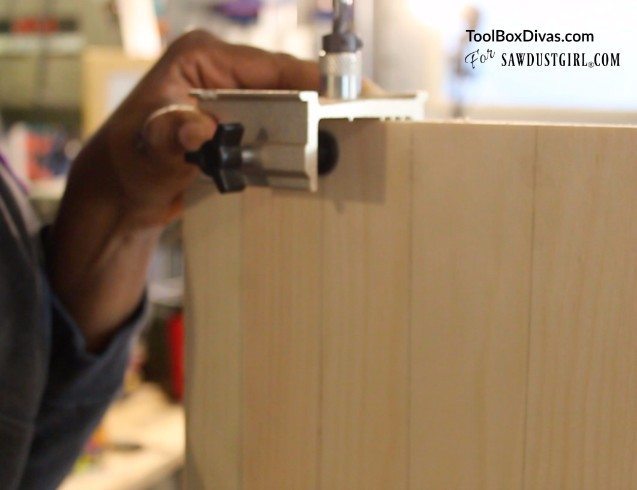
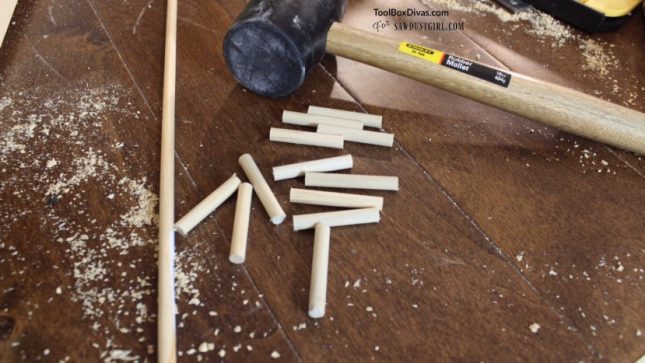
Use a mallet to connect the two boards.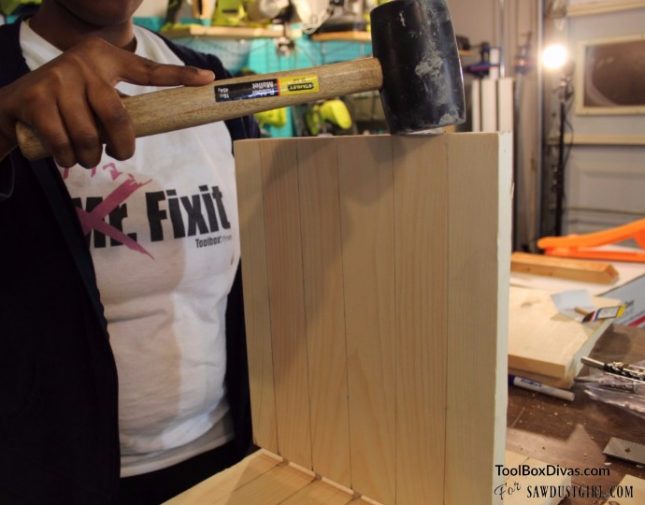
Edge to edge:
Edge to edge is when the two ends butt up against each other. You want to make sure your alignment is correct. Mark out your drill points before drilling.
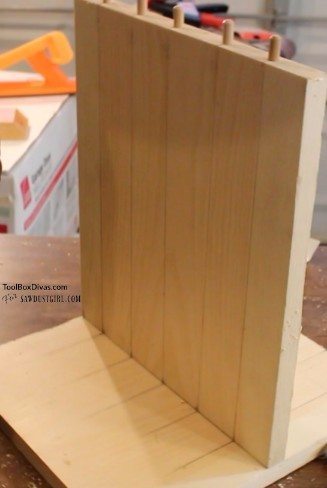
Exposed Dowels:
Exposed dowels, these are probably my favorite. So this is simply when the dowel is inserted from the exterior portion of the wood into the adjoining piece. So the dowel is actually visible. Another reason I like this is because I can put the piece together using clamps and drill from the outside and insert the dowel pieces using a mallet. It is still important that the drill points go in straight.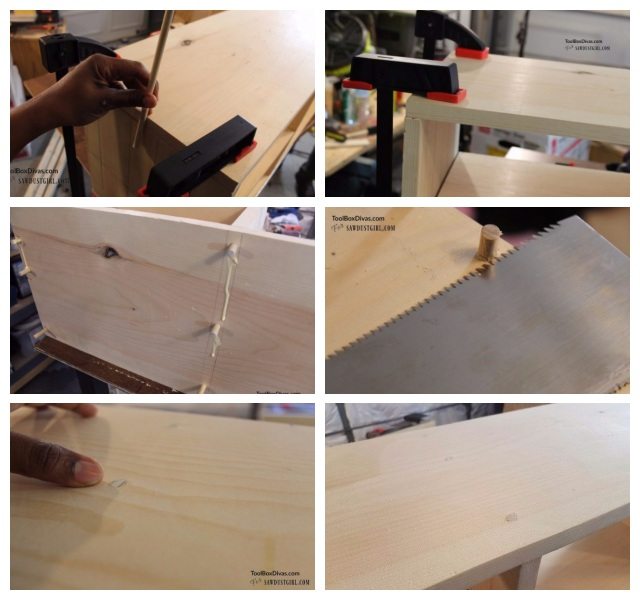 When working with dowels (exposed or unexposed), always do a dry fitting first to ensure everything is lined up correctly and square. You will definitely need to use the clamps for this part. Once everything is in place reassemble it with glue. Use a Japanese saw to cut off the excess dowels. Sand down and you have a strong tight bond.
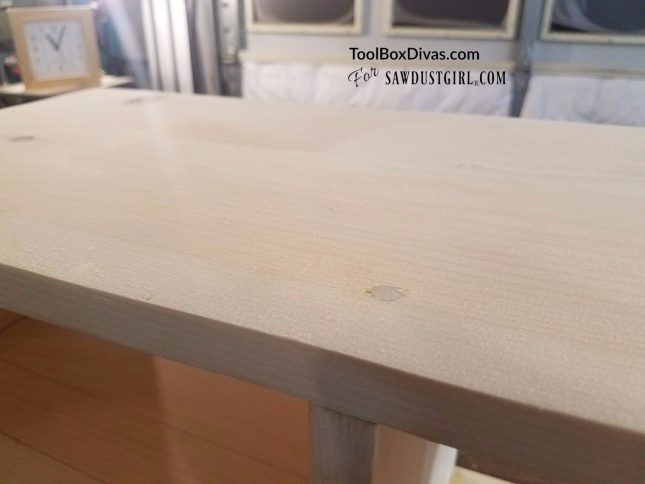
Here’s what I took away from this experience.
Pros
- Dowels are cheaper than screws. A 36″ dowel is under $1. I can make a lot of dowels from one.
- It’s crazy strong and sturdy.
- The exposed dowels are beautiful.
Cons
- Accuracy is key. Your markings and measurements have to be precise or you’ll be left with misaligned pieces and random holes.
- It was not as quick as I thought it would be. This could very well change with experience. The more I do it the faster and easier it could get, especially when using exposed dowels.
- Clamps are a necessity. Clamps can be pricey and not everyone has those readily on hand.
- If you realized you made a mistake after gluing it together, OH WELL. Plan better. Do better.
Misaligned drill holes.
Will I do this again and use dowels on my next project? Heck YEA! well, maybe not my next project, but definitely again in the near future. At the end of the day I used wooden dowels in various forms for this project.
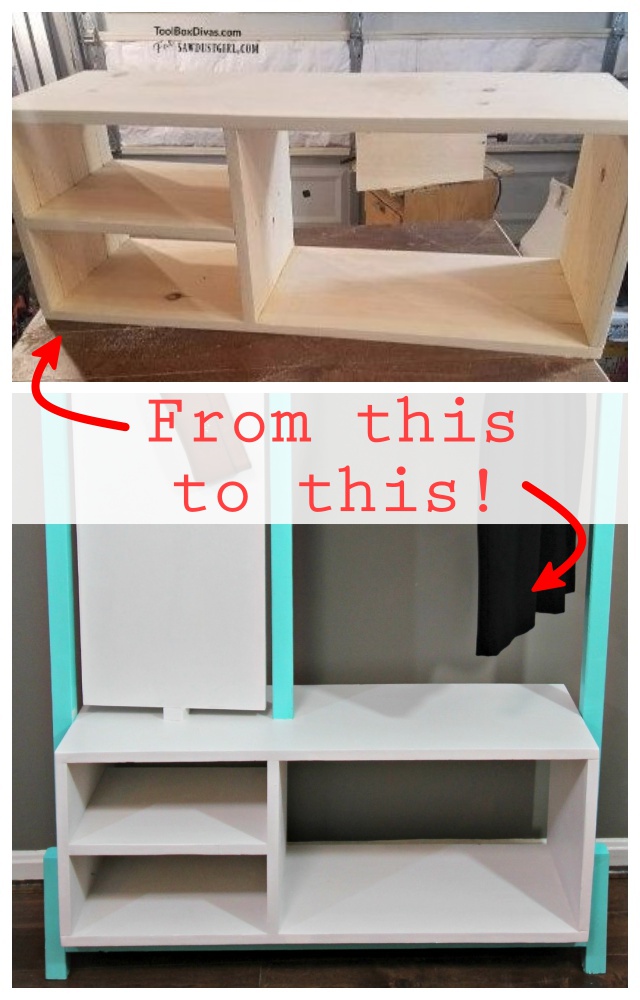
You will not believe what I made using all these wooden dowels. I’ll give you a hint: A girl’s gotta have a place to stash her goods….Or rather hang her goods (Hahaha). Check out my new Stylish DIY Clothes Rack.
Till Next Time. ~T.
lisa ryan says
Wow, you sure make it look easy!
Timisha says
Thank you so much Lisa! It’s really not hard once you get into it.
Lynda says
Great article on dowels.
Timisha says
Thank you Lynda! So glad you enjoyed it.
Morgan says
Do you have a recommendation on dowel spacing? (I’m building a shelf with surface to edge joint and exposed dowels). Not sure how many dowels I need to secure each shelf.
Thanks so much for posting such great work! I am thrilled to find your site.
Paul Christu says
Very much an amateur; beekeeper, so have to construct various types of boxes, generally using scrap/recovered lumber, OSB, plywood. Most of my doweled joints are butt joints. I glue, clamp square, drill pilot hole through first piece, large enough for screw threads to pass without catching, then continue a small pilot hole into the second piece. Pop a 2-3” deck screw in, use that to compress the joint while glue starts to set (say, 20-30 minutes). Then remove the screws, enlarge the pilot hole to dowel size, drop a little glue in the hole and pound flush with mallet. No jig needed; holes are never misaligned. Process moves along quickly because I’m not using a jig and always drilling in one direction.
Bonnie says
Super helpful! Who knew there was so much helpful equipment out there? Not me!