Hi SawdustGirl Readers! It’s Mindi again from MyLove2Create, and I have to say that this month’s theme of using a new joinery method has pushed me to conquer a fear that I have been avoiding for way too long…
The Table Saw. Dun dun dun!!!
I am going to show you how to cut a dado on a table saw. Believe me, if I can do it, you can too!
I can’t even explain how THRILLED I am to have Sandra encouraging, motivating, and pushing me to learn new skills and overcome my fears. That is what the SG Squad is all about and I am so glad to be a part of it!
But real quick, I need to share how I overcame this fear of the table saw so I could actually make my dado cuts.
When I told Sandra that I was thinking of buying a router to make my dado cuts, because I was afraid to use my table saw, she told me that I couldn’t! Ha! She was right, I was running away from my fear instead of facing it.
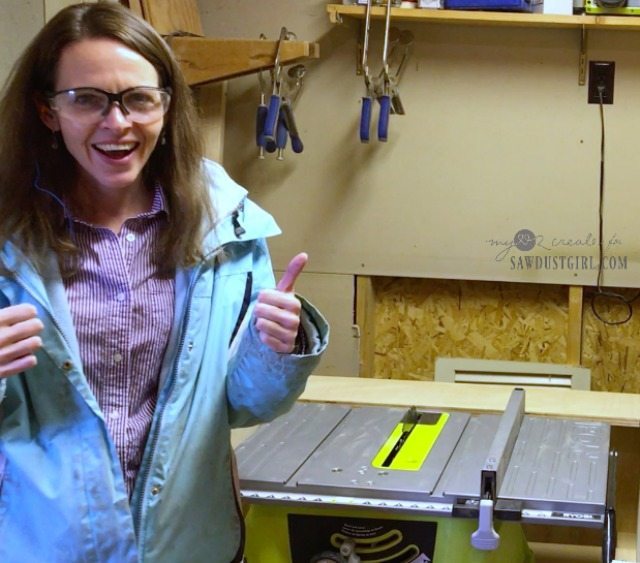
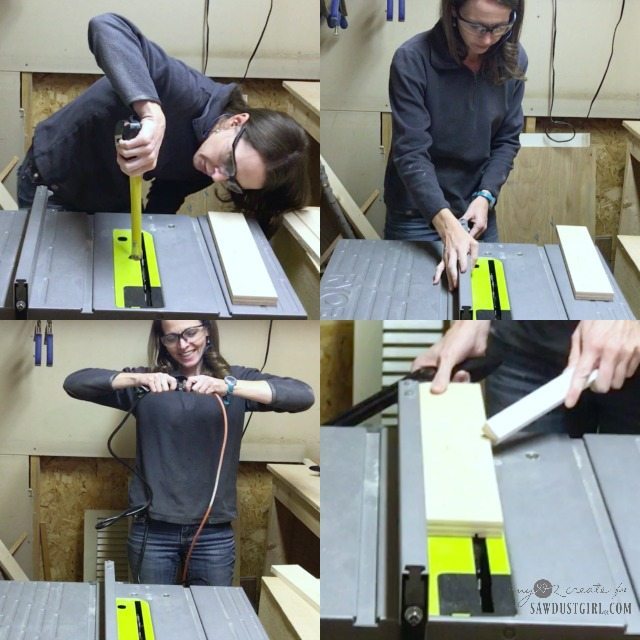
She challenged me to start by just turning on my saw… I know that sounds silly, but I had actually set the saw up and put the blade on myself…and I was afraid that I had done it wrong and the blade might come flying out or something. (complete irrational fear, but real to me!) I eventually got up the nerve to do it and this is me right after…look, I didn’t die!
Almost a week later, several “how to safely use a table saw” youtube videos, and some serious self pep talks, I eventually gathered the courage to rip a piece of wood on my saw. I am not kidding, I was truly terrified, but I knew that I needed to overcome this fear.
I had built it up in my mind and the longer I put it off the worse it got…I had the knowledge to do this, I just needed to believe in myself…
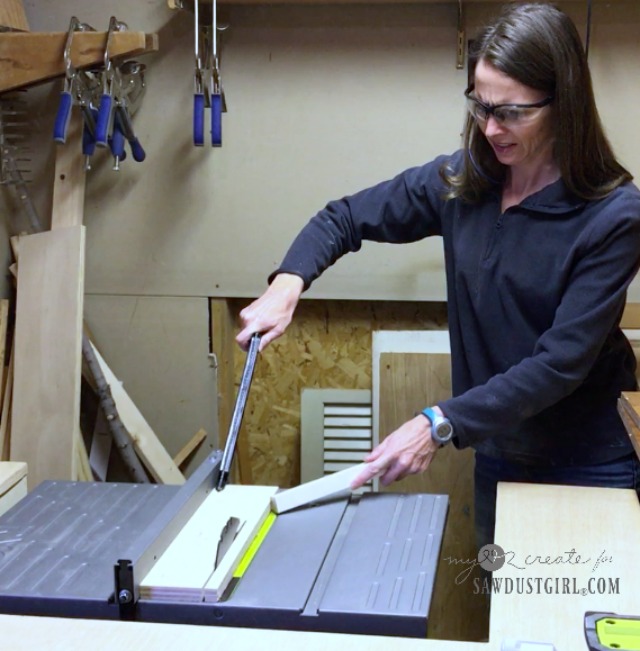
Can you see the fear and concentration in my face?! I stayed calm and focused on what I was doing, and I did it!!! Phew!
As soon as I finished that first cut I was a little emotionally drained, but I felt amazing because I had done it, and it really wasn’t that bad! I can’t believe I put this off for so long! I guess I just needed Sandra to give me the push to believe in myself and be brave!
Ok, moving on…
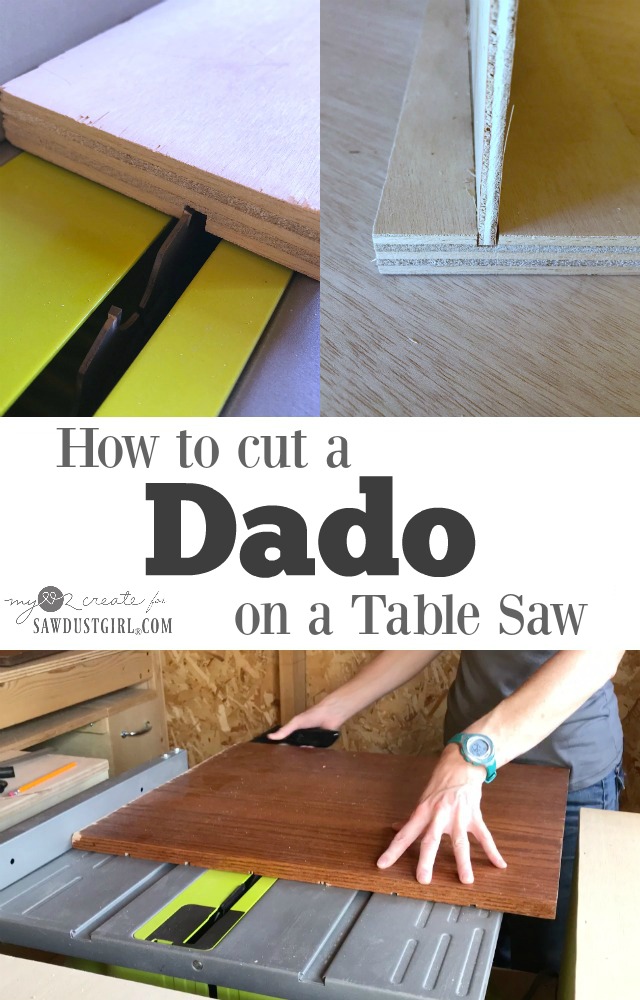
How to cut a Dado on a Table Saw
Supplies:
- Table saw
- Push Sticks
- Wood for the project you are making (can be any thickness)
- Tape measure or combination square
- pencil
- Safety gear (glasses, ear/lung protection)
- Chisel, depending on how accurate your cuts are…you may not need it, but if you have some small slivers of wood then it is very helpful for removing them.
So what is a dado joint you ask? Well, first of all, let’s pronounce it correctly, maybe you already know, but I wasn’t sure. Sandra gave my the best way to remember…Dado rhymes with Play-dough! See?! Now you will never forget.
A dado joint is a slot or trench cut into wood where another piece of wood fits into. You can use these joints in a variety of ways, but a lot of times they are used for shelves to fit into the sides of a bookcase.
Making Dado Cuts
Step 1: Set your table saw blade to the correct height, make sure your table saw is unplugged to do this. (top left) This will vary on the wood you are using. I was using 1/4” plywood to go into my dado cuts, so I set my saw height at 1/4”. You can go up to a depth of half the thickness of the board you are cutting your dado’s into.
Step 2: Set your rip fence the correct distance from the blade to ensure the proper placement of your first pass. (top right)
Step 3: With your saw blade and rip fence set you can now plug in your saw, and make your first pass to create your dado. Be sure to use push sticks to move your board through the table saw, which will help keep your fingers far away from the blade.
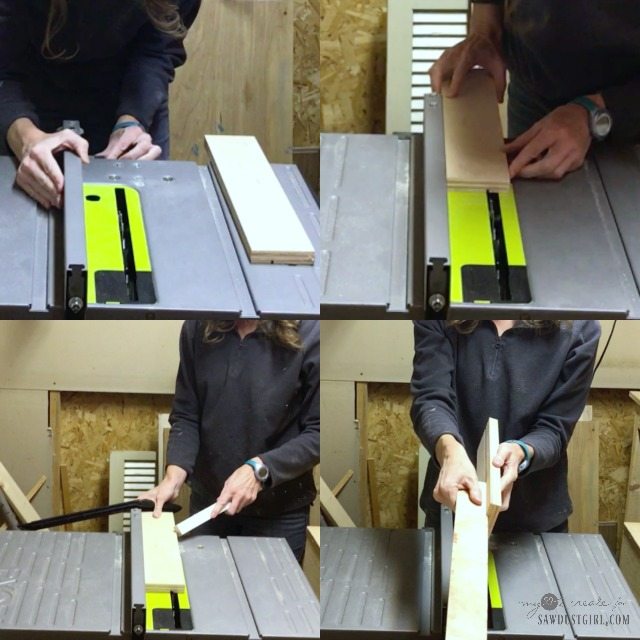
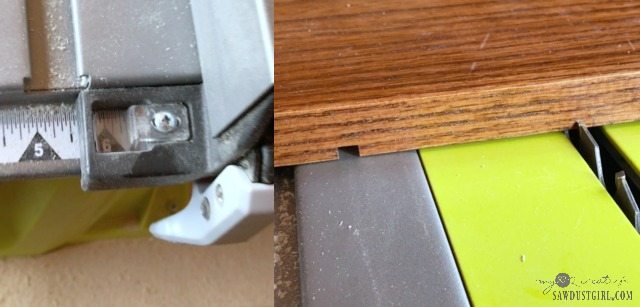
Step 4: For my second pass through the saw, I moved the rip fence over approximately 1/4” from my first cut. (top left)
Step 5: Test your board against the rip fence and the blade to make sure you set your fence correctly. (top right) Adjust the fence accordingly using your first dado cut as a guide to make sure the second cut will line up properly.
Step 6: Once I knew my rip fence was in the right place, I made my second pass through the table saw (bottom left). When finished, I grabbed a scrap piece of 1/4” wood and tested it in my dado, and wouldn’t you know it? It fit!
Totally beginner’s luck folks, but I’ll take it!

I quickly learned that not all 1/4” plywood is created equally. In the above photo you can see that one piece (left) was slightly smaller than my dado. The piece on in the right photo was slightly thicker. The ideal dado joint is a nice snug fit.
*Tip-Use the actual wood you will be working with to measure, mark, and cut your dado, this way you can ensure a nice tight fitting dado joint.
I used different pieces of scrap and repurposed 1/4” plywood for my project. I needed several dado joints and didn’t realize that my 1/4” plywood pieces were all slightly different in width. I ended up cutting all my dado’s to the same size, but this made some of my plywood pieces slightly loose, (like the above left photo) because of the nature of my project it wasn’t too big of a deal. If your dados will bear a load, then you really need them to fit nice and snug.
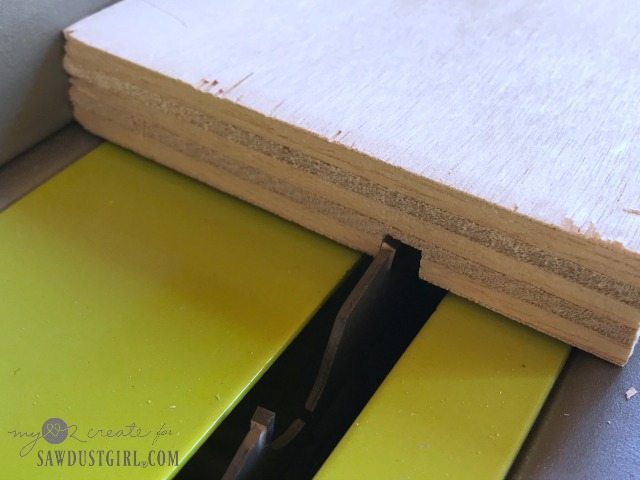
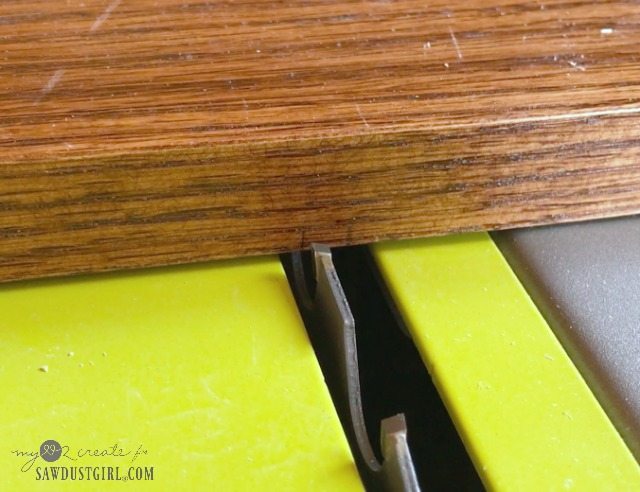
Here is a close up of how my second pass through the saw hits my dado.
Since I needed my dado’s 1/4” thick, I only did two passes with my table saw to create my dado, My blade is very close to 1/8” thick (just a tad smaller). For thicker wood you will need to make more passes until you create the thickness you need so it matches the wood you will be using in your dado.
Getting symmetrical dado joints:
In order to get dado joints that line up on your two opposite boards exactly the same you will need make 4 cuts, one on each side of each board, before moving your rip fence.
I started with my outside dados. Once I had my first dado measured and marked, and my rip fence set up, I was able to make a pass on both sides of each board (equaling 4 cuts). The above photo shows one pass on the saw on both sides of one board, both boards should look like this.
To finish the dado I needed to make another pass. I set the saw again moving it over to create the 1/4” dado, and then repeated the 4 passes again, cutting on each side of both boards. This way I was working from the outsides of my board toward the center.
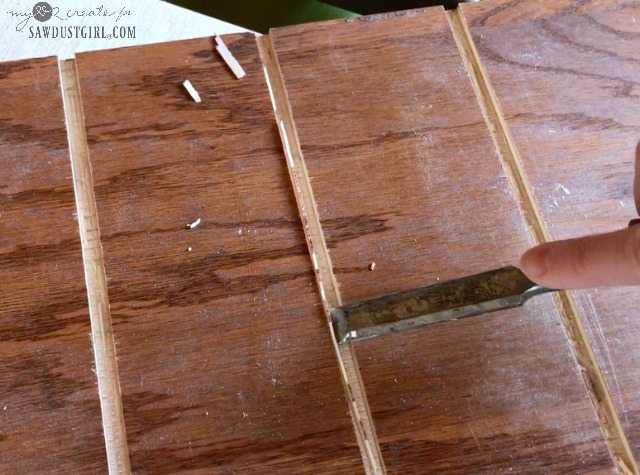
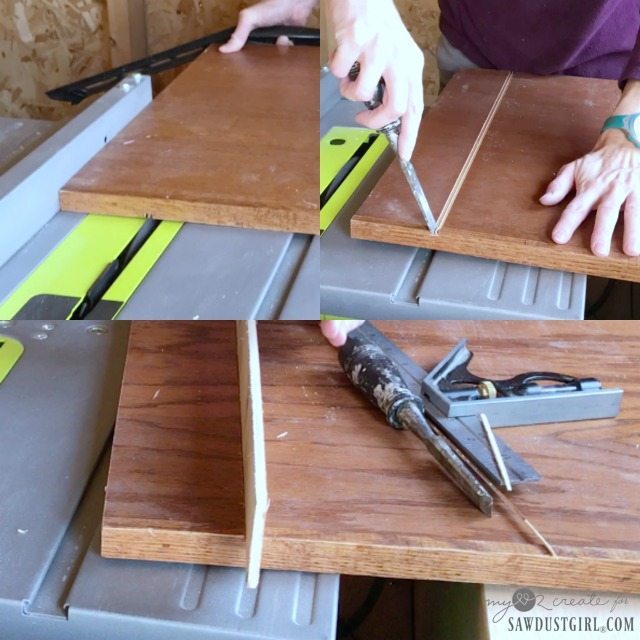
The 1/4” plywood I was using was just a bit thicker so I needed to make my dado’s a little wider, and because my saw blade is a little thinner than 1/8” I had to leave a little sliver of wood in my dado cuts.
Of course I could have just made three passes on the table saw, and I would recommend this if you need really strong weight bearing joints, but I didn’t. So I just made two passes and used a chisel to chip out the extra sliver of wood, it was really easy to do. Then I tested my 1/4” plywood to make sure it fit.
With my outside dado cuts done and I was ready to measure and mark for my center dado cuts.
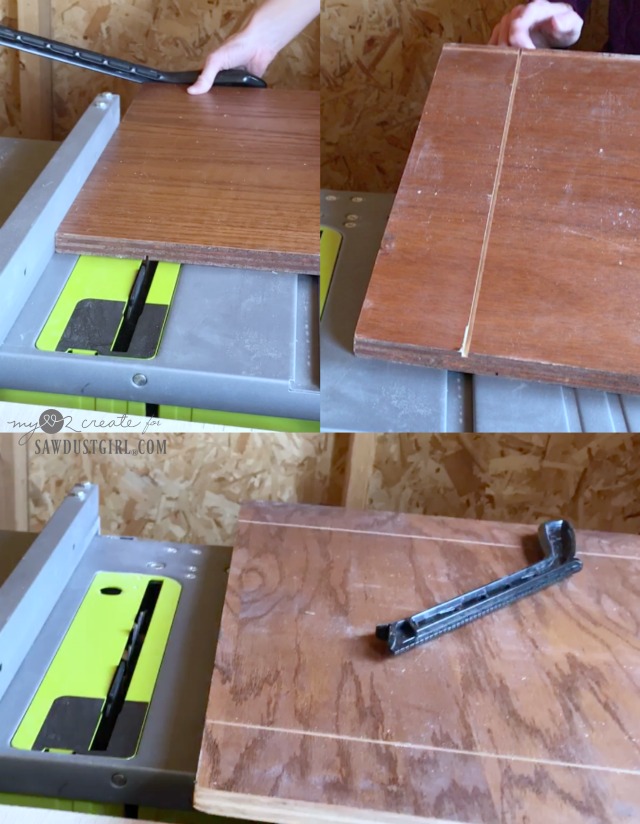
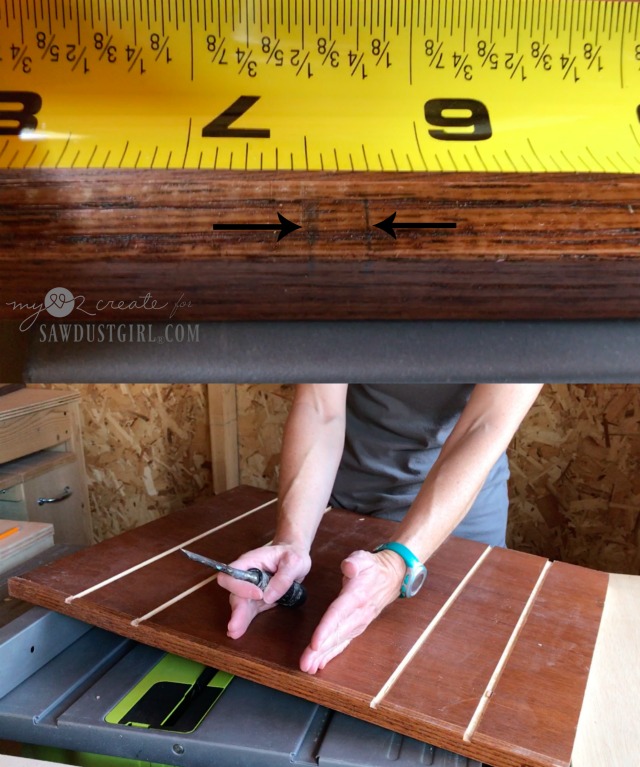
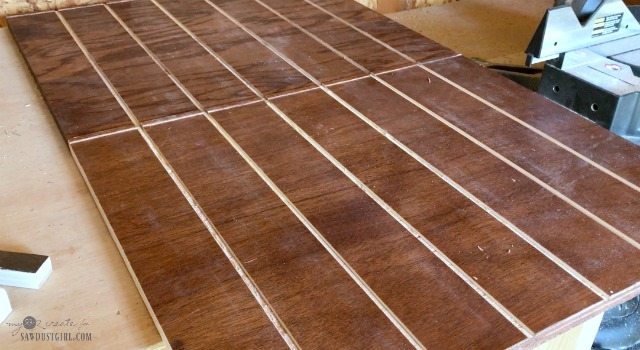
In the top photo you can see I previously marked where each dado needed to be cut on my boards.
This is helpful for when you are setting your rip fence for each dado. You can use the marks to make your cuts accurate.
See how my saw blade is lined up with the mark on my board? This is for my first pass. Then I will re-set the rip fence and line up my cuts with the other line for the second pass.
When I finished my two boards were perfectly symmetrical…

…And I was really really happy!!! I am seriously so excited to do more projects on my table saw, and I look forward to trying a thicker dado joint in the future!
I hope this was helpful to you! I believe that you can tackle anything if you really want to, and if you need a push to get you started… Sandra and I are here, sometimes that is all you need!
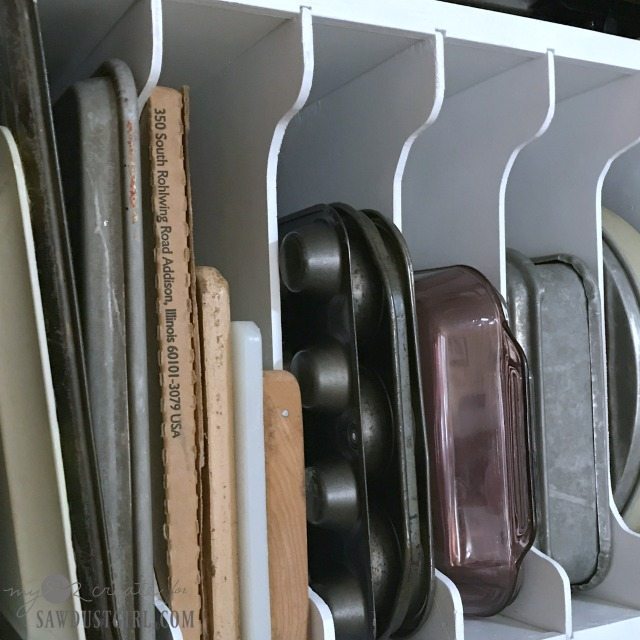
If you want to see what I made with my dado joints (and the amazing difference this project makes in my cupboard) you see How to make a tray divider using dado joints on my blog! I wish I would have made this years ago, I LOVE it!
Hugs!
Mindi
Barb says
Thank you. That was an excellent tutorial! My big fear (and I completely understand yours), is the miter saw. It terrifies me and I avoid using it at all costs.
Mindi Carwin says
Thank you Barb, I am so glad you enjoyed it! I totally understand about tools and fears, it is so important to be save and respect the tool. I hope someday you can overcome yours with the Miter saw…baby steps! I am still taking them on the table saw! 🙂
marvin says
Hi Ladies and whomever else.
A table saw just might be the most dangerous tool in the shop.
May I interject? I am not fond of a push stick. I take a scrap piece of wood, maybe 12″ long, and make two passes thru the saw. Look at your shoes in profile. See how the heel sticks down lower than the toe? I make a long cut maybe 1/2″ from the edge like the shoe sole about 3/4 the way along the wood, then
another cut to remove the long sole, leaving the heel to safely push the work piece thru the saw. I stand the push shoe against the fence and away I go. If you are making thin cuts, don’t worry about the push piece getting chewed up bit. When it’s shot, grab some scrap and make another. My current push shoe is about a year old and needs to be replaced.
Thank you, Sawdust girl – Another great and sorely needed post to your blog.
Y’all have a Merry Christmas and remember the true meaning of Christmas.
Mindi Carwin says
Thank you so much Marvin! I appreciate the tips, I can use all I can get with my limited experience on the table saw! Have a very Merry Christmas!
Lauren says
Thanks for this post– Im nervous about this tool as well, but feel encouraged after reading! Great tips and project!
marvin shelley - Master Sawdust Maker says
Hi Folks – Safety tips with power tools. I gave my Grandson – 23 YO – a table saw for his birthday and printed the safety list that I live by:
1) Never use any power tool when drinking alcohol – even one beer or glass of wine is a NO-NO!
2) Never get in a hurry. Under pressure – sit for 5 minutes and think about what you are about to do. Relax.
3) Never use a power tool when tired. Good way to make mistakes and get hurt.
4) Always try to keep those fingers at least 6″ away from a spinning blade. There are some exceptions.
5) Always use a push shoe or stick with the table saw. A crosscut sled is best.
6) Tell spouse and kids to never walk up behind you as a surprise when using power tools. When you jump, the work piece flies over your shoulder and hits them.
7) Never run plywood less than 1/4″ thick thru the table saw. Serious kick back will occur. I’ve only had 2 kick backs in 20 years. Both times was running 1/8″ plywood. Use the portable circle saw.
8) Use eye and ear equipment. I am almost deaf from not using cheap ear muffs. Harbor Freight has good ones for $2-$3. Hearing aides are $1,200 and up. I had to buy them last year. They also have face shields and goggles. An eye is a terrible thing to lose. All it takes is ONE splinter thrown off a spinning blade at 100+mph and you are blind in one eye – FOREVER!
I’ve been at this off and on for 20+ years and still have 8 fingers and 2 thumbs and 2 eyes, ears are shot! Play safe. Safe is cheap. Doctors and ERs are painful and expensive. Don’t be afraid of power tools. Just use them correctly.
marvin shelley - Master Sawdust Maker says
Free lumber at the saw mill – Your local saw mills piles up and burns the first cut on each of the 4 sides of the log. Meaning – there’s a lot of bark on the piece. Then they pile it up and burn it. WHAT?
When I visit the local saw mills to buy, I always ask if I can get a few sticks off the burn pile? There’s about 25-40% good useable lumber in every piece. You have to do some sawing when you get home to get rid of the trash, but, if you have time to do that, you can get lots of good lumber for free.
There’s lots of things you make with the trash with the bark still on it. Small boxes,candle holders, hat/coat racks, etc. Myself, I just do not have time to saw out the waste. One mill a few miles away has cedar bundles of the of the slabs. $20 a bundle all banded up nice and neat. Weighs about 1,700 pounds (hardwood weighs maybe 2,500 pounds) so you need a pretty
good trailer to haul it. It’s 8+ feet long. They will load it with their front end loader.
After you get the good stuff, stack and sticker for 6 months.
IF you GOOGLE SAWMILLS in your area, they will pop up. Or GOOGLE WOODMIZER and they will have a list of saw mill owners in your area.
Have fun! Be safe.
ANDREA says
Thanks for the correction on pronouncing dado. I refused to say it out loud, as I was never sure. Still working on conquering my fear of the table saw… but this gives me hope! On a side note, in Step 1, you refer to 1/4″ plywood; did you mean 1/2″?
Vic Rauch says
For making a dado to fit your piece of wood…
Cut off a piece of that wood to use against your rip fence. Set your rip fence where you want the “top” of your dado to be and then make that first pass for the “top” portion of the dado. Then put your piece of wood you cut first next to the rip fence (use the thickness of that piece) and make your second pass for your dado. If the dado needs to be wider than 1/4″, you now have the upper and lower sides of your dado cut. Now just move your rip fence 1/8″ in order to start ripping out the middle waste of material in your dado.