We decided the basement floors were something we had to update before we can sell this house. Which meant removing tile and thinset from the concrete foundation. This was difficult and dusty, but it was definitely a DIY’able task. Thank goodness for my good friend, Chelsey, who loves doing demo and is willing to get dirty and work hard in exchange for a good meal cooked by Chef Powell!
The builders made the choice to install a section of tile, leading from the garage door, over to the stairwell, and back to the patio door. It makes sense to have a durable, cleanable surface in that, high traffic area. Especially considering two of those doors lead to the outside. I didn’t love the triangle, but didn’t have a better design idea for including two different flooring materials either.

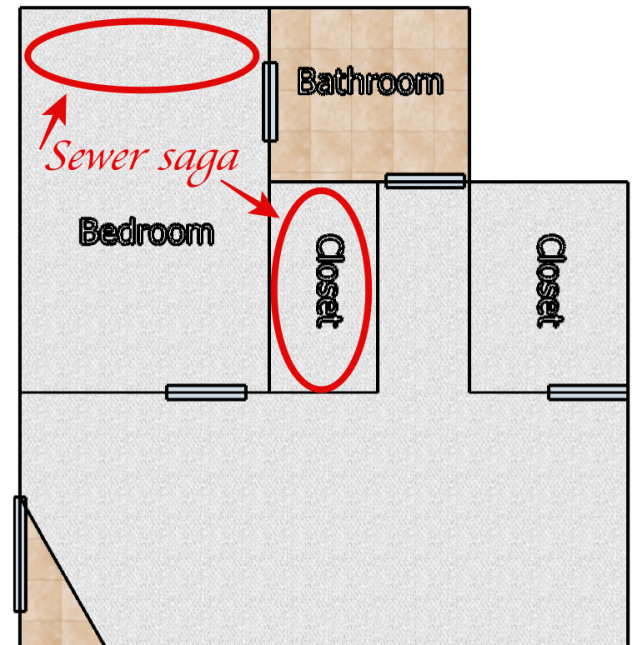
I considered leaving the tile and just replacing the carpet, which HAD to be replaced. The carpet in the bedroom and closet affected by the sewer saga had already been torn out. If I had been able to find a reputable carpet installer, I would have gone that route.
I could not find a carpet installer (I felt comfortable with) so we decided to choose flooring we could install ourselves. Which wouldn’t be carpet. Since we would be installing the flooring ourselves, I wasn’t going to leave the weird triangle of a different material. We tore out ALL the flooring, including the tile and thinset.
Removing Tile
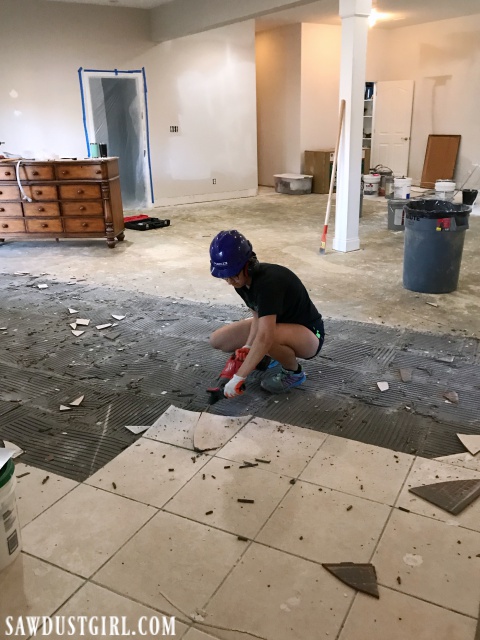
Removing the tile was easy with Milwaukee tool’s M18 FUEL™ 1″ SDS Plus D-Handle Rotary Hammer! That thing, with a tile chisel bit, popped the tiles up like nothing. And it was fun to use – on the tile.

Removing Thinset
Removing the thinset was another story. It was probably the thickest thinset application in the history of ever.

I did some research before tackling this project. House of Hepworths was the most informative out of all that I read. Their tip for success was to rent a Floor Maintainer (from Home Depot) along with a Diamond disk, to grind down the mortar. My closest HD does’t do rentals so I called my local rental center and asked what they had for the job. It wasn’t a Floor Maintainer and the head was smaller than the machine in Allison’s post. I didn’t want to drive forever to get the exact machine so I went with my rental center’s machine.
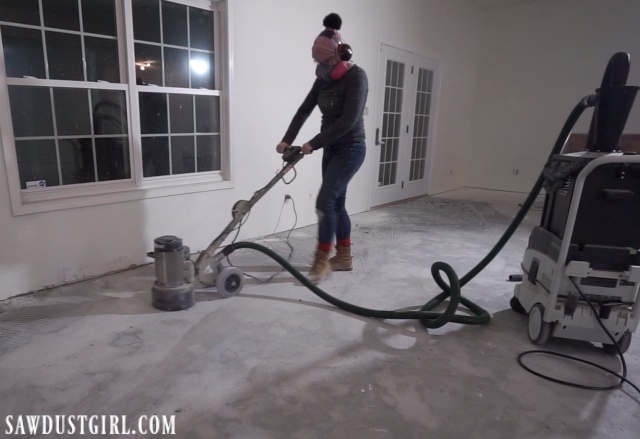
It did not go smoothly. The machine kept dying. I took it in and exchanged it for another. That one kept dying too so the rental center sent someone out to look at the situation. Apparently the mortar was just too thick. I don’t know if the Floor Maintainer would have done a better job or had the same problem. The rental center gave me a new disk to use on the machine. One with more hearty grinding pads. Taking turns between that and the hammer chisel, we were finally able to get it done.
Man it was a chore though!
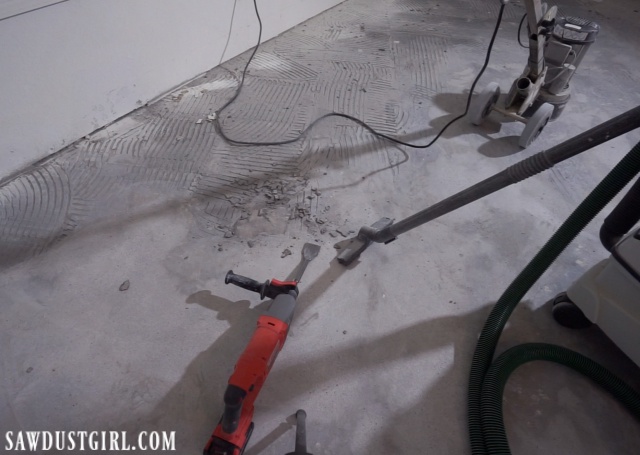
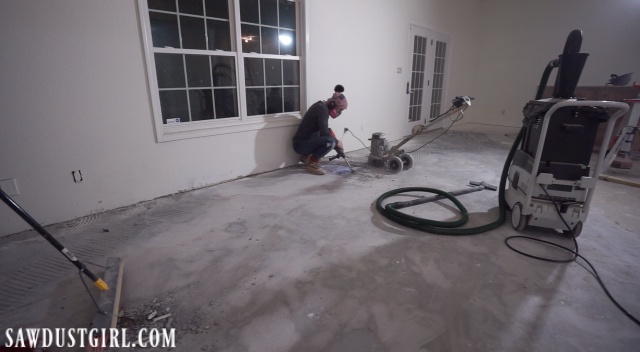
First, we’d chip out as much as we could get with the hammer chisel. Then we’d sweep away the chunks. After that, we’d use the machine to grind down at the thinset that was left. The grinding process left a thick layer of dust on the floor. I had my dust vac hooked up to the machine which I think just kept some of the dust out of the air. Periodically I vacuumed up a thick layer of dust.
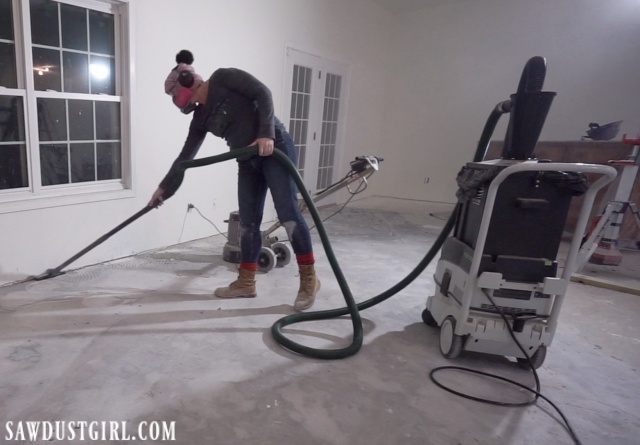
Then I’d start the process again: chip, sweep, grind, vacuum…
Until finally the whole room was finished. We completely filled the 14 gallon dust extractor with mortar dust during this process. Months later, I vacuumed a layer of gray dust off the walls down there.
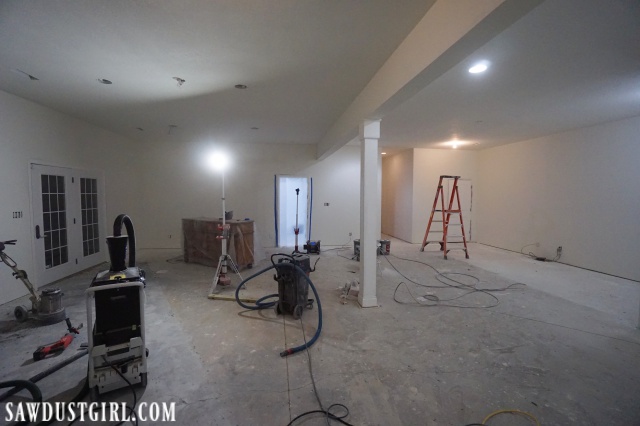
Grinding the thinset off the concrete was a two day chore. I spent a couple hundred dollars on the machine rental. It wasn’t fun and it wasn’t cheap, but it’s done.
Stacy says
Ugg. I have a similar project and I hope it isn’t this involved. Thanks for sharing this so i can mentally prepare for it!
Sandra says
I think it’s good to know what you’re getting into. LOL
Rebecca says
Wow, thanks for sharing this! I have a large covered patio that will need this done. I’m guessing since it’s so labor intensive that I could save quite a bit of money doing it myself. Question: what kind of mask do you recommend for this project? I want to be sure I get a good one that will protect me. Thankfully it’s outside so that should help.
Sandra says
That is a great question. An N95 mask (or cartridge if you have a face mask type respirator) is recommended for common dusts, including silica. Like this: https://amzn.to/2TkDrFV
Jill says
I am surprised you did not try to put the carpet down yourself!!
Sandra says
In a room this large there are going to be at least 3 seams. I have no experience and don’t want to gain it on a space this big. I am going to install some on the stairs! So I will get some practice for next time.
Tammara says
Oh my, thats a lot of work! Now I know why most folks in TN do there own work! Looks good,
Sandra says
I don’t think it’s just in TN where people like to DIY to save money. LOL
DARLENE says
I have a small bathroom and laundry area that have tile that needs to be removed and replaced. It’s on concrete. I’m not looking forward to that job!
Sandra says
It’s a dirty job. But if it’s got to be done…
Trisha Lawrence says
The floor maintainer with the grinding disc (has 3-4 large teeth on it) would have taken it off. I worked as a laborer in the union in Indiana and had to use it for this same application. But when that thing grabs onto something be ready cause it can fling you a few feet if your not prepared. Lol
But definitely the tool to have for that project.
You ladies did a killer job though! Way to tackle it!!
Sandra says
The grinding disc we used initially had 3 large teeth. I think the machine just wasn’t beefy enough for what it was being asked to do. The floor maintainer looked like the “head” was maybe 12″ in diameter. This one was 7″. It was easier to handle but IT couldn’t handle it. LOL We got it done though. If I ever need to do this again I will get the floor maintainer and try it.
Teresa says
I’m really surprised your arms aren’t like Arnold’s lol Any ideas as to what material(s) you’ll be replacing with yet?
Sandra says
The nice thing was that Chelsey did a big part of it. She was sore by the time she went home. I took over from there. If I had done the whole floor, I would have been much more sore than I was. This work definitely keeps you motivated to stay in shape.
Ironmongery Experts - Jamie says
Good job! That looked so tough, you must be so dedicated. Are you looking to lay anything else over the concrete or leave it as it is? Talk soon, Jamie.
Chen says
That’s a really messing job. But you did good!
Andrew says
Hi, I’m wondering if this process created a smooth finish? We removed tile from our driveway and have a thin coat of thin set that needs removed. Thoughts?
Sandra says
The grinder scraped off all the thinset, basically exposing the concrete underneath. We didn’t resurface the concrete but there are discs for the grinder that will do that.