• Home
  • About
    • Personal Posts
  • Privacy
  • Shop
    • My Account
    • Checkout
    • Email
    • Facebook
    • Instagram
    • Pinterest
    • Twitter
    • YouTube
Sawdust Girl®

Sawdust Girl®

Renovation, cabinet building and woodworking plans and tutorials. Build like a Girl®

  • My Home
    • Clinton TN House
      • Clinton TN House in Progress
    • Maryville TN House
      • Maryville TN House Tour – Completed Rooms
      • Maryville TN House in Progress
        • Basement
        • Basement Storage Closet
        • Bedroom Office
        • Craft Room
        • Dining Room
        • Entry
        • Garage
        • Guest Bedroom
        • Hallway
        • Jack and Jill Bathroom
        • Kitchen
        • Kitchen Entry
        • Laundry Room
        • Library
        • Living Room
        • Loft
        • Madison’s Room
        • Master Bedroom
        • Master Closet
        • Pantry
        • Porch
        • Powder Room
        • Wes’ Office
    • Illinois House
    • Calderwood Cottage
  • My Workshop
    • Clinton Workshop
  • Build & Breakfast
  • Cabinet Making 101
    • Cabinets
    • Doors
    • Drawers
  • Projects and Plans
    • Countertops
    • Beds
    • Benches
    • Bookshelves
    • Desks
    • Gift Ideas
    • Holiday
      • Christmas
      • Halloween
    • Home Accessories
    • Kids
    • Kitchen Cabinets
    • Lockers
    • Nightstands
    • Organization accessories
    • Recipes
    • Sewing
    • Tables
    • Vanities
    • Wardrobes
    • Woodworking
      • Wood Finishing
    • Workshop
    • Workshop Storage and Organization
  • Remodeling 101
    • Baseboard and Trim
    • crown molding
    • Demolition
    • Door and Window Casings
    • Door Installation
    • Drywall
    • Electrical work
    • Flooring
    • Home Maintenance
    • Painting
    • Plumbing
    • Resources
    • Safety
    • Tile
    • Wall and Ceiling Treatments
  • Sawdust Squad
  • The Sawdust Diaries
    • Andrea
    • Ava D.
    • Beckie F.
    • Cara C.
    • Courtney B
    • Fawn T.
    • Jenn D.
    • Kelly C.
    • Kristy K.
    • Lara T.
    • Malisa B.
    • Marnie D.
    • Robin C.
    • Val F.
  • Tools
    • Products
    • Tool Reviews & Overviews
    • Inspiration & Ideas

Craftsman Style Trim – Door Trim

All Posts, Door and Window Casings, Pantry

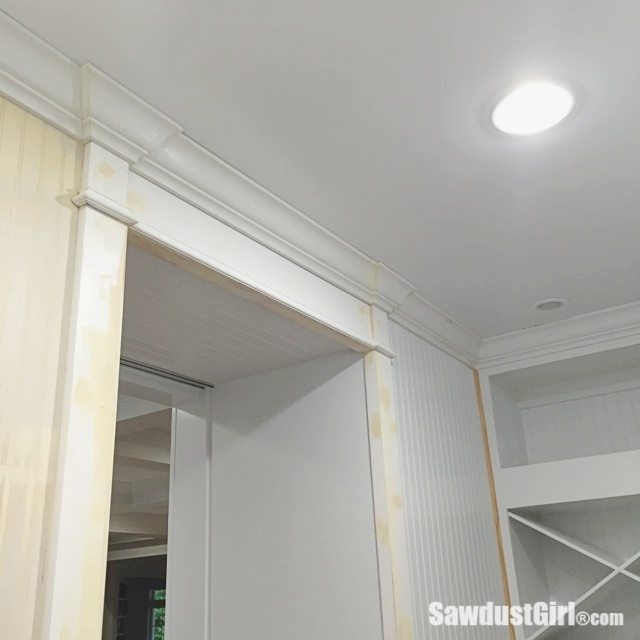
I have finished a TON of details (big and small) in the pantry.  The craftsman style trim around the door with all the little return pieces was a bit of a chore but the visual appeal is so worth it.  DIY Door Trim with Decorative Header
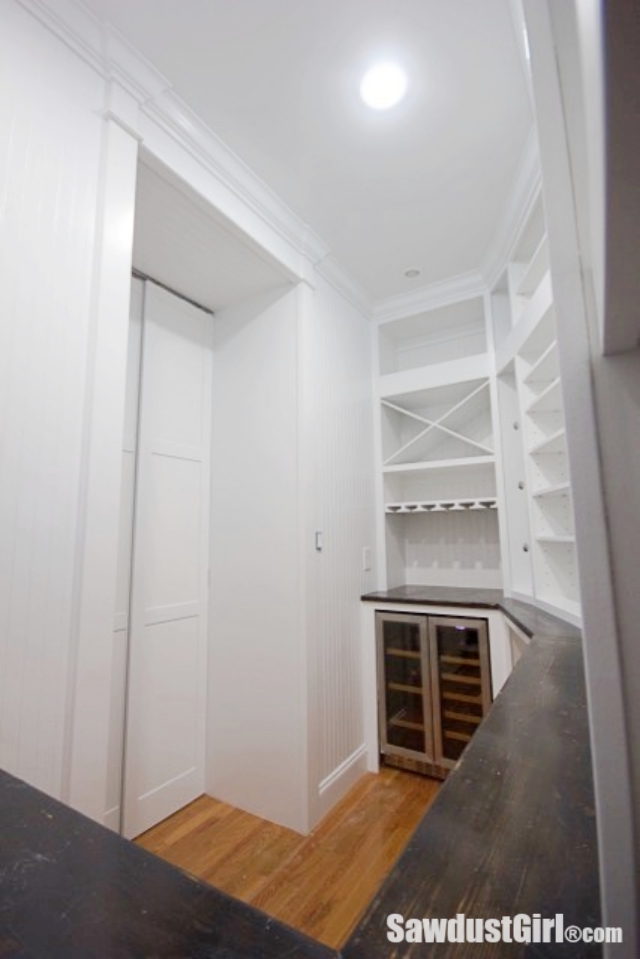
I originally thought I’d include the cabinet in the doorway so the decorative header would extend to the backside of the cabinet and the vertical piece would come down behind it…when it came time to DO the door trim I changed my mind.

DIY decorative door trim.

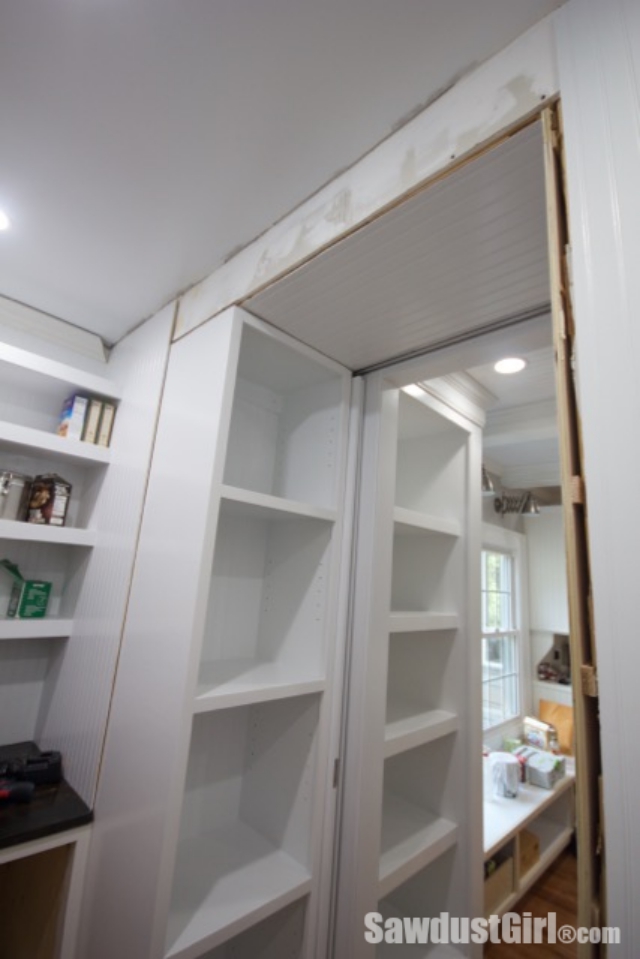
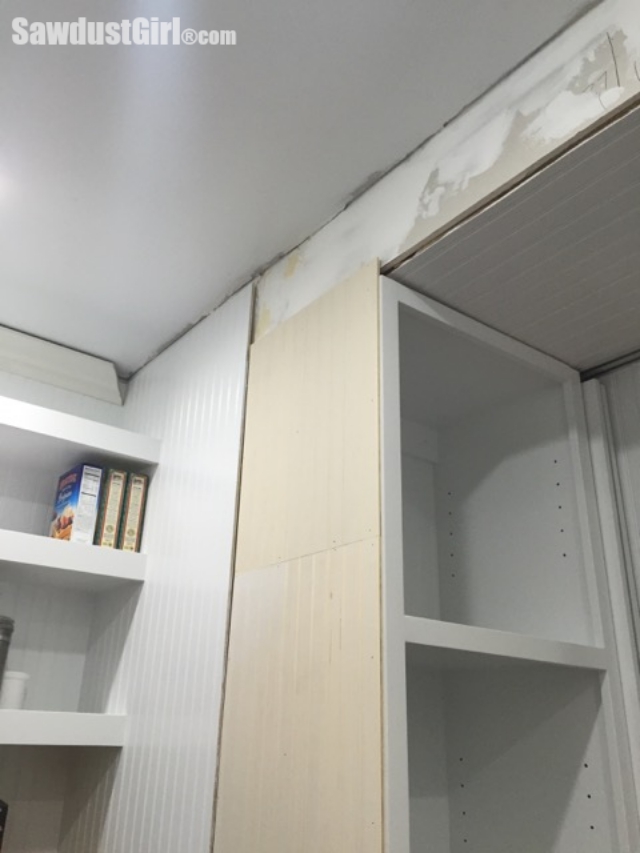
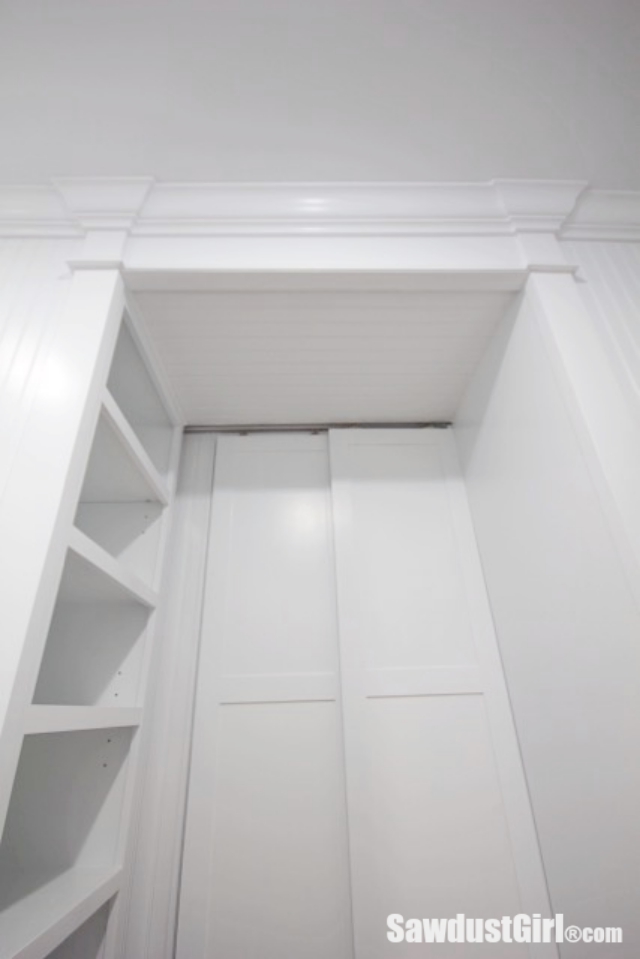
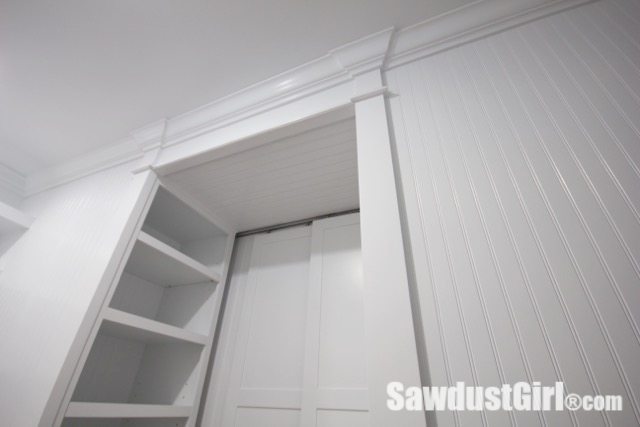
I decided the door trim needed to be ON the cabinet so I had to make the side of the cabinet look like the wall.  Or look like it was part of the wall.  Which meant applying beadboard to the cabinet.  My truck was in the shop for 6 days so I couldn’t go get a sheet of beadboard so I used what I had.  I had scraps.  So I had a lot of puttying and sanding to add to my to-do list.  Check out my tutorial on how to hide seams in beadboard!
How to DIY a decorative door trim.

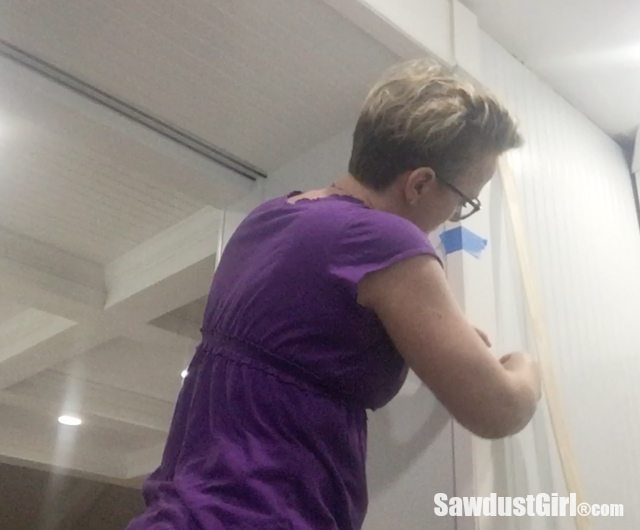
For the craftsman style trim, I used primed 1×3 pine. The verticals are only 8′ tall so I made sure the seam would be under the trim.
How to DIY a decorative door trim.

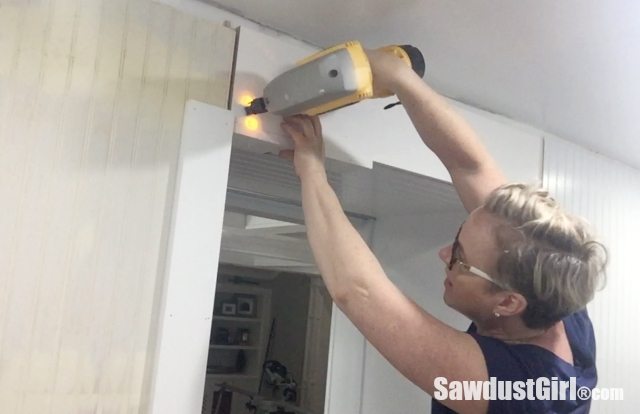
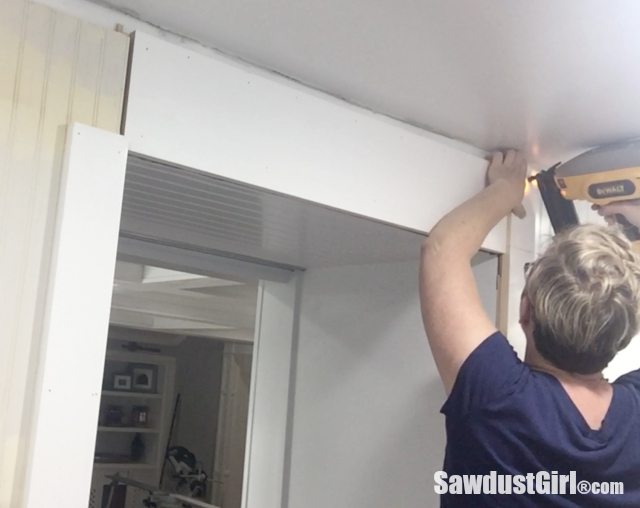
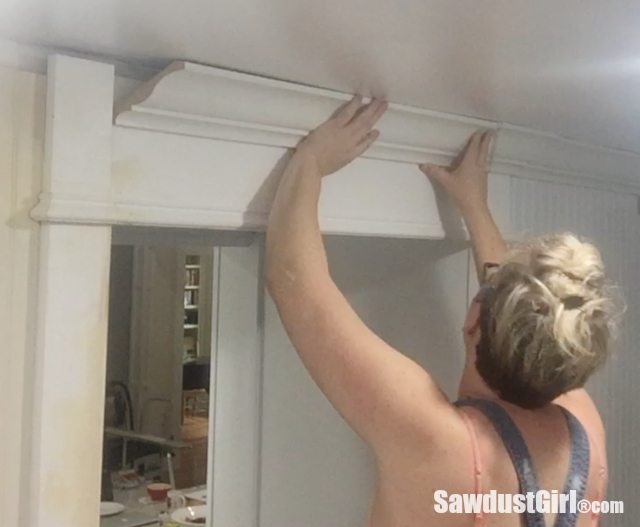
Next I added the horizontal piece which filled in the space all the way to the ceiling (almost).

DIY Door Trim with Decorative Header

The vertical pieces should be proud of the horizontal piece by 1/4″- 1/2″.

DIY Door Trim with Decorative Header

Finish off the verticals.

DIY decorative door trim.

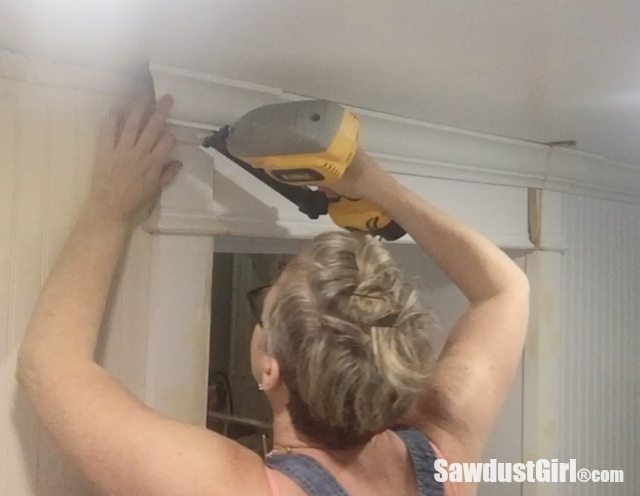
Then the decorative moulding gets added.  I install a small moulding across the bottom of the horizontal “header”, carrying it over across the seam in the verticals.  I’ll nail the larger pieces in place but the small “return” pieces I secure with wood glue and tape.

DIY Door Trim with Decorative Header

Those little pieces tend to move out of alignment and/or break when they are nailed into place.

DIY Door Trim with Decorative Header

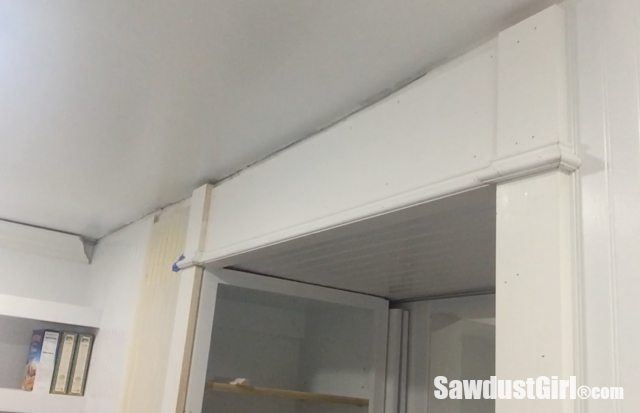
I ripped a couple 1/4″ thick strips on my table saw to use to hide the cracks behind the casing.

How to DIY a decorative door trim.

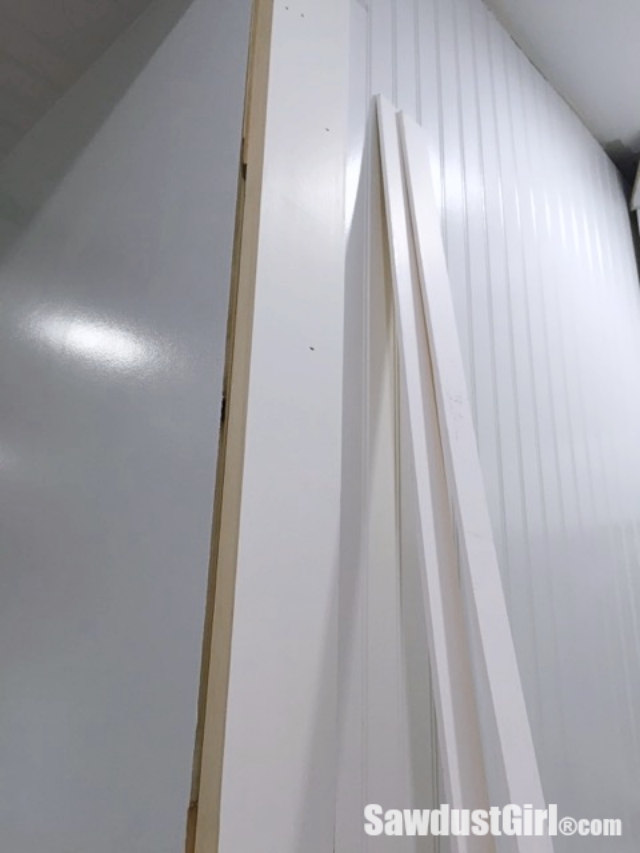
This also made the casing chunkier– which I like.

DIY decorative door trim.

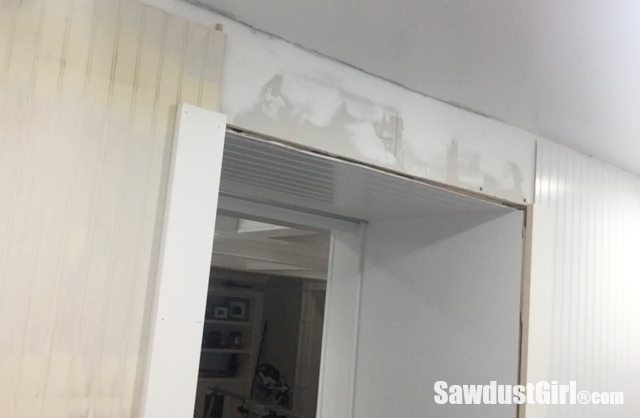
The last piece was finishing up the crown moulding that runs around the rest of the room.

DIY Door Trim with Decorative Header

DIY Door Trim with Decorative Header The bump-outs are what make craftsman style trim look SO COOL!  They’re a bit tedious — but worth it.

I take a ton of time making sure all nail holes, cracks and imperfections are filled and GONE before I’m ready to paint.
Craftsman style trim with Decorative Header

Then I prime, look again, fill and sand some more and then paint.

Craftsman style trim around pantry door

I included a few tips for cutting and adding the small return pieces in my video.


Here is the completed craftsman style door trim with a decorative!
How to: DIY Door Trim with Decorative Header

DIY Door Trim with Decorative Header

It’s a lot of white right now!  But soon there will be tons of food and pots and pans and other stuff on the shelves to break it up.  SOON!

September 15, 2015 · 13 Comments

« Attaching Faceframe to Adjustable Shelves
Spray Shelter for Painting »

Comments

  1. Sandy says

    September 15, 2015 at 3:19 pm

    What color white paint do you use? I love it!

    Reply
    • Sandra says

      September 15, 2015 at 6:00 pm

      This is Decorator White from Sherwin Williams.

      Reply
  2. Barry Bratus says

    September 15, 2015 at 3:21 pm

    The trim and crown on the door looks amazing. Nicely done !!

    Reply
    • Sandra says

      September 15, 2015 at 5:59 pm

      Thanks Barry.

      Reply
  3. Jake's a Girl says

    September 15, 2015 at 3:39 pm

    I love it!! Dang fantastic is what it is!

    Reply
    • Sandra says

      September 15, 2015 at 5:58 pm

      Thanks!

      Reply
  4. Marieza says

    September 15, 2015 at 3:48 pm

    Wow, wow and wow! It’s BEAUTIFUL

    Reply
    • Sandra says

      September 15, 2015 at 5:58 pm

      Thank you Marieza. What a pretty name!

      Reply
  5. Terry says

    September 15, 2015 at 6:16 pm

    you have awesome skills.

    Reply
  6. sherry says

    September 15, 2015 at 6:24 pm

    On your paint, what finish do you use? Satin, semi gloss etc? Your work truly is beautiful and you make it seem so effortless. I’m always so inspired by your posts. Thank you for sharing your talent.

    Reply
  7. Annet M says

    September 15, 2015 at 6:42 pm

    That was really neat to watch, thanks for the video! I trimmed out my upstairs hallway the other day and kept repeating to myself “caulk is my friend”, which I totally learned from you! So thanks!
    Completely helped with the freaking out when things don’t match completely. Still not 100% happy with the joins but I mostly think that’s because I know what I’m looking for and anyone else wouldn’t see the flaws…

    Reply
  8. Ava Maria says

    September 15, 2015 at 9:05 pm

    Now that’s a pantry. Beautiful job.

    Reply
  9. christanp says

    September 27, 2015 at 4:06 pm

    I love your tutorials! It makes me feel like I can try to tackle a project I wouldn’t have otherwise!

    Reply

Leave a Reply Cancel reply

Your email address will not be published. Required fields are marked *

Categories

New Post email notification signup

You Subscribed!

Legal Stuff

Terms of Use

Privacy Policy

Disclosure

Recent Posts

  • Lodge Update – Floors, Cabinets, Countertops, and Appliances
  • Lodge Kitchen Cabinet Progress
  • Halloween Mad Gab – Halloween Party Ideas
  • Concrete Backsplash or Vertical Wall Treatment
  • Building and Installing a Giant Faux Beam on the Ceiling

Disclaimer:

Although it is my intention to provide accurate plans and clear instructions, not all plans have been tried and tested. Using plans or information found on SawdustGirl.com indicates that you agree with the Terms of Use policy and will accept full responsibility for the process and outcome of any project you attempt. All plans are for private use only. Plans and information published on SawdustGirl.com may not be reproduced, republished or distributed in any manner without written permission from Sandra Powell, Sawdust Girl. Actual projects built using Sawdust Girl plans may be published on your own site without instructions or "tutorial" as long as you provide a link to my original post with full post title or "SawdustGirl.com" as link title.

Copyright © 2022 · anchored theme by <a target="_blank"