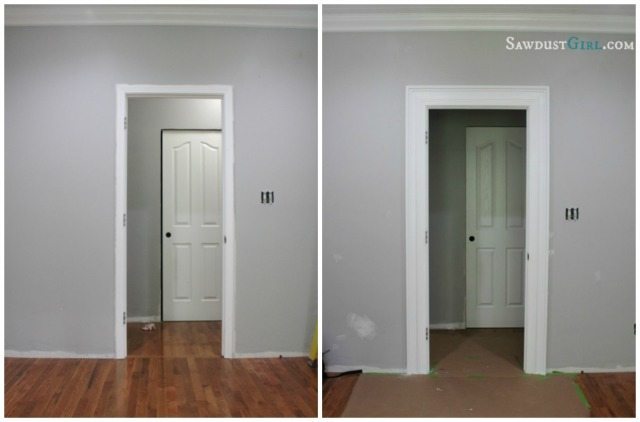
Most builders don’t spend money on trim around doors and windows. They might splurge on crown molding or tall baseboards but typically just put in common, inexpensive door and window casings. Without removing anything or doing any demo, it’s easy to create custom trim molding by adding a second moulding next to the existing one.

How to create awesome door and window trim molding by layering
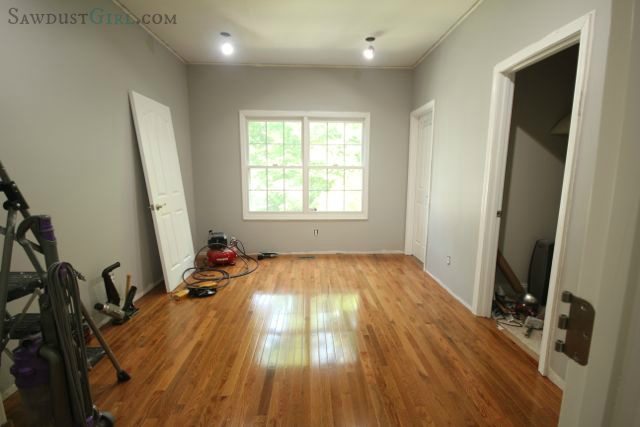
Case in point: my office, had blah trim molding around the window and doors. blah~

I like this SO much better.

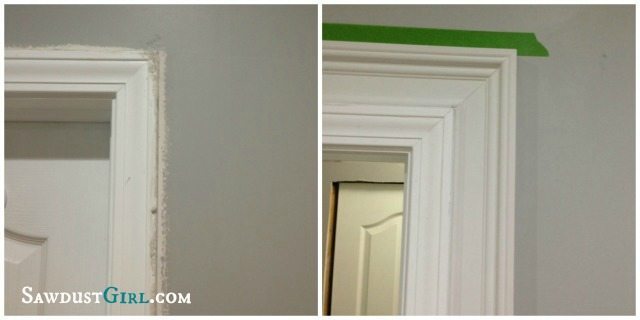
I added the second layer of molding outside the existing one, following the existing joint method of simple mitered corners.

I chose a molding that would work well with my existing trim. What I looked for:
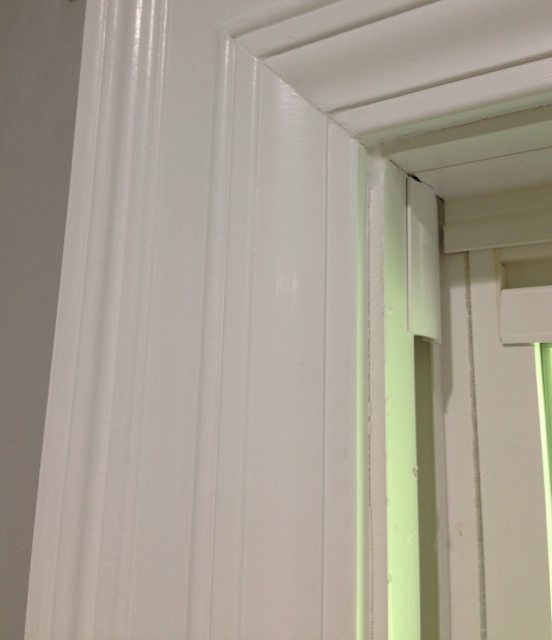
- I wanted a molding that was slightly wider than my existing trim on the inside and got thicker towards the outside.
- I wanted a rounded inside edge so the seam where the two moldings came together would look like part of the pattern and it would look like one big, wide, bulky piece of trim once it was all painted.
Once painted, you wouldn’t know it was two pieces if you didn’t know it.

It just looks like one big, beautiful, bulky, expensive door casing which is a step up from the cookie cutter trim molding that was there before.


*I purchased my trim molding from a local lumber yard, Anderson Lumber. They had a TON of moulding options for really reasonable prices.
*Trim paint: Sherwin Williams – out of the can white (acrylic latex- ProClassic – semi gloss)
*Office wall color: Sherwin Williams- Light French Grey

Krista says
Are you going to do this trim around all of your doors in you house?
Sandra says
Yes I am. 🙂
Javed says
Dear Sawdustgirl please tell me exactly what the name of the exact casing moulding that you put around the existing door casing. Thank you very much.
Javed
Sandra says
I have no idea what the name was.
teri says
I actually love that look, we started doing that in our 1/2 bathroom by mistake. I love it so much that I’m going thru the house little by little and beefing up the rest of the window casings where I can. 🙂 Love it!
Sandra says
Happy mistakes!
MoeWest says
For your closet(?) door near the corner, are you leaving that as is because there’s not enough room for more trim? I have that situation for quite a few doors in my house. I could add to the top but not the sides.
Sandra says
The two doors on the adjacent wall will most likely get moved when I do the Jack and Jill bathroom so I’m not doing anything to those doors right now.
Recreateanddecorate says
I am showing my husband this right now! Cant wait for him to do ours as well as crown molding and baseboards! Looks great!
Sandra says
I have a feeling Sawdust Girl is going to become a bad word in your home. 😉
Sharon says
You really do a beautiful job on the mitered corners! Your molding is just perfect and really makes a statement!
Sandra says
Thank you Sharon. The miters are my friends. It’s the compound miters I’m not so thrilled with. 😉
Kim says
So true that builders don’t add nice door and window trim unless you request it. We added some just like what you added around all our doors and windows on the first floor when we built our home 17 years ago. We just used the standard stuff upstairs to save money. My husband did all our trim. I am so amazed at the work you can do that I had to show my husband your closet that blows me away.
Sandra says
Thanks Kim. It’s definitely worth the effort.
Tracy says
Wonderful job! This is awesome!
Ana says
It’s amazing how new trim completely changes the look of windows and doors! I know you’re super busy, but could you please sometime write a tutorial on how to deal with angles that are not exactly 90 degrees? I trimmed a lot of windows in my house many years ago and remember having the hardest time cutting the trim according to inexact angles. Thanks so much, love your blog and your amazing creations!!
Amanda C says
Looks great! Just wondering if you did anything to the Sherwin Williams Light French Gray paint to change the color of it? I have that same color in my entrance and mine seems much bluer than yours does (yours looks more gray). Just wondering… Thanks!
Sandra says
No I didn’t change it. Paint is always effected by everything else in the room and the windows and which direction the sun is shining in… That is why choosing paint is such a difficult task.
Amanda C says
I figured as much 🙂 Thanks for the reply!
Ann Nell says
beautiful molding !! you are a very talented carpenter…you go girl !!
Karen says
Love your newest project. It’s very timely! I was just thinking about doing that around here. Thanks for throwing in what you looked for in the molding. My builder installed 3″ trim…how wide did your trim end up being with the additional piece?
julia andersen says
I am building in 3 months and am so thankful for your photos. i was debating on just adding later down the road but have decided to do it from the get go. thanks so much!
Joanie says
I love this! None of my windows have any trim at all, and the doorways are sad little things. Now if I could just find some decent-looking baseboard ideas to add to what I’ve got. I don’t want to rip out the old, but also don’t want to do the “paint-in-between” thing that I’ve seen elsewhere.
Chris says
Love this!! Thank you for posting! Do you also have posted somewhere how to do it? How did you affix the molding on the walls/original door trim? Suggestions/tips for doing this for completely ‘naked’ windows with no trim?
Isidro says
Howdy, i read your blog from time to time and i own a similar one and i was just wondering if you get
a lot of spam feedback? If so how do you protect
against it, any plugin or anything you can suggest?
I get so much lately it’s driving me insane so any help is very much appreciated.
Fred says
Where’s the actual “sawdust”?
Jaimie says
I relocated with my family about 2 years ago from an 1869 Victorian home with this style of trim into an early 2000’s traditional home. To say it is lacking character is an understatement. I would love to add some of this character, however, I am getting stuck in the corners. The doors are so close to the walls and almost touch in the hallways. Ugh. Can I still add trim and just thin it out or what advise would you have? Thanks so much. Looks beautiful. Great job.
Sandra says
I dealt with that exact situation in a hallway. Check out this post where I show how I dealt with it. It’s not a tutorial but maybe you can get some ideas.