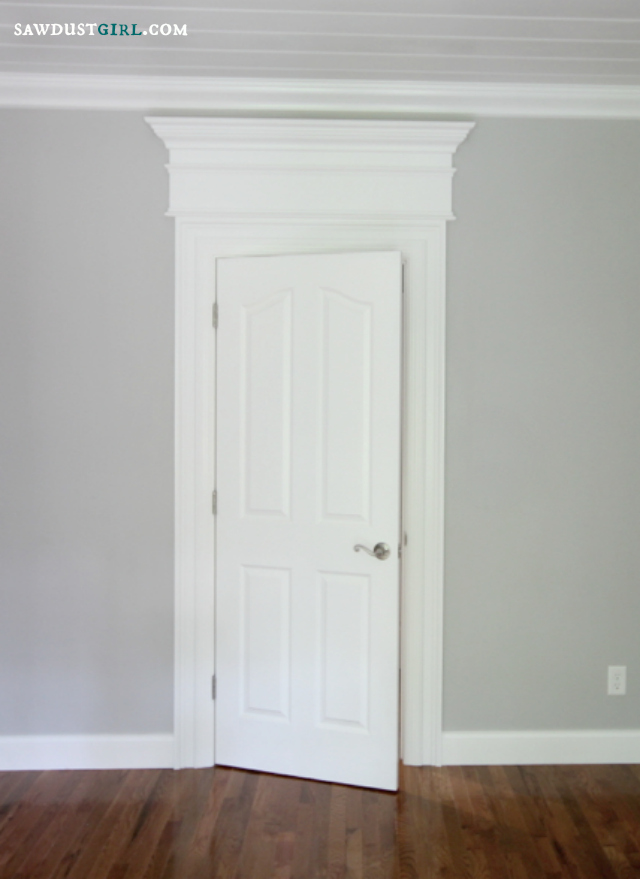
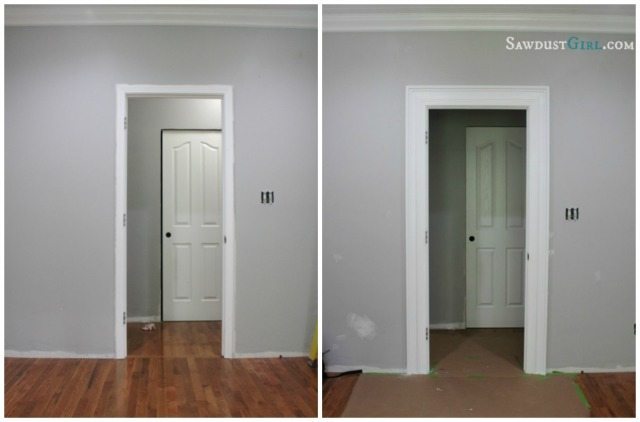
 Yesterday I showed you only the first step in my ultimate plan to upgrade my window and door trim molding. I wanted to add a decorative header (that thing at the top) and needed to bulk out the width of the casing first.
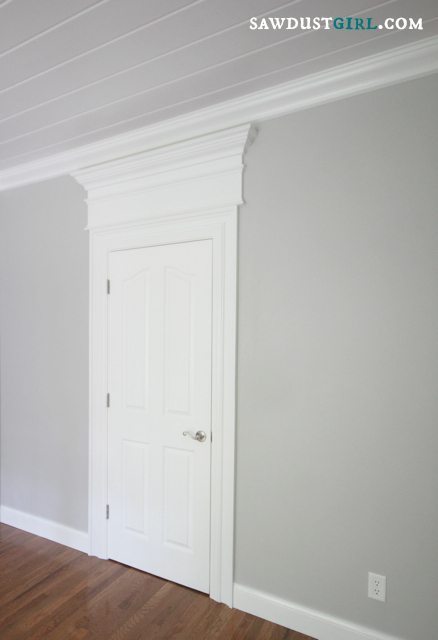
I didn’t want to rip anything out and start from scratch so I made it work with what I already had. Just tricked it out — a lot! Am I going to do this in my entire house? Probably. The decorative header is simply a piece of MDF with crown moulding at the top and a couple pieces of decorative moulding on the face. Depending on how tall your decorative header is, you’ll want to space your trim in order to achieve appealing proportions.
(Except the doors that I’m tearing out like the bathroom and closet doors in this room — ya’ll keep asking me about that.)
It feels like I spent a week adding a decorative header to one door and one window. I was making it up as I went along so it will go much faster next time. Also, I’ll probably paint ALL the parts before I install them so I only have to fill nail holes once it’s all up. Painting over all the details and in the cracks and corners is a pain. But I think it was worth it.
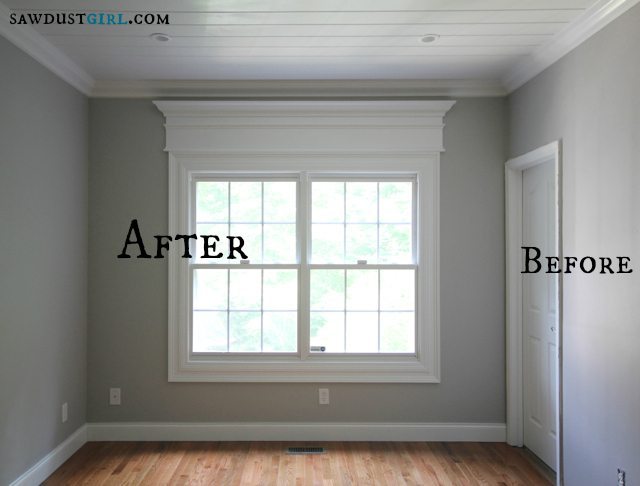
Yes it was worth it because I really like it. I could have stopped with adding another layer of molding around the existing trim because the chunky casing looks great too.
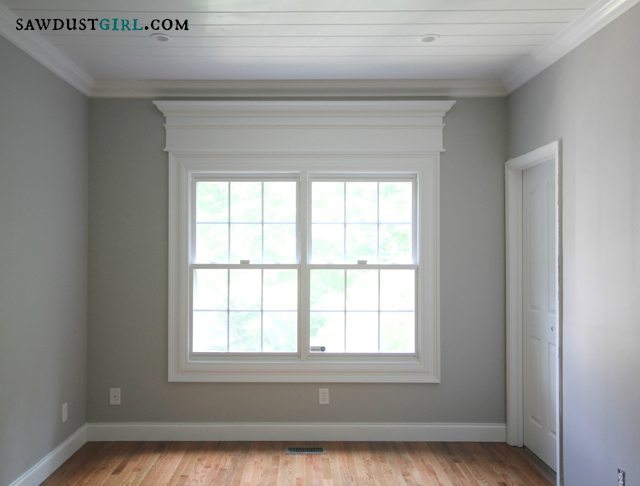
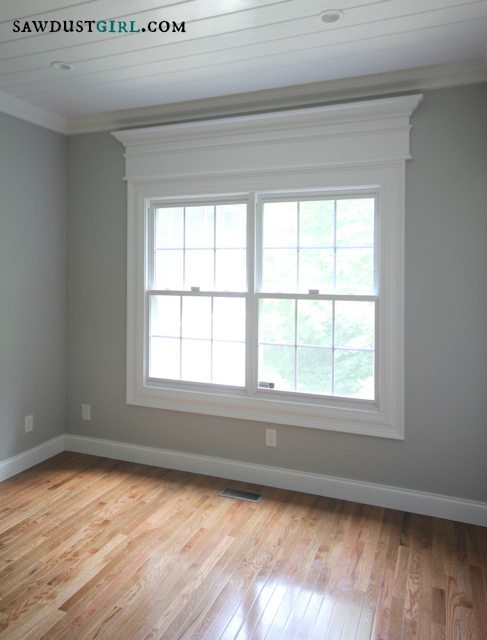
But I really wanted to add some visual height to both the doors and windows. So I added the decorative header and achieved that goal!
I wish I would have taken the window all the way to the ceiling and incorporated the crown moulding in the room to go over the window. I don’t love the small gap above the window. It’s dark and shadowy. Maybe I’ll add a light strip. Like I have nothing better to do with my time! LOL
Shannon Blogger Homes says
LOVE! I mean swoon, drool, faint…LOVE!!!!
Shannon
Jessica says
While I love it, I think it’s a bit top heavy visually, for the size of the room. It is an impeccable job, for sure!
jane says
ABSOLUTELY LOVE the trim!! It looks SOOOOOOOOOOOOO GOOD!!
kristin says
Speaking my mind….I think they are too big and heavy looking in that space for my personal taste. NOW–I love molding! I love nice, thick, quality molding, not the builder grade crud. However, as awesome as your work is, it just seems to heavy for the windows and doors in a more “regular” home. If the ceilings were taller and the home more “grand” I would say yes. Bottom line–you are giving people an awesome tutorial for enhancing their molding and doing a KA job as always educating us 🙂
Linda S says
Kristin’s opinions are exactly what I was thinking. It struck me as “overkill” for the height of the ceiling and size of the room. I think I would have liked it better if you had stopped at the inbetween sample you showed us. Again, your workmanship is not to be messed with, and thanks for sharing your room as it progresses.
Feral Turtle says
Looks fantastic!
Jake's a Girl says
LOVE THIS! I want this trim/moulding on every door and window.
Really beautiful, Sandra.
Tom says
Well – must be a guy thing as I am with Wes!
Brenda says
Love it on the window, but not so much on the door.
LD says
Love the window!!!! Door a little too tall for me but that is nitpicky. Are you going to show how you did it or just final results from now on? Love your step by steps better!
Sandra says
I’ll do a tutorial but sometimes after working on something for a long time and you finish I just want to show it! LOL
Julie W says
Looks amazing!
Nyka says
I’m dying to see what you do for window treatment – I’m having a hard time picturing where it would go/what I would do. I love the idea, but it does look a little top heavy to me. If a bed was in front of the window or a trunk under it, I think it would balance it out. That being said, I totally want to add molding to ALL my doors and windows now!!!
leslie says
I am loving this look. I have recently come upon your blog and have already told my sister all about you and your clever ways. Truly, your projects have sparked something in me.
Sue says
I LOVE, LOVE it!!! As soon as I am done writing this zI am going to show it to my husband. Here’s hoping…
Leslie Stewart @ House on the Way says
It looks awesome! You never cease to amaze me!
Jann Newton says
I think you did a beautiful job! But…as a window treatment designer and fabricator, I have to say that I find it extremely hard to design a window treatment for this kind of window with molding. It is a shame to cover the molding, but the client wants privacy, or some fabric at the window. The best option is, if there is enough depth, to do an inside-mounted roman shade. Otherwise it is tough. I can’t wait to see what, if anything, you do for a window treatment!
Angie says
This is absolutely gorgeous! Love it, this is my inspiration for my house. You can never have too much molding 🙂
Jo says
What paint color did you use? It’s beautiful.
Sandra says
The ceiling and trim is plain out of the can bright white since that’s what they used for the moulding in this house. I matched it so I didn’t have to repaint every speck of existing trim. 🙂
Wendy says
This is beautiful. I want to redo my bedroom and I love the look of this entire room. What color is the paint, and what type of boards did you use for the ceiling. I have stipple on the ceilings throughout the entire house – and I want to get rid of it. Were they actually designed for ceilings or did you use some type of bead board – cost???
Sandra says
The ceiling is pine tongue and groove planks. You see them on a lot of walls nowadays. They are available at lumber yards and home improvement centers for around $7 per 6″x12′ plank.
Kelly says
Curious as to what color wall paint did you use?
Brittany says
A roman shade mounted on the inside of the casing is what I am doing. And truly the only option for such grand features. I lived in a plantation house what was built in the late 1800’s that was completely covered up in this style of molding. It has completely ruined me for life. I’ll never be able to look at builder-grade homes without longing for that house. However, thinking about the electric bill soon snaps me back into reality.
Valerie says
How tall are your ceilings?
Sandra says
9′