For a couple years my scrap lumber was kept in my Hall of Shame. No matter how many time I neatly piled and organized it continually ended up in a big mess because I had to dig around every time I wanted to find something. I finally set aside some and built some organizational storage units to corral all of my craps and treasures (because I keep everything).
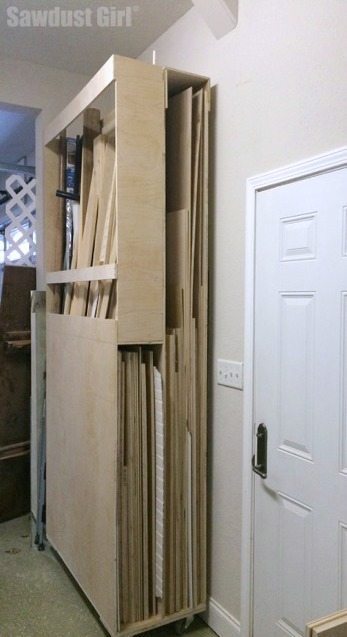
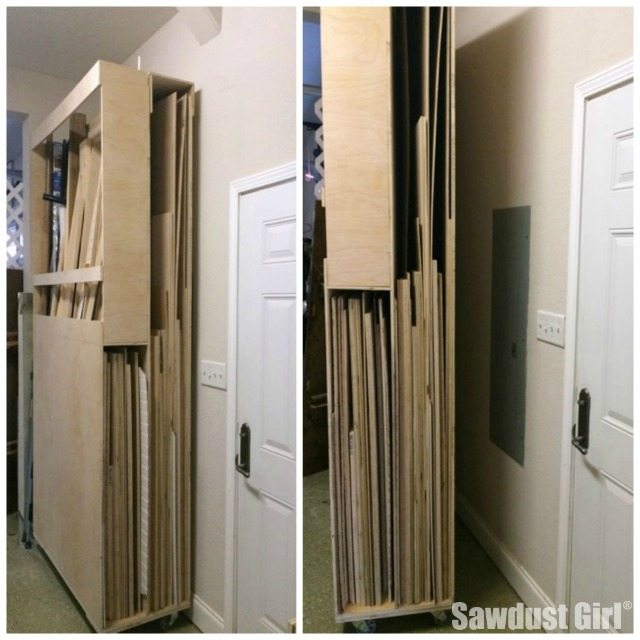
I always want to utilize every inch of space and the narrow wall that houses my breaker box outside my workshop was no exception. I designed this lumber storage unit to fit that space. I put the whole thing on four swivel casters so I can easily move the storage unit out of the way when I need to access the breaker box.
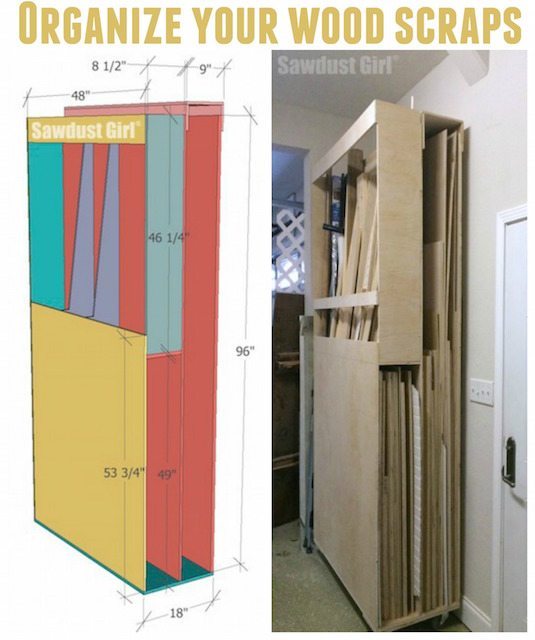
Lumber Storage Unit on Wheels
It takes a good amount of lumber just to build this unit but it was worth the expense for me to have a place to slide sheets of plywood, beadboard, MDF, etc. and sort all my scrap sticks and moldings instead of having them all laying on top of each other. This way, I can see everything in the unit and easily pull out what I need.
 Materials:
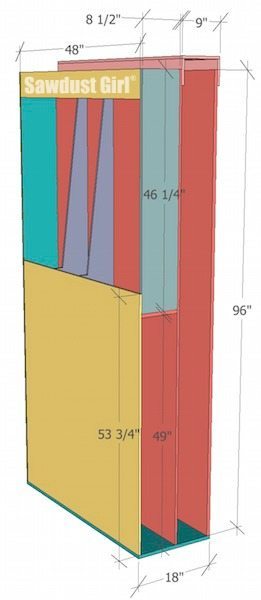
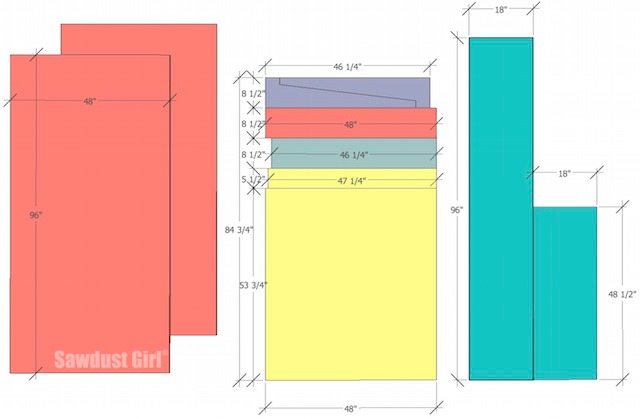
- This unit is built out of 1/2″ plywood except the bottom which is 3/4″ plywood. The back piece can be 1/2 or 3/4″ It is shown in 3/4″ to demonstrate how to get the most out of your lumber but if you have scraps, 1/2″ is sufficient.
- Use wood glue and screws to assemble.
- 4 casters
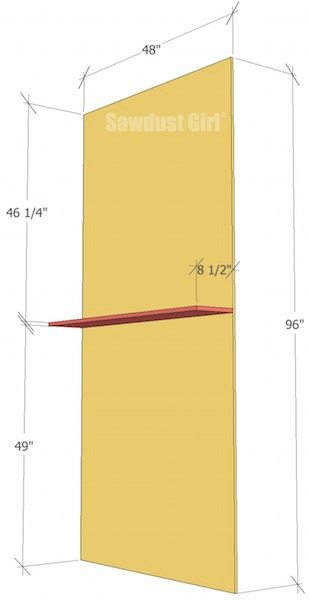
Step 1
- Attach the middle divider to one of the full sheets of 1/2″ plywood.
- Use wood glue and wood screws (I use 1 3/4″ SPAX screws so I don’t have to mess around with pre-drilling)
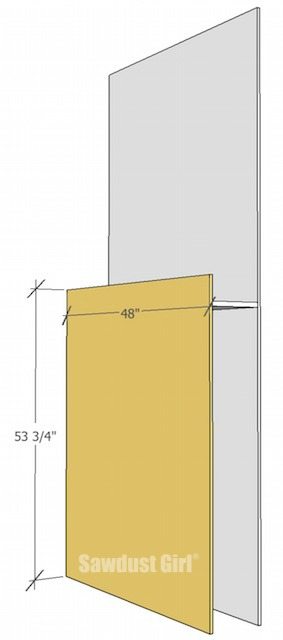
Step 2
- Attach the short side piece ( 53 3/4″ piece of 1/2″ plywood) to the divider.
- Make sure the bottoms of the two pieces are flush.
- The top of the front piece will extend above the center divider by several inches.
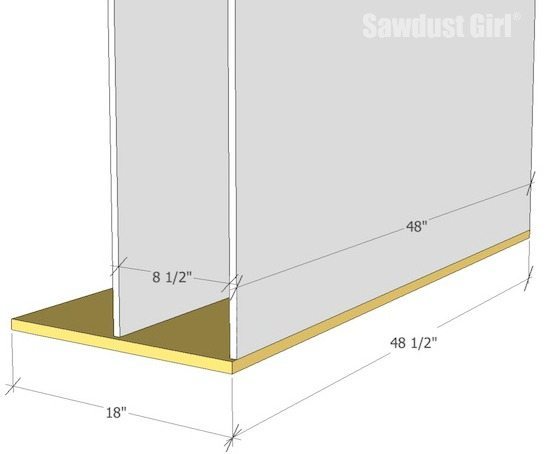
Step 3
- Attach the 3/4″ thick bottom piece. It will extend by 1/2″.
- *If using 3/4″ plywood for the back piece, cut the bottom piece 48 3/4″ long so it will extend by 3/4″.
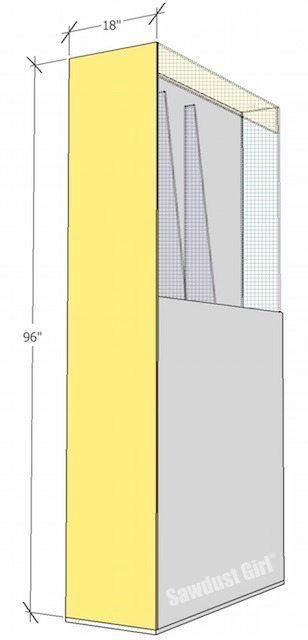
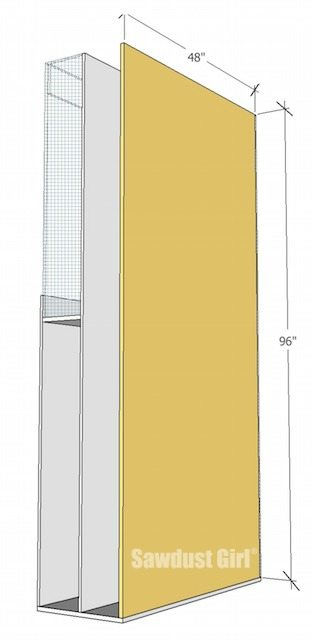
Step 4
- Attach back.
- It should sit on top of the bottom piece and be flush with the front piece.
Step 5
- Add short dividers to the upper portion of the center divider.
- Apply glue to bottom and back and screw them in from the back.
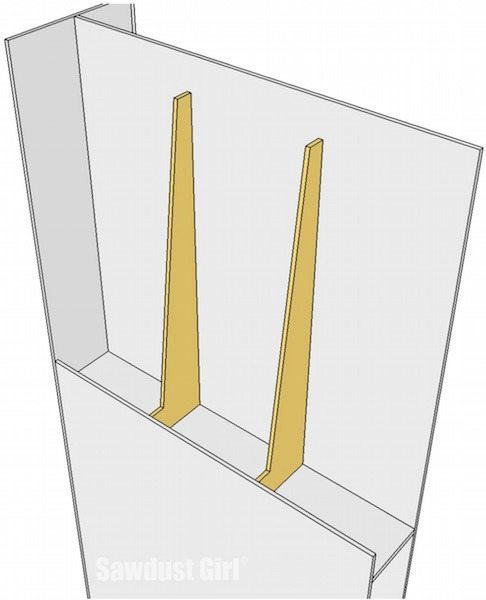
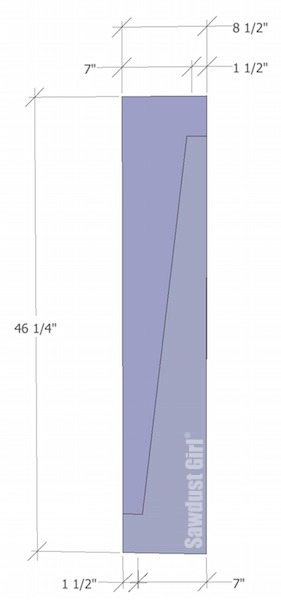
You can get two dividers if you cut them as shown below.
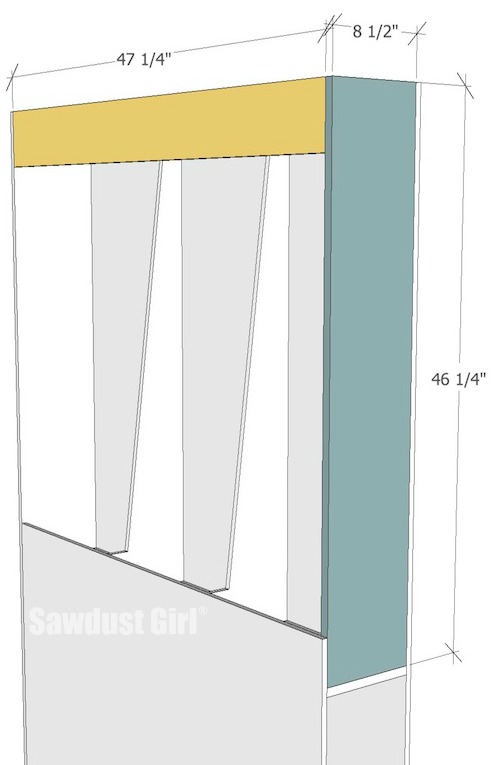
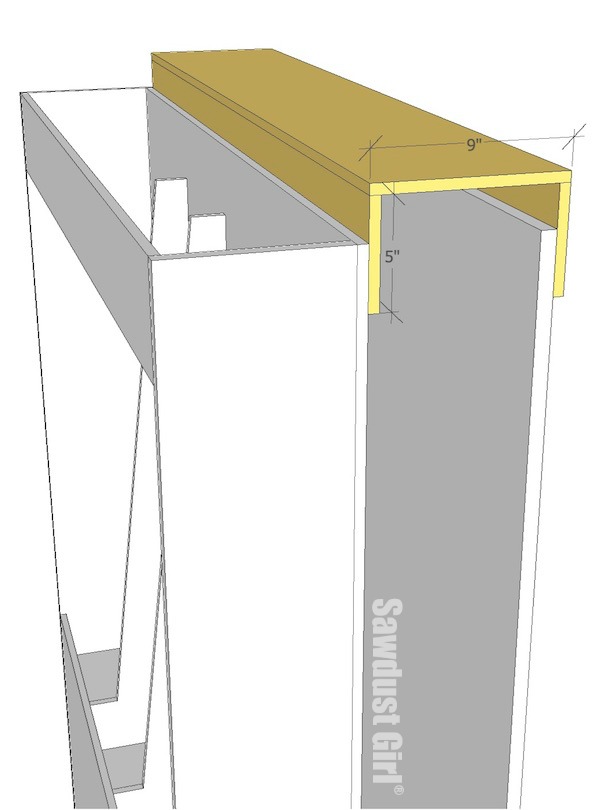
Step 6
- Attach front and top face.
- This section of the unit is to sort and store small pieces. The front (blue) is to keep anything from falling out to the side. The top face (yellow) is to keep anything from tipping over and falling out.
- The top of the section is open so you can slide longer pieces up through the top and then set them into place behind the “lip”.
Step 7
- Attach last side.
- This should sit on top of the bottom piece and be flush with the back.
Step 8
- Attach a “top hat” to hold the side and middle dividers in place against the weight of future lumber that will be stored in the unit.
- You need a height extension to allow full sheets of lumber to slide in place easily
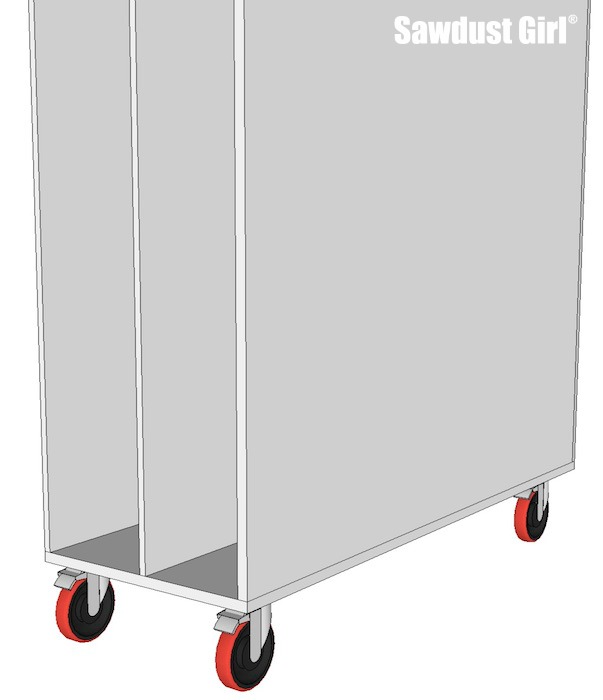
Step 9
- Install casters of your choice. I just ordered these from Amazon for another project (affiliate link).
Download and Print: Narrow Lumber Storage Cart on Wheels.pdf
You might also like these cantilevered garage shelves.
Sarah says
I’ve been trying to figure out how to make my scraps take up less space (and be more accessible). I love this!
Nikki says
This is perfect! I definitely need somewhere to put all of my scraps – this is exactly what I was needing. Thank you!