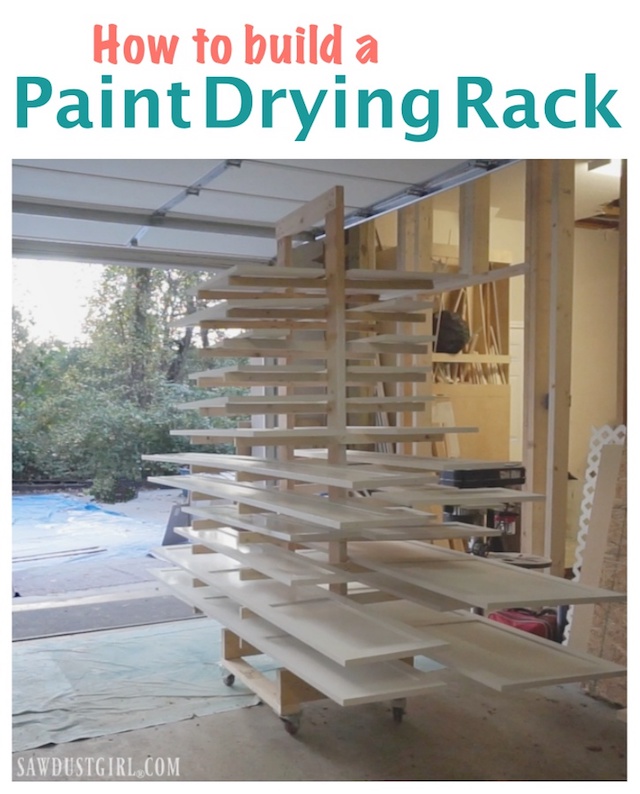
Last week I had to build a Paint Drying Rack for Cabinet Doors. I had 39 cabinet doors to paint for the Jack and Jill Bathroom! I did not build these doors. They are from CabinetNow.com. I’ve recently had to look at which things I HAVE to DIY and which things I can hire out…because I CAN’T do everything myself. Building 39 doors found it’s way to the “hire it out” list so all I had to do was paint them…and build a cabinet door paint drying rack.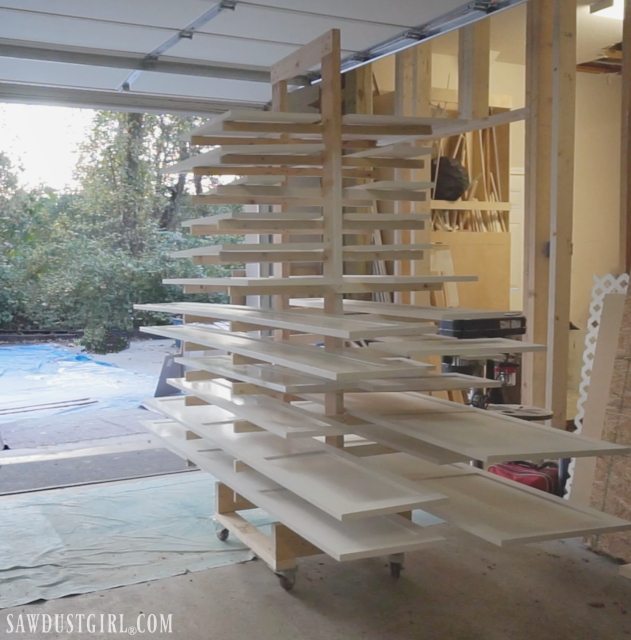
Materials
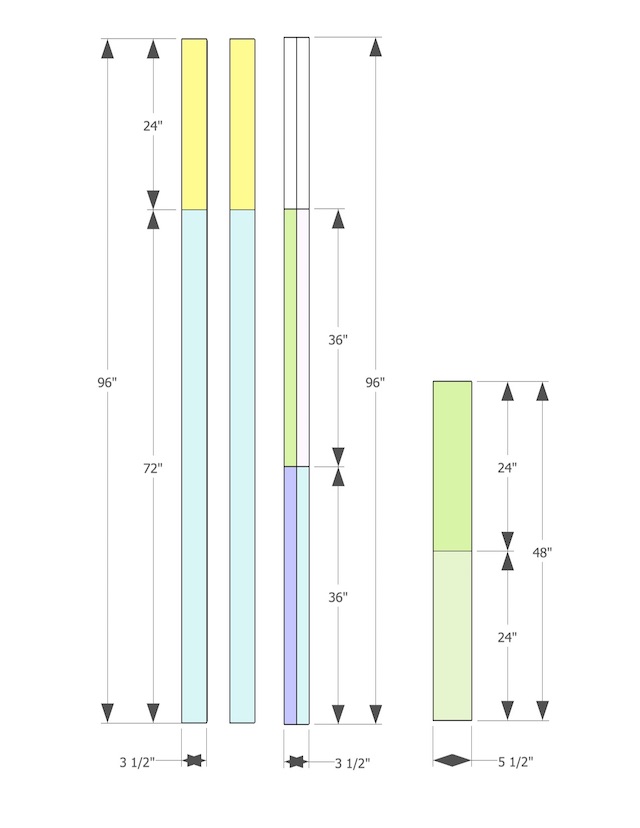
- two 8′ 2×4
- cut each 2×4 into a 6′ and 2′ piece
- six 8′ 1×4
- cut each 1×4 into 3′ sections
- rip each piece of 1×4 into two 1 1/2″ wide stirps
- each 8′ 1×4 will give you FOUR 1×36″ strips
- two 2′ 2×6
- 1 1/2″ wood screws
- 2 1/2″ wood screws

Building a Paint Drying Rack for Cabinet Doors
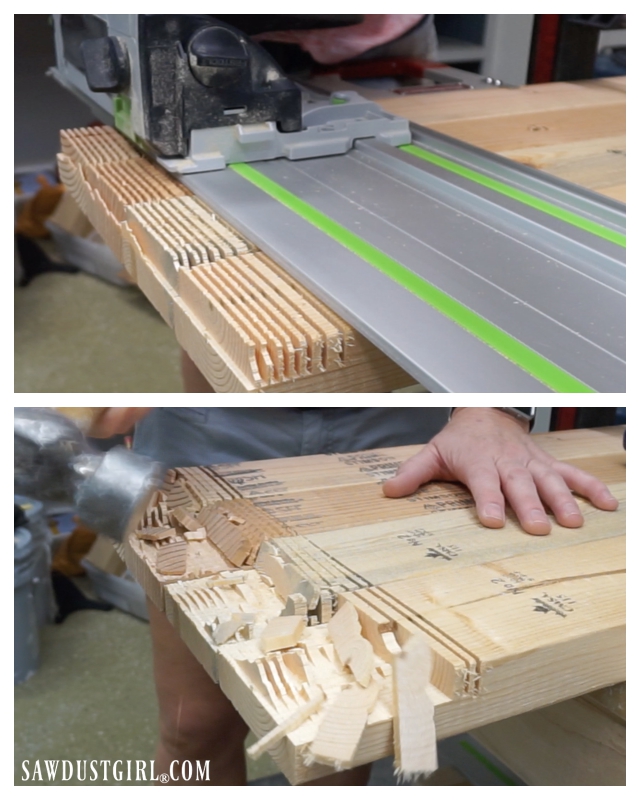
I notched out the ends of all my 2×4 pieces to create a slim profile. You don’t have to use half lap joints though. You could simply secure the 2′ 2×4 pieces on top of the 6′ pieces.
Notching ends
To notch out the ends of the short 2×4 pieces, I used my table saw. A miter gauge keeps the wood square to the blade. Set the fence at 3 1/2″. Set the blade to cut halfway up into the 2×4. Then make a bunch of cuts, close together.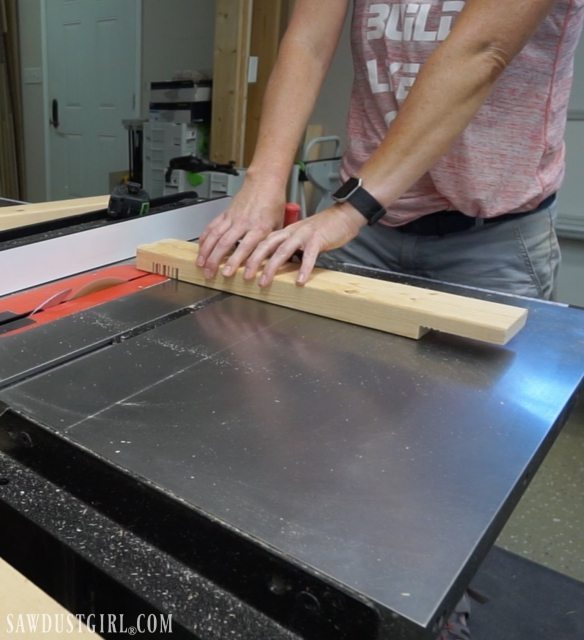
On the longer 6′ pieces, I used a track saw. If you don’t have a track saw, use a circular saw and rafter square.
- Set the blade to cut halfway through the thickness of the 2×4.
- Notch out 3 1/2″ off the ends of all the 2×4 (Since 2×4’s are actually only 3 1/2″ wide.)
- Break out the left over wood with a hammer.
Clean up the surface with either a chisel…or a belt sander if you don’t actually own a sharp chisel like me. The belt sander made quick work of cleaning up the half lap joint surfaces.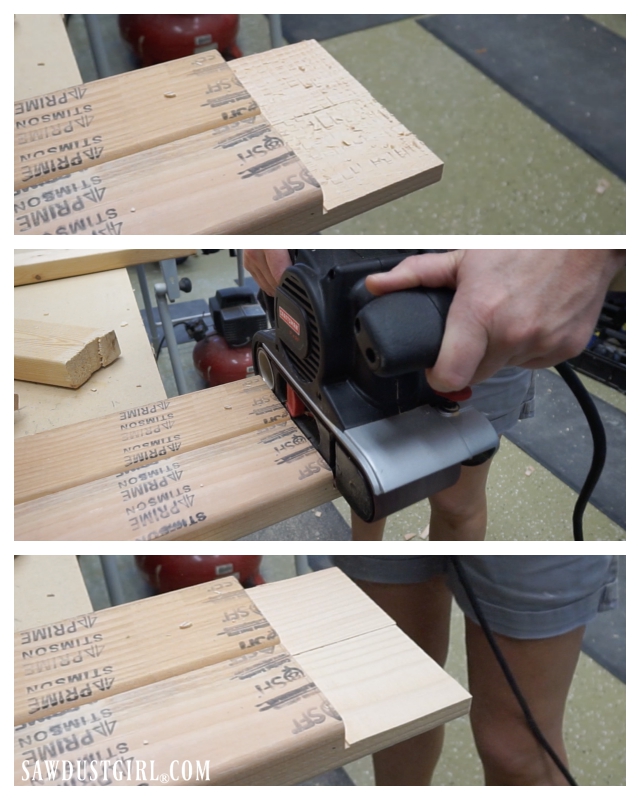
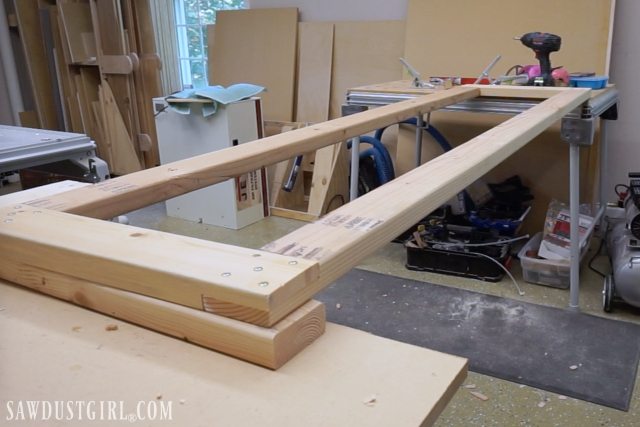
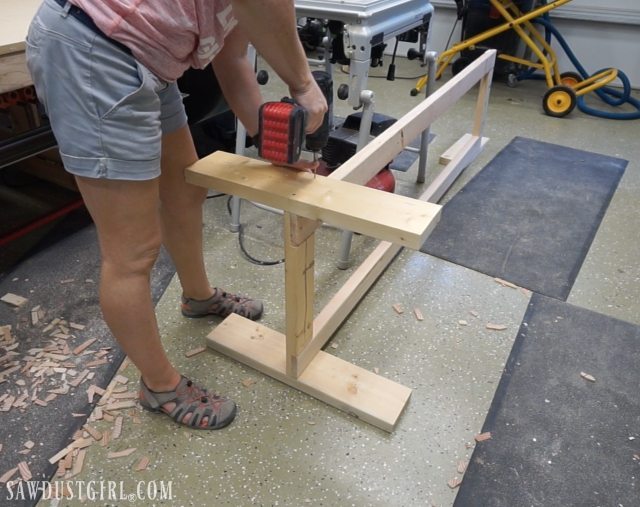
Assemble Frame
Now create a rectangular frame with the 2×4 pieces. I did not use any wood glue because I want to dismantle this after use. There’s no room in my shop for a giant paint drying rack to just sit around, waiting for the next big paint job.
I secured the 2×6 pieces with four 2 1/2″ screws on each side. The 2×6’s are flush with the bottom of the 2×4 frame.
Straight and true, 1×2 furring strips are usually hard to find. Instead, I used 1×4’s and ripped them down to 1 1/2″ wide strips. You could certainly use 1×2 furring strips if you wanted to dig through to find some good ones. That would save you some time.
Cut the 1×4’s into 36″ long sections before ripping because it’s easier to manage shorter pieces on the table saw.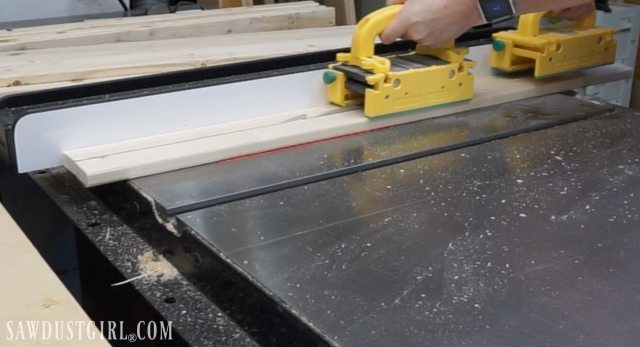
Its also easier to start your screws on a flat surface, rather than when you’re trying to secure the 1×2’s to the vertical paint drying rack for cabinet doors. Mark the center of the 1×2 and start two 2 1/2″ screws in each one. Since the 1×2 is thin and narrow, offset your screws to give them more stability.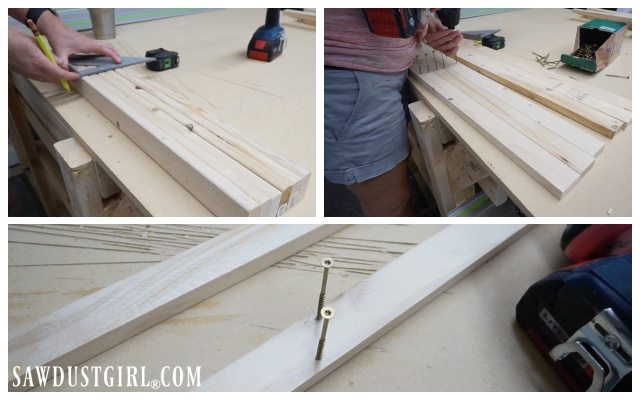
Attach drying arms
I used a leftover scrap of 1×4 as a spacer when securing my 1×2 strips.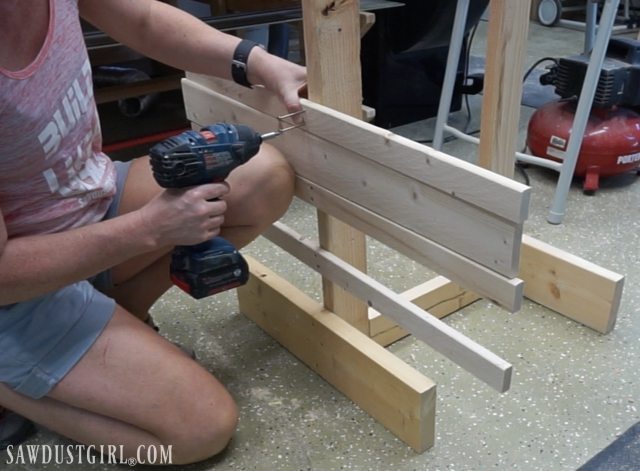
I secured the 1×2 strips on the outside of the 2×4 frame on the lower section.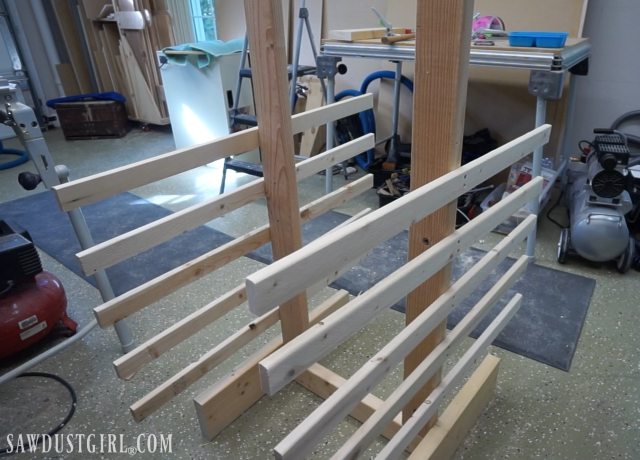
On the upper section, I moved the strips to the inside of my frame to hold smaller cabinet doors.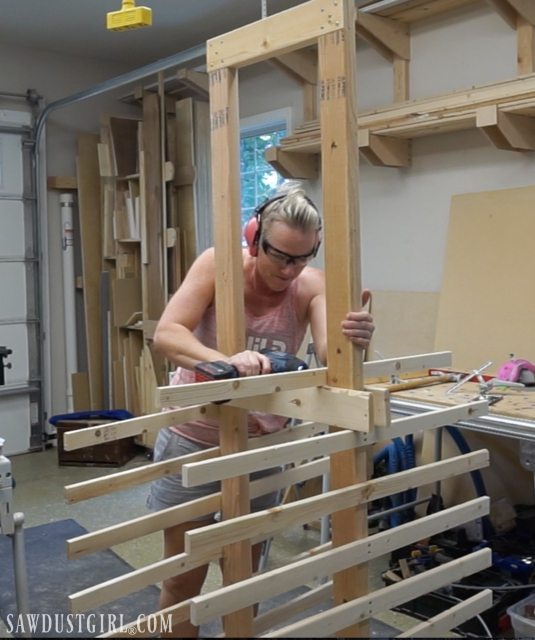
Casters for mobility
Locking swivel casters will allow me to fill up one side of my paint drying rack for cabinet doors, then turn it around and load up the other side.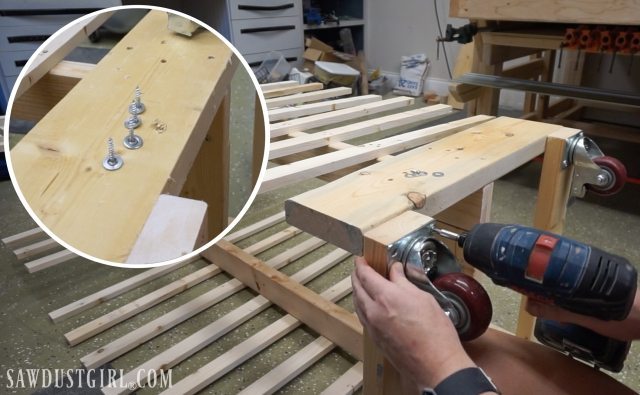
This looked like it’s going to hold a LOT of cabinet doors so I didn’t go all the way to the top.
But I had to add a few more a rows WHILE I was painting because it wasn’t nearly enough. I even had 5 doors on a scrap of wood on several rows so…39 doors is a LOT of doors! 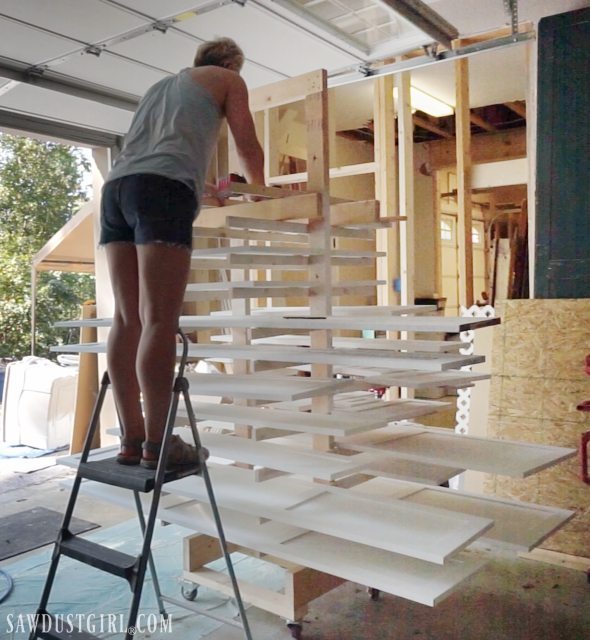
After spraying each door, I place it to dry on the paint drying rack for cabinet doors.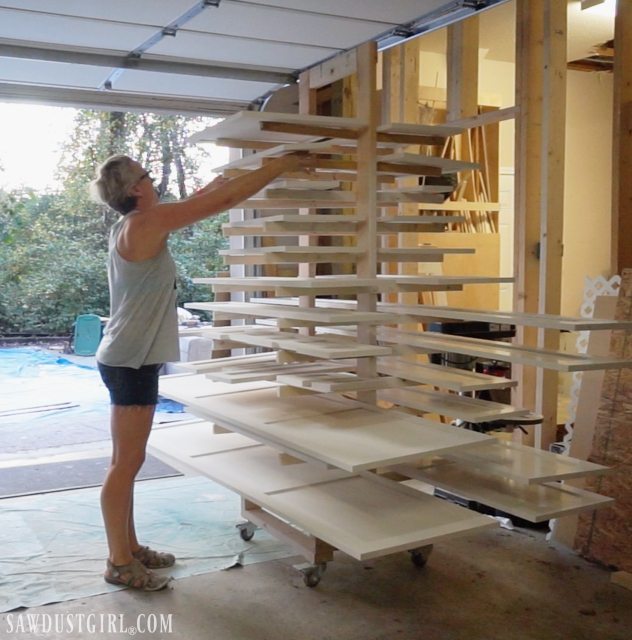
After painting all the doors on one side, I spun the whole thing around and did the other side. Over and over…as I primed both sides of each door. Then painted each side of each door.
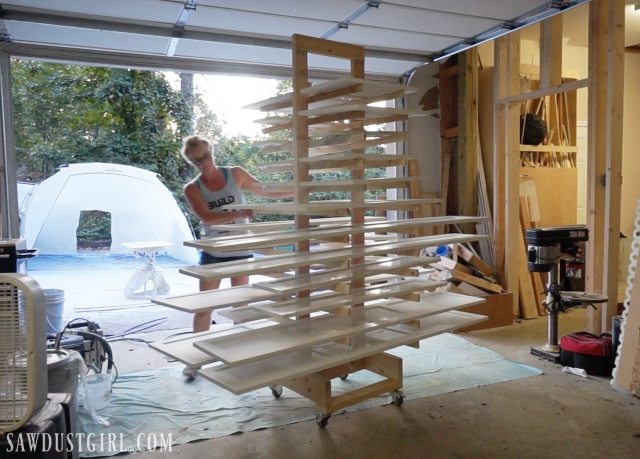
It would be impossible for me to find a horizontal surface to store all those doors while they dry. I know I’ll need a paint drying rack for cabinet doors again some day, but it takes up a lot of space in my (Wes’) garage. I’ll have to at least partially dismantle it to store it out of the way until I need it again.
Robin says
Awesome! You are amazing!!!❤️
Sandra says
Aw thanks Robin!
Lee Hernandez says
I look forward to seeing the finished bathroom. It is hard to imagine a bathroom with that many doors. Your drying rack would be great for artwork too; for someone who is very productive(!) or for class projects.
Sandra says
The 39 doors are for the bathroom vanity, the built-in linen closet and in the wall cupboard (in the water closet) AND the two closets in the adjoining bedrooms. I think the drying rack would be great for artwork too!
Dave King says
Love the drying rack. I am about to build one similar. My shelves will be 1 X 2 and 4ft in length. Your 2 x 6 pieces are 2ft long. I am thinking my bases need to be at least 3ft, possibly 4ft, to coincide with the shelves. What do you think?
Sandra says
Hey Dave. If you’re making your shelves deeper you might as well increase your base too. I wanted it a bit recessed to create a sort of “toe-kick” area. You’d still have plenty of that if you increased your base size to 3′.
Raef juell says
When. An we hear more about the cabinet doors and that company
Brian says
Nice work Sandra. By the way, is that a California Air Tools compressor that I see in the photos? If so, what model is it and how do you like it? I hear that they are super quiet, but I wonder how they hold up and if they can power different type of nailers. Would love to see a review on this compressor. Thanks!
Krsiten Buckley says
Great job Sandra. I’ve built about 10 of these now as my cabinet painting business has grown. When I started I laid them out on tables, then I moved to a janky system I bought of eBay, but finally decided to build my own. It started off just like yours, but evolved ever so slightly to be pipes instead of slats and I cover them with easy-release painters tape to avoid any scuffing or sticking.
Tommy says
I may have to build one of these for my woodshop so that when I am in full production. I will have someplace to store stuff as I get pieces painted or otherwise finished.