• Home
  • About
    • Personal Posts
  • Privacy
  • Shop
    • My Account
    • Checkout
    • Email
    • Facebook
    • Instagram
    • Pinterest
    • Twitter
    • YouTube
Sawdust Girl®

Sawdust Girl®

Renovation, cabinet building and woodworking plans and tutorials. Build like a Girl®

  • My Home
    • Clinton TN House
      • Clinton TN House in Progress
    • Maryville TN House
      • Maryville TN House Tour – Completed Rooms
      • Maryville TN House in Progress
        • Basement
        • Basement Storage Closet
        • Bedroom Office
        • Craft Room
        • Dining Room
        • Entry
        • Garage
        • Guest Bedroom
        • Hallway
        • Jack and Jill Bathroom
        • Kitchen
        • Kitchen Entry
        • Laundry Room
        • Library
        • Living Room
        • Loft
        • Madison’s Room
        • Master Bedroom
        • Master Closet
        • Pantry
        • Porch
        • Powder Room
        • Wes’ Office
    • Illinois House
    • Calderwood Cottage
  • My Workshop
    • Clinton Workshop
  • Build & Breakfast
  • Cabinet Making 101
    • Cabinets
    • Doors
    • Drawers
  • Projects and Plans
    • Countertops
    • Beds
    • Benches
    • Bookshelves
    • Desks
    • Gift Ideas
    • Holiday
      • Christmas
      • Halloween
    • Home Accessories
    • Kids
    • Kitchen Cabinets
    • Lockers
    • Nightstands
    • Organization accessories
    • Recipes
    • Sewing
    • Tables
    • Vanities
    • Wardrobes
    • Woodworking
      • Wood Finishing
    • Workshop
    • Workshop Storage and Organization
  • Remodeling 101
    • Baseboard and Trim
    • crown molding
    • Demolition
    • Door and Window Casings
    • Door Installation
    • Drywall
    • Electrical work
    • Flooring
    • Home Maintenance
    • Painting
    • Plumbing
    • Resources
    • Safety
    • Tile
    • Wall and Ceiling Treatments
  • Sawdust Squad
  • The Sawdust Diaries
    • Andrea
    • Ava D.
    • Beckie F.
    • Cara C.
    • Courtney B
    • Fawn T.
    • Jenn D.
    • Kelly C.
    • Kristy K.
    • Lara T.
    • Malisa B.
    • Marnie D.
    • Robin C.
    • Val F.
  • Tools
    • Products
    • Tool Reviews & Overviews
    • Inspiration & Ideas

How to make a Countertop Template

All Posts, Countertops, Pantry

How to make a countertop template.As you know, my pantry has an angled wall which increases the level of difficulty when it comes to fitting it with cabinets and a countertop.  Building a countertop with corners is challenging enough but add an odd angle into the mix and it becomes a level RED headache.  Or it could, if you let it.  🙂 I decided to build my countertops “offsite” and then install them in the pantry.  The easiest way to do that, is to make a countertop template that I could take into the workshop and use as a life size guide replica of the shape I needed to create.

How to make a Countertop Template

I decided I wanted to do a DIY countertop for the pantry for a couple reasons;  1: expense, 2:  I didn’t want to wait.  HA!  All said and done I could have gotten a fabricator in here to template and fabricate a granite countertop in the time it took me to deal with my “workshop upgrade”.  BUT, decisions were made that I couldn’t back out of once I took apart my dust collector system!  LOL

Before I started building any countertops I had to create a template.  Creating a countertop template is really easy, cut a whole bunch of strips of inexpensive thin wood.  3/16″ or 1/4″ masonite or plywood will work.  I used some junky thin plywood that had served as a “floor” to a big pallet of something that I had delivered at some point …for something.  See how hoarding all the scrap wood pays off!

  • Cut 3″ strips of 1/4″ plywood.
  • Lay the strips on top of the cabinets, creating a grid.
  • Glue the strips together with either wood glue or hot glue.
    • Hot glue would have been 100 times faster than waiting for wood glue to dry!
    • If you don’t have a hot glue gun, wood glue and lots of heavy items to weigh down your “joints” works great!

How to make a countertop template

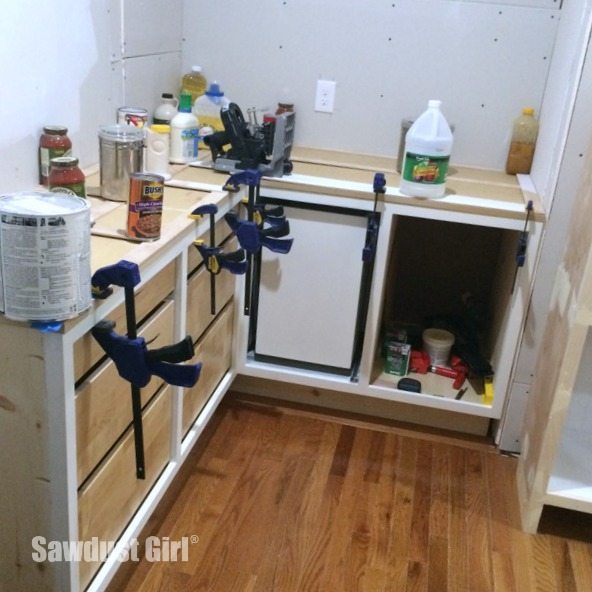
Most countertops extend beyond the cabinets.  I felt it would be easiest to first create a strong cabinet outline and then add an overhang.

  • I created my template first by following the exact layout of the cabinets.  Then I came back later and inserted additional strips under the front of my template to create an overhang.
  • Because the rest of the template was already set, I didn’t have to worry it moving or adjusting while I glued on my additional strip, measured to make sure it was exactly the same all the way around.

How to make a countertop template

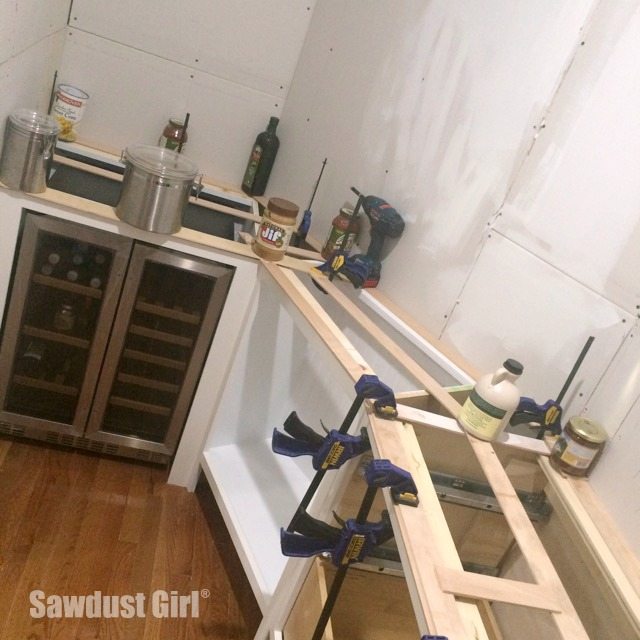
As you can see, you don’t have to have a bunch of fancy clamps or tools.  Make use of what’s on hand.  Peanut butter, maple syrup, olive oil…

How to make a countertop template

Once the glue is dry you’re all set to take your template out to your workshop and build away!  Unless you can’t get your template out of the room you just built it in!

How to make a countertop template

Yeah, that was fun!  😀

May 11, 2015 · 1 Comment

« DIY Scrap Wood House Shelf
Wood Countertop with Mitered Corners »

Comments

  1. Michelle says

    May 12, 2015 at 2:14 pm

    I LOVE your blog. Everything is just so great and practical from a DIY perspective. I have scoured your blog looking for your new living room paint color. I am about to paint my kitchen and I need this color! 🙂 Please share so I can get my kitchen finished.

    Reply

Leave a Reply Cancel reply

Your email address will not be published. Required fields are marked *

Categories

New Post email notification signup

You Subscribed!

Legal Stuff

Terms of Use

Privacy Policy

Disclosure

Recent Posts

  • Lodge Update – Floors, Cabinets, Countertops, and Appliances
  • Lodge Kitchen Cabinet Progress
  • Halloween Mad Gab – Halloween Party Ideas
  • Concrete Backsplash or Vertical Wall Treatment
  • Building and Installing a Giant Faux Beam on the Ceiling

Disclaimer:

Although it is my intention to provide accurate plans and clear instructions, not all plans have been tried and tested. Using plans or information found on SawdustGirl.com indicates that you agree with the Terms of Use policy and will accept full responsibility for the process and outcome of any project you attempt. All plans are for private use only. Plans and information published on SawdustGirl.com may not be reproduced, republished or distributed in any manner without written permission from Sandra Powell, Sawdust Girl. Actual projects built using Sawdust Girl plans may be published on your own site without instructions or "tutorial" as long as you provide a link to my original post with full post title or "SawdustGirl.com" as link title.

Copyright © 2022 · anchored theme by <a target="_blank"