 I’m making progress in the pantry and today I’m showing you how the template became a Wood Countertop with a mitered corner AND a wonky angle! I built my pantry countertop out of inexpensive construction lumber (SPF — Spruce, Pine, Fir — standard construction “studs”) because I want a distressed, “reclaimed lumber” look and I didn’t want to spend much.
 Building a Wood Countertop
 Building a Wood Countertop
*I always buy pretty pieces of 2x material (2×4, 2×6, 2×8 etc.) and keep them in my shop so when I want to build something with them I have a stash of wood that has had time to dry out and acclimate to my house so I have minimal shrinkage/expansion to deal with.
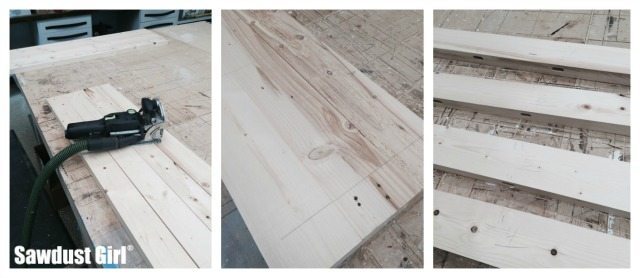
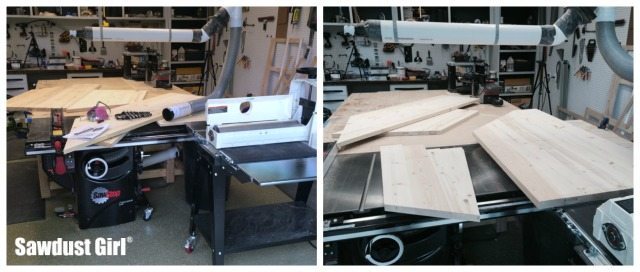
For these countertops, I’m using a combination of 2×4 and 2×6 studs that I selected based on their appearance.
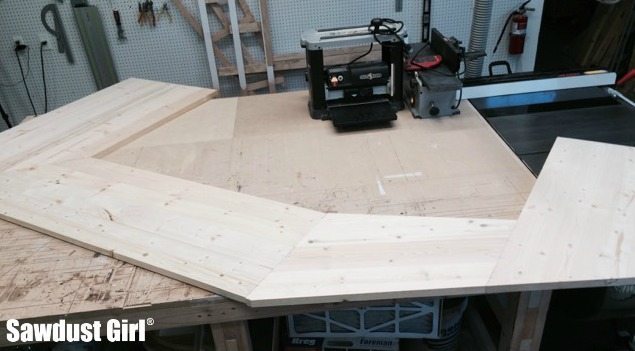
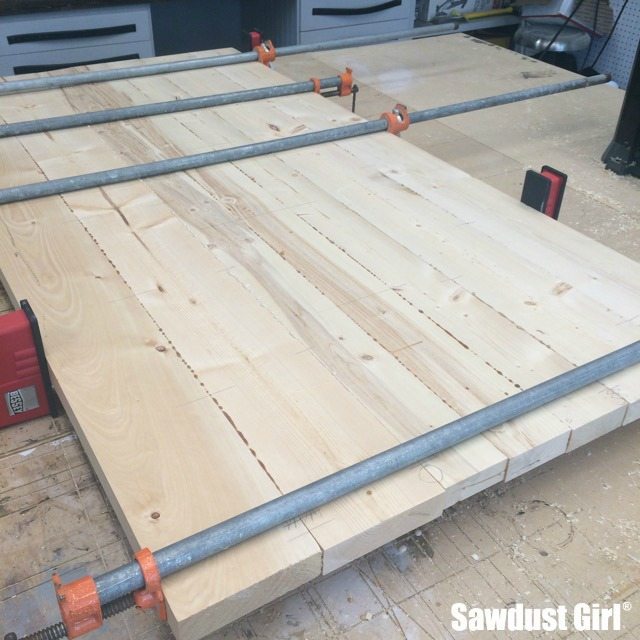
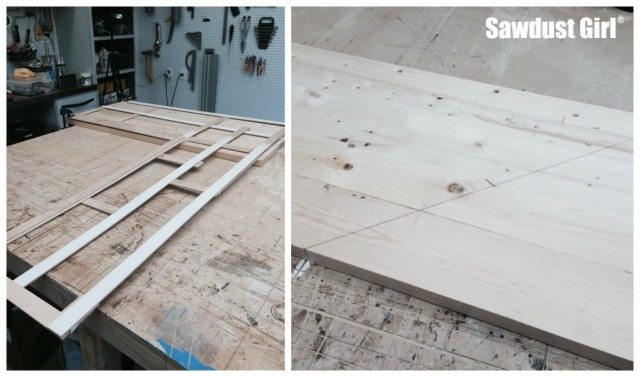
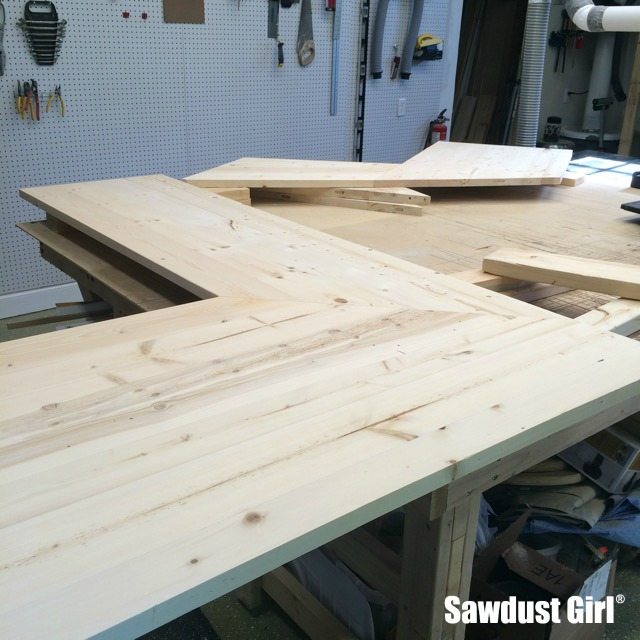
- I built my countertop in four sections.
- I laid out each section, giving myself extra length and width so I could trim to fit later.
- I labeled each piece on the ends so I’d still know what went where after running each board through the jointer and planer.
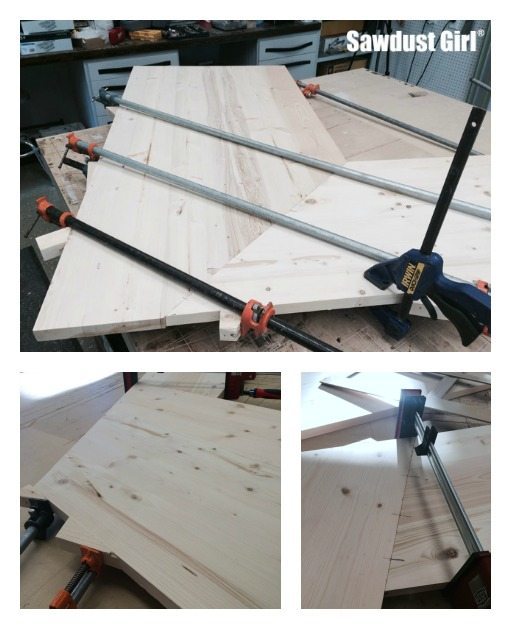
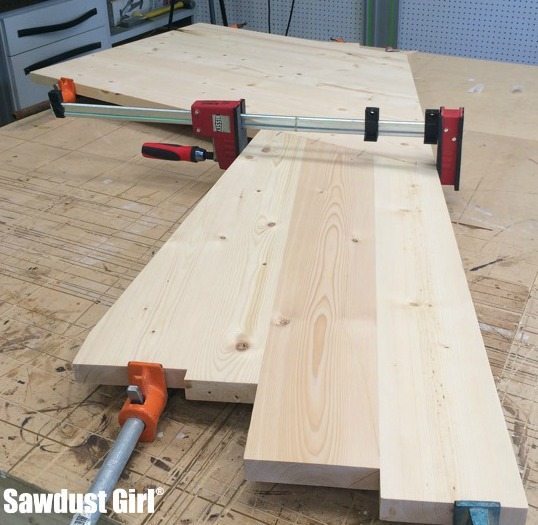
- After jointing and planing the wood, I used Dominos (like biscuits but stronger) to keep the pieces on the same plane while I glued them up.
I apply glue inside the hole that will hold the Dominos and along the entire surface of each board.
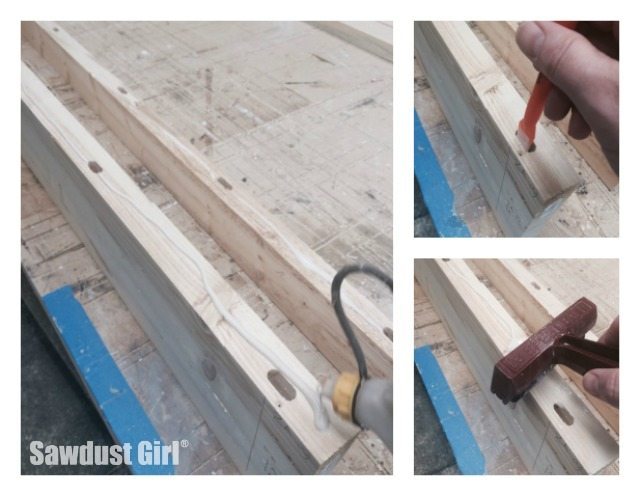
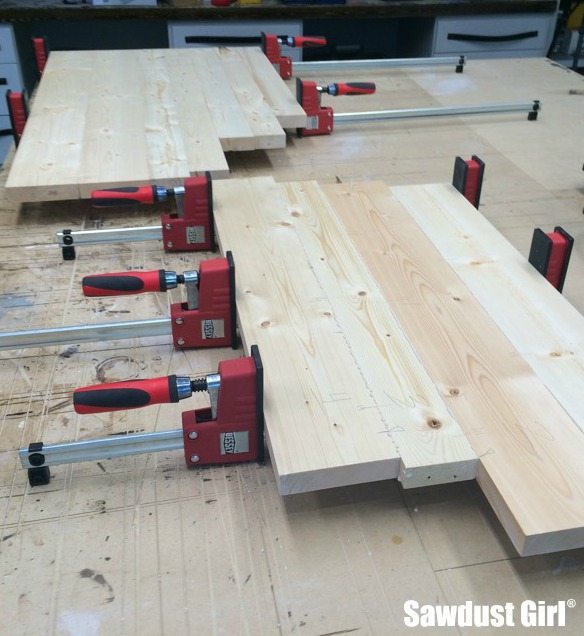
If you aren’t using tenons or biscuits to hold the wood pieces on the same plane there can be a lot of slipping and sliding, causing the top surface to be uneven. In this case, it’s easier to glue up small sections and then glue those sections together.
The Dominos do a great job of keeping the top surface even so I did each section in one glue/clamp up.
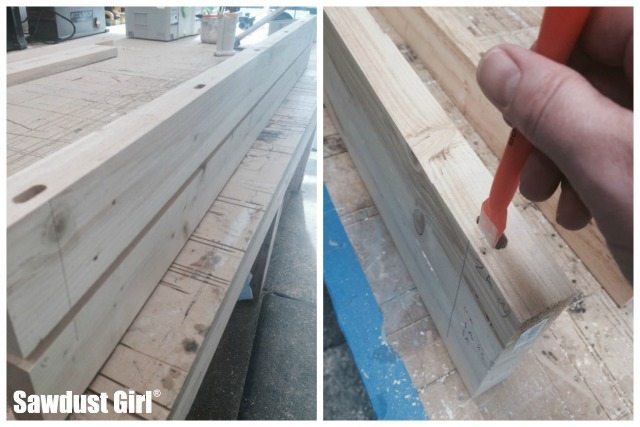
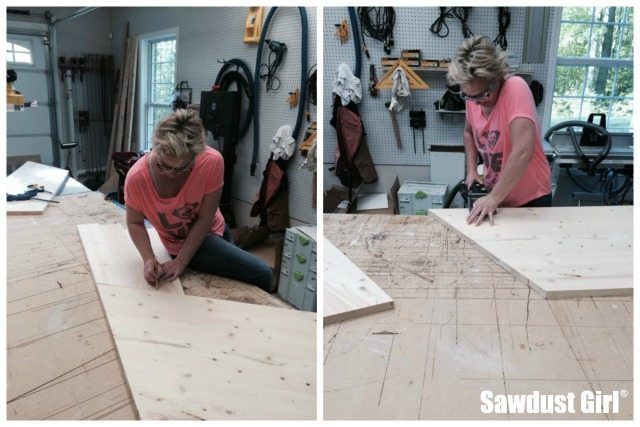
I loosely followed the template angles on each piece so I wouldn’t be cutting off and wasting a lot of wood.
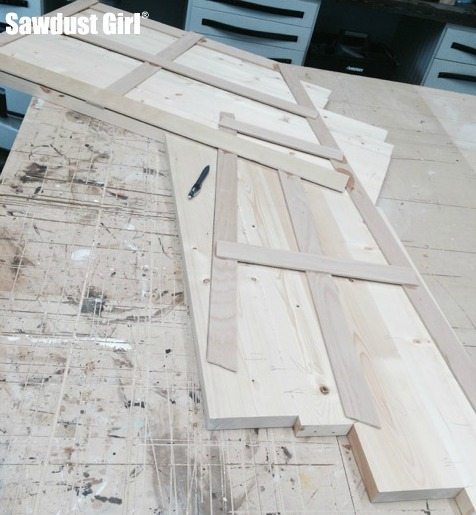
After each section was dry, I traced the outline of my template onto each section and cut where needed.


Then I sanded the entire thing. I used my Jet drum sander that I purchased almost 8 months ago for the first time! After spending a few hours messing with fine tuning the settings.
That was a BIG job! Those pieces were heavy and big and cumbersome and my shop was crowded… But the surface was crazy SMOOTH and even!

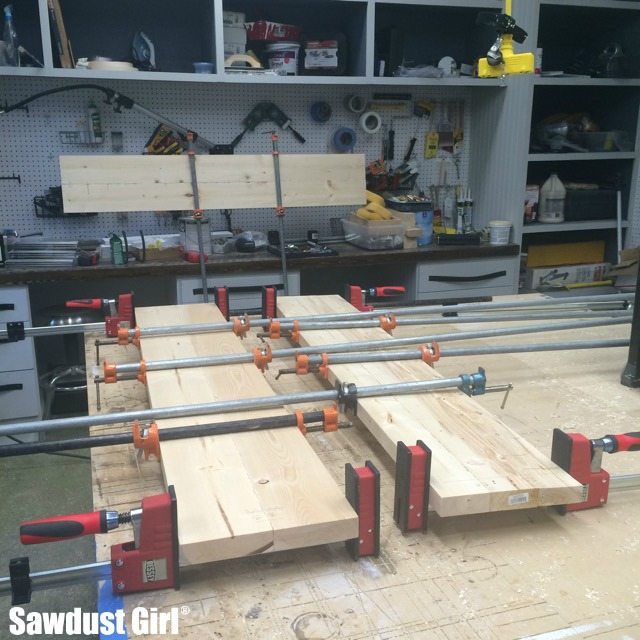
After sanding down to 120 grit, I glued my four sections into two. I used Dominos and glue again.
I had to nail angled blocks onto the edges to give my clamps something to hang onto. I highly recommend figuring that out before you apply the glue!
 I left trimming the last joint to the very end in case anything shifted or freaked out on me while gluing up the other parts. You never know!
I used my track saw to make all my “after assembly” cuts.
After cutting and checking it with the template, Wes and I carried the two large sections upstairs to dry fit it in the pantry. I did a little scribing and trimming here and there, after which it fit like a glove!
Then we hauled the big pieces back down to my workshop so I could do the finishing there because I’m using Tung Oil which is pretty stinky!
Here’s a video of the process that took place over the course of several days.
Next I’ll finished my Wood Countertop with water soluble dye and tung oil
Jada says
I’m so excited to see how it turns out. I’ve been brainstorming countertop options for the laundry room cabinets I built but everything is so expensive compared to the lumber cost of the cabinets themselves. Your house is looking great!
Sandra says
I know what you mean. DIY wood countertops are probably the most inexpensive countertop available and done well, they look fantastic!
karrie says
That’s great! Love the video. I’m so envious of your workshop! Tools galore and luxury things like an exhaust system! 🙂
Sandra says
That dust collection system is a bunch of pvc pipes rigged up to a $180 dust collector. It works greats but has been a struggle to get set up how I want it.
Val says
What wood did you use?
Sandra says
“inexpensive construction lumber” = common building studs 🙂
Feral Turtle says
I have a bit of clamp envy right now! Love your countertop and your hair looks fantastic! Cheers.
Sandra says
I just purchased those big Bessey’s and they are worth the $$! Can’t believe I didn’t buy some years ago.
Teresa Kirkland says
I’m also wondering what type of wood you used. Pine?