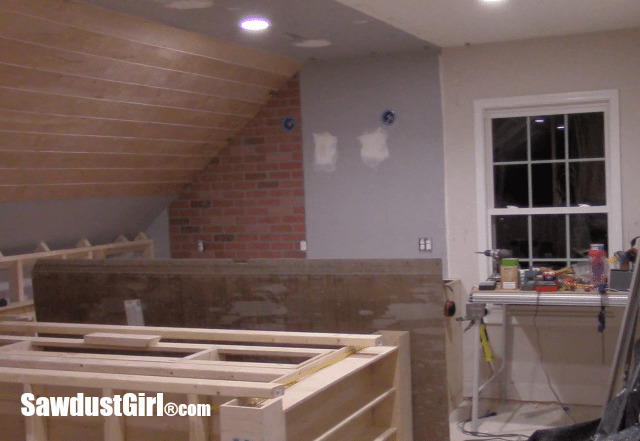
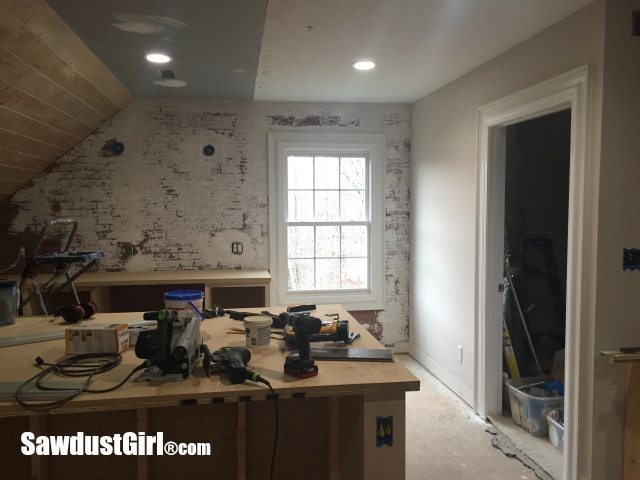
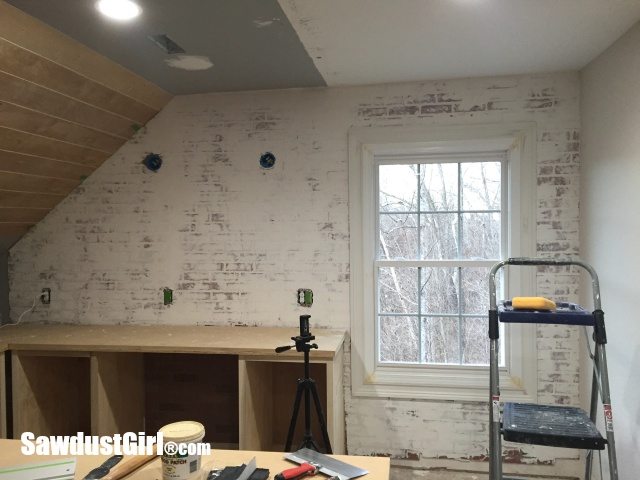
I created a faux brick and plaster feature wall in my craft room. I used inexpensive brick veneer wall panels from the Home Depot and then zhushed them to make them look fancy! The whole idea came about because I wanted to reuse the materials I tore out of the un-realized recording studio which included a few sheets of brick paneling. I wanted to use the material but wanted to make it look more like real brick. Specifically like a really old brick wall that had been plastered and painted repeatedly over a few decades.
Use Brick Panels create a Brick and Plaster look
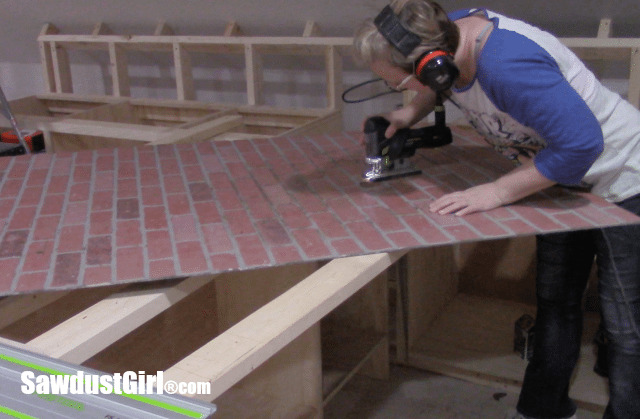
I cut the first sheet of faux paneling and put it in place. I had to cut out a couple outlets and a light box and those holes came out perfect on the first try.
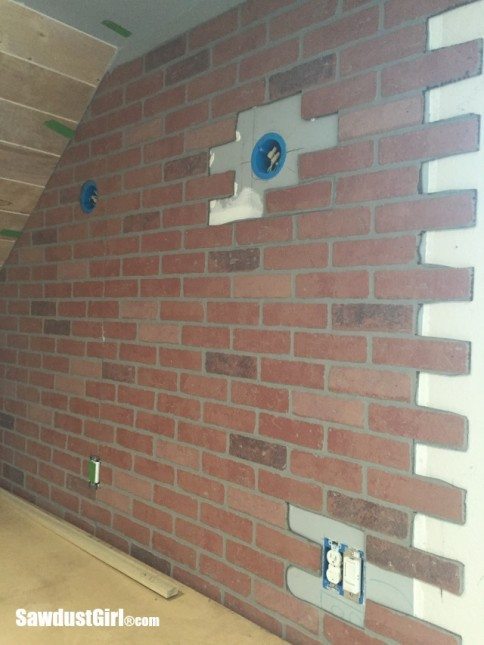
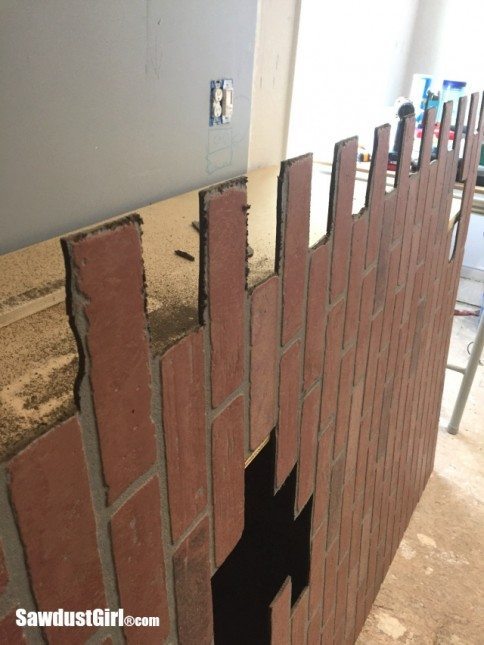
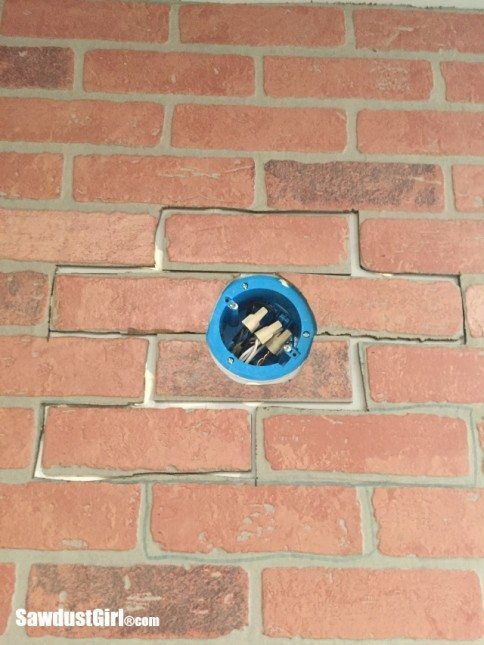
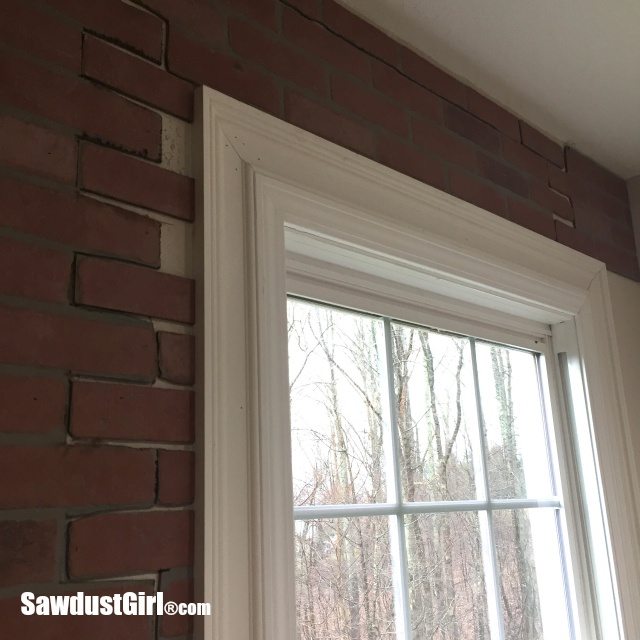
Which is more than can be said for the second piece. I cut the holes too high and rather than start over with a new sheet of paneling, I cut out a patchwork or bricks around the light and receptacle…and while I had the jigsaw in my hand, I cut out all the half bricks on the end of the panel. I knew the seams would hide better this way after plastering but I got lazy on the first section and didn’t do it. Because I had to recut the light and receptacle holes on this one I went ahead and got fully committed. All in.
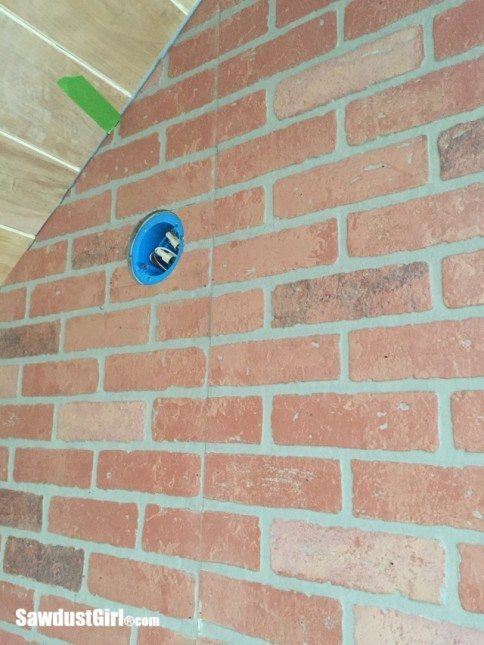
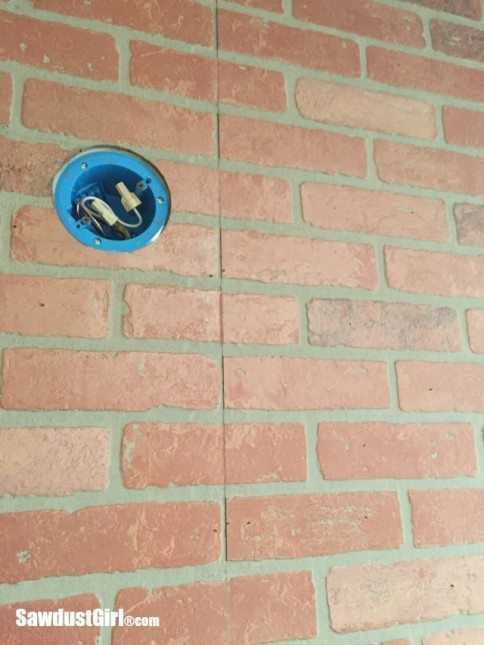
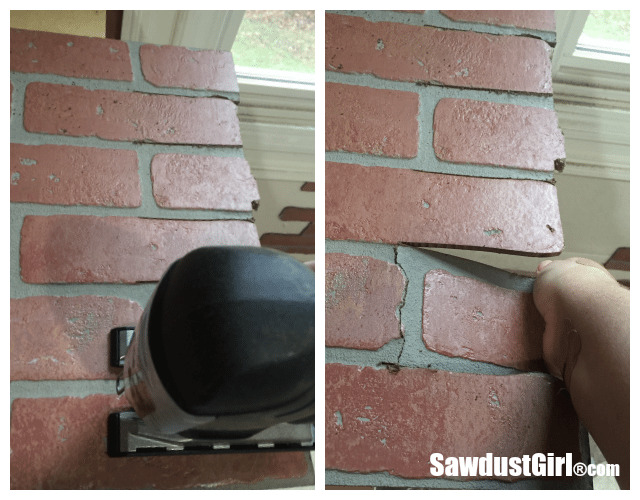
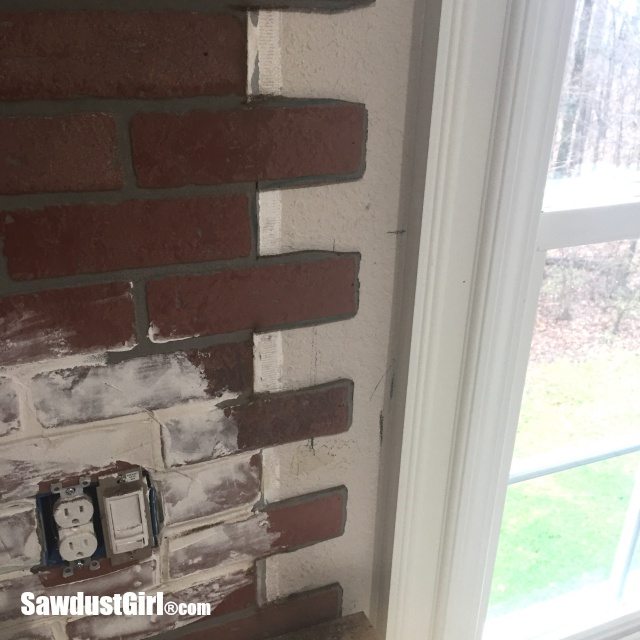
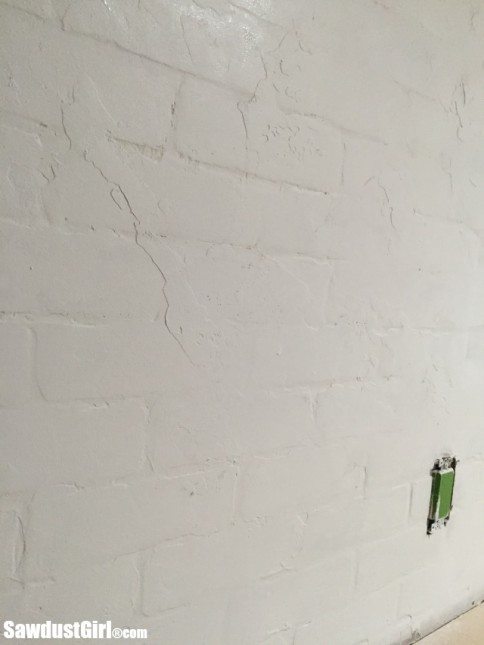
This is the seam where the two panels meet without weaving the bricks. It’s a very blunt edge and even if you line the bricks up perfectly, the seam is quite visible.
More so depending on your angle! I would have taken the first panel down and weaved the bricks on this joint too but I’d used construction adhesive on the edge and just figured I’d make all the other seams perfect and spend more time hiding this one with the plaster.
To cut away the half bricks, I cut on the grout line and then broke the unwanted bricks out. Breaking it, as apposed to cutting it, created a jagged edge which looks more realistic (in an old brick sort of way).
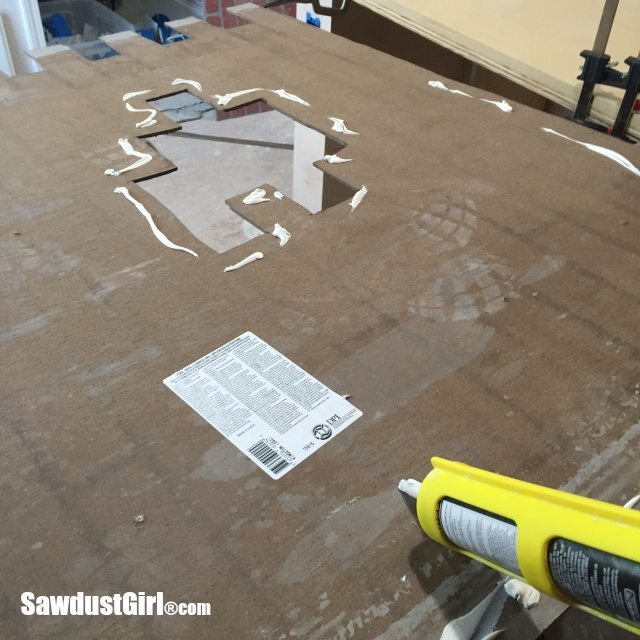
I applied construction adhesive around the holes and on all the protruding bricks on the seam line and then went ahead and dotted the entire back of the panel because at this point– I’m never taking this brick wall down anyway so why not make good and sure it never budges!
Next I cut a WHOLE BUNCH of single bricks and glued them in where they needed to be.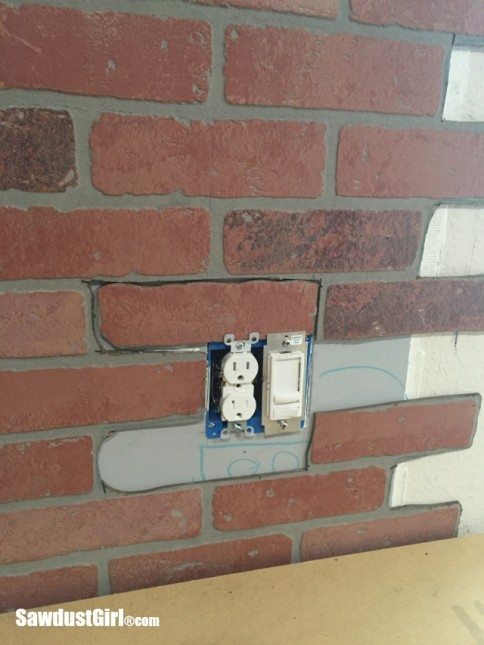
U used joint compound to fill in the voids and hide my seams. 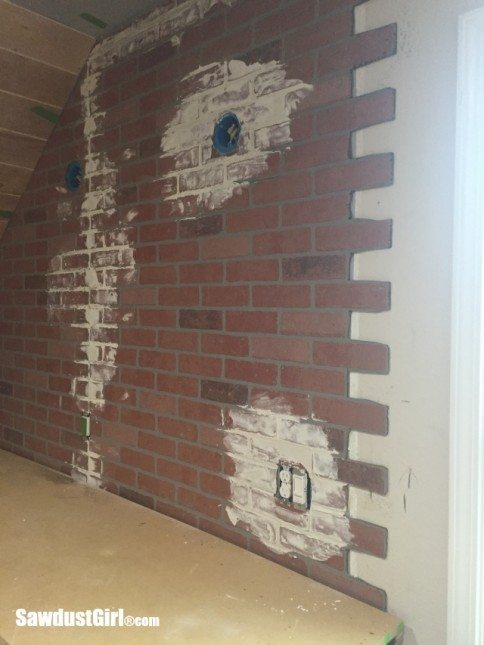
Once I added the additional moulding pieces, I finished up my brick wall using the same “weaving” method. It was a lot of stinking work. I probably could have applied a brick tile on the whole wall in the time it took me to do the paneling but the paneling was a whole lot cheaper. I used about 3 sheets.
Once I finished the whole wall, I concentrated my efforts on hiding the seams and creating the plaster look. The weaved seams basically disappeared once filled with joint compound.
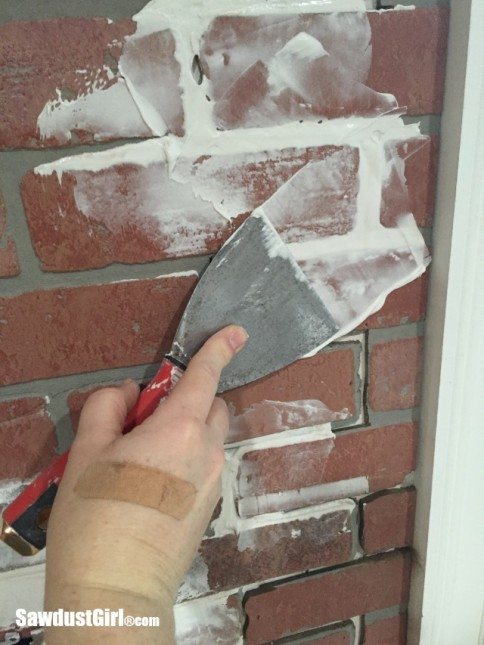
I had to build it up since the voids were so deep. I smooshed it into the seams, let it dry and then came back and applied a little more where needed.
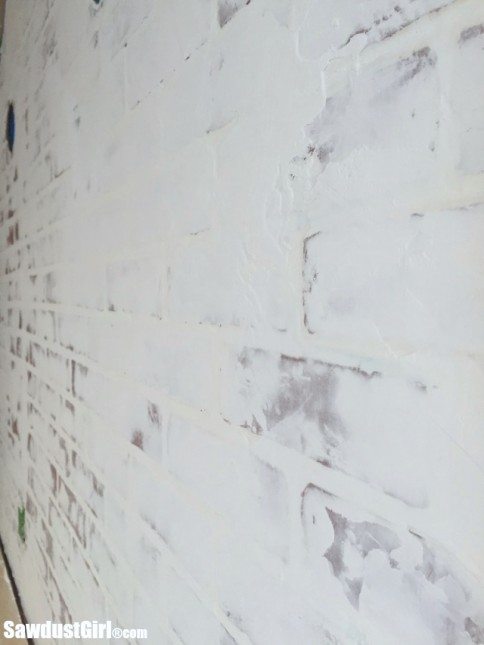
After the seams were dry I started troweling joint compound over the whole wall to create the “plaster look”.
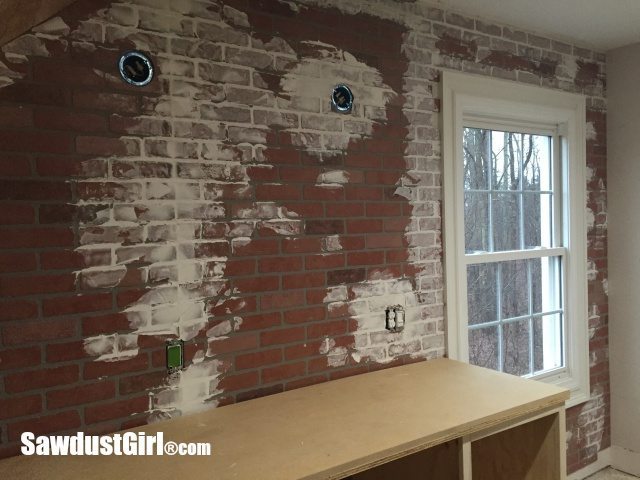
I did this in stages. I applied some plaster, let it dry and then went back in and applied some more. This part is the artistic part where you just get the wall to look however you want.
I applied plaster, then sanded and sponged some away, then came back in and applied some more purposely creating some texture. I messed with this wall A LOT.
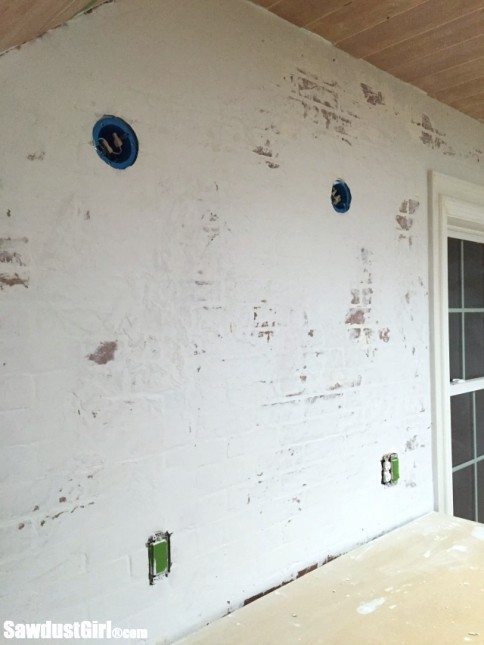
Then I painted it. Actually it’s just primer because the primer will seal the plaster but it has a really dull, chalky look and will grey over time which is perfectly perfect for the look I’m going for.
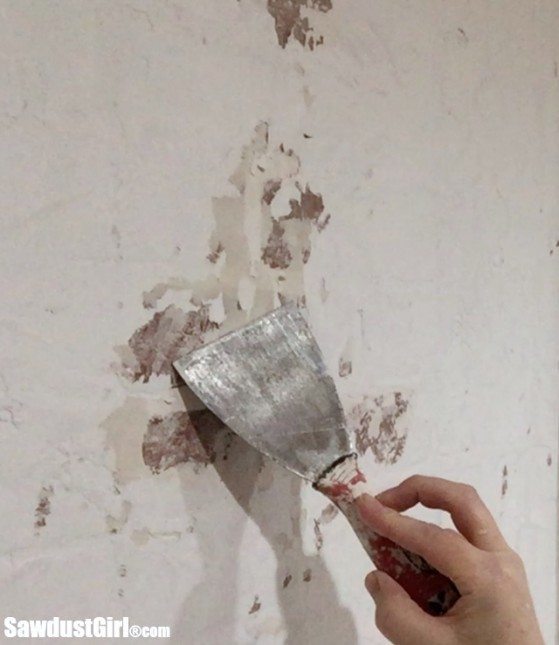
After applying priming, I let the primer dry for less than an hour and went back in with a little trowel and scrapped some of the paint back off. Another layer of the aging process I was going for. I scraped away just enough to expose some of the brick and plaster underneath. It looks like the paint is flaking off.
The moisture in the primer dampened the joint compound so the timing on this part is somewhat critical. I don’t think you’d get the same result if you waited too long.
Now I’ve exposed some of the joint compound again so I need to go back and wash the whole wall with a transparent glaze or something that will seal the wall. I took way more time than I expected it would to create a faux brick and plaster look, but it’s my feature wall so I had to keep messing with it until it looked right. Next I’ll focus on finishing my ceiling.

Janice says
This is AWESOME! I might brave this! Nice work!
Sandra says
Thank you Janice.
Theda says
You are amazing! I think you’ve achieved perfection on that wall. It looks great!!
Sandra says
I’m definitely tenacious — I don’t know about amazing. LOL Thanks!
[email protected] says
LOVE this! Never would have imagined you could get this look from those awful fake brick panels. Well done!
Sandra says
Thanks Sue. I just kept messing with it until I did get the look I wanted…I was unsure there for a while. LOL
Terry Moore says
Looks like a lot of work but the end result is amazing and so worth it. A very good look and it looks authentic.
Sandra says
Thanks. Authentic is what I was going for. I didn’t know how much work it would take to achieve it so I just kept at it until I saw it. In hind sight…I’d probably do exactly the same thing again. Because I only spent $8 on a tub of plaster and was able to re-use material that would have otherwise been thrown away. So, win/win!
nellie says
jagged seams awesome.
question: how did you get the panel to line up so perfect with the ceiling? can you do a tutorial on that?
nellie says
the angled ceiling that is
Cindy dabney says
That is a fabulous technique! I need to find a wall in my house to do this on! As always thanks for sharing. You are such an inspiration to me!
Sandra says
I’m not sure what you are asking. How did I cut out the angle on the brick so it would fit? Match the ceiling angle? I measured the highest point on the ceiling and then the lowest. Then measured the distance between those two points and transferred those measurements onto my panel. (Hope that was what you wanted to know and that it made sense.)
Heather C says
Really, really, like the look you achieved, you are one hard working girl.
Sandra says
Thank you Heather.
Renate says
‘Wax on, wax off’!!
Oh my gosh this wall was A LOT of work…I’m suprised you can still move your arms!
But the end result was worth all the work. The wall looks awesome. I live the old world style. It makes the room look so cozy.
I’m thinking maybe I should try something similar to a couple of walls in my basement.
Sandra says
LOL Thanks! (wax on, wax off, wax on, wax…still going. Kidding. I’m done!)
shnatanu sinha says
Hi Sawdust girl
What a masterpiece you provided us with 🙂
It seems to be a huge amount of work to be carried upon. I wish you could perform a tutorial on how to get the panels
lined up exactly the same size.
I definitely would like to carry this achievement for one of my walls. You are such an inspiration. good work girl 🙂
Have a great week
Shantanu sinha
Sandra says
Thanks. I’m not sure what you mean about getting the panels lined up the same size. Could you explain? Then perhaps I can do an additional video/post.
Mrs. Cobra says
I just finished distressing my faux brick with the joint compound. I love how into looks and don’t want to change a thing! I am just wondering what glaze or topcoat you might recommend to seal it off? I would leave it exactly how it is, but don’t want to risk it getting overly gray or yellowing over time. Thanks so much for the inspiration! You are fantastic!
Kim cortino says
I’ve been wondering the same thing!! What did you end up using for a clear glaze top coat?
Morgan says
I am also wondering!!!
Sandra says
I would try a waterborne poly.
Robin says
This is so wonderful. Your video, especially! I believe I can do it, too. Thank you !
Danielle says
So the supplies I need are the panels, joint compound, trowel, sandpaper, sponge and water and waterborne poly?? Would you recommend waiting longer than an hour so the compound doesn’t get wet from the poly when you trowel some off? You should wait until the compound drys completely to do the top coat? Would this work in a bathroom with the extra moisture in the air?
Sandra says
I never went back and coated my wall with anything. In my craft room, that’s fine. I think it would be fine to do it in a bathroom as long as you completely seal it. You may have to experiment with different sealers.
sam says
great wall! wanna come here and do mine!
question… why do you need to seal it? if the ‘brick’ board itself is ‘sealed’ and you put primer on, does it need to be sealed? or, if you put the primer on, go back and do the aging on it and then paint and wipe off where you want. would that work too!
i’m certainly going to try this, but a bit more information would be helpful!
thanks so much for the video! it was helpful!
Sandra says
If you used a plaster type material (like hot mud), you probably wouldn’t need to prime. I used regular joint compound that will wipe away with water if not sealed.
Ginny Horn says
I just found you on Pinterest and I am absolutely hooked on your projects! I live in KY. If I ever come to Bucksnort, I would love to meet you two. I grew up in a small town in TN outside of Nashville where the real estate is still affordable… Thanks so much for your inspirations. I can’t wait to try some of your projects! I am most definitely a remodelaholic :))
Sandra says
Hi Ginny! I can’t imagine any real estate near Nashville being affordable any more. LOL People are leaving that area and moving to Knoxville and now Knoxville prices are getting too high. I guess that is the case everywhere…
Ingrid Sawubona says
Really, really nice work! Thanks for the info!