I’m installing Pergo in my loft craft room. It took about an hour to remove the old carpeting. Then it took about four hours to complete installing laminate flooring. Pergo is easy to clean and resists scratches. It is a floating floor so you don’t need a flooring nailer to install it. The tongue and groove click together for easy installation. You will need a miter saw to cut your flooring to the proper length. A table saw or circular saw will come in handy for ripping the planks to width when you come to the end run. Of course you’ll want to follow the manufacturer installation instructions for up to date instructions on your specific flooring. Here’s how I installed my Pergo flooring.
I’m partnering with Pergo to complete my loft and am installing 12mm Coffee Handscraped Hickory laminate flooring.
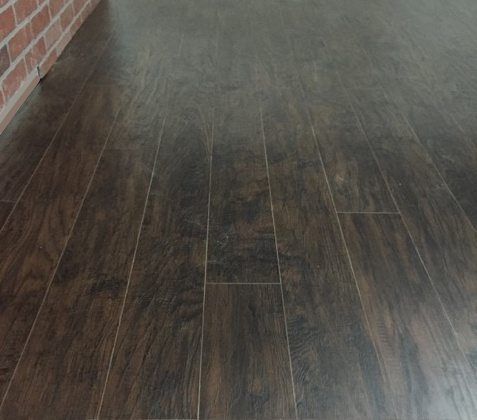
Pergo Laminate Flooring
I actually started installing the new flooring before I decided to dump the recording studio project and started in that room. Installing flooring can be hard on your back so I just do a little at a time and take lots of breaks.
The flooring I selected has an attached underlayment so we didn’t need to deal with a separate underlayment. 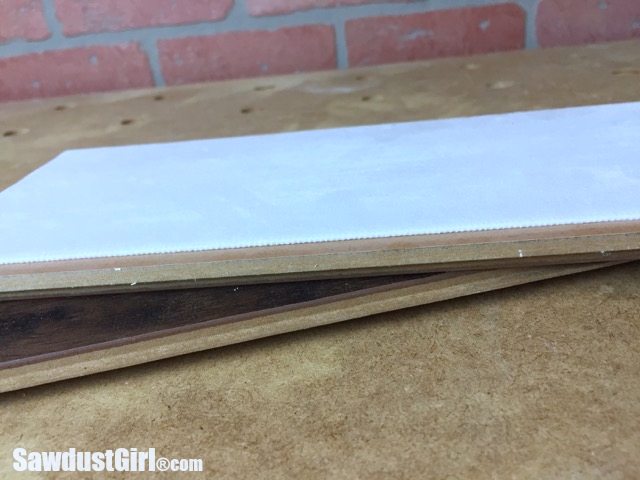
Prep floor
We prepped the floor by making sure it was flat. I sanded down along the seam in the subfloor because it peaked up to a high point along that line. To check if your floor is flat, lay a straight edge on your floor. If your floor is dead flat, the straight edge will lay completely flat and not let any light through. If there are low or high spots, some light will come through and the straight edge may rock back and forth like a teeter-totter. You’ll want to fill depressions with floor leveling compound if there is more than 3/16″ unevenness per 10-foot span.
Floating floor
This is a floating floor so it’s not glued or nailed down. It just “floats” on top of the subfloor. The only thing needed to install is a saw to cut the planks, a mallet and an installation kit with a pull bar, tapping block and spacers. The spacers are to ensure a 3/8″ expansion gap so the floors can expand and contract around the perimeter of the room.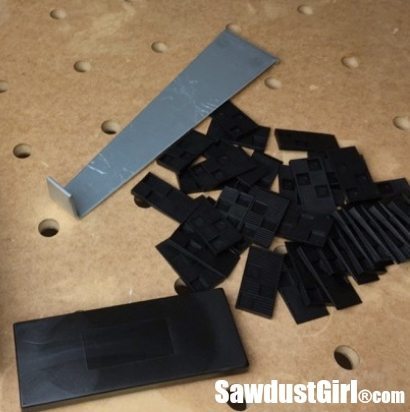
Tongue and groove
The floors connect with a tongue and groove system. Now, it might look confusing at first glance because there is a protrusion on both sides of each plank. My brain sees a protrusion as a tongue in a tongue and groove situation.
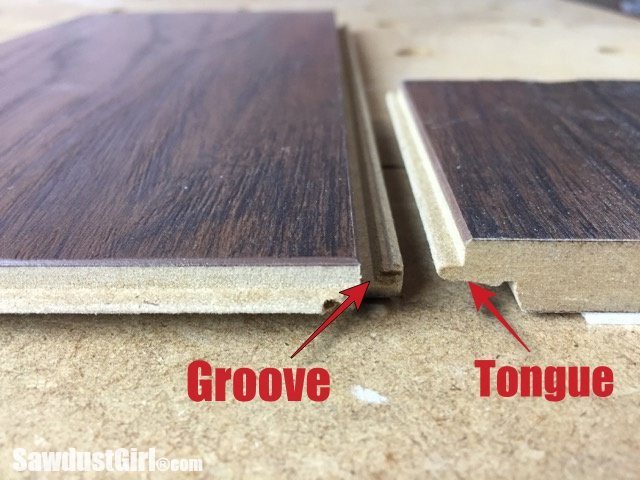
So with these floors, the “tongue” fits over the top of the “groove” protrusion. Really, I think it’s a “double tongue and groove” system because there’s a small groove on the underside of the tongue that a small tongue on the top end of the groove locks into when the whole thing locks properly. To lock the planks together, you tilt one plank up slightly, insert the tongue over/into the groove and then rotate that plank down, locking the joint.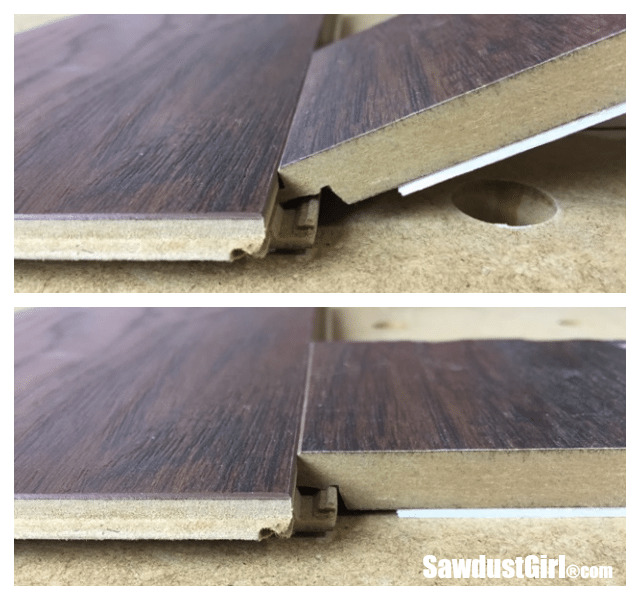
Installing laminate flooring
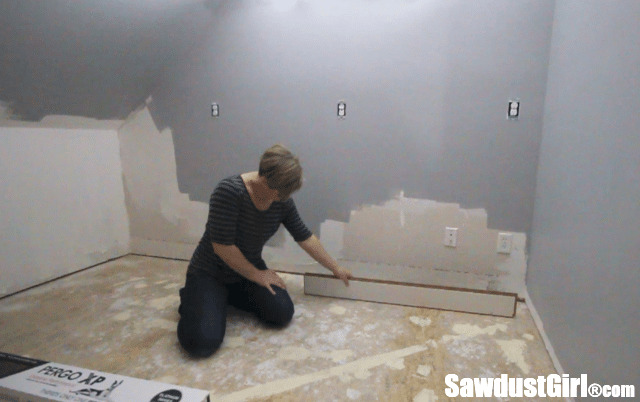
Install the tongue towards the wall you are starting on. The tongue should be removed from the long side of all of the planks in the first row and from the short end on only the first plank. Running it along the table saw is an easy way to remove the tongue on the long end but if you don’t have a table saw, a circular saw or even an oscillating multi tool works.
The first row simply requires locking the planks end to end.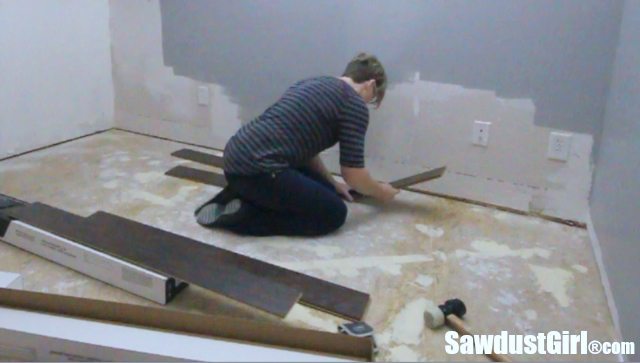
The second and consecutive rows you have to lock end to end and also lock them with the previous row. This room is small and I’m building shelving against two walls so I’m not covering the entire width of the floor. I’m only covering 8′. Because we were working with short rows, we tried a method I read about when looking for installation tips on the interweb. We locked the short ends of planks in a whole row and then locked the long side of that whole row into the previous row.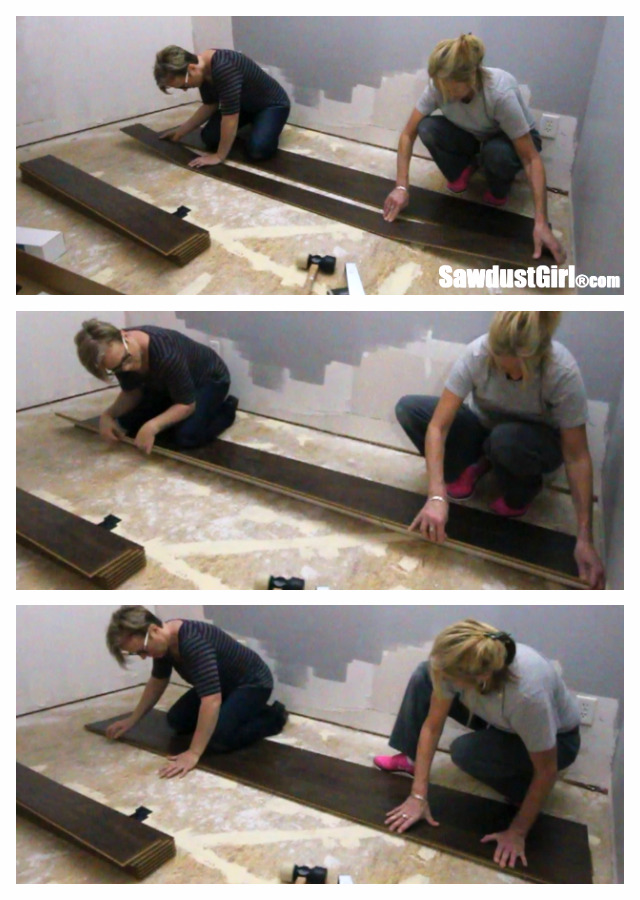
I’m not sure that way is easier than the traditional way of locking one piece into the previous row and then adding the consecutive pieces of that row one by one with the use of a tapping block. You first lock the short end, then tap the long end until that joint locks.
Tapping block
The tapping block has a recessed area on one side and end. This recess allows space for the protrusion on the “Groove” side of the plank to protect it while you “tap” the block with a hammer. 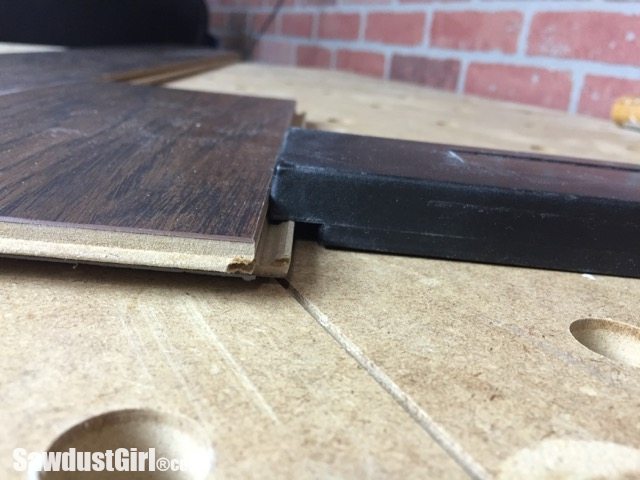
Use the correct side of the tapping block and then tap along the long side of the plank until the joint closes up tightly.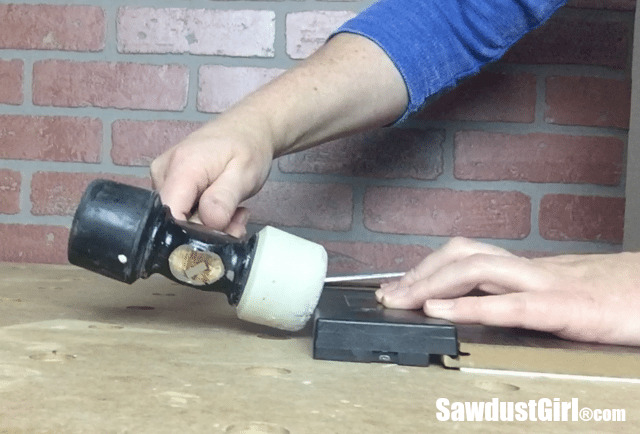
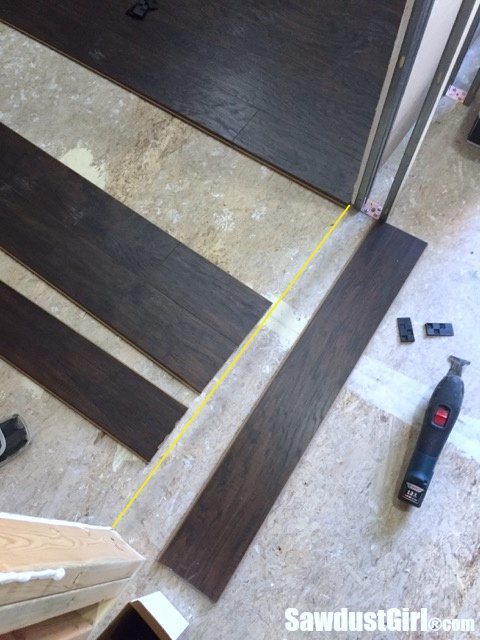
Staggering joints
The joints need to be staggered with at least a 12″ offset. I was able to use both ends of my cut plank in one row with one full length plank in between them. This only worked out this way because the planks are 4′ long and I was installing my flooring 8′ wide. If working in a wider room, use the cutoffs from previous rows to start new rows as demonstrated in this graphic from the instructions manual.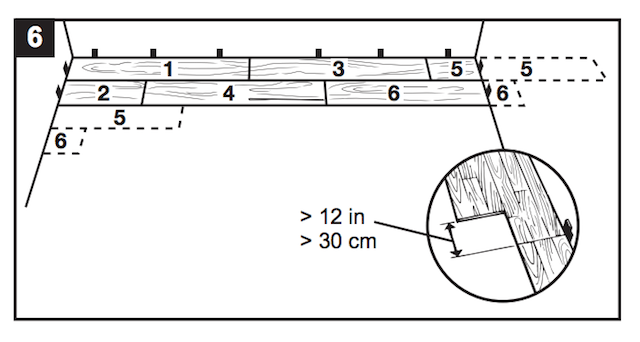 A miter saw is the quickest way to cut planks to length but a circular saw and cutting guide would work too.
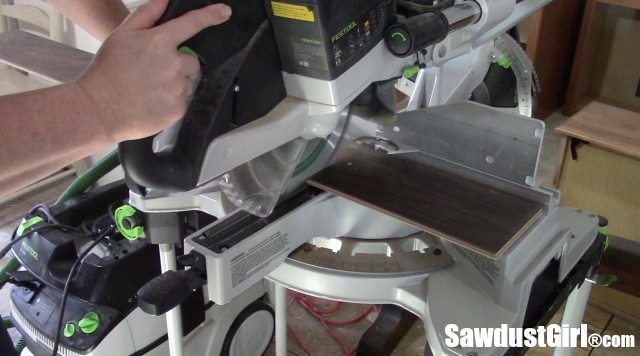
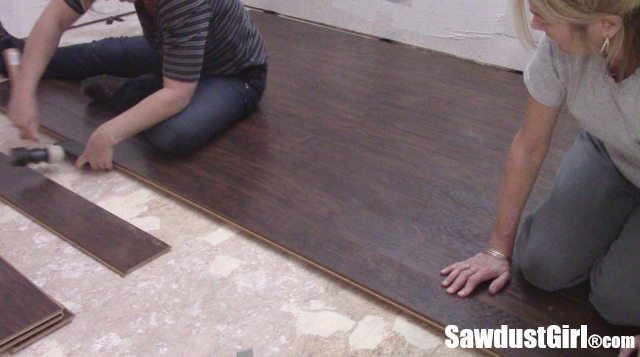
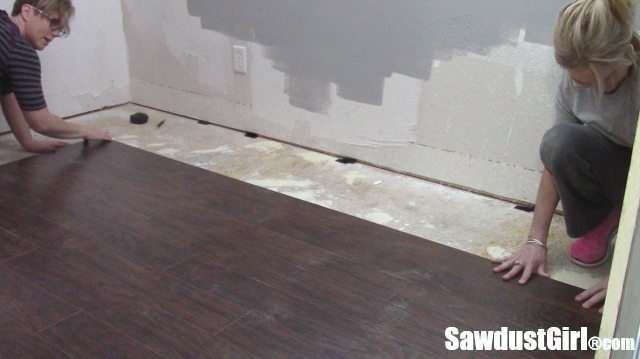
Since the floor is not secured to the floor, it tends to slide around for the first few rows. This can be managed by laying a couple boxes of your flooring on the section that is already installed OR, as I found to be easiest, kneel on the installed floor as you add consecutive rows.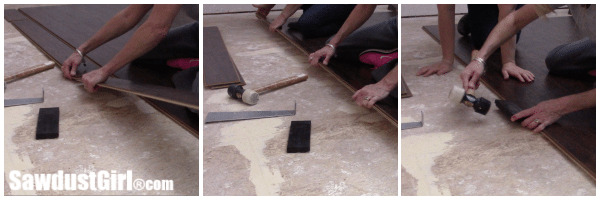
Once there is a good chunk of flooring locked together, you can move the whole thing into place. This is where you want to make sure you are leaving a 3/8″ expansion joint on the sides.
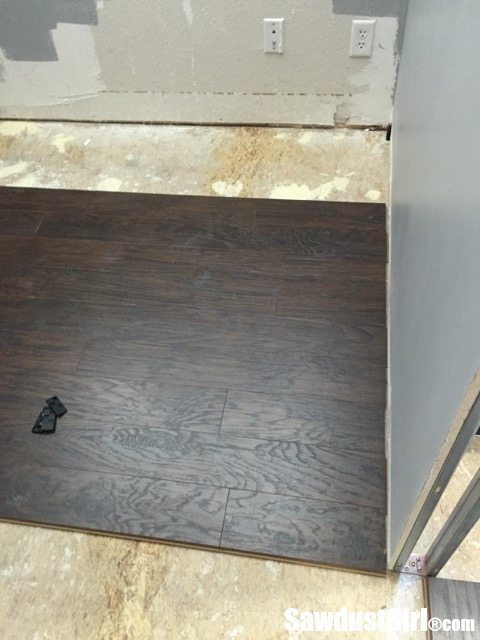
Don’t install under cabinets
Since I haven’t built any cabinets or shelves yet, I simply marked the floor 20″ out from the wall and positioned the floor on those marks. These floors shouldn’t be installed under permanent cabinetry so I’ll be installing the cabinetry 3/8″ behind the floors and then adding the toe-kick piece over the gap.
This side wall will not have any cabinetry because it’s such a small room. The baseboard will cover the space between the wall and the floor.
Thresholds
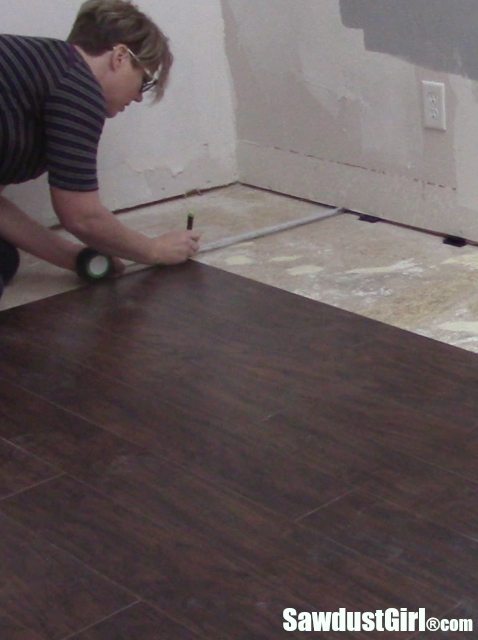
The door threshold requires a special moulding to provide the floors in joining rooms adequate room for expansion. I’m not going to install that piece until I’m ready to install the floors in the adjoining space. Mark a straight line from one side of the door to the other. Start each new row on that line.
Pull bar
In areas where you don’t have room to use a mallet and tapping block, use a pull bar. It gives you the leverage you need. It’s important to apply downward pressure to the “pull” end of the pull bar so it doesn’t jump up and damage the floor when you whack the other end with the mallet. 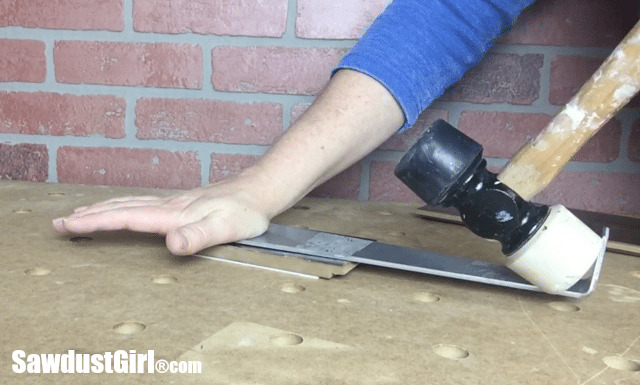
It can be awkward getting up into those tight spots but it’s generally just the last row. Hang in there.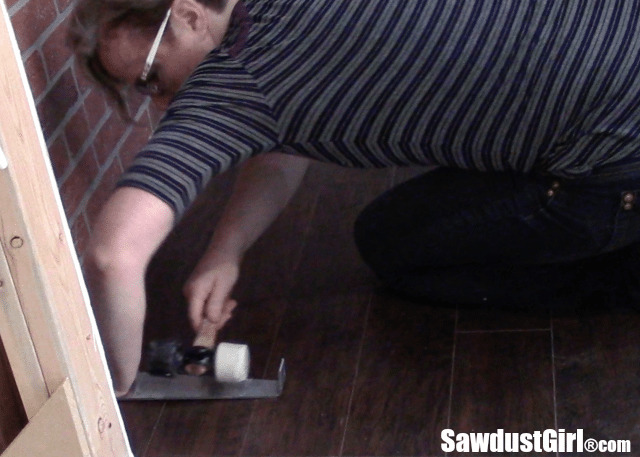
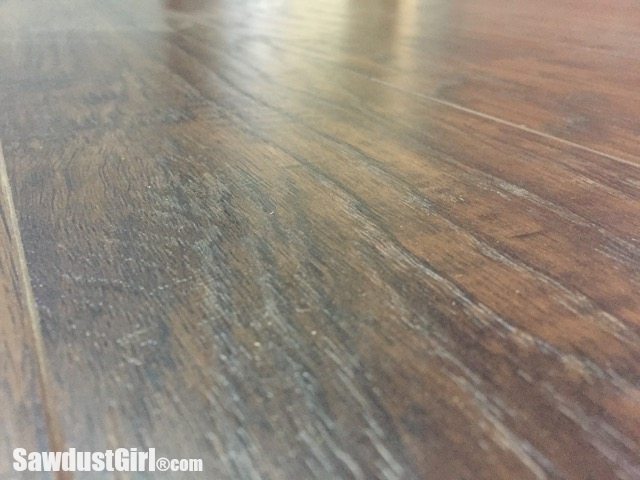
The end result of installing this laminate flooring is pretty stunning. 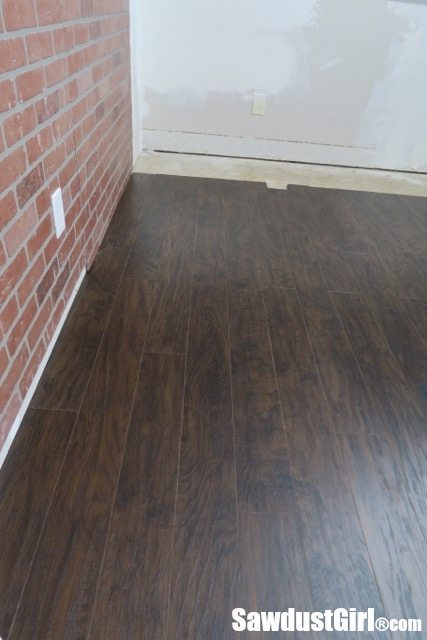
Just imagine…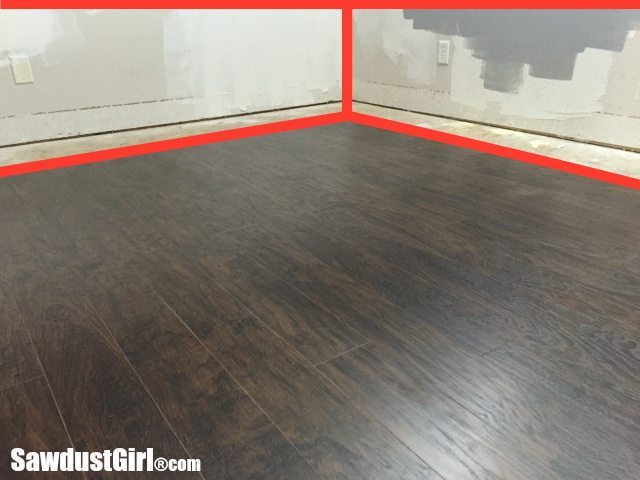
The Pergo laminate floor is gorgeous. I’m super excited to get my studio cabinets built and get these floors installed out there!
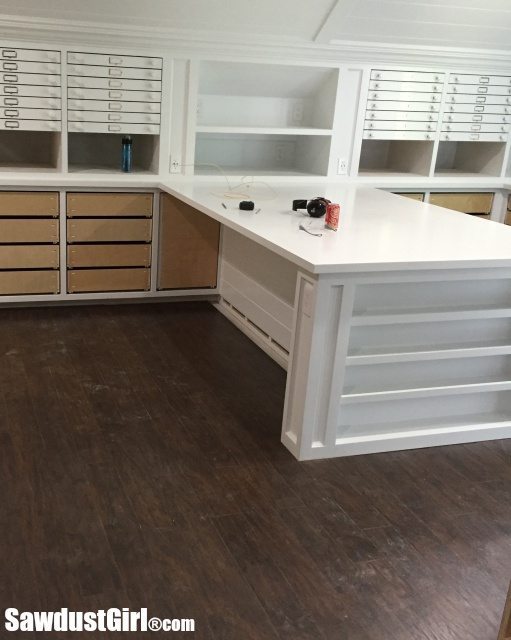
Look how good the laminate floors look with my studio cabinetry!
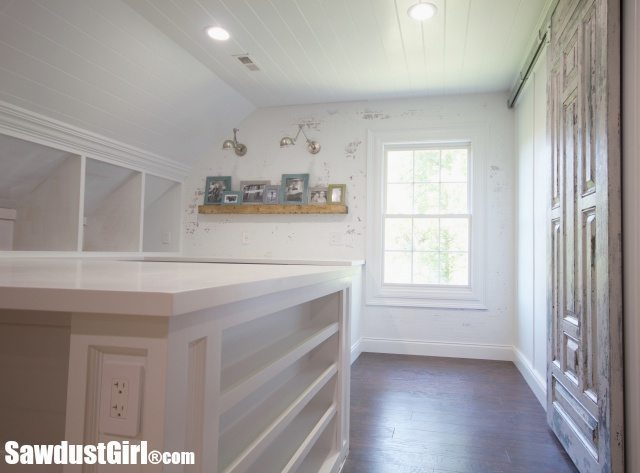
The map drawers and huge island are going to be SO fun to use (as soon as I finish this room)!
I’m partnering with Pergo to complete my loft. I received product and compensation from Pergo. All opinions expressed are 100% my own.
beck campbell says
LOVE! I installed laminate in my master bedroom and office and all the rooms upstairs. I usually put the additional underlayment down just for added sound proofing…I think it helps a tad but might not be necessary! I think people are afraid to try this but your tutorial should encourage people to give it a shot. It is a very doable DIY project even if you are a novice! Beautiful!
Sandra says
It is definitely a doable DIY project. I actually wanted to put additional underlayment down but was told by the Home Depot flooring associate that using additional underlayment under Pergo with attached underlayment would void the warrantee on the floor so I opted not to do it. I’m so excited to build out my loft and get the rest of the floors installed.
laura{not a trophy Wife} says
I am ready to rip out my entire golden oak, dog destroyed hardwood floors on my entire main floor. I was at a gorgeous home for a party and I actually ran my hands across the floor boards in the guest bathroom and was psyched to find they were laminate!
Love this! I just did a tile “wood” floor.. this is much easier!
PS If you are in Knoxville do you know John Becker at WBIR? He’s my brother-in-law. I love visiting Knoxville to see John and my sister (a teacher)!
Sandra says
LOL I don’t know John but if I ever meet him I’ll be sure to tell him to give you my best the next time he sees you. Or better yet, next time you’re in Knoxville visiting your sister (and John), you and I should meet for coffee! 😀
carol says
Looks great! I just installed pergo highland hickory in my living/dining area a few weekends ago. A back strainer for sure! How you did all that kneeling without knee pads, I don’t know. Enjoy reading about your projects and would love to know how you got started building things. Can you recommend how a woodworking beginner can best begin building her skills? Thanks & Happy holidays!
Sandra says
I definitely regretted not wearing knee pads. I will be sporting them with my next flooring installations! I kept asking Penny how her knees and back were feeling and she was all, “Oh I’m doing great”! I was feeling it and she is 5 years older than I am so I just felt soooo out of shape! LOL
As far as learning woodworking: Definitely look at woodworking stores in your local area and see if they offer classes. Rockler and Woodcraft both offer classes. You may be able to find classes through a community outreach program, parks and rec, college… Some areas I’ve lived there were tons of options and others it seemed like there was nothing. Woodworkers, I have found, are generally very generous with their talents and willing if not eager to teach and mentor others with an enthusiasm for the craft. If you can’t find someone to teach you in person, start small but start doing it and learn as you go. Obviously I’m going to say, “Read every single post on my blog”. LOL But there are a LOT of bloggers and YouTubers out there sharing their knowledge. I am self taught. I learned by doing; reading and watching videos and talking to anyone that seemed to know anything about what I was trying to do — then I’d filter all that information into an idea of an approach that made sense to me at the time and give it a try. I learn and gain more skill with every project. No matter how you learn, we all start at the bottom rung of the ladder and climb upward. So that’s my advice, Start climbing! 😀
Kris says
I installed this same flooring in my daughter’s bedroom and closet a year ago. Love, love, love it. Daughter loves it also. I want to put it in our bedroom and closet also. My pictures and yours are a bit deceiving though as the pictures seem to make it look like the seams are lighter making them stand out and I don’t see that in her room. Yes, you can see the seams like any planked flooring but they aren’t lighter in color. I think that’s worth pointing out if anyone is thinking about this flooring.
The 12 mm thickness is SO much better and nicer than the 3-4 mm. I’m not even sure what the price difference is but it’s worth it.
Sandra says
I definitely see the joints/seams more prominently when looking down the planks than across them and they show up WAY more when the floors are dusty because the dust settles in the joints. LOL I agree, the 12 mm is WAY nicer than a 3 or 4 mm floor. I don’t think I’ve ever seen a 3 or 4 mm floor actually. I think in my last house we bought a 7 or 8mm floor. This floor is tons nicer than that one. It seems laminate flooring has made some big improvements over the last 5-10 years.
Nancyinnortheastiowa says
I installed FIVE rooms and two bathrooms of floating floor in our house and it IS a killer on your back. I did mine all by myself and I wish I had pictures of me, laying on the floor, locking long rows together. Anyone watching would have thought I was nuts! Ha ha! The end result was worth it though…. I LOVE my floating floors!!!!
Sandra says
Anyone that has ever installed flooring would not have thought anything odd about you laying on the floor! LOL
yvonne says
I would be interested in knowing the time it took install. Can you provide the room dimensions and a timeframe?
Sandra says
Hi Yvonne! I think you read the post too fast. LOL That info is in there. 😉 We installed a section of floor 8′ wide and about 10′ long. It took Penny and I about 5 hours. I took lots of breaks to rest my back.
DAN says
Sandra, I’ve been a huge fan of your blog and work for a long time. I’m “floored” by your skills, the integrity with which you build, your humor and talent as a writer, and your ability to dive head-first into each of your projects. Here’s my question: your kitchen remodel is AWESOME… and I’m curious if you have completed the drawer front and cabinet fronts? How do you balance which projects to finish or which to put on hold while you begin a new one? Thanks for doing what you do!
Sandra says
Thank you Dan! No, I have not done the drawer fronts or doors in the kitchen. I haven’t finished the laundry room or dining room either. All those rooms are to the point where they are functional though which is why I’m able to move on to other projects. This house has so many spaces that are completely useless until I do “something” with them. That is the driving force behind my scattered work pattern. I need to create some level of functionality in a whole lot of rooms so spending the amount of time it will take me to build and install perfect inset cabinet doors in the kitchen is not a priority right now. Maybe after the loft and wes’ office.
😀
Kate Brownell says
Liked the whole installation process shared by you. I have installed hardwood flooring over a concrete floor. That was a nice experience for me to do the main floor installation on a subfloor. I will try your instruction to install laminate flooring in my bathroom and kitchen. Thanks for all your information.