Love this fold away picnic basket tutorial shared by Holly of 504 Main. Wouldn’t this be a great DIY wedding gift? Every year I say I am going to “get on it” and start making my Christmas cards and presents early…and almost every year I fail…so…THANKS to Sandra for hosting Christmas in July, and for letting me be a part of it! This is surely going to light a fire under me! (see one project is already done!) I am so motivated to get moving. Now, let’s sew!
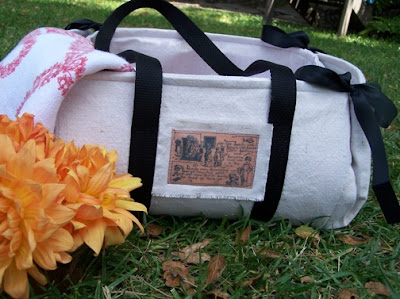
Fold Away Picnic Basket
I found a great fold up picnic basket at a thrift store and whenever I use it I get a ton of compliments. That got me thinking…I wanted my take on the basket to be different…and then I remembered my mom made me an Easter basket when I was about 9 (yes I still have it and it is used by my daughter). So I took the features I liked of both these baskets and combined them into my take on a Fold-Away (personalized) picnic basket.
…Before you go any further…
I know there are a lot of steps, but it is really not that complicated.
After perfecting the original pattern,
it only took my 1.5 hours to finish – with kiddos running around too!
I also must admit that although I was fashion designer,
my sewing skills are a little rusty, so
you do not have to have super-sewing-powers to do this!
SUPPLIES
- About 2 yards (this gives you extra) Canvas, Denim, Duck Cloth – I used a Drop Cloth. You can sew this in oil cloth (more on that in the NOTES section).
- NOTE: I thought I was going to be thrifty and make this in a vinyl tablecloth that I found at a discount store…it started off OK, but was quickly reminded why I hate these tablecloths – it is crinkly, and rips really easy – so while the tablecloth only cost me $3.00 it ultimately was a waste of time….spend the extra money if you take the time to make this.
- NOTE: YOU MAY SEE SOME STEP USING THIS RED TABLECLOTH.
- Matching or contrasting thread (and bobbin with thread)
- 3 yards 1″ Webbing in coordinating color
- Twill tape or ribbon (or you can make strapping in the same fabric)
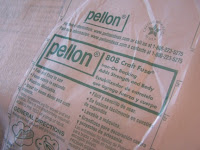
- 1.5 yards Craft Weight Pellon (Fusible)
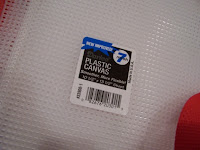
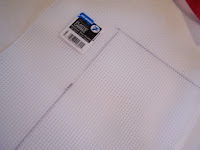
- 5-6 sheets of Plastic Canvas (about 99 cents each). NOTE: Sadly my local fabric store has a limited selection of options for the siding and this was what I came up with – bonus it is cheap. Bonus, I do not mind the relaxed look. I recently found some Styrene (used for glass crafts) and that may work. Illustration or foam board could work too…but I was looking for something waterproof.
- Double Stick Velcro Tape (optional)
TOOLS
- Scissors
- Sewing Machine
- Heavyweight needle
- Pencil/Fabric Marker
- Large sheet of paper for making pattern
- Iron/Ironing Board
- Yardstick/Ruler/L-Square
- Pins
DIY IT!
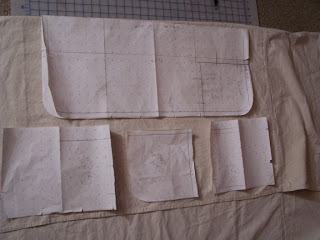
- Make the pattern on a large piece of paper (posterboard, newsprint, etc.).
- NOTE: I did one solid piece for the outside of the basket and pieced the inside of the basket together so that there were pocket to easily access/remove the plastic canvas for washing.
- ALL SEAM ALLOWANCE IS 1/2″, EXCEPT WHERE NOTED ON HEMS = 1.5″.
- A Notch is a small slit – Make a quick snip of the scissors no more than 1/4″deep.
- FINISHED DIMENSIONS: 25″ x 22″
OVERALL PATTERN PIECE/OVERVIEW
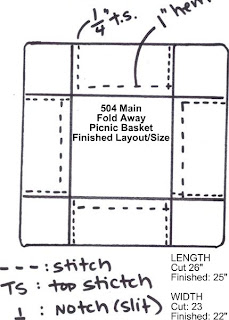
PATTERN PIECE DIMENSIONS
OUTSIDE Measurements (with seam allowance)
Cut 1: Fabric
- 26″ Long (includes 1/2″ seam allowance all around)
- 23″ wide (includes 1/2″ seam allowance all around)
- NOTCH:
- Along the long – 26″ side – make a notch 7.5″ from the outside edge on both sides.
- This will tell you where the finished sides/folds of the gusset will be and help place the twill tape for closure.
- Along the shorter – 23″ side – make a notch 7.5″ from the outside edge on both sides.
- This will tell you where the finished sides/folds of the gusset will be and help place the twill tape for closure
- From the center notch 2″ over on each side (4″ space total, 2″ on each side of center)
- Along the long – 26″ side – make a notch 7.5″ from the outside edge on both sides.
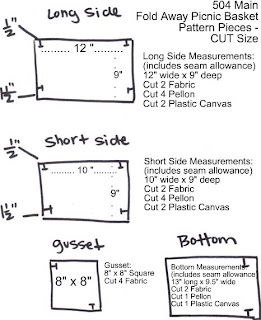
Short Side
Cut 2: Fabric
Cut 4: Craft Weight Pellon (Fusible)
Cut 2: Plastic Canvas subtract 1/2″ from finished dimension. Should be approx. 6.5″ x 7.5″
- Measurements for cutting fabric/Pellon: 9″ deep/long x 10″ wide
- There is a bottom hem of 1.5″, and 1/2″ seam allowance on the other three sides.
Long Side
Cut 2: Fabric
Cut 4: Craft Weight Pellon (Fusible)
Cut 2: Plastic Canvas subtract 1/2″ from finished dimension. Should be approx. 6.5″ x 10.5″
- Measurements for cutting fabric/Pellon: 9″ deep/long x 12″ wide
- There is a bottom hem of 1″, and 1/2″ seam allowance on the other three sides)
- Make a notch 1.5″ up from the bottom of the piece to mark where the hem is.
- From the center point (Fold piece in half) measure over 2″ and make another notch through both sides of fabric – this marks where your straps line up.
Gussets
Cut 4: Fabric
- Measurements for cutting: 8″ squares (7 inch square with 1/2″ seam allowance all around)
- NOTE: You may round the outside corners as a styling detail or you can leave them square. I rounded mine…just use a rounded cap and match it up to the side line and trace the shape.
Bottom
Cut 2: Fabric
Cut 1 (or 2 for more stiffness): Craft Weight Fusing
Cut 1: Plastic Canvas subtract 1/2″ from finished dimension. Should be approx. 8.5″ x 10.5″
- Measurements for cutting fabric/Pellon: 9.5″ wide x 13″ (1.5″ hem at one end)
Twill Tape
Cut 8 lengths 15″ long.
(I purchased 2 packages of twill tape and used 1 and 1/4 of the packages)
DIY it!
GENERAL NOTES:
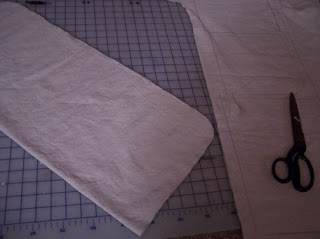
- Cut the correct number of pieces as directed above
- NOTE: I LIKE TO CUT PATTERN PIECES THAT ARE SYMMETRICAL ON THE FOLD – FOR EXAMPLE, THE OUTSIDE (LARGE) PIECE IS FOLDED IN HALF LENGTH WISE AND LAID ON THE FOLD FOR CUTTING.
- Be sure to keep the pattern pieces going the same way – for example all inside pieces should run with the length of the pattern following the length of the fabric. The outside piece just needs to be lined straight on the length of the fabric.
- All seam allowance is 1/2″ – except hems
- All hems are 1.5″ (I turn my hems under 1/2″ for finishing and them press under 1″ for stitching.
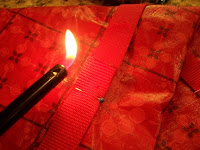
- Cut webbing to be about 96″ long. Once cut carefully use a flame to seal the ends of the webbing so it will not fray.
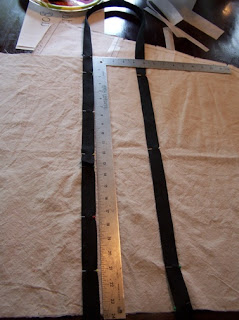
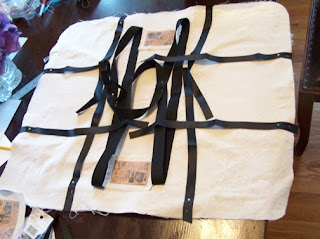
- Take the outside cover and lay it on a flat surface RIGHT side up.
- Using the notches that are 4″ apart in the center of the long side, layout the handles.
- Start in thee middle of the bottom with the edge of webbing.
- If necessary, lay a long ruler (or L-square or yard stick out connecting the handle notches as a guide).
- Pin webbing down to the cover.
- Towards the top of the basket, stop approx. 2.5″ from the edge, pin, and measure out 24″.
- Loop the handle being careful not to twist it and come back on the opposite side and begin pinning 2.5″ down from the top).
- Repeat above on other side.
- You will end where you started and overlap the webbing by 1″ +/-.
- NOTE: YOU DO NOT NEED TO CUT THE WEBBING, except at the correct measurement…IT SHOULD REMAIN IN ONE PIECE.
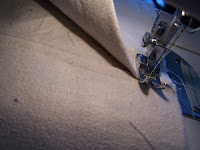
- Sew webbing down
- Start at the outside top and sew the length of the webbing
- Stop at the 2.5″ mark, leave needle down, turn and sew across the width, leave needle in and turn and then continue back down the length of the webbing;.
- Repeat until as you approach the middle bottom of the basket where you started.
- Overlap your webbing and continue sewing up to the top of the last handle.
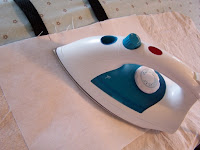
- Using a hot iron and follow directions on the Pellon for best results. Fuse the Craft Pellon to the (wrong side) of the fabric.
- Place Craft Pellon on inside pieces and outside piece.
- Line up notches
- Iron Pellon into place on the wrong side of the large (one-piece) outside basket.
- Iron Pellon onto the inner and bottom pieces of the basket as well (wrong side of fabric). Use notches to line up pieces.
- NOTE: Follow direction on the Pellon for best results.
(match up notches)

(Iron into place)
- Sew bottom together
- Use 1/2″ seam allowance on three sides to close and at one end
- Use a 1.5″ hem and leave this side open.
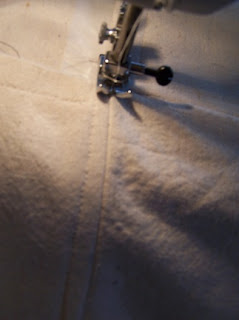
- Sew hems on the long and short sides of the basket
- Then sew gussets to the short sides.
- NOTE: You may have to clip the point of the gusset where the two hems come together. You are basically sewing into a point.
- Press seams and turn seams to the inside and topstitch at 1/4″.
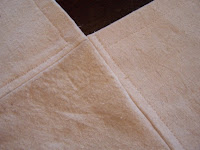
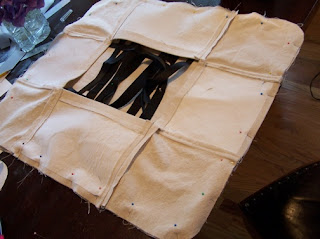
The entire inside should look like this
DECORATE NOW (Optional)
- If you choose to do an iron on transfer or fabric paint, do it now while the fabric is single layer and flat – so much easier.
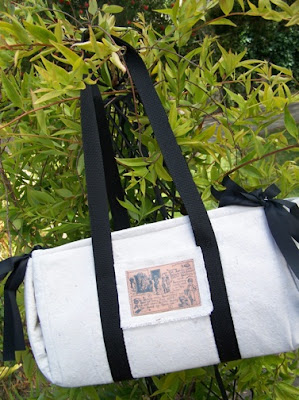
- When I did my iron on the product I used was old or bad and it did not stick correctly, so I made patches with the iron on detail and topstitched them on the basket.
(This is the OOPS!)
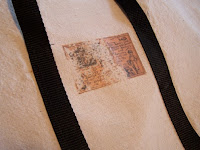
(This is the FIX)
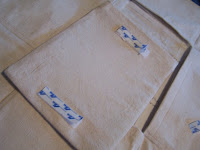
A small patch with the iron on transfer topstitched onto the basket.
I actually like the additional detail it provided.
CONTINUE SEWING…
- With right side of outside laying face up, place inside/lining on top with right sides facing each other.
- Place the twill tape on the inside of the notches – the seams from the gussets should also line up here.
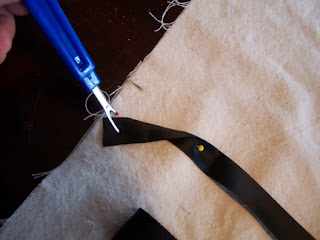
- Pin into place (I like pinning…if you are really skilled you may not need to).
- Be sure the handle/webbing and twill tape is laying towards the inside of the basket and not going to get sewn into the seam. (I folded mine up a little and pinned it to the middle of the cover.
- Sew all around the edge with a 1/2″ seam allowance (usually a 1/4″ seam allowance is used for inside seams, but this area could get a lot of wear and tear, so I suggest 1/2″).
- Clip corners (or curve) and flip cover.
- Press
- Top stitch with 1/4″
- NOTE: I also stitched the gusset to the outside cover.
- I did this by pressing the inside, laying the entire piece flat and sewing with the inside facing me with a single stitch into the seam (not the top stitch) from the gusset.
- NOTE: I also stitched the gusset to the outside cover.
- Press again, if necessary
- Lay bottom in
FINISHING
- Cut Plastic Canvas pieces according to cut quantities needed above. Cut 1/2″ TOTAL off the length and width of each piece. Depending on your sewing it may be a little more – you can always measure how big your pockets actually turned out.
- Insert Plastic Canvas (cut to size) when complete.

- Clip all threads
- Apply double stick Velcro tape to the bottom insert; removed sticky side from opposite side of tape and press into bottom of basket.
NOTES:
You could try the iron on vinyl on a regular fabric too- I have NOT tried this, but as of right now see no reason it won’t work.
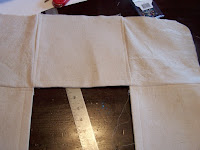
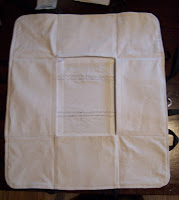
This is the basket laying flat (and finished w/o bottom)

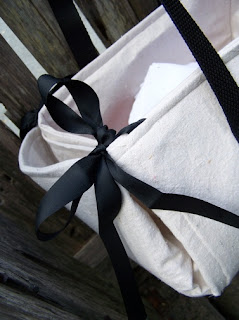
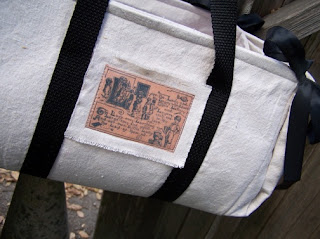
This is the basket folded for easy storage
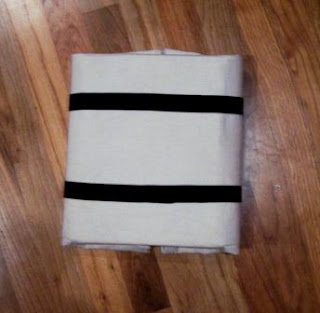
Ta-Da…All done!
Thanks Sandra for letting me showoff my creation!
Lynn R says
Genius! I cannot wait to try this!
Holly L says
Thanks for having me! I am happy to be prepping for Christmas already! I forgot to mention…if anyone has any questions they can email me…I know that is A LOT of directions.
Sawdust and Paper Scraps says
Thank you Holly! There are a lot of steps – but I think even I can follow them. (And that’s saying something.) Can’t wait to try this out!
Patty A says
Holly…who knew? I am going to print these directions and make this picnic basket. It’s amazing.