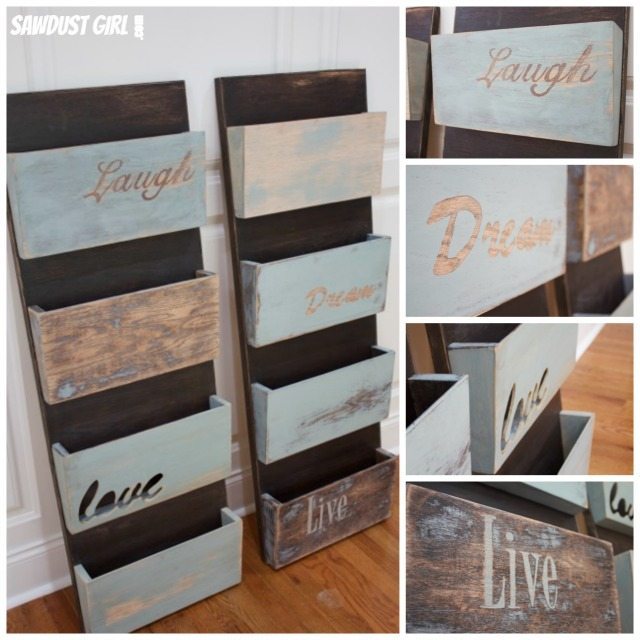
Build a Hanging Organizer
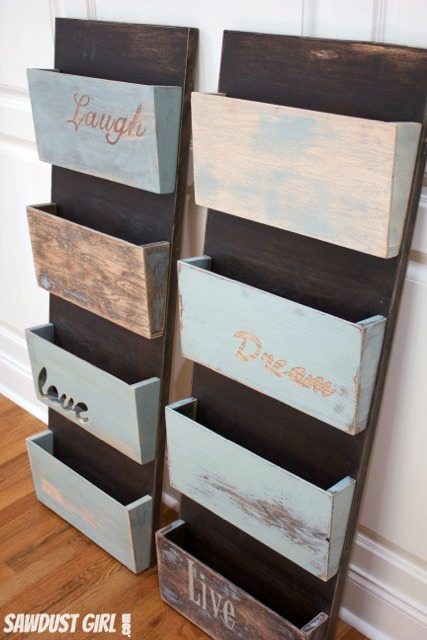

We’ve been cleaning up the house, getting rid of excess and I’ve been getting my office organized and trying to find a successful way to keep track of everything I have going on. I’ve got file folders in my desk, a whiteboard on my wall, a calendar on my desk and a planner within reach at all times. I still have issues though. My desk is covered with receipts and papers and I have a pile of magazines and manuals in the corner…which is the solution I am remedying with this DIY hanging organizer!
Materials:
- Dremel Fortiflex
- Wood glue and brad nails
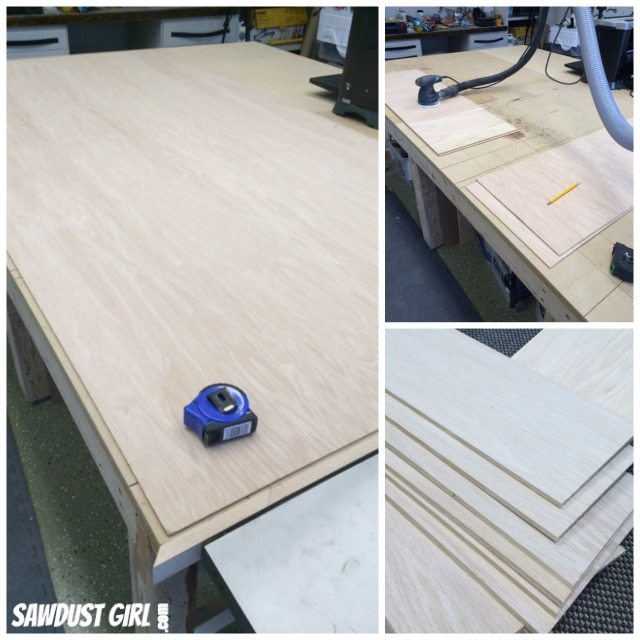
- one sheet of 1/4″ plywood
- scraps I had in the shop:
- 1×2 furring strips
- 1×3 pine (for french cleat)
- 2×6 (for edge strips).
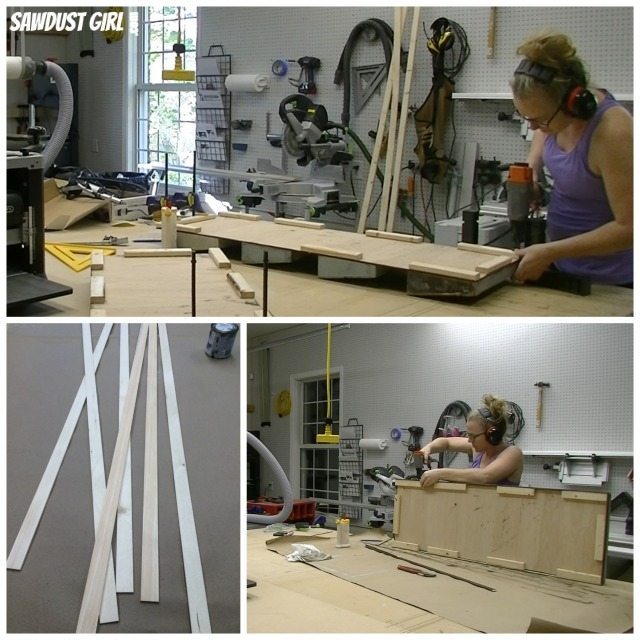
*My Hanging Organizer Dimensions: 48″ tall, 14″ wide.
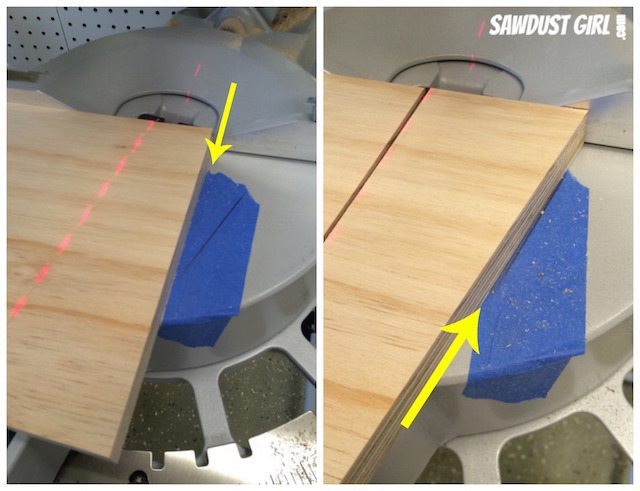
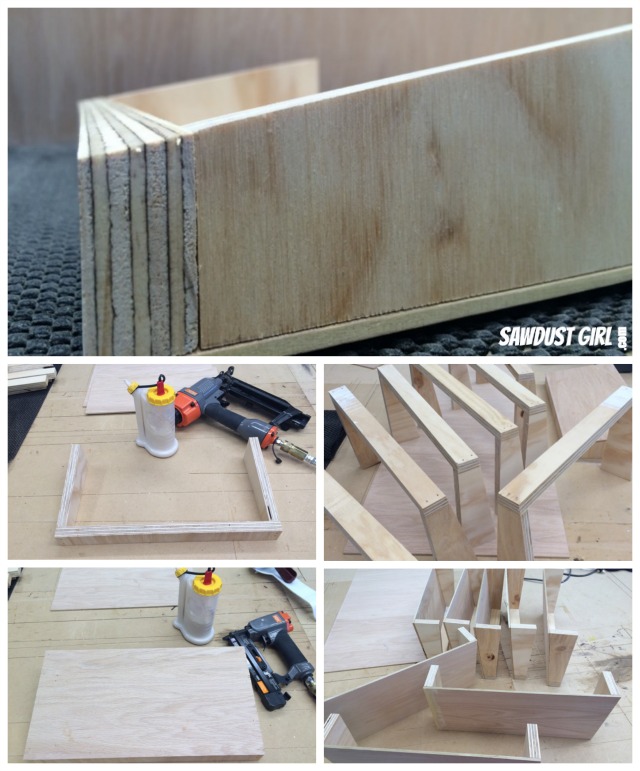
I wanted my organizer boxes to slant out so I cut one side of of each piece at a 10º angle. To easily repeat this step on all 16 pieces, I put a piece of tape on my miter saw. The left edge of the tape marked the “stop” for the square side of my board. I then cut the board with the 10º angle. Then pushed the board over and lined up the angled edges to the next mark on the tape, changed the saw to cut at 90º.
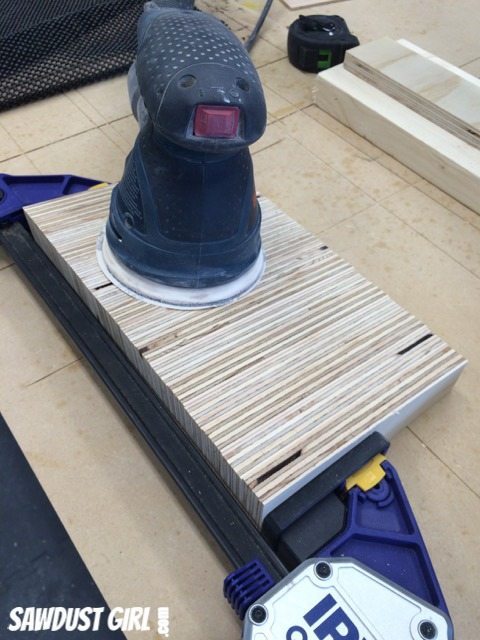
They weren’t all perfectly the same so I clamped them together and sanded out the discrepancies. (Perfectionist behavior.)
Building the Hanging Organizer Compartments
- I cut the bottoms for the compartments with a 10º angle on one side to match the slant of the sides.
- Then I glued and nailed the sides to the bottoms.
- Then I glued and nailed on the fronts.
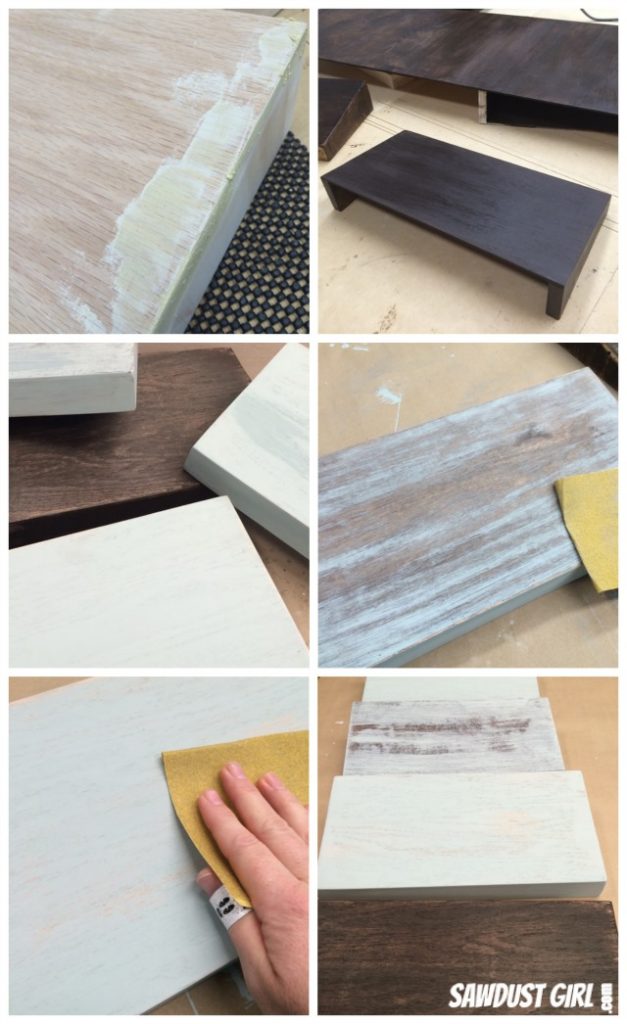
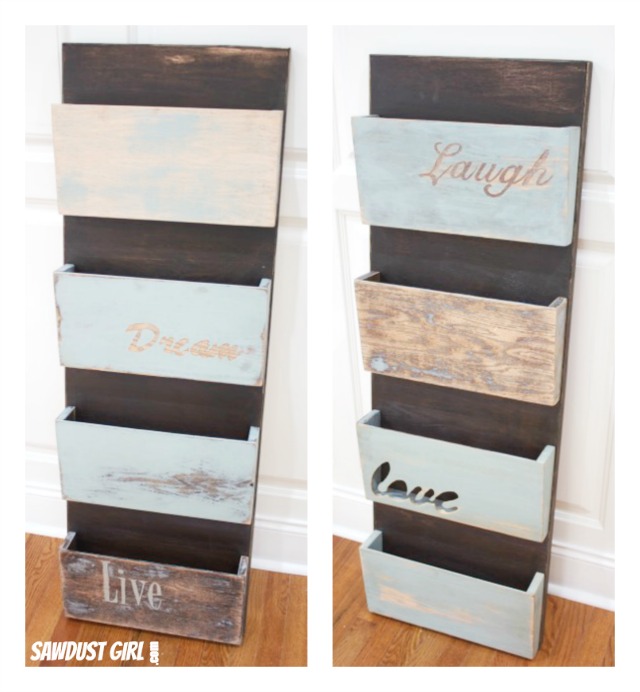
At this point I filled, sanded, stained, painted and distressed the backs and compartments.
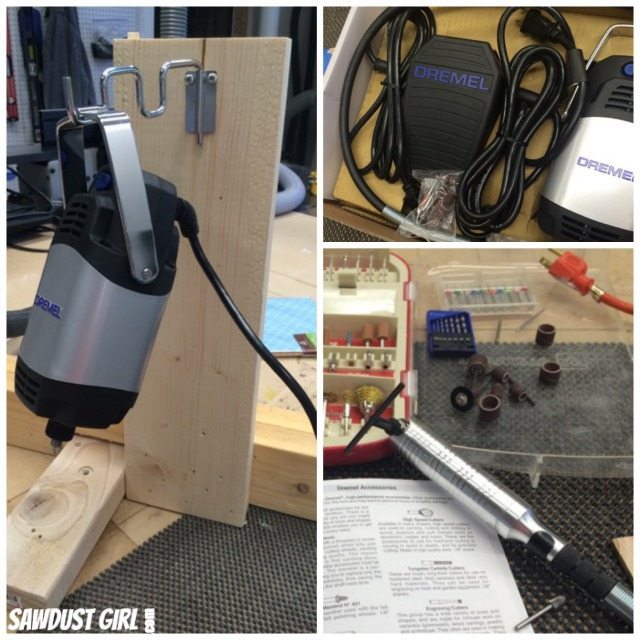
Now for the FUN part! I set up my Dremel Fortiflex. It comes with a bracket so you can hang it on a wall but I’m working on an island so I had to build this little “tripod” thingy.
The Fortiflex is a motor, a long cord and a penlike handle which is where you connect the bit. It has a foot petal so you can control start and stop and control the speed with your foot. This allows you to keep your hands on your project. Kind of like a sewing machine for anyone out there that has used a sewing machine.
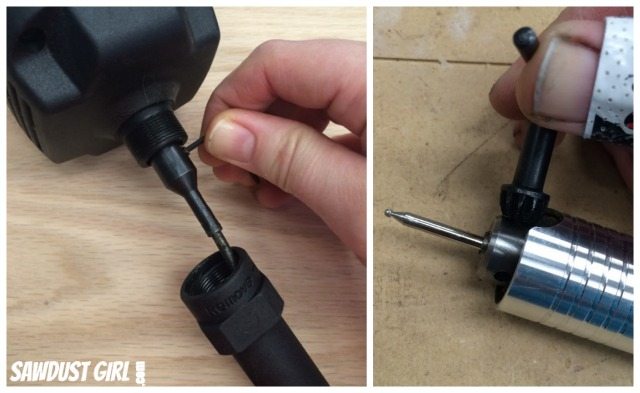
It’s important to securely connect the cord attachment to the motor assembly. I know this because I initially didn’t do it so while I could hear the motor, my bit wasn’t turning. See how helpful my failures can be?!!
Changing the bit is easy, just don’t lose your “chuck key”.
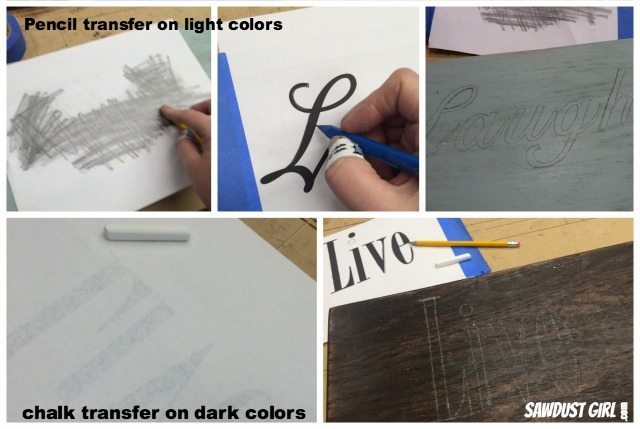
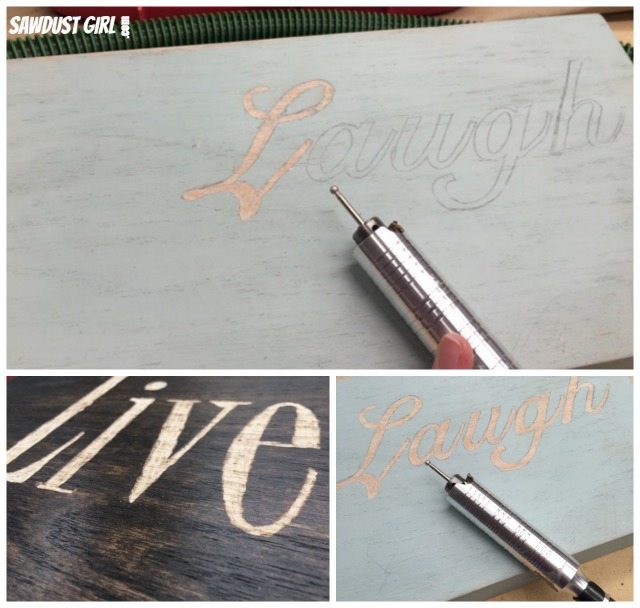
I printed out the words I wanted to use and transferred them to my wood. Easy way to do that is to rub pencil or chalk on the back of the paper and then trace the design.
OK, so now, because I love letting you learn from my failures, it’s time for the #RealAndRaw!
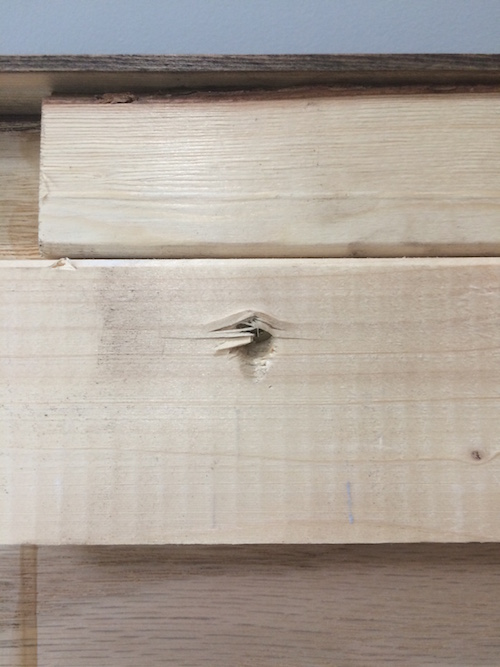
My original idea was to cut out inspirational words on my compartments. Through trial an error, I found that was not going to work. I was imagining I could find a bit that would cut through the wood like I’ve seen people do in the movies with a red light – laser beam!
I couldn’t find a bit that worked like a laser beam and made a pretty big mess of a few pieces of wood. So I grabbed my jigsaw to finish the cut out on “Love”.
I needed a scroll saw for letters this small. Part of the “v” broke off. Glued it back on and then cleaned up the whole thing with the Fortiflex and a sanding bit. That worked awesome!

So, since the cutting out thing didn’t work too well I decided that I’d go with carving. I tried a few different bits, had some fails and finally settled into a groove.

Once I found the right bit and figured out my technique (keep it moving, don’t stop in one spot– like a belt sander) I had so much fun with this tool!
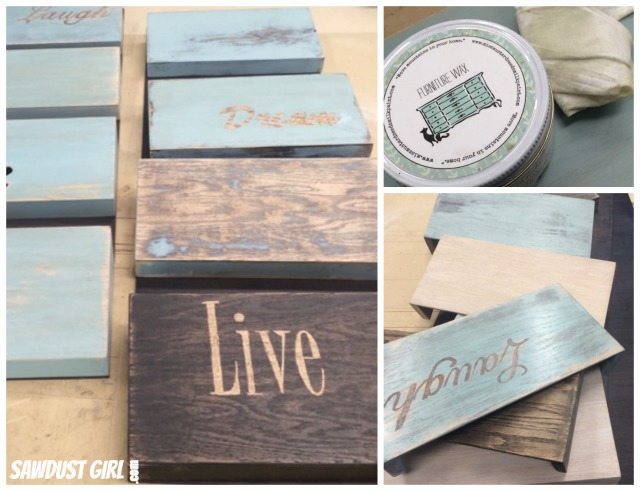
I sanded everything smooth and waxed all parts with Miss Mustard Seed Furniture Wax. I like that wax because I only have to wait 3-5 minutes before I can buff it. Some wax you have to wait an hour and I was impatient to put the thing together!
I stapled and screwed the compartments onto my backs.
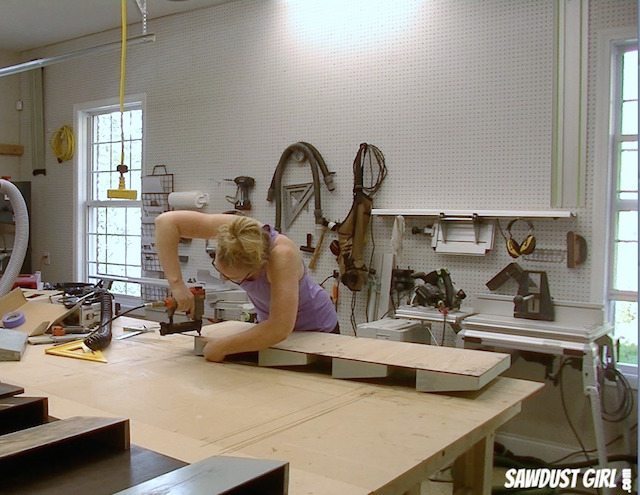
I wanted my hanging organizers to look chunky but not be too heavy so I wanted the back to LOOK like a chunky, thick slab of wood when it’s really only 1/4″ plywood. To create this fake-out, I added thin strips of wood to the sides. I had to add scrap furring strips to block out the sides to give me something to attach the strips to.
*I used glue and nails to attach the blocks and the strips.
You could use any kind of picture hanging device you want. I chose to make a french cleat.
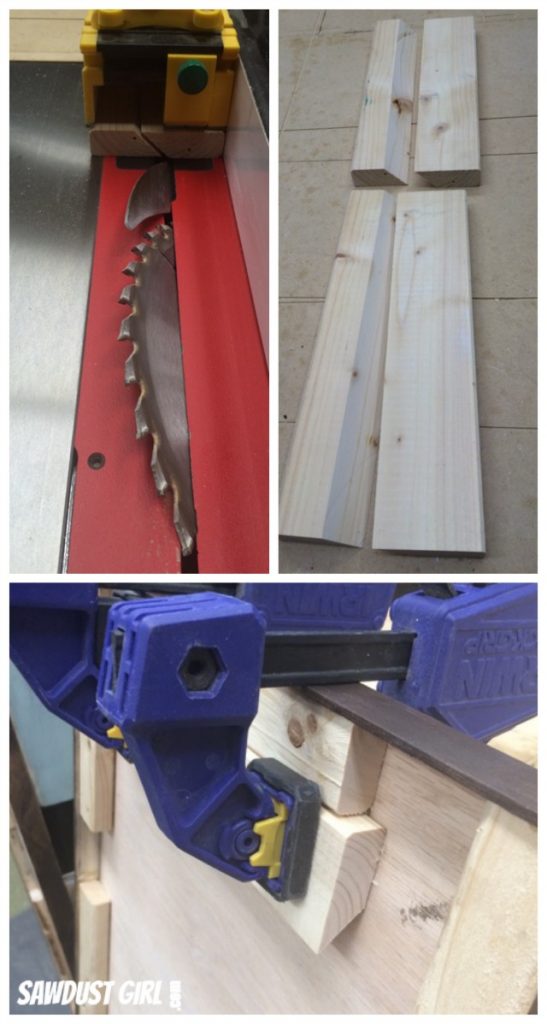
I attached it to the top block by driving 1 1/4″ SPAX wood screws into the cleat up into the top block. I love not having to drill pocket holes and driving SPAX in at an angle just LIKE a pocket hole but without the pre-redrilling!
And that brings us to the end of this tutorial and the finished product!
I had so much fun trying out the Dremel Fortiflex on this project! I was looking online at all the cool projects others have done using their dremel and now want to try carving rocks and ceramic, etching glass and mirrors. Of course, I’ll do that in all my spare time! Someday!
This post was sponsored by Dremel. I was given the Fortiflex tool and hired to dream up and create a unique project using this tool. All ideas, opinions, work, and words are all 100% my own.
Melanie says
What are the actual measurements of your cut pieces? If I missed it my apologies.
Sandra says
If it’s not in the post then I have no idea because I did that project years ago.