• Home
  • About
    • Personal Posts
  • Privacy
  • Shop
    • My Account
    • Checkout
    • Email
    • Facebook
    • Instagram
    • Pinterest
    • Twitter
    • YouTube
Sawdust Girl®

Sawdust Girl®

Renovation, cabinet building and woodworking plans and tutorials. Build like a Girl®

  • My Home
    • Clinton TN House
      • Clinton TN House in Progress
    • Maryville TN House
      • Maryville TN House Tour – Completed Rooms
      • Maryville TN House in Progress
        • Basement
        • Basement Storage Closet
        • Bedroom Office
        • Craft Room
        • Dining Room
        • Entry
        • Garage
        • Guest Bedroom
        • Hallway
        • Jack and Jill Bathroom
        • Kitchen
        • Kitchen Entry
        • Laundry Room
        • Library
        • Living Room
        • Loft
        • Madison’s Room
        • Master Bedroom
        • Master Closet
        • Pantry
        • Porch
        • Powder Room
        • Wes’ Office
    • Illinois House
    • Calderwood Cottage
  • My Workshop
    • Clinton Workshop
  • Build & Breakfast
  • Cabinet Making 101
    • Cabinets
    • Doors
    • Drawers
  • Projects and Plans
    • Countertops
    • Beds
    • Benches
    • Bookshelves
    • Desks
    • Gift Ideas
    • Holiday
      • Christmas
      • Halloween
    • Home Accessories
    • Kids
    • Kitchen Cabinets
    • Lockers
    • Nightstands
    • Organization accessories
    • Recipes
    • Sewing
    • Tables
    • Vanities
    • Wardrobes
    • Woodworking
      • Wood Finishing
    • Workshop
    • Workshop Storage and Organization
  • Remodeling 101
    • Baseboard and Trim
    • crown molding
    • Demolition
    • Door and Window Casings
    • Door Installation
    • Drywall
    • Electrical work
    • Flooring
    • Home Maintenance
    • Painting
    • Plumbing
    • Resources
    • Safety
    • Tile
    • Wall and Ceiling Treatments
  • Sawdust Squad
  • The Sawdust Diaries
    • Andrea
    • Ava D.
    • Beckie F.
    • Cara C.
    • Courtney B
    • Fawn T.
    • Jenn D.
    • Kelly C.
    • Kristy K.
    • Lara T.
    • Malisa B.
    • Marnie D.
    • Robin C.
    • Val F.
  • Tools
    • Products
    • Tool Reviews & Overviews
    • Inspiration & Ideas

How to make a beaded face frame

All Posts, Cabinet Making 101, Cabinets

How to make a Beaded Face-frame

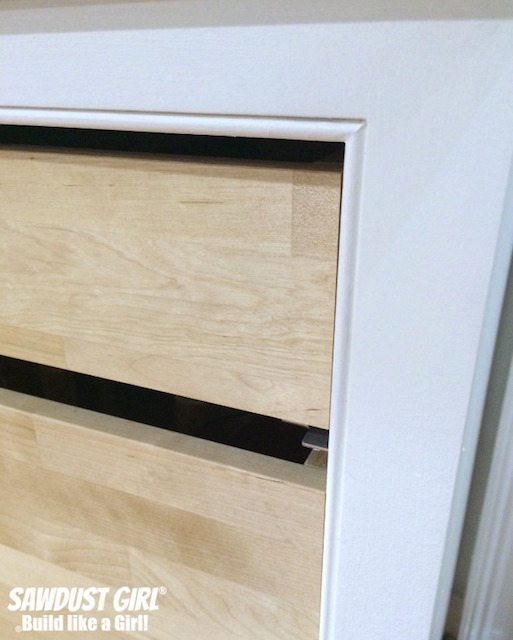
I love the look of beaded face-frames.  Adding that small detail intimidated me for a good, long while but I finally decided to take on the challenge with my kitchen remodel.   I looked for a jig, machine or the magical “Easy Button” but had no luck.  The one face-frame beading system I did find was $380 and made my brain hurt just thinking about how perfectly precise my measurements and cuts would have to be.

So I decided to add bead toing my face-frames “old school” — which ended up being so easy I can’t believe I let it intimidate me for so long!

This post contains affiliate links.

How to add beading to a face-frame

Adding beading to an already assembled face-frame is going to add additional width to your face-frame so plan accordingly for the *width of your beading and then build your face-frame.

*Beading bits come in numerous sizes and you’ll have to determine what size bead YOU like on your cabinet.  I purchased both a 1/4″ radius beading bit and a 3/16″ radius bit.  Even though it’s only 1/16″ difference, the 1/4″ was too large for my liking so I went with the Frued 3/16″ radius beading router bit.
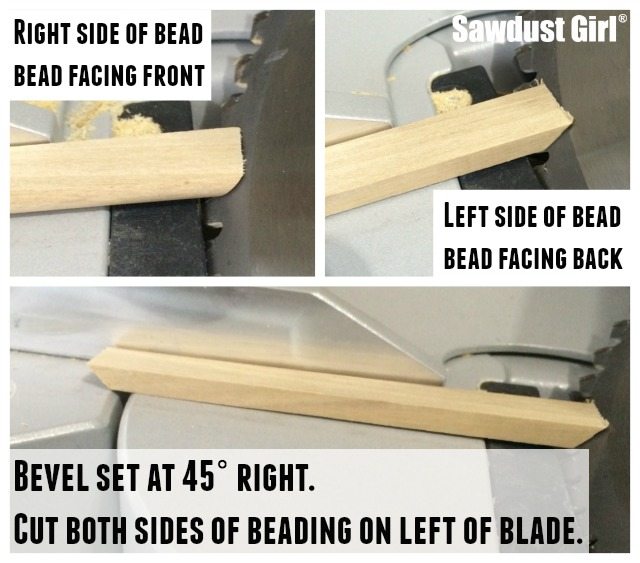
Route beading

Once your regular face-frame is build, route a ton of beading onto the same wood which you used to build your face-frame.  I route more beading than I will need for the complete project in case of mess-ups.  (It happens.)  I route beading on both sides of my wood and generally use 1×3 or wider stock so I can route and rip the bead and still have a piece of wood wide enough to use for a face-frame or door.

Micro Jig GRR-Rip push blocks are perfect for this job.  They keep your hands away from the router bit while you keep the wood flush against the table and fence while you push it completely through the cuts.

beaded faceframe 1

Rip Beading

After routing all the beading, use the table saw to cut the bead away.  I used my Micro Jig GRR-Ripper 3D push block for this.  Easy!

2a rip bead using grrrripper on tablesaw-1

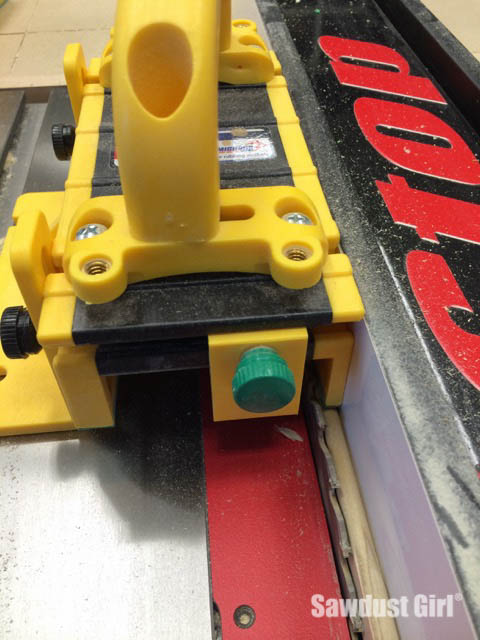
Make sure you set your bade to completely clear the bead Don’t cut too narrow or the bead will be ruined.  It’s better to set the cut just slightly too wide than too narrow.  Then you can hit the beading with an orbital sander to quickly clean them up.

4 may have imperfection from ripping, sand smooth now or after installed-2

Now we’re ready to attach the bead to the face-frame!
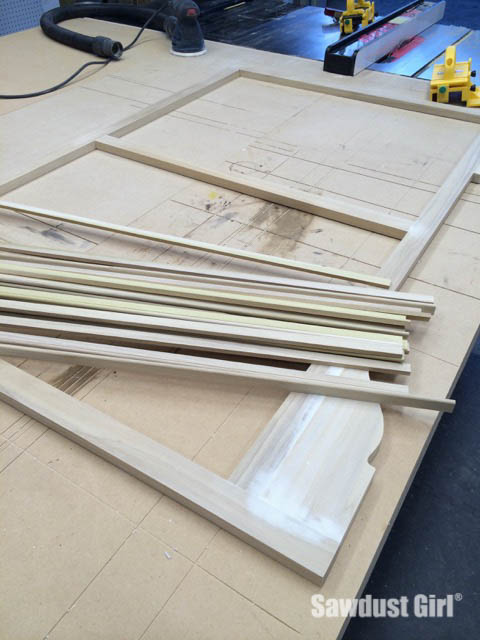
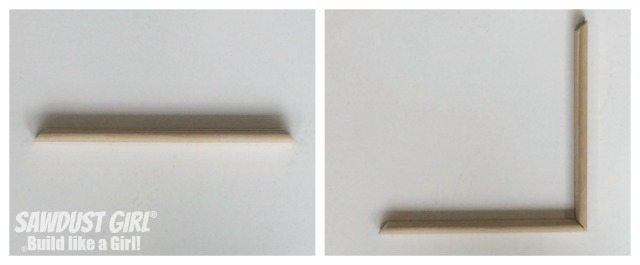
Faceframe cabinet construction

Miter

Measure and miter each piece one by one.  Cut all four pieces of beading for a square and dry-fit before attaching.

How to miter corners beading

Adding beading to a faceframe

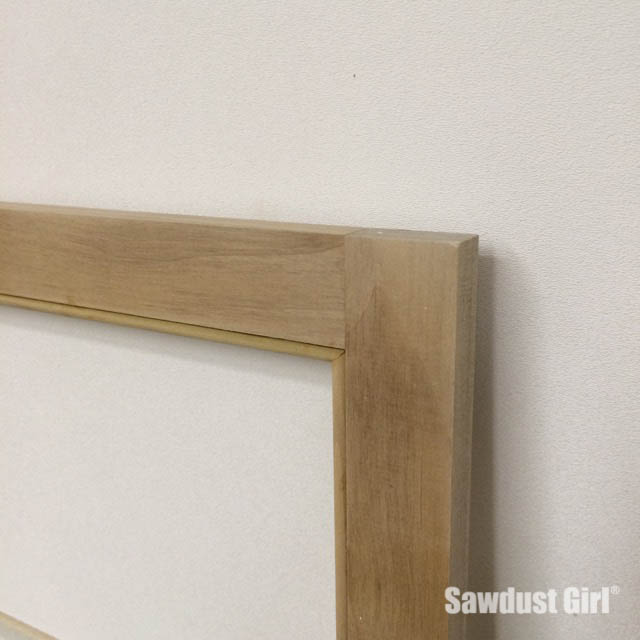
Attach Bead to Face-Frame

Use glue and small brad nails to attach the beads to the face-frame.  I use my 23 gauge nail gun for this job.  It holds the bead in place but barely leaves a hole to patch.
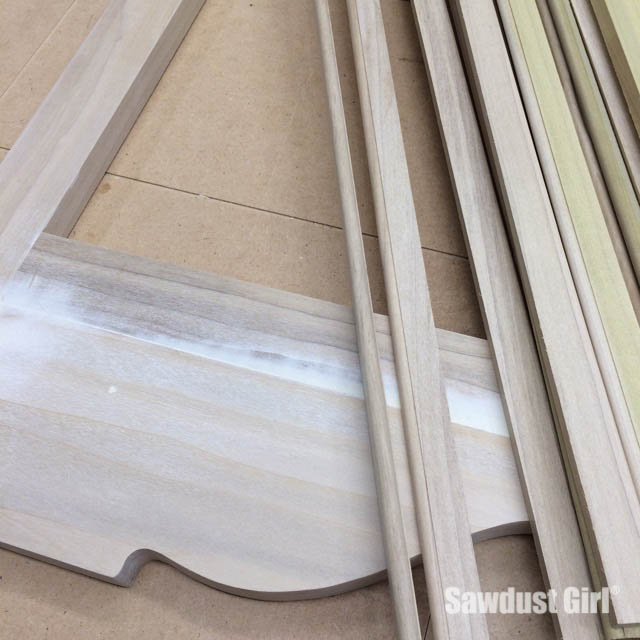
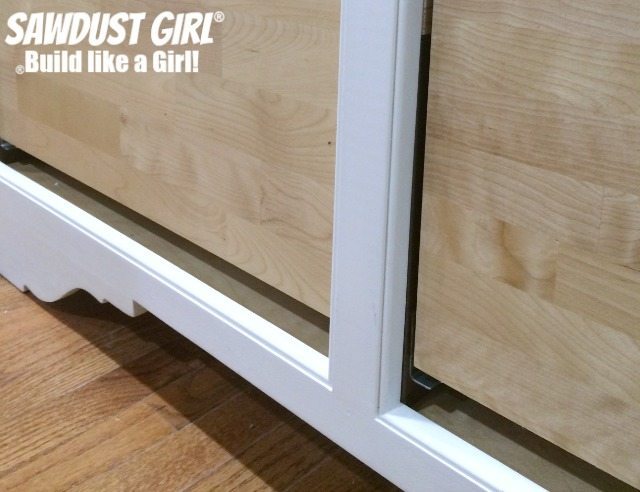
Make a beaded face frame

Finish

I prime my face-frame before I attach it to the cabinet and then.  You can obviously do this before or after.  I just like to prime a face-frame while it’s laying flat on my workbench when possible.  O fold a piece of sandpaper in half to get into the nooks and crannies.
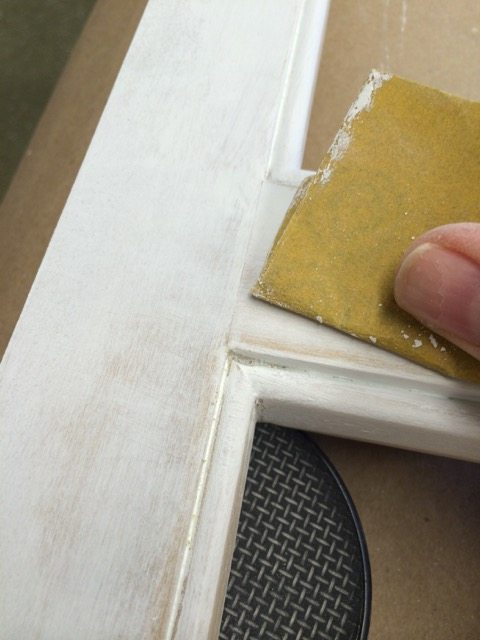
6 prime and paint - fold a piece of sand paper to get into the bead and clean it up

How to build a Beaded Faceframe

March 9, 2015 · 5 Comments

« How to cut beadboard to fit around decorative moulding
Plans for China Cabinet Base »

Comments

  1. PJ says

    March 9, 2015 at 12:09 pm

    Thank you for always making it look so easy and for breaking it down into easy steps

    Reply
  2. marenras says

    March 9, 2015 at 1:15 pm

    Beautiful! I’m planning on building floor-to-ceiling bookshelves in my living room to turn it into a library. I have 11 foot ceilings and I’m going to go the whole rolling ladder thing. I’d LOVE to add a beaded detail to the frame. Thanks for a great tutorial!

    Reply
    • Sandra says

      March 9, 2015 at 9:56 pm

      Awesome! I’m glad to share. I hope you share pics of your project, it sounds amazing!

      Reply
  3. Jen @ Restore + Style says

    March 9, 2015 at 2:46 pm

    You’re just amazing. I am pretty handy, but hats off to you girl. Seriously…

    Reply
  4. Nance Wilson says

    February 20, 2021 at 6:21 pm

    Thank You! Thank You! Thank You!
    I was almost ready to give up on my dream cabinets (beaded face frames) because I can’t justify the cost of the equipment, which I probably won’t use ever again, after my kitchen cabinets are finished.

    Your method is so simple & your results are as neat as anything I’ve seen online.
    I never realized, until you mentioned it, that this is the “old” method. Everybody else says you need to rout the beads directly onto the face frame pieces.
    Brilliant tutorial.

    Reply

Leave a Reply Cancel reply

Your email address will not be published. Required fields are marked *

Categories

New Post email notification signup

You Subscribed!

Legal Stuff

Terms of Use

Privacy Policy

Disclosure

Recent Posts

  • Lodge Update – Floors, Cabinets, Countertops, and Appliances
  • Lodge Kitchen Cabinet Progress
  • Halloween Mad Gab – Halloween Party Ideas
  • Concrete Backsplash or Vertical Wall Treatment
  • Building and Installing a Giant Faux Beam on the Ceiling

Disclaimer:

Although it is my intention to provide accurate plans and clear instructions, not all plans have been tried and tested. Using plans or information found on SawdustGirl.com indicates that you agree with the Terms of Use policy and will accept full responsibility for the process and outcome of any project you attempt. All plans are for private use only. Plans and information published on SawdustGirl.com may not be reproduced, republished or distributed in any manner without written permission from Sandra Powell, Sawdust Girl. Actual projects built using Sawdust Girl plans may be published on your own site without instructions or "tutorial" as long as you provide a link to my original post with full post title or "SawdustGirl.com" as link title.

Copyright © 2022 · anchored theme by <a target="_blank"